Using Roland GX-24 vinyl cutter
Initial set up
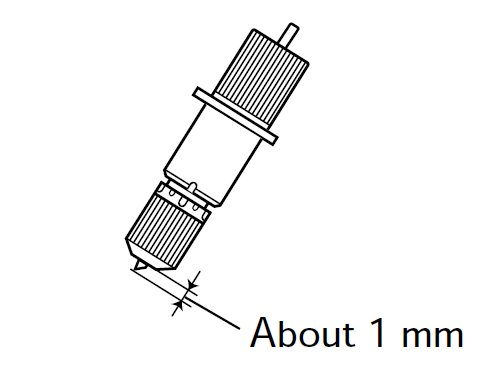
When a new blade is loaded into the GX-24 blade holder extend the blade beyond the housing by approximately 1mm as per Roland's recommendations.
The blade holder has an indent mark while the blade holder cap has 5 of these marks. Rotating the blade cap clockwise - looking at the blade tip - will extend the blade. Rotating the cap clockwise so that the cap mark matches up with the holder mark will extend the blade by 0.1mm or 0.5mm if the cap is rotated a complete turn.
To load adhesive vinyl the roller lever is pressed down releasing the pinch rollers allowing the vinyl to be positioned on the cutter. The pinch rollers are moved manually into position until they are within the white guide marks and at the edge of the material.

When using sheets of vinyl, from the menu SELECT SHEET press the up and down arrows until PIECE is shown and press enter. With the material loaded pressing the TEST button performs a test cut of the vinyl where a circle is cut within a square. If the cutter is set up properly the circle will be easily seperated from the square when weeded out and the blase will not cut through the vinyl backing material. If this doesn't happen either the blade force can be changed ot eles the blade can be extended further.
Setting the origin
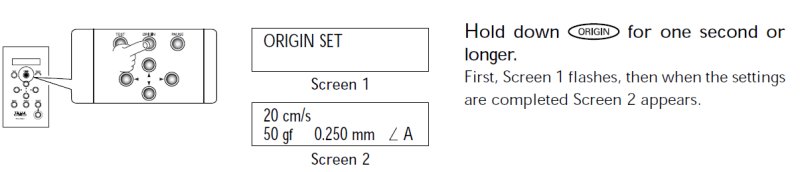
To set the origin use the forward/reverse and left/right arrow keys to move the vinyl to the start position and press and press and hold the origin key for one second until screen 1 flashes and when complete screen 2 appears.
CutStudio
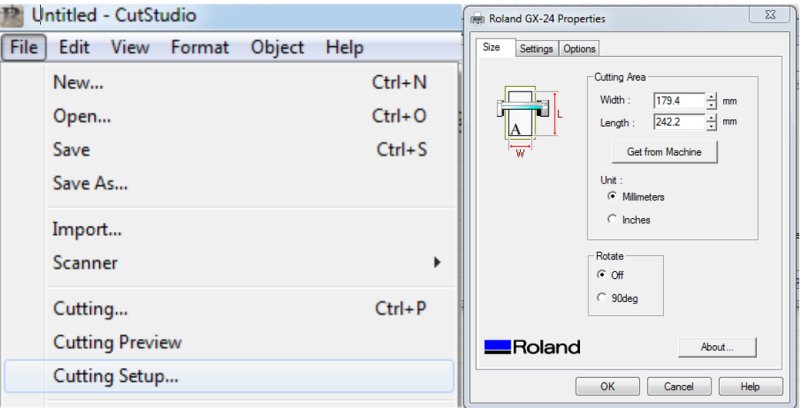
With a sheet of vinyl loaded and the GX-24 connected to the PC run Roland Cutstudio. First thing is to set up the cutting size parameters by selecting File->Cutting Setup->Properties and click Get from Machine. This will change the cutting area to the sheet size present in the GX-24.
With CutStudio opened shapes can be drawn as selected from the tool bar and text added. When either shapes or text objects are selected small squares will appear at the corners of the object area and small triangles in the middle of the area outline. Selecting the square by moving the mouse over causes the mouse icon to change to two small arrows. Left clicking and dragging here will resize the object on the X and Y axis. Placing the mouse icon over the small triangles allows the object to be resized in the X or Y dimension. Holding the shift key when dragging the square selector will keep the X and Y proportions the same.
Likewise, the shape or text objects can be moved by placing the mouse icon over the object where it changes to a moving icon. Left clicking and dragging will then move the selected object to the desired location on the canvas.
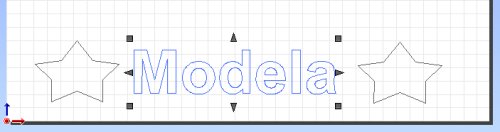
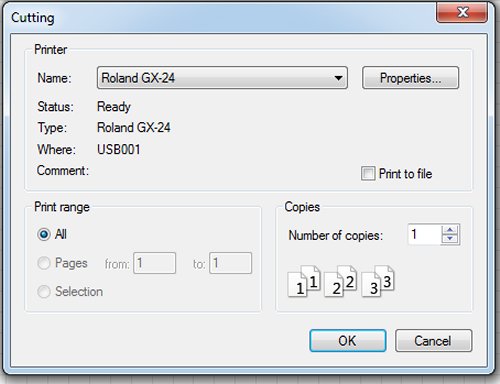
Once the text or shapes are positioned and sized properly select Cutting from the toolbar and click ok to cause the GX-24 to begin cutting out the design.
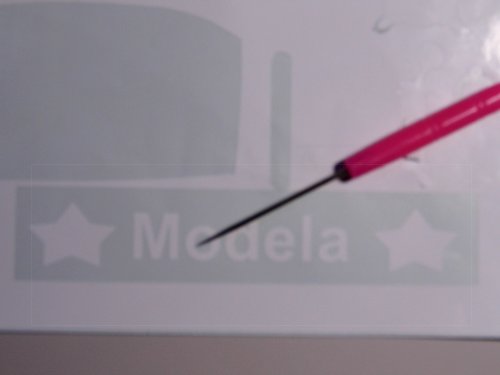
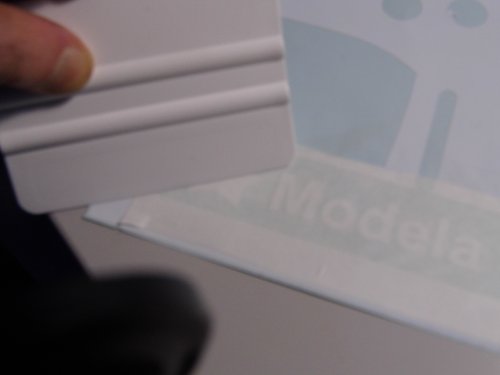
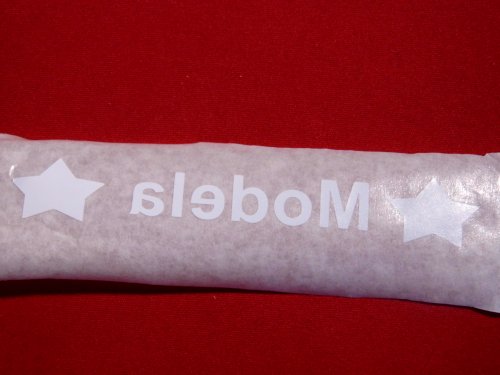
After the design has been cut out it will usually need 'weeded' where small areas of vinyl have to be manually removed by using a sharp pointed tool to pick out the unwanted vinyl. Transfer tape is then applied to the vinyl using a plastic squeegee, rubbing the tape onto the vinyl so that it makes good contact. Once satisfied that the tape and vinyl are bonded the tape is removed and the vinyl plus tape is applied to the display surface.
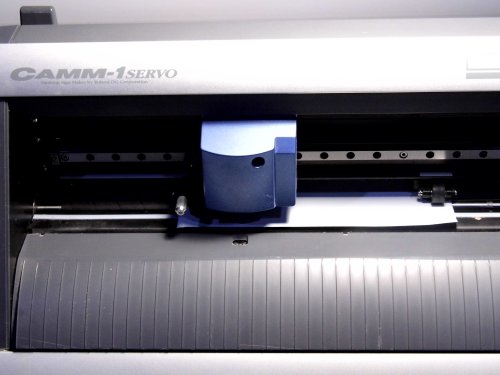
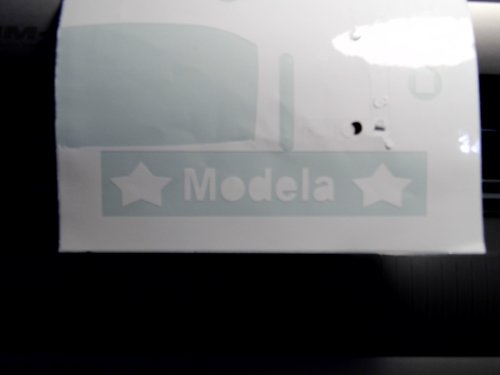
The images below show the various stages of cutting and applying the vinyl using the GX-24:
- GX-24 cutting vinyl
- Finished cut
- After weeding the vinyl
- Applying transfer tape to the cut and weeded vinyl
- Vinyl pattern transferred to tape
- Vinyl pattern applied to object

Import images
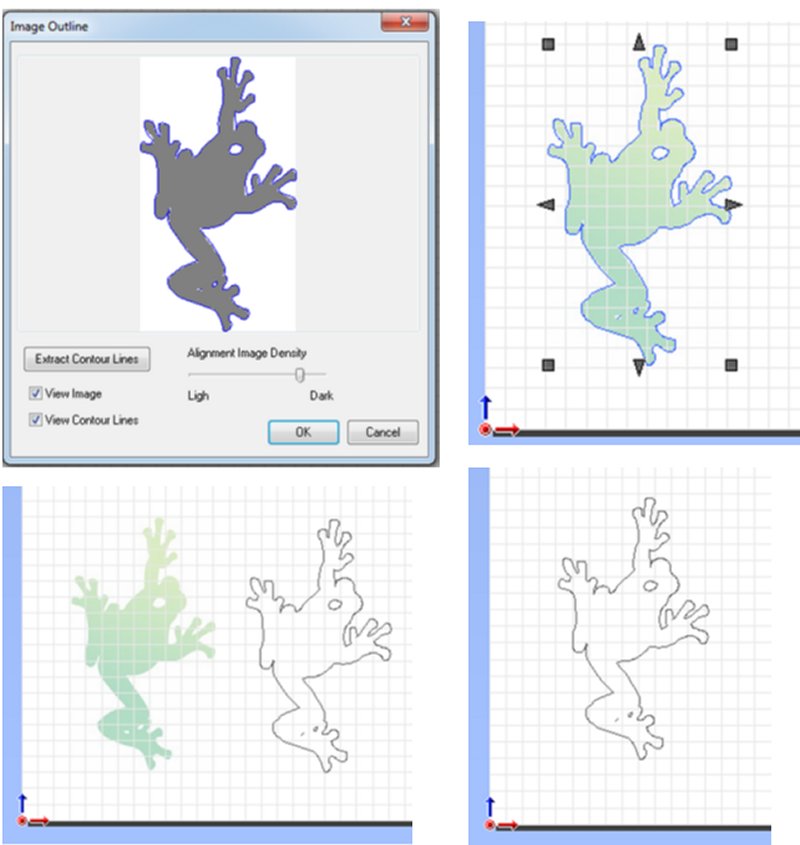
CutStudio can also load in bitmap and jpeg files and convert them to outlines suitable for cutting on the GX-24. To import an image select File->Import and browse to the image to be imported. The image will then appear on the CutStudio canvas.
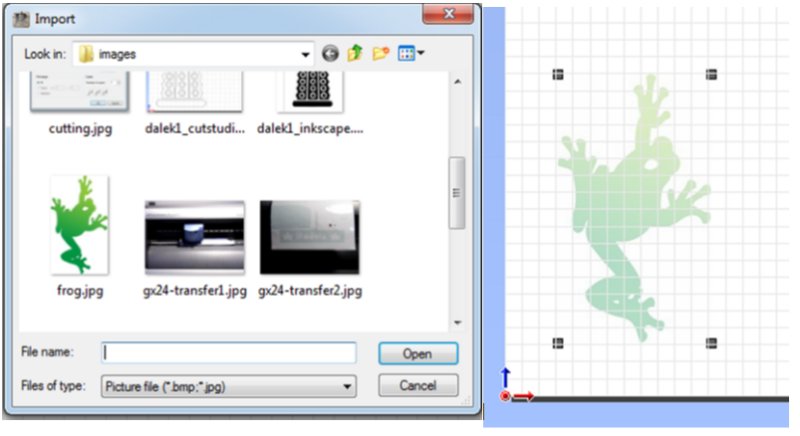
With the image selected, from the Menu bar select Object->Image Outline. For now accept the Alignment Image Density settings and click on the button Extract Contour Lines. This will draw an outline around the bit map and place the outline on the canvas. The outline can be separated from the image and the imported image deleted leaving just the outline. This outline can then be cut in the normal way as described in the previous section.
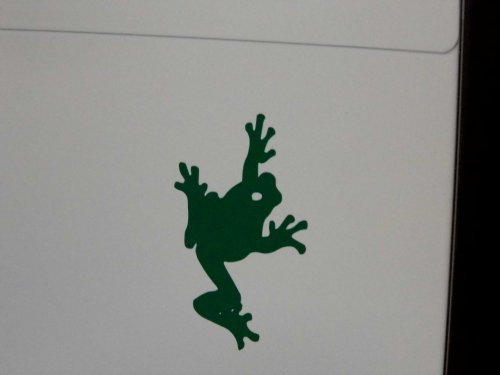
The image below shows the frog sticker applied to the front of a filing cabinet.