4 Electronics Production
FabTiny ISP
For the electronic production assignment we decided to build the FabTinyISP AKA Brian.
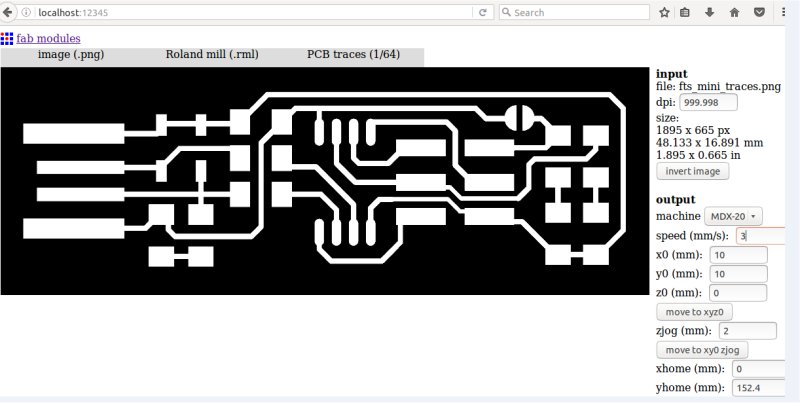
The board was milled out on a Roland Modela MDX-20 using Fab Modules software running on Ubunto 14.04 LTS. Using the terminal application, the working folder was changed to the Fab Modules installation folder. At the terminal prompt the command npm start was entered. The application responded with the following message.
listening for connections from 127.0.01 on 12345
Firefox was started and the following address entered in the browse address window. This started the Fab modules server.
http://localhost:12345
The png file for the programmer board was loaded, with Roland mill selected for output and PCB traces 1/64 picked for the process
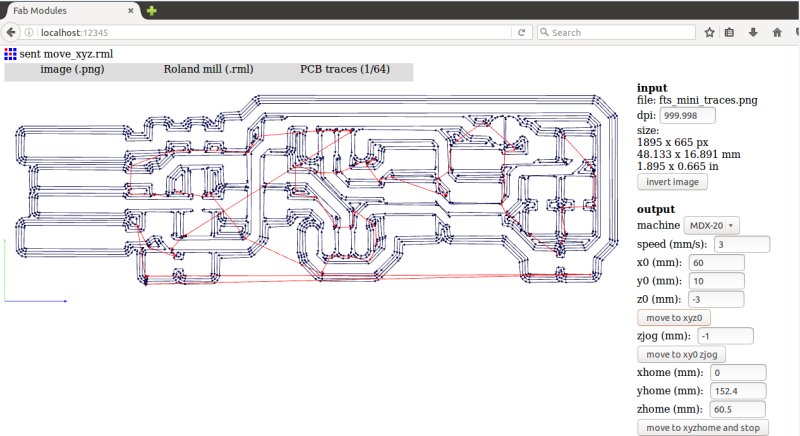
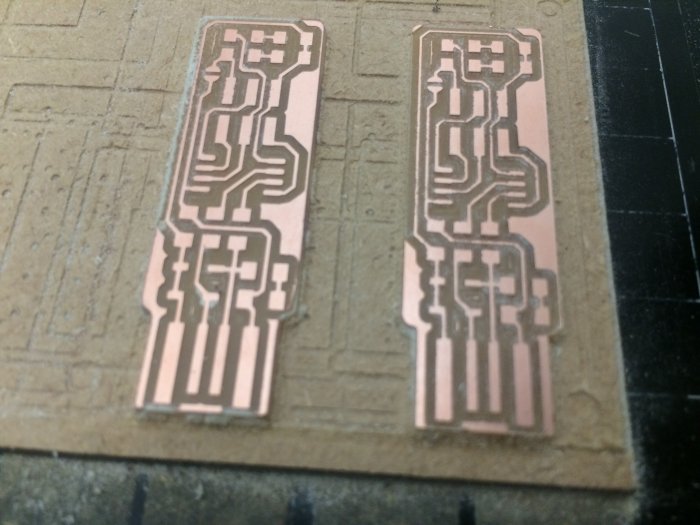
A piece of FR1 board was attached via double sided tape to the Modela MDX-20 bed. A 0.4mm end mill was loaded into the Modela's spindle and the spindle moved to the routing start position by entering values into the move to xyz0 input boxes. To zero the routing bit in the Z axis the Modela spindle was lowered closer to the FR1 surface until the bit was almost touching. Then the grub screw holding the bit was loosened so that the bit touched the surface of the FR1. The grub screw was tightened and the calculate button on Fab Modules was pressed. This calculated the tool path for the pcb trace routing.
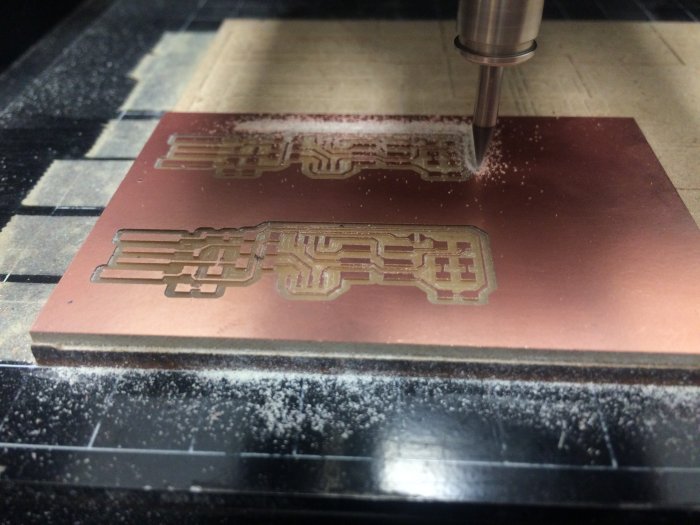
The pcb traces were then routed out. The process was repeated again but this time loading the board outline png into Fab modules and selecting the 1/32 outline as the output process. An 0.8mm routing bit was inserted into the spindle and the routing start position setup as before. The board outline was then routed out producing a finished pcb.
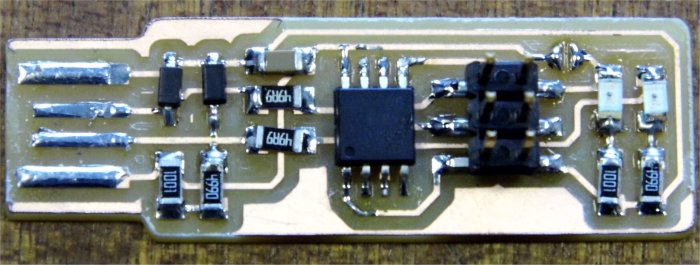
The board components were selected from the Fab Lab inventory and organised so they could be easily picked and soldered to the pcb. Prior to assembly each component pad was given a dab of solder. The component was then picked up using tweezers and one end of the component was placed over the soldered pad which was reflowed by holding the soldering iron on the pad. The soldering iron was removed and the solder cooled holding the component in place. The other pad was then soldered and once this was secure, the previous pad was re-soldered by heating the pad up and adding a small bit of solder. Care was taken on some components to make sure they were place in the correct orientation. The assembled board is shown below
Programming
We had a lot of trouble trying to program the FabTinyISP boards under Windows 7 and 10. The way to do this is described in link http://fab.cba.mit.edu/classes/863.16/doc/projects/ftsmin/windows_avr.html We got as far as installing the various tools Atmel GNU toolchain, GNU Make and avrdude and checked that everything had been installed properly. The firmware was downloaded and the programmer detials changed in the Makefile to avrisp2.
Entering the command Make hex built the firmware but when the programming command avrdude -c usbtiny -p t45 was entered an error message was received indicating the usbtiny device could not be found.
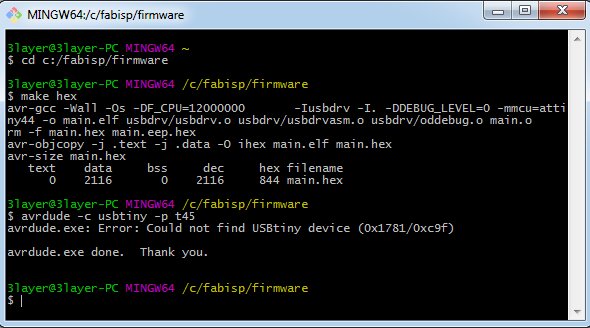
Further investigations revealed it was a USB driver issue and Atmel Studio was installed to try and fix this but even with the correct driver installed avrdude still produced the same error. At this point time was running out and it was decided to program the boards under the Ubuntu OS. This worked according to the original instructions linked to above.
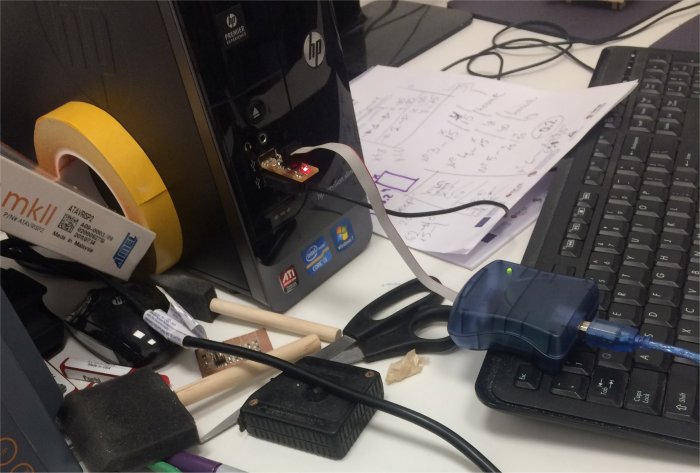
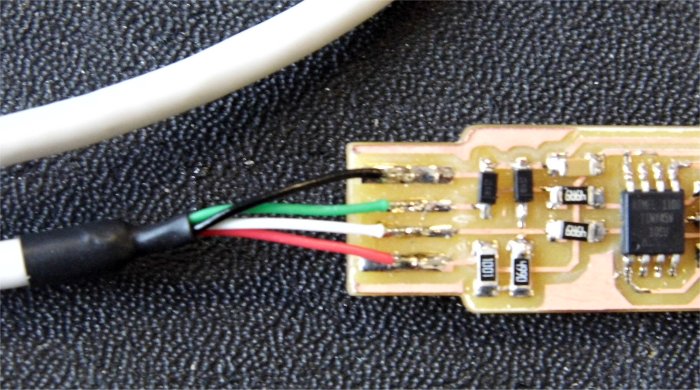
I decided to solder a USB cable directly to the board as plugging it into a USB port directly was not satisfactory. The table below shows the USB 2.0 cable color codes and the photos indicate what wire goes where.
| Colour | USB Signal | |
|---|---|---|
| RED | VCC | |
| BLACK | GND | |
| GREEN | D+ | |
| WHITE | D- |

Testing
When the programmed board was first plugged into a Windows 7 USB port, Windows indicated that the device had been found but the required driver had not been installed.
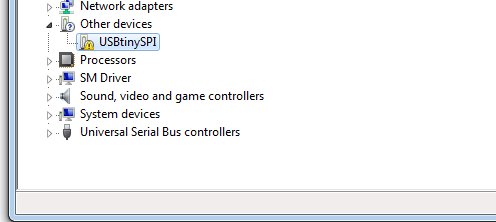
Windows and other OSs match USB devices to their drivers by obtaining the Vendor and Product ID from the device - stored in flash - and then searching through .inf files to find one that includes these ID's and also has details of which driver to install. The Vendor and Device ID for USBTiny is 0x1781 and 0x0C9f
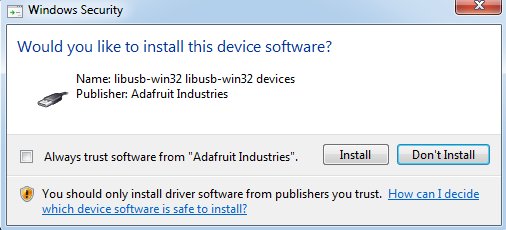
Adafruit produce a USBTiny which has the same IDs and their driver can be used for our USBTiny. To download the driver go to https://learn.adafruit.com/usbtinyisp/download Download the file usbtiny_signed_8.zip and extract.
In Windows Device Manger select the USBTiny device and in Properties->Driver select Update Driver. Then select Browse my computer for driver software and browse to where the driver files are extracted. Click next and wait until the drivers have been installed
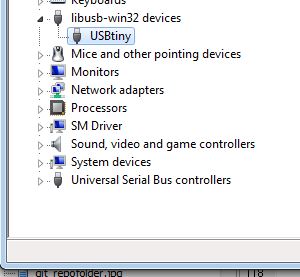
If successful the programmed USBTiny will apear in Device manager ready to use.