Moulding and Casting
Introduction
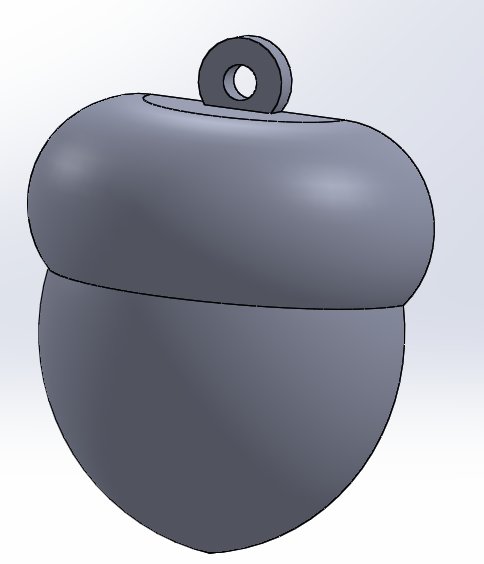
For this assignment I designed an acorn shaped key ring which could be personalised by laser engraving a place name on it. Why an acorn? There was a time, not that long ago, when you could walk the length of Ireland on the top of the oak trees. They were everywhere. Because of this, Irish towns, villages, parishes etc. have the Gaeilge word for oak grove, Doire, as part of their name. This is usually anglicised as derry. The oak trees have long gone but the places remain. Having an acorn keyring suitably engraved would serve as a reminder of past generations and surroundings.
Design and milling
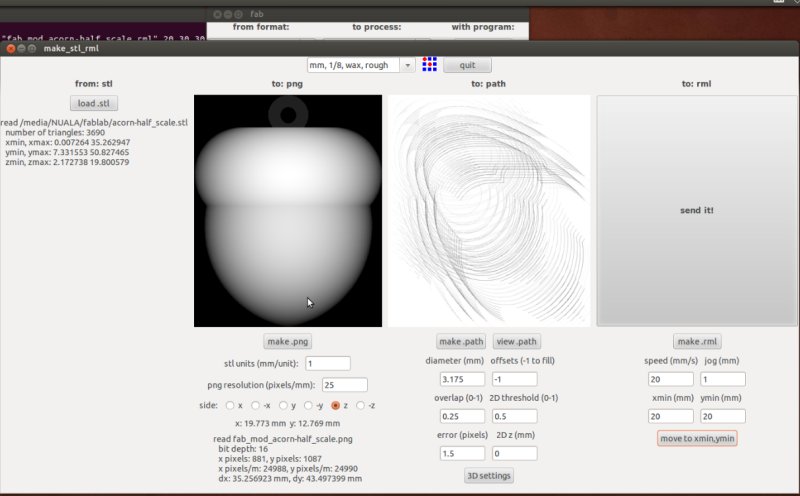
The acorn keyring was created in Solidworks and when complete was saved as a binary stl file. Note the file extension needs to be in lower case or Fab Modules won't recognise it as an stl file.
Fab Modules was run and the work flow set as follows:
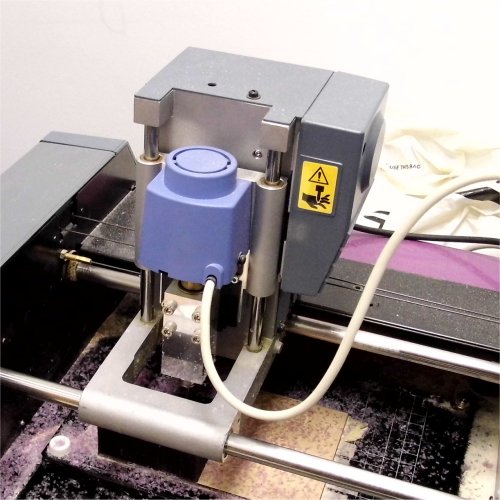
- Secure machinable wax to Modela MDX-20 bed - double sided tape.
- from format : stl
- to Process: Roland mill
- process : mm 1/8, wax, rough
- make png
- Under Fab Modules control move cutting bit to suitable position on machinable wax and zero the Z axis.
- make path.
- make rml.
- send it.
I also had to change the 3D settings from the default so that the Top Height was -1mm and the Bottom Height was -22.97mm which was the height of the 3D part plus an extra 1mm as margin for the top of the silicone mould.
Note that the process mm 1/8, wax, rough needs to be selected because if the process inch 1/8, wax, rough is picked then the generate png command will not work, and neither will anything else after that.
A good link for using the older Fab Modules can be found here.
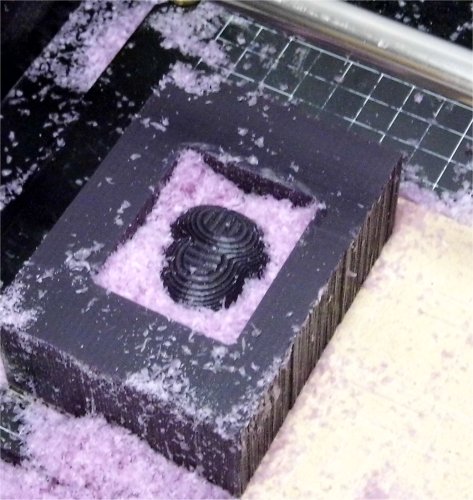
This first milling operation would roughly route the design onto the machinable wax. After the first milling operation the process was changed to mm 1/8, wax, finish and the milling operation run again.
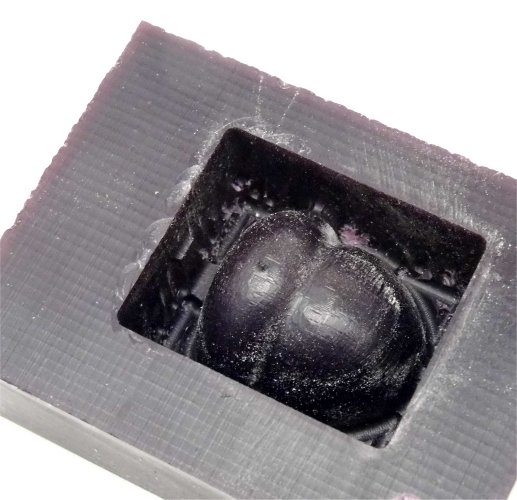
Making the mould
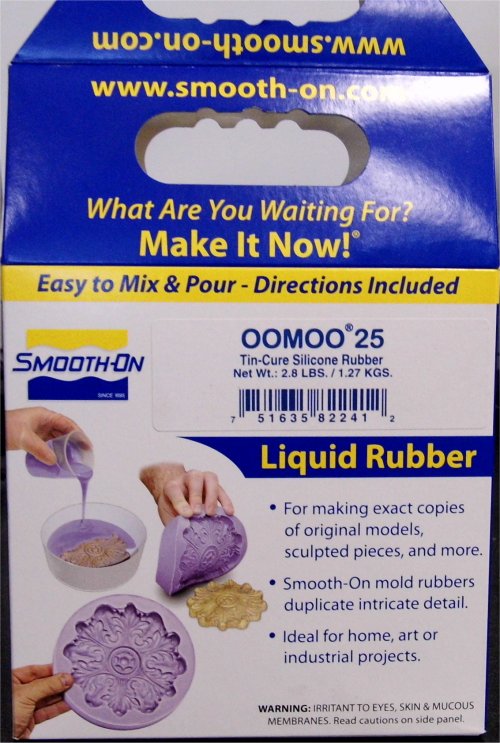
All the shavings, and there were lots of them, were swept up and stored for later recycling. The mould was cleaned out and OOMOO 25 silicon rubber poured into it.
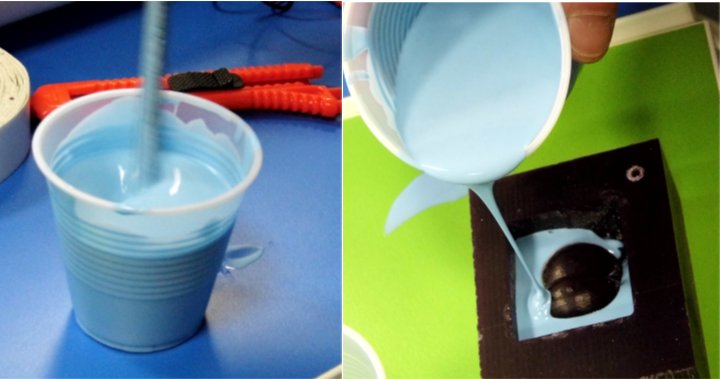
After waiting a while for the mould to harden and nothing happening I realised I had made a big mistake when mixing the OOMOO 25 silicone rubber and had mixed two 'B' parts together instead of parts 'A' and 'B'. It was late so I decided to make the mould another day. Will update when complete.
Making the mould déjá vu
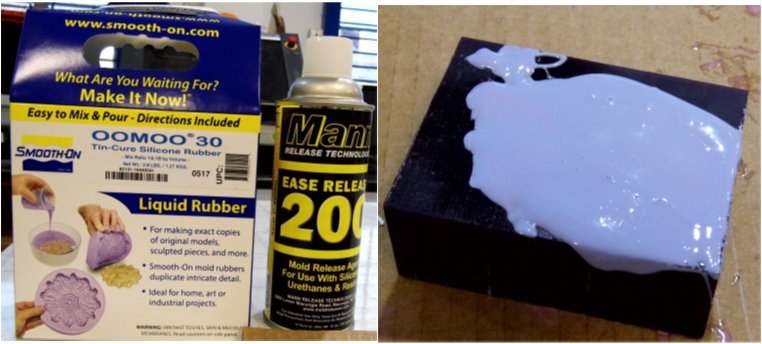
It was discovered that OOMOO 25 had expired so the next mould was made out of OOMOO 30. This takes longer to cure, about 6 hours, but it has a far longer shelf life, plus it was the only OOMOO version I could get at short notice. A release agent was sprayed into the mould and the silicon rubber poured in
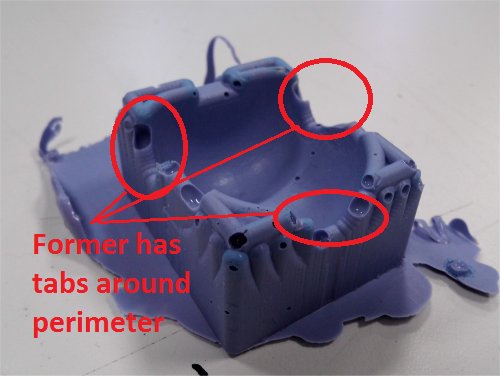
When the mould was released it contained a number of air bubbles. A bigger problem was the mould former had tabs in it which resulted in the mould having hollow spaces at three points on its perimeter. I don't know how the mould former had these tabs. I think it might have something to do with settng the margin in Fab Modules but I am stuck with it.
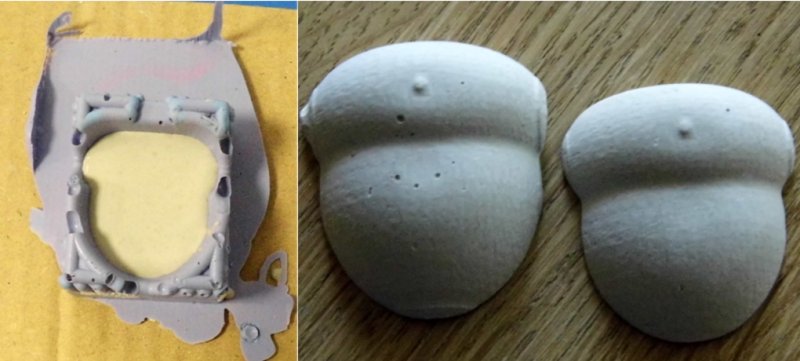
I mixed up some DryStone casting plaster and poured it into the mould until it was level with the edge of the tab cut outs. I made two casts with the mould and in the second cast I increased the amount of poured Drystone so that it was just about to overflow. Because I was unable to pour the casting plaster past the tab cut outs I ws unable to include the keyring holder support.
Conclusion
The milling of the mould fromer didn't go completely to plan as I didn't allow for enough margin when milling out with Fab Modules. This mean't I couldn't cast the complete part as there were cut outs in the mould which limited the fill height for the casting plaster. I enjoyed making the rubber silicon mould and casting the pasrt and will definitley do this again with a more original design