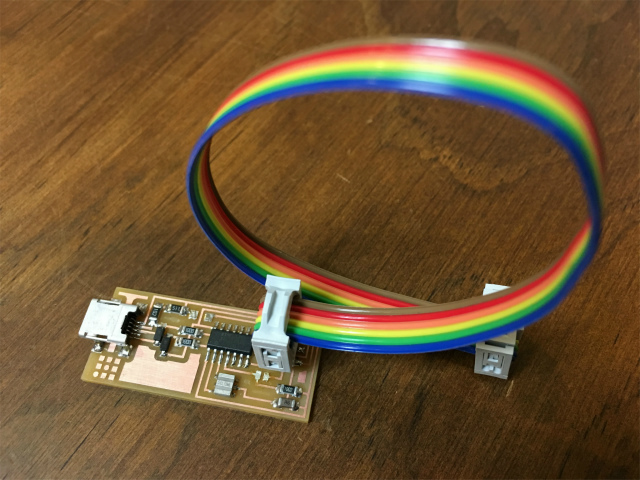
Week 5. electronics production
Assignment
- group assignment: characterize the specifications of your PCB production process
- individual assignment: make an in-circuit programmer by milling the PCB, then optionally trying other processes
group assignment
see FabLab Kamakura's group assignment page.
preparation
ISP board selection
I chose hello.ISP.44.res board. Prior to this week, local instructors tested a FabTinyISP board, but it was less reliable than hello.ISP.44.res board. I wanted to dare to choose the board, but I didn't...
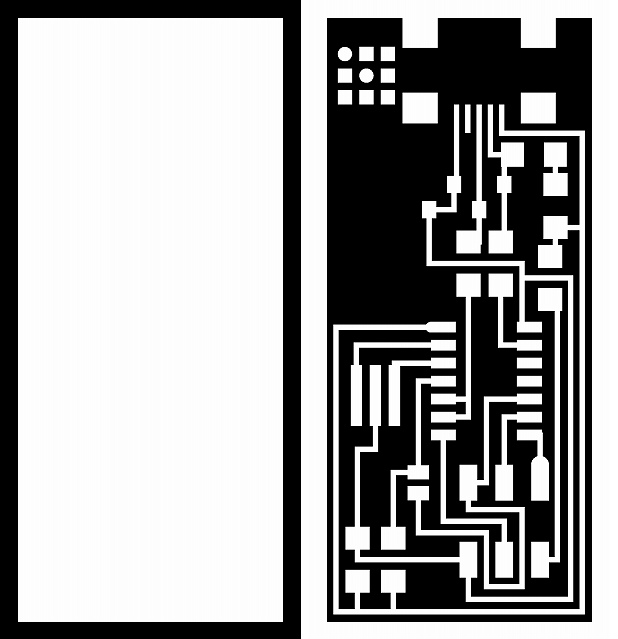
CAM data
To machine the PCB based on the above traces and interior images, it is necessary to teach a milling machine how to move its drill bit. CAM program calculates the data from the image. It is mods for that purpose. That is the same role of a slicer program in 3D printing, which will calculate g-code from SLT file. I have not understood the role of CAM yet, but Asako Okazaki(a local instructor)'s convincing explanation helped me a lot.
Roland SRM-20 needs CAM data in RML (Roland Machine Language) format. With this in mind, we made the CAM data with mods.
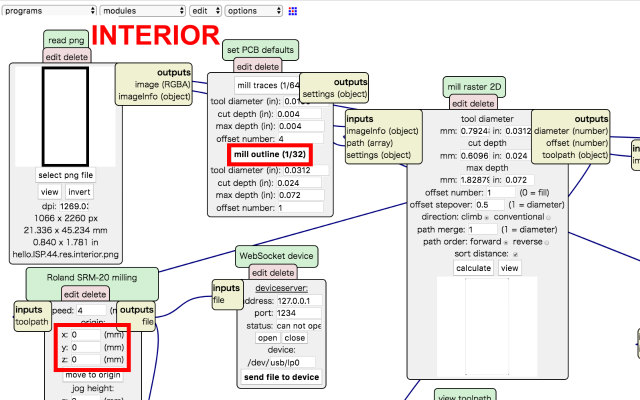
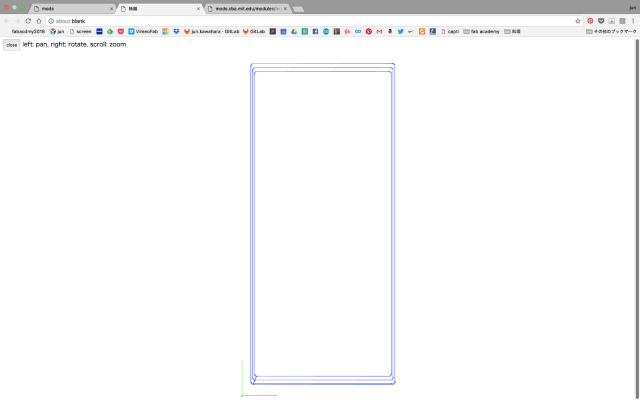
First, select "mill traces (1/64)" for milling traces and set origin (x, y, z) = (0, 0, 0), then push calculate button. RML file will be generated.
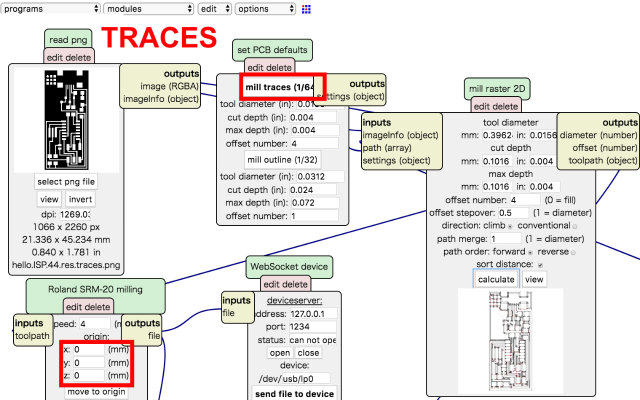
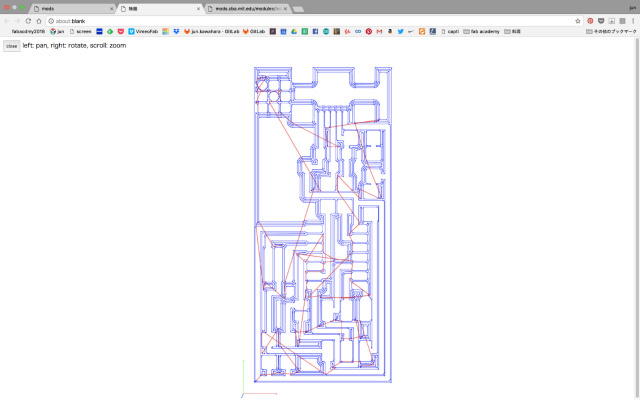
Next , select "mill outline (1/32)" for milling interior and also set origin (x, y, z) = (0, 0, 0), then push calculate button. RML file will be generated.
milling table levelling
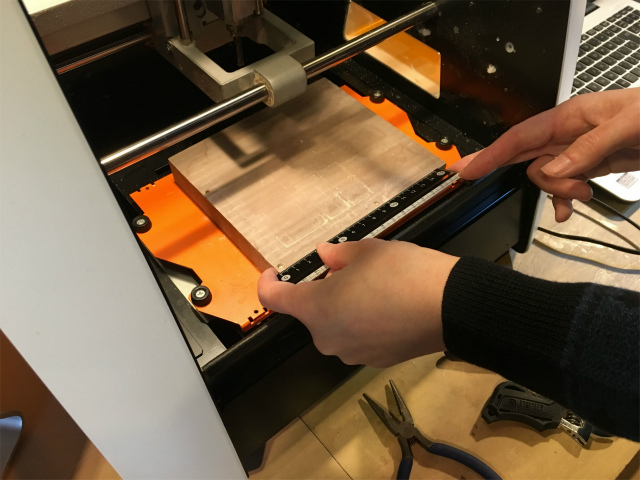
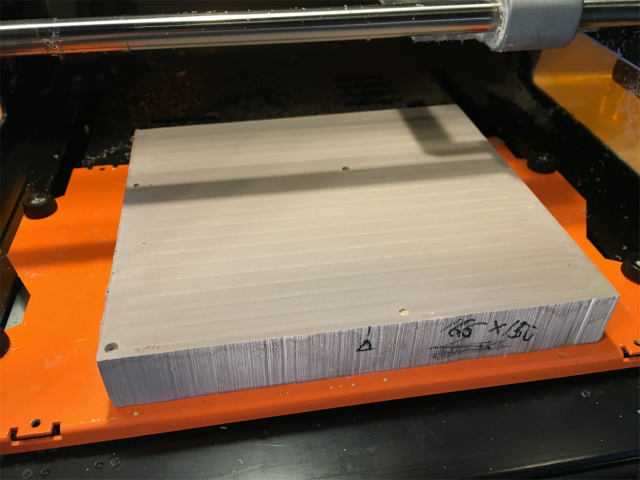
Before milling PCB, we calibrated the sacrifice table leveling. After removing PCB with an organic solvent, we milled the table by 0.5 mm thickness with a large drill bit(6 mm in diameter).
milling
milling traces and interior
I made careless mistakes...
First, I milled traces with 1/64 drill bit, but the result was interior. I chose a wrong rml file.
After I milled traces successfully, I tried to mill the interior. What I've got was that interior movement milled traces.
Is there something wrong with x-axis movement or mods RML calculation?
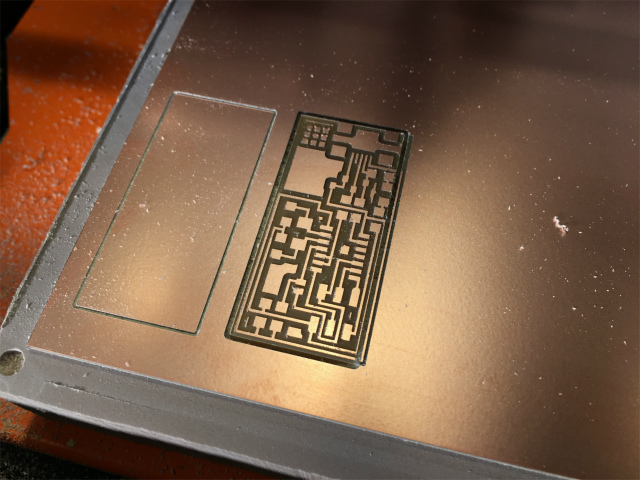
I recalculated interior CAM data carefully, and then I tried milling again. After I milled the traces, Kai recognized that it was the interior which is wrong not the traces. I had downloaded hello.ISP.44.traces(without resonator) by mistake.
I downloaded the right file and made an RML file via mods. Milled traces was narrower than before.
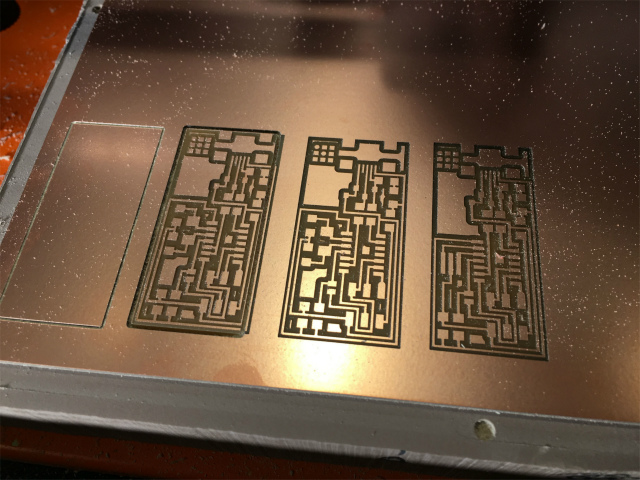
Milling traces was successfully done!
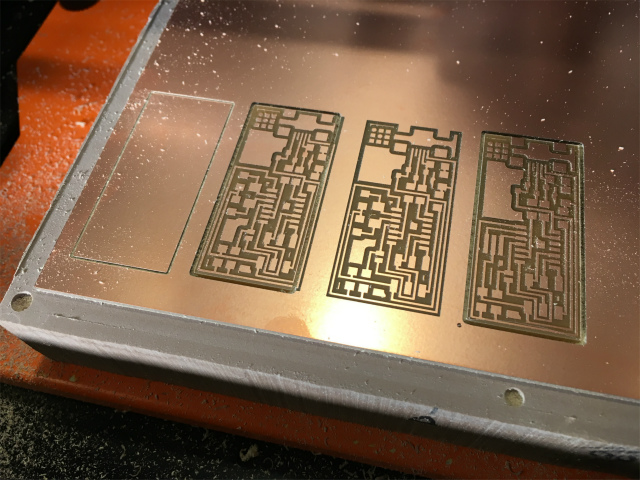
post processing
Applying some organic solvent under the PCB to remove the double-sided tape, I removed a milled PCB with a scraper from the sacrifice table.
I removed undesirable residuals with a sharp cutter and rubbed the surface gently with steel wool(fine grade)
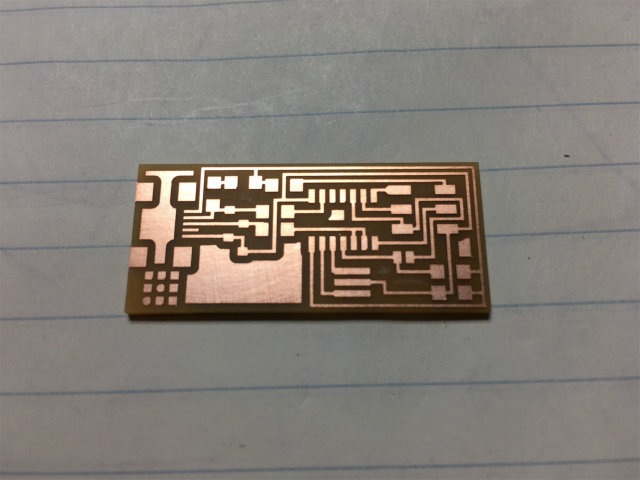
Applying flux on the board, the PCB was ready for soldering.
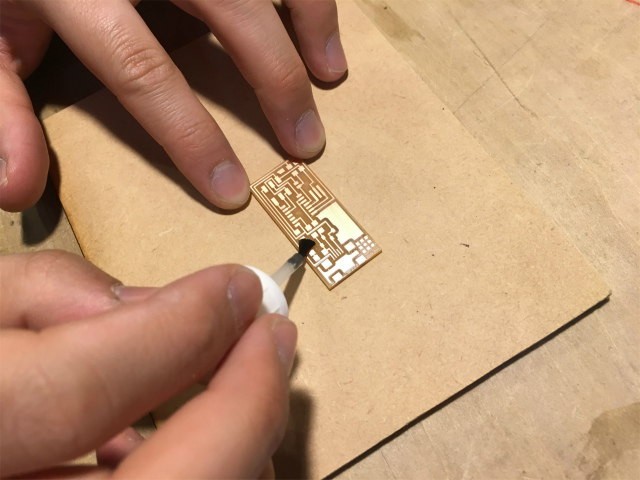
soldering
components
All electrical components were followings. They are tiny parts.
- R1: 1 Resistor 1K ohm
- R2: 1 Resistor 499 ohm
- R3,R4: 2 Resistor 100 ohm
- R5: 1 Resistor 10K ohm
- C1: 1 Capacitor 1uF
- D1,D2: 2 Zener Diode 3.3 V
- IC1: 1 ATTiny 44 microcontroller
- 20MHz: 1 20 MHz Resonator
- SJ1: 1 Resistor 0 ohm
- J1: ISP/6 pin header
- J2: mini USB jack
I picked out carefully.
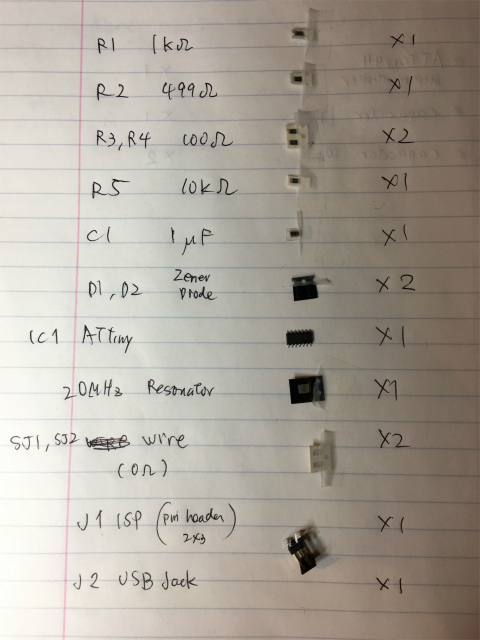
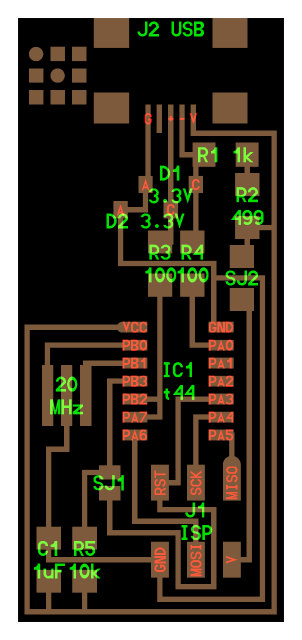
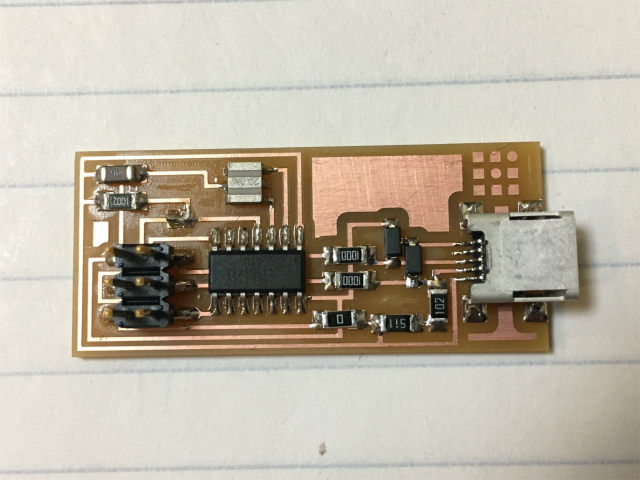
soldering components
Yamamoto-san, electronics GURU of FabLab Kamakura, told us tips for soldering. We should solder the thinner components preferentially. But first, I had to solder mini USB onto the board because it was difficult to solder, then an ATtiny44
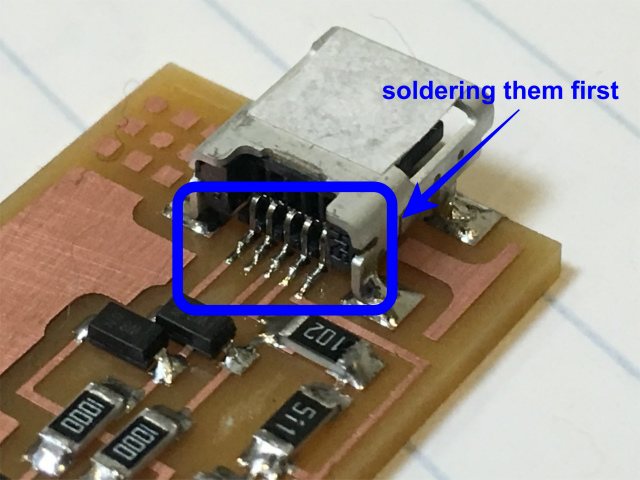
I soldered Resistors, capacitors, and diodes, then finally six pin header.
program the FabISP
preparation
I have already installed Xcode. I download and install Crosspack AVR. I also download and unzip fabISP_mac.0.8.2_firmware
writing a firmware
I connected FabISP via AVRISP mkII.
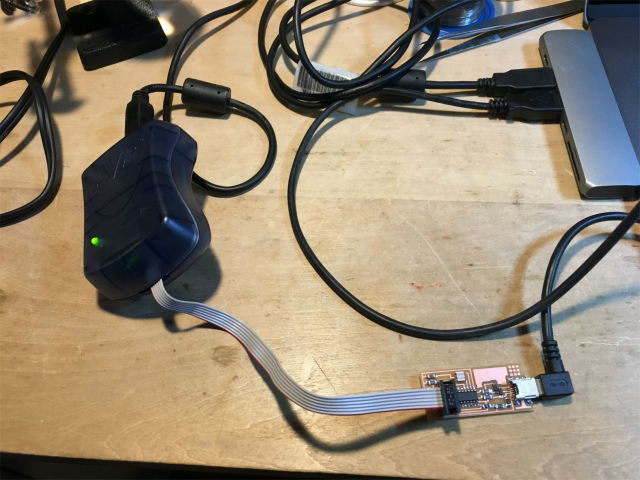
I followed the procedures to write firmware. First, "make clean"
KWHRJN:fabISP_mac.0.8.2_firmware kwhrjn$ make clean
rm -f main.hex main.lst main.obj main.cof main.list main.map main.eep.hex main.elf *.o usbdrv/*.o main.s usbdrv/oddebug.s usbdrv/usbdrv.s
No errors. It looked good. Next, "make hex"
KWHRJN:fabISP_mac.0.8.2_firmware kwhrjn$ make hex
avr-gcc -Wall -Os -DF_CPU=20000000     -Iusbdrv -I. -DDEBUG_LEVEL=0 -mmcu=attiny44 -c usbdrv/usbdrv.c -o usbdrv/usbdrv.o
make: avr-gcc: No such file or directory
make: *** [usbdrv/usbdrv.o] Error 1
oh-uh, an error occurred...It was because PATH configuration wasn't set right. I made a .bash_profile file and added the following line.
/usr/local/CrossPack-AVR-20131216/bin
You have to restart a terminal or type "source ./bash_profile" before PATH worked properly.
KWHRJN:~ kwhrjn$ source ~/.bash_profile
-bash: /usr/local/CrossPack-AVR-20131216/bin: is a directory
KWHRJN:~ kwhrjn$ echo $PATH
/usr/local/bin:/usr/bin:/bin:/usr/sbin:/sbin:/opt/X11/bin:/usr/local/CrossPack-AVR/bin
"make hex" again. No error occurred this time.
KWHRJN:fabISP_mac.0.8.2_firmware kwhrjn$ make hex
avr-gcc -Wall -Os -DF_CPU=20000000	 -Iusbdrv -I. -DDEBUG_LEVEL=0 -mmcu=attiny44 -c usbdrv/usbdrv.c -o usbdrv/usbdrv.o
avr-gcc -Wall -Os -DF_CPU=20000000	 -Iusbdrv -I. -DDEBUG_LEVEL=0 -mmcu=attiny44 -x assembler-with-cpp -c usbdrv/usbdrvasm.S -o usbdrv/usbdrvasm.o
avr-gcc -Wall -Os -DF_CPU=20000000	 -Iusbdrv -I. -DDEBUG_LEVEL=0 -mmcu=attiny44 -c usbdrv/oddebug.c -o usbdrv/oddebug.o
avr-gcc -Wall -Os -DF_CPU=20000000	 -Iusbdrv -I. -DDEBUG_LEVEL=0 -mmcu=attiny44 -c main.c -o main.o
main.c:88:13: warning: always_inline function might not be inlinable [-Wattributes]
 static void delay ( void )
             ^
avr-gcc -Wall -Os -DF_CPU=20000000	 -Iusbdrv -I. -DDEBUG_LEVEL=0 -mmcu=attiny44 -o main.elf usbdrv/usbdrv.o usbdrv/usbdrvasm.o usbdrv/oddebug.o main.o
rm -f main.hex main.eep.hex
avr-objcopy -j .text -j .data -O ihex main.elf main.hex
avr-size main.hex
   text	   data	    bss	    dec	    hex	filename
      0	   2002	      0	   2002	    7d2	main.hex
The next command, "make fuse"... and error again.
KWHRJN:fabISP_mac.0.8.2_firmware kwhrjn$ make fuse
avrdude -c avrisp2 -P usb -p attiny44  -U hfuse:w:0xDF:m -U lfuse:w:0xFF:m

avrdude: stk500v2_command(): command failed
avrdude: stk500v2_program_enable(): bad AVRISPmkII connection status: RST fail, Target not detected
avrdude: initialization failed, rc=-1
         Double check connections and try again, or use -F to override
         this check.


avrdude done.  Thank you.

make: *** [fuse] Error 1
My USB hub caused this trouble. I changed it with other hub and "make fuse" again and finally made it through.
KWHRJN:fabISP_mac.0.8.2_firmware kwhrjn$ make fuse
avrdude -c avrisp2 -P usb -p attiny44  -U hfuse:w:0xDF:m -U lfuse:w:0xFF:m

avrdude: AVR device initialized and ready to accept instructions

Reading | ################################################## | 100% 0.00s

avrdude: Device signature = 0x1e9207
avrdude: reading input file "0xDF"
avrdude: writing hfuse (1 bytes):

Writing | ################################################## | 100% 0.00s

avrdude: 1 bytes of hfuse written
avrdude: verifying hfuse memory against 0xDF:
avrdude: load data hfuse data from input file 0xDF:
avrdude: input file 0xDF contains 1 bytes
avrdude: reading on-chip hfuse data:

Reading | ################################################## | 100% 0.00s

avrdude: verifying ...
avrdude: 1 bytes of hfuse verified
avrdude: reading input file "0xFF"
avrdude: writing lfuse (1 bytes):

Writing | ################################################## | 100% 0.00s

avrdude: 1 bytes of lfuse written
avrdude: verifying lfuse memory against 0xFF:
avrdude: load data lfuse data from input file 0xFF:
avrdude: input file 0xFF contains 1 bytes
avrdude: reading on-chip lfuse data:

Reading | ################################################## | 100% 0.00s

avrdude: verifying ...
avrdude: 1 bytes of lfuse verified

avrdude: safemode: Fuses OK (H:FF, E:DF, L:FF)

avrdude done.  Thank you.
and the last command, "make program"
KWHRJN:fabISP_mac.0.8.2_firmware kwhrjn$ make program
avrdude -c avrisp2 -P usb -p attiny44  -U flash:w:main.hex:i

avrdude: AVR device initialized and ready to accept instructions

Reading | ################################################## | 100% 0.00s

avrdude: Device signature = 0x1e9207
avrdude: NOTE: "flash" memory has been specified, an erase cycle will be performed
         To disable this feature, specify the -D option.
avrdude: erasing chip
avrdude: reading input file "main.hex"
avrdude: writing flash (2002 bytes):

Writing | ################################################## | 100% 0.43s

avrdude: 2002 bytes of flash written
avrdude: verifying flash memory against main.hex:
avrdude: load data flash data from input file main.hex:
avrdude: input file main.hex contains 2002 bytes
avrdude: reading on-chip flash data:

Reading | ################################################## | 100% 0.35s

avrdude: verifying ...
avrdude: 2002 bytes of flash verified

avrdude: safemode: Fuses OK (H:FF, E:DF, L:FF)

avrdude done.  Thank you.

avrdude -c avrisp2 -P usb -p attiny44  -U hfuse:w:0xDF:m -U lfuse:w:0xFF:m

avrdude: AVR device initialized and ready to accept instructions

Reading | ################################################## | 100% 0.00s

avrdude: Device signature = 0x1e9207
avrdude: reading input file "0xDF"
avrdude: writing hfuse (1 bytes):

Writing | ################################################## | 100% 0.00s

avrdude: 1 bytes of hfuse written
avrdude: verifying hfuse memory against 0xDF:
avrdude: load data hfuse data from input file 0xDF:
avrdude: input file 0xDF contains 1 bytes
avrdude: reading on-chip hfuse data:

Reading | ################################################## | 100% 0.00s

avrdude: verifying ...
avrdude: 1 bytes of hfuse verified
avrdude: reading input file "0xFF"
avrdude: writing lfuse (1 bytes):

Writing | ################################################## | 100% 0.00s

avrdude: 1 bytes of lfuse written
avrdude: verifying lfuse memory against 0xFF:
avrdude: load data lfuse data from input file 0xFF:
avrdude: input file 0xFF contains 1 bytes
avrdude: reading on-chip lfuse data:

Reading | ################################################## | 100% 0.00s

avrdude: verifying ...
avrdude: 1 bytes of lfuse verified

avrdude: safemode: Fuses OK (H:FF, E:DF, L:FF)

avrdude done.  Thank you.
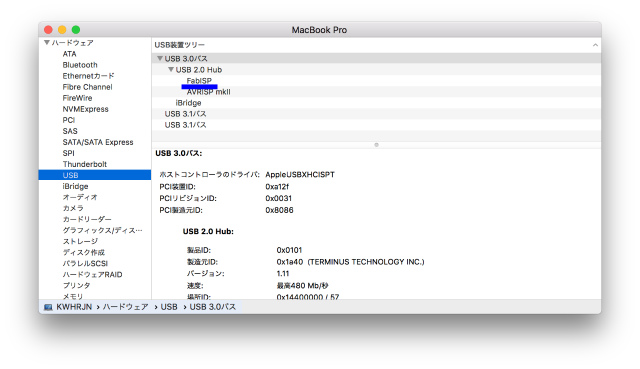
I removed two jumper resistors and confirmed that the board was recognized as fab ISP.
As I'm going to use FabISP throughout FabAcademy, I made an SPI connection cable.
