3D Scanning and printing
Task Requirments:
- Test the design rules for your printer(s) (group project)
- Design and 3D print an object (small, few cm) that could not be made subtractively
- 3D scan an object (and optionally print it)
3D Printing
Idea:
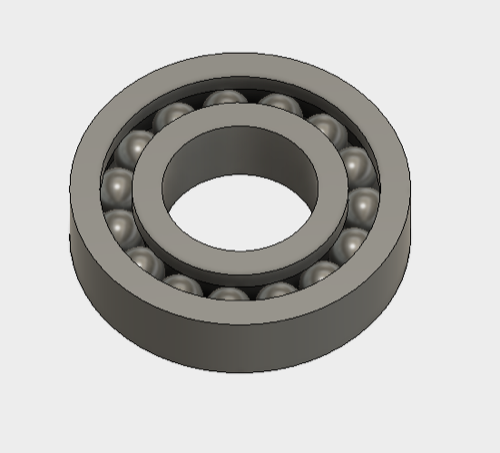
I decided to design and print a fully assembeled functioning ball bearing, i thought that this design will challenge my modelling skills and it's almost impossible to cut it due to the curves of the balls inside the ring.

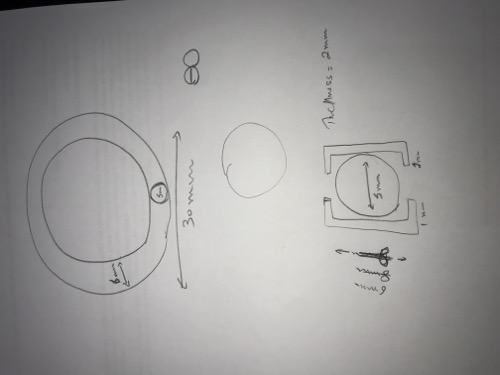
Sketching
I started with sketching the bearing from a side view and top view and determined my dimensions
Modeling:
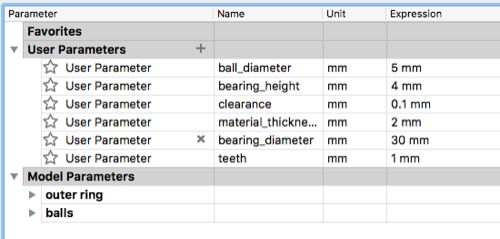
I used fusion to 3d model the bearings i started with setting the paremeters for all my dimensions to make it easy for me to change them while in the process of the designing and making. I set the clearance between the balls and the casing 0.1mm.
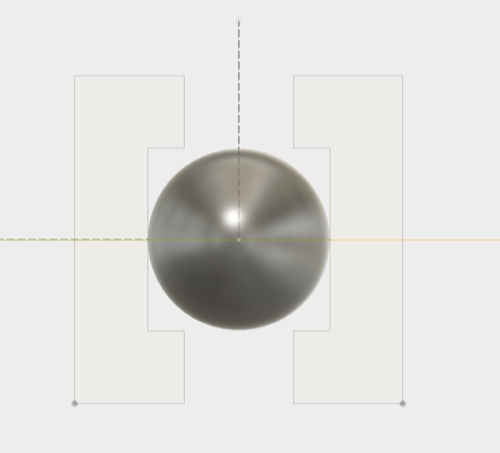
I sketched the outer ring from a side view then made an offset to the other ring witht he value of ball diameter + double clearance, then i made a construction plane in the middle of the rings and placed a sphere inside.
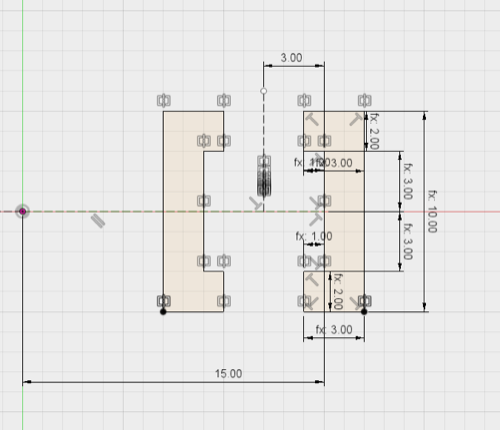
I made a full revolve for the 2 rings
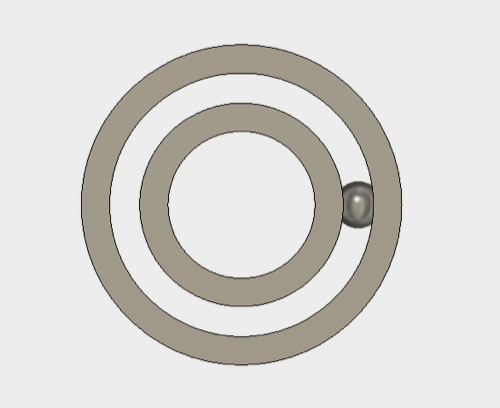
I then made a circular pattern to the balls and i have my bearing looking great
Printing:
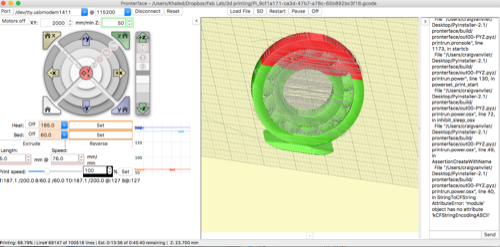
In have prusa i3 printer at my office so i desided to print the model to test it.
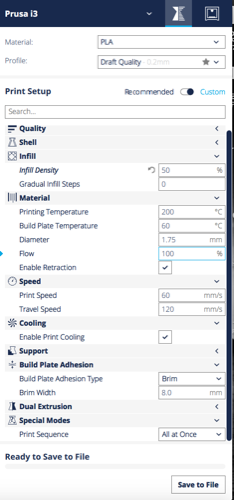
I have cura installed so i choose the 3d print option under make tab in fusion to export the file directly to cura.
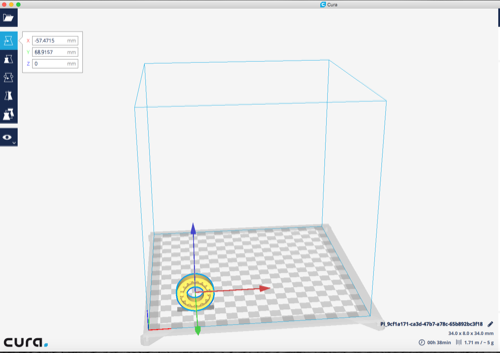
In Print setup i choosed custom settings and made the foloowing inputs:
- Material: PLA
- Profile: Draft quality 0.2mm "profile height"
- Infill Denisty: 50%
- All other parameters left un changed
I use a freeware "pronterface" to control my printer, open the app and hit connect to connect the printer, then import the file and hit print
Printing process
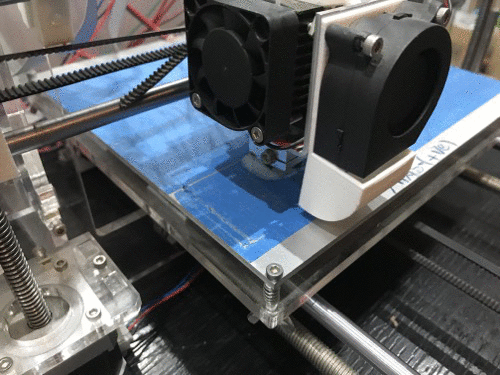
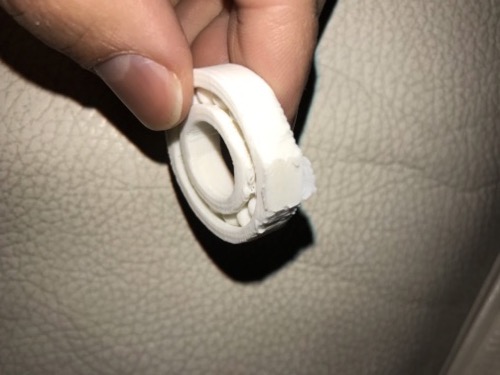
Result:
The balls was sticking to the wall and i had to separate them using a fork, i think this is due to the clearance only 0.1 so i will do another trial with more clearance.

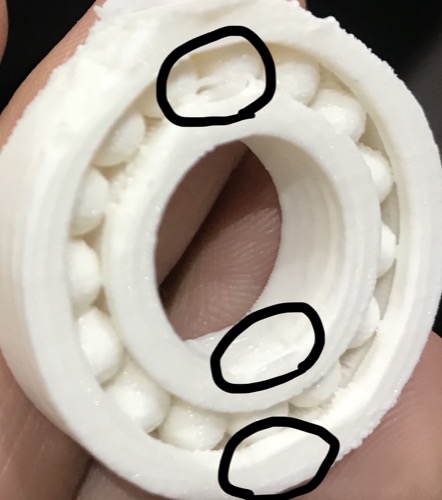
Printing failures:
1. Squared block at the bottom of the part:
After a lot of research, i found that this block is generated by the slicer program because the area of contact between the design and the bed is to small, so the best way to solve this is by changing the orientation of the model in printing or manualy designing support underneath the model.
2. Minor failures in bridged areas
This areas need some support beneath, this can be made by checking the generate support option in cura settings.
Also decreasing the print speed can give better results
3D Scanning:
I used Qlone app for IOS, It's free to use but you can only export images, if you need to export workable files like STL you have to pay.
it's a very simple app to use, First print the attached mate and place your object in the middle.
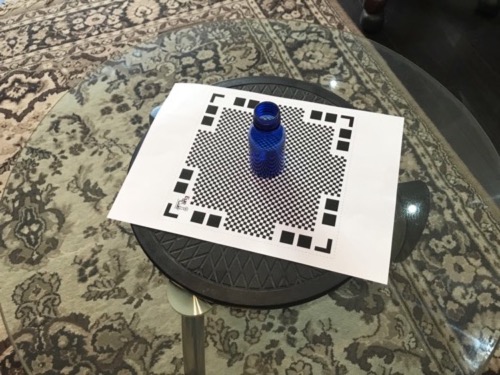
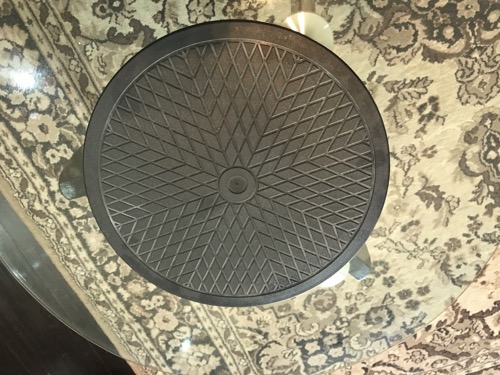
Then open the app and start to rotate the camera or the mate to follow the dome, i used a rotation table to rotate the mate.
after you capture the object you can retouch it using the modify tab, you can modify the texture, sculpt the mesh or just clean it.

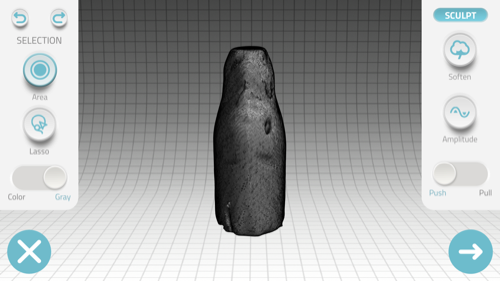
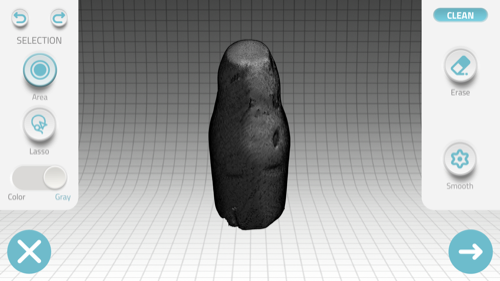
I didn't Like the results of the scan so i statrted to search for the causes of this and discovered it's because the object was transparent and that kind of softwares can't scan transparent objects in good quality.
Group Assignment:
As a group Assignment we were assigned to test the design rules of the printer.
we decided to print a ready designed model from thingverse and each one of us examines a certain aspect.
I was assigned to examin the bridge printing aspect.
Bridging:
As per definition from Ultimaker website:
Bridging is when the Ultimaker must print a flat, horizontal part of the model mid air. Although using a support structure for such a part could be a solution, it often works to just bridge the gap without using support. The Ultimaker will have to drag lines of plastic between already printed parts, in a way that the plastic won’t fall down when being printed.
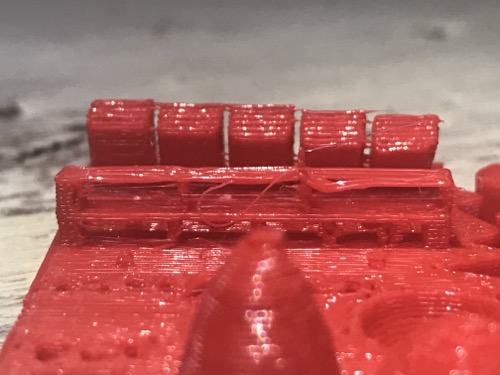
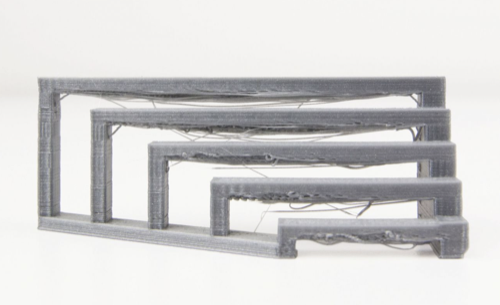
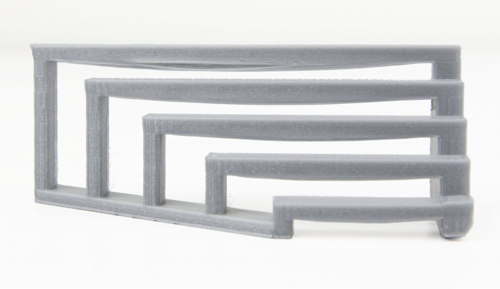
As shown in the image above, the bridges start to fail starting from 7mm wide spacing until totally failed at 9mm wide.
The easiest way to avoid this problem is to generate support underneath the bridged area, but there is also walkarounds to improve bridging without making supports
Print speed
Decreasing the print speed will allow the plastic in the bottom layers of the bridge to stick into the vertical pillars
High Speed printing
Low Speed printing
** image credit ultimaker website
Temperature:
Decreasing the temperature will also help print better bridges, for the same reason as speed, printing at low temp will make the material less liquid and will better stick to the vertical pillars with minimal stringing