Exercise 5. 3D Scanning & Printing
Assignment: 3D Scanning & Printing
- Test the design rules for your printer(s)
- Design and 3D print an object (small, few cm) that could not be made subtractively
- 3D scan an object (and optionally print it)
Learning Outcomes
- Identify the advantages and limitations of 3D printing and scanning
- Apply design methods and production processes to show your understanding
Evidence
Process
3D Scanning
3D Systems Sense
The Sense is a small handheld scanner that retails an estimated $400. It has some basic functionality but I found it very difficult to get a serviceable scan regardless of object size.
As a group we scanned Greg by having him rotate very slowly.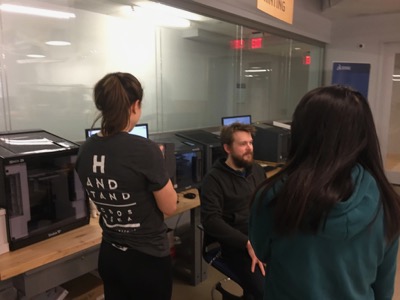
The resulting scan was rather zombie-like.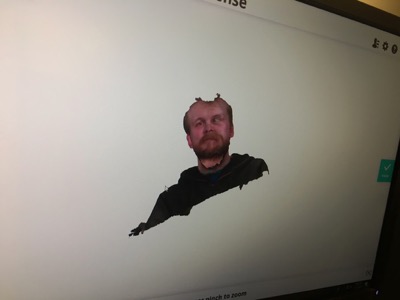
I created a self-portrait by propping the scanner up.
My results were only slightly better as the top of my head was filled in.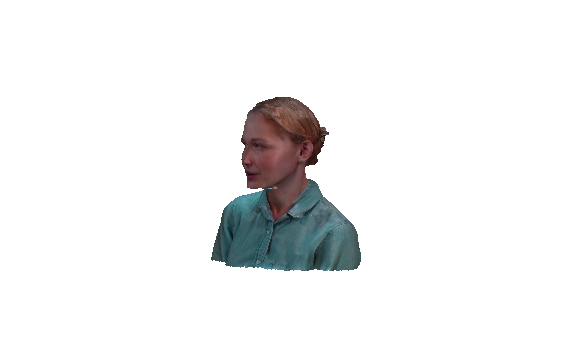
I tried scanning a few different smaller objects from the lab. With each one it took a few tries and a lot of time. Mostly I stood a few feet away from the object placed on the floor. I also tried on a slowly rotating chair but found these scans to be slightly poorer.
Scanning a 3D printed frog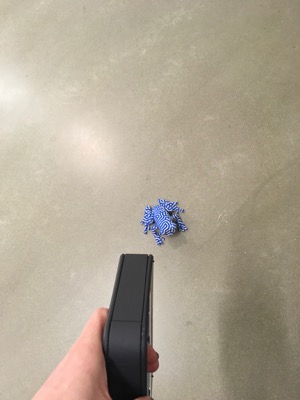
It was fascinating to see all the parts of the whole taht were collected and used to create the final object.
I was able to get a scan that was fairly decent save for the underside of one hand.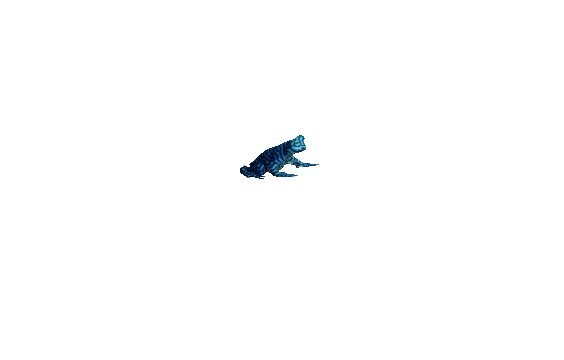
Creaform HandySCAN
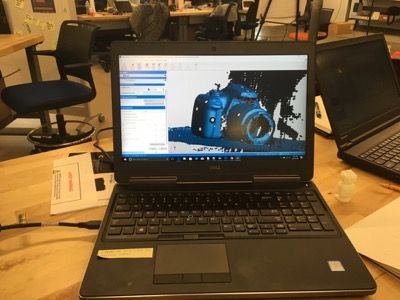
We were fortunate enough to have a Dassault staff member trained on the Creaform to demonstrate to our group how to use it. We started with a test piece and then a camera in the lab. The lense was tricky to capture as the light bounced off of it.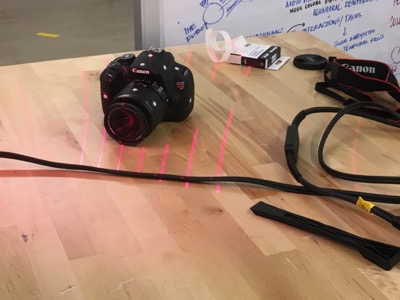
The HandyScan retails for an estimated $57,000. It has a lot more functionality in the software and captures more nuanced details than the Sense.
After slowly scanning objects in the lab other people made, I decided to scan something a bit more creative.
We have a wire mannequin so I decided to create a character that could potentially appear as a shadow puppet in my final project. The lasers need a solid surface to bounce off of so I taped the mannequin and added PlayDoh hands, feet, and head.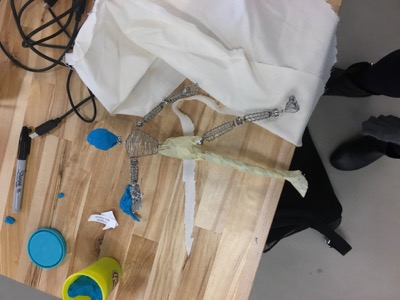
Next step was to add the target dots. Guidelines suggest they be placed fairly evenly apart, capture all large surfaces, especially areas near detailed features, and not be placed on sharp corners.
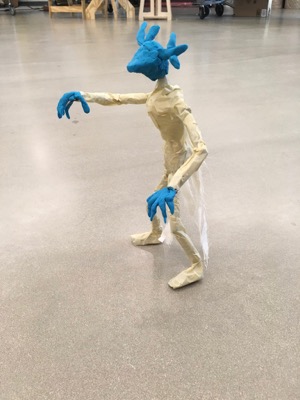
(This is a second rendition of my character made the following day. The tail had been problematic so I didn't include it on this one).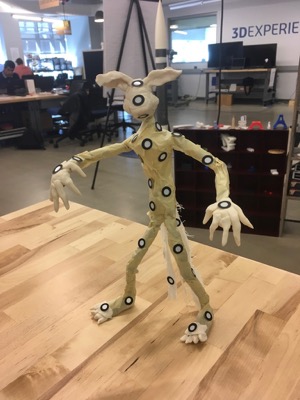
Time to scan
On the left side of the screen the colored bar tells you whether you are in range to get a good scan or not. You can see that part of the table surface was included, I was able to remove this from the object later on.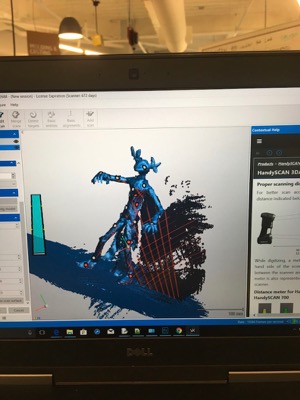
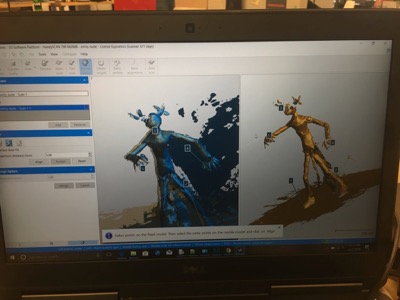
Capturing additional surfaces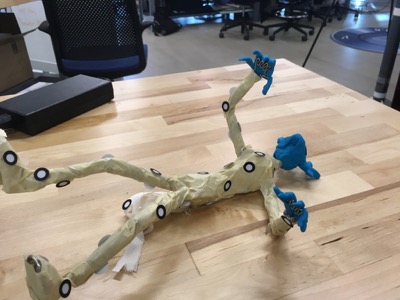
Using the software to rotate and combine data from two scans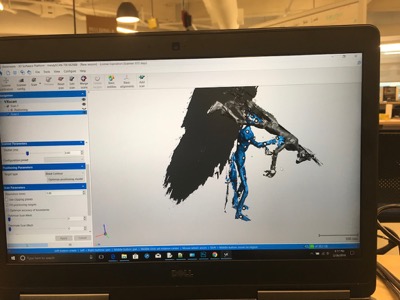
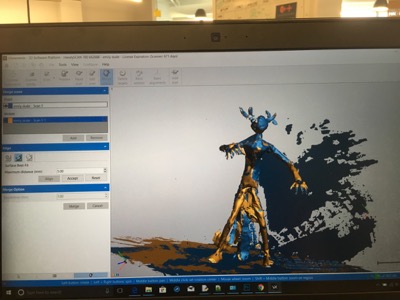
A solidly successful scan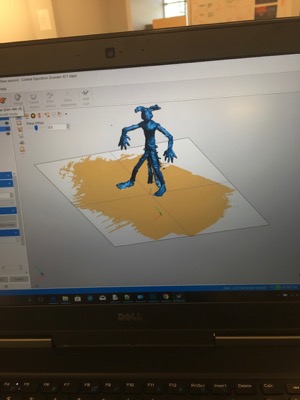
3D Design
I remembered reading an article about an organization that was cataloguing types of corals so to have a record of them and raise awareness, particularly the ones at risk of disappearing and was inspired to make coral.
Rhino
I spent a little time experimenting with TinkerCad, which I've used before, and then decided to explore Rhino.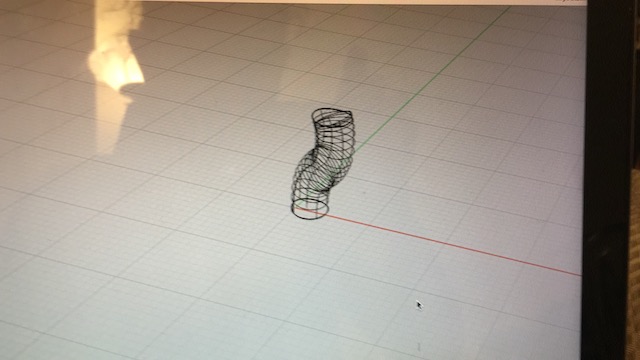
I created elliptical shapes on my drawing plane and then lines extruding up from their centers. With the guidance of this tutorial I was able to use the sweep command.

While my object didn't look much like coral, I was learning a new tool but I was particularly interested in exploring voronoi patterning and not confident I could tackle it in Rhino.
Meshmixer
My classmate Pilar introduced me to this excellent Adafruit tutorial on using Autodesk's MeshMixer.
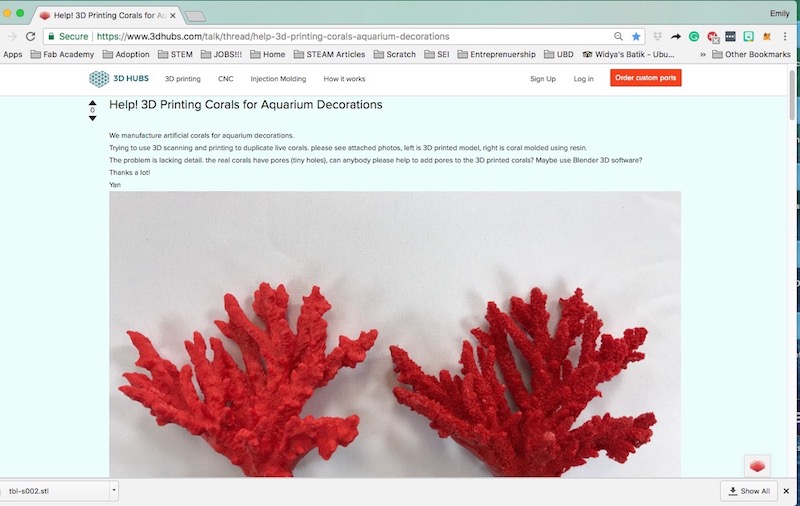
Additional helpful resources are Kayla Pruyssers tutorial and this workflow from Instructables. I downloaded the software and began testing it with my shapes. I wanted to start with something more "coral-like" so went back to the web. A contributer to 3D Hubs Talk thread had scanned coral and 3D printed it for his aquarium. I started with his file.
Here's the starting piece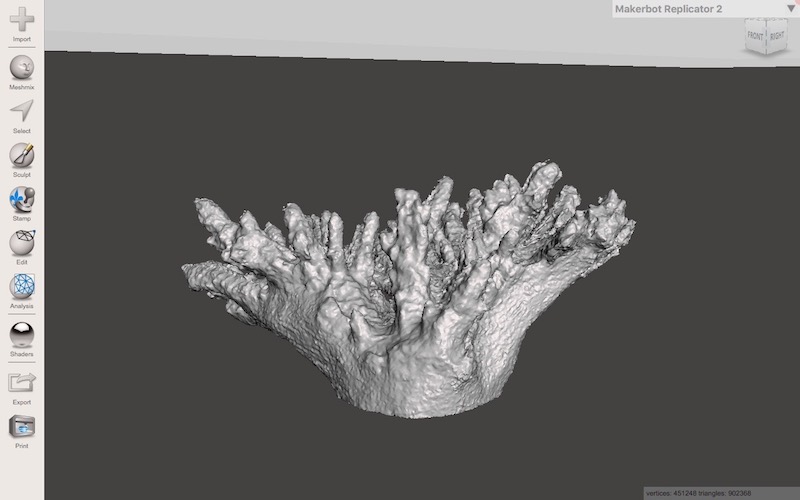
I first built out the arm thickness and smoothed the surfaces.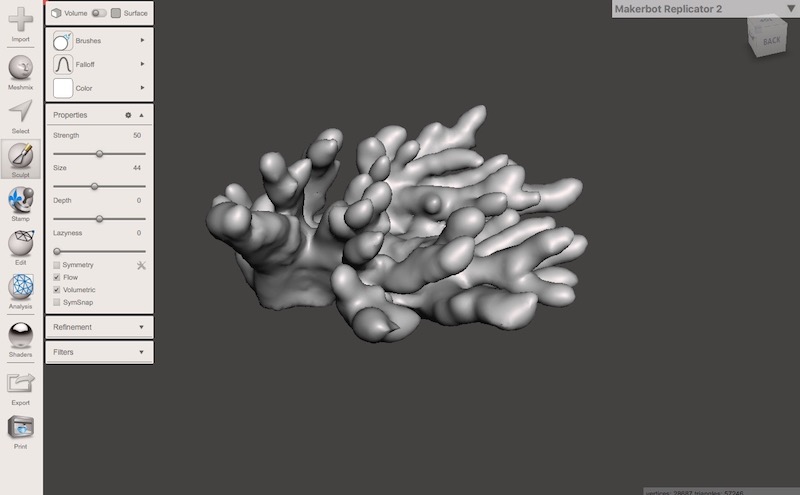
Then I tested the meshing tool. The style below is so dense, I'd be surprised if you would see any change in the object!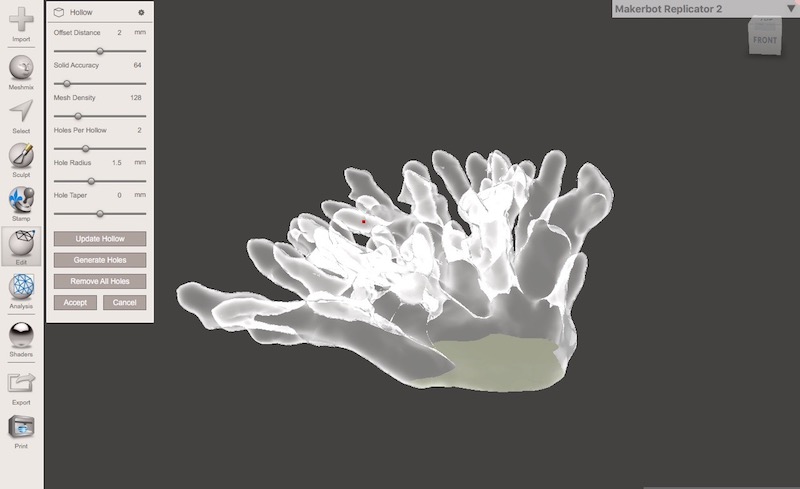
After making my first 3D print I realized I needed more of a base for my object. Spliting it and adding to the bottom took some time to figure out and brought me back to the internet for more tutorials on how to use MeshMixer.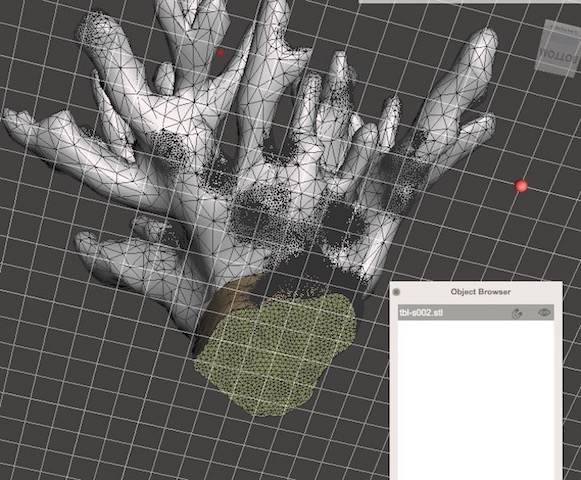
My computer crashed using MeshMixer a few times. Saving my work was key.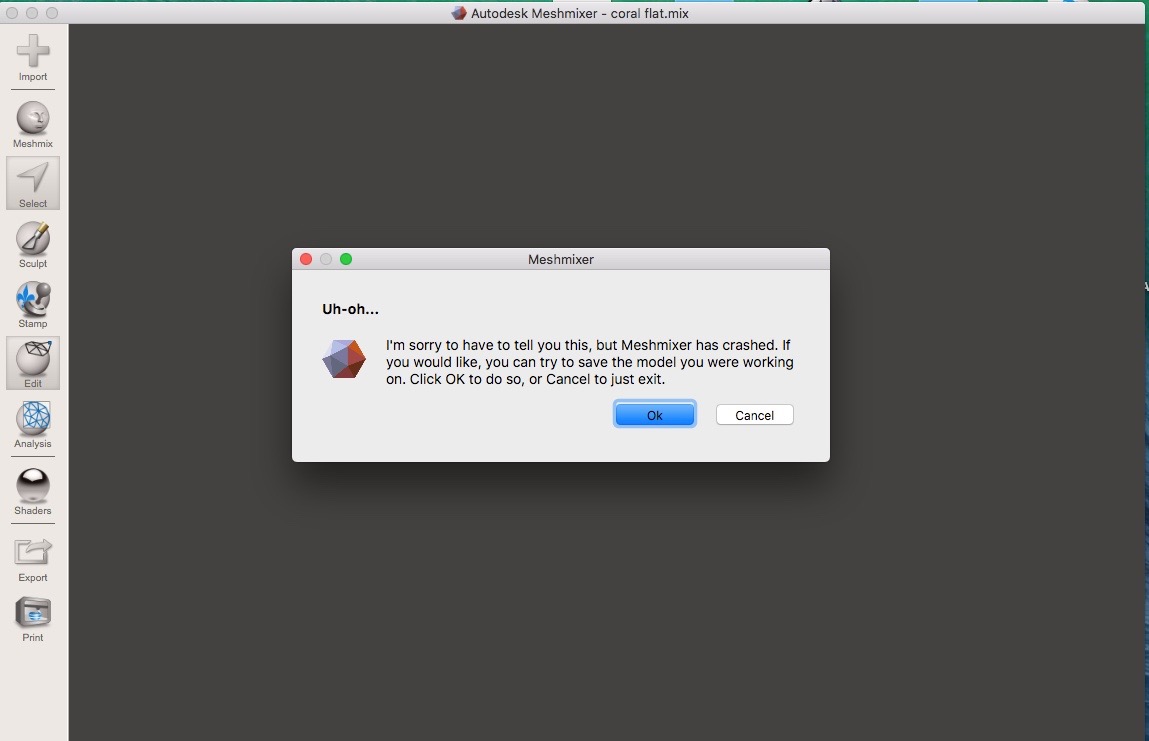
I "painted" surfaces where I wanted the meshing pattern to appear.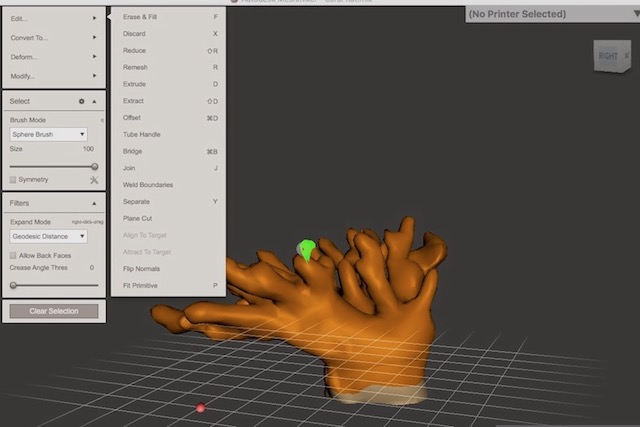
Applying the pattern creates triangles all over the object.
By clicking on different parts I was able to control which areas of the object I wanted to have patterning of different densities. I kept things more open on the arms and closer together on the base and in corners for stability and structural integrity.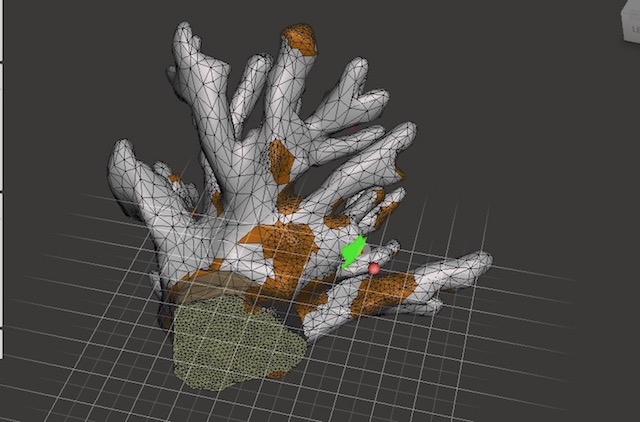
Closing up small holes and enlarging others by brushing edges.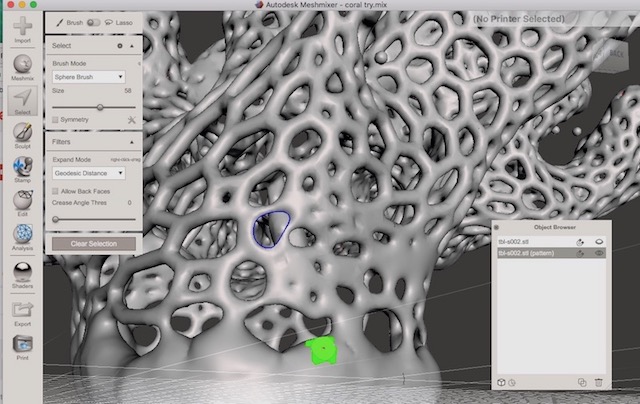
Finished design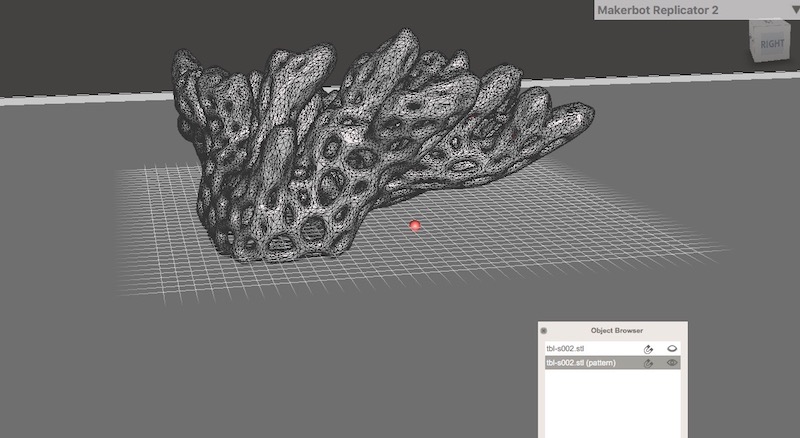
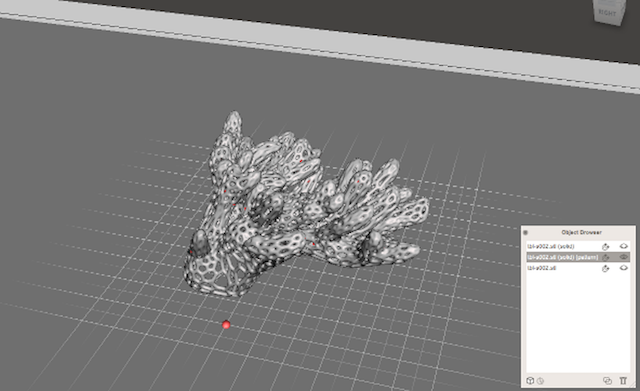
The voronoi patterning creates a lace-like texture that conforms to contours of the object and leaves the interior completely hollow. This type of design would be difficult to create in a subtractive way.
3D Printing
In the school I'd previously run a makerspace, I set up a printrbot and a MakerBot Replicator Mini. The Dassault Lab has many 3D printers; I look forward to familiarizing myself with them.
Sindoh 3DWox
I made four different pieces on the 3DWox and found it to be rather comperable to the MakerBot Replicator Mini in printing and in the software interface and capabilities.
Key differences are in the tool itself- the 3DWox has greater range of connectivity options (wifi and USB FlashDrive), automatic loading of filament, a camera for monitoring, display screen, and some other bells and whistles.

My first run would have been beautiful if it finished.
The varanoi pattern on the interior and exterior of the piece were striking in black filament.
However, my piece is much too unbalanced to be built without supports at this size. I also had difficulty keeping the piece on the bed, user error I'm sure.
It might have made more sense to run this job from top to bottom (upside down) with supports. Additionally, it is quite top heavy so repeating it in a radial pattern 3 more times around the center would have made for a more balanced finished object.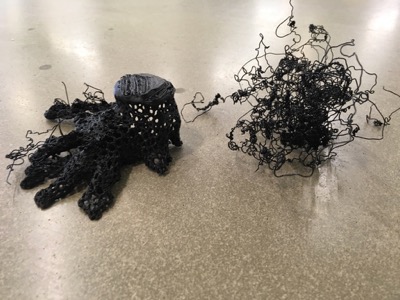
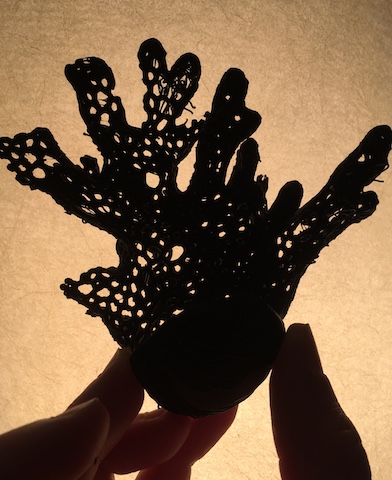
First successful run- a scaled down model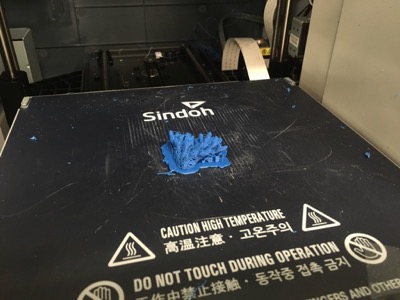
The filament on the exterior was quite wavy. I I suspect because the piece moved slightly or there is just too much detail in a small area for the filament to cover without some build-up.
Unfortunately I broke it as I was removing support material.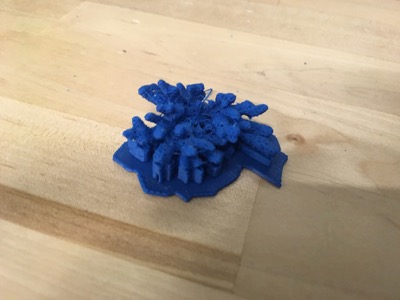
Nothing a little glue couldn't fix though.
Formlabs Form 2
I love the Form 2! It's magical to watch a solid object slowly taking shape from a vat of liquid.
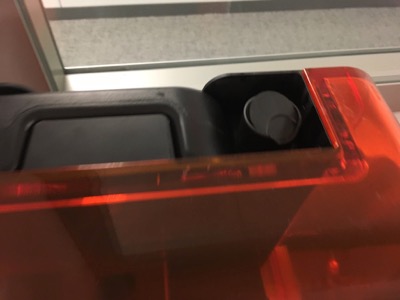
We were out of resin material in the machine so the first task was to load a new container and dispose of the old one.
I also switched to the proper tray for my material (clear).
I didn't delve too much into the software for the tool, but it seemed comperable to ones I've used in the past.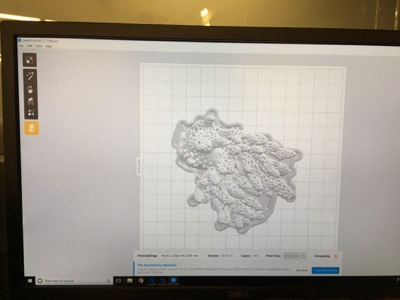
It was wonderful to have an onscreen display that identified what was happening.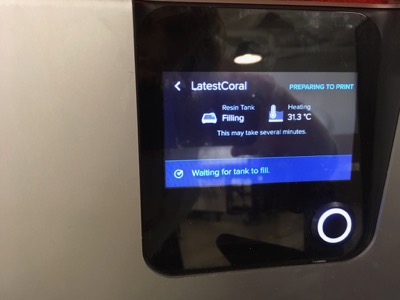
Our alcohol bath was quite old which meant when I took my object out it was still slimy with residue. I soaked it for longer and then wiped clean. I didn't have a UV curing lamp on hand to completely harden the object.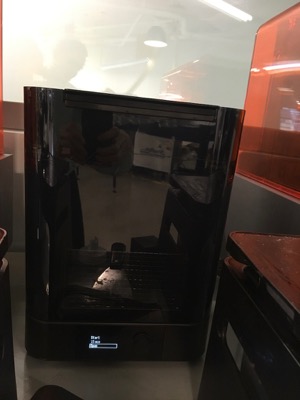
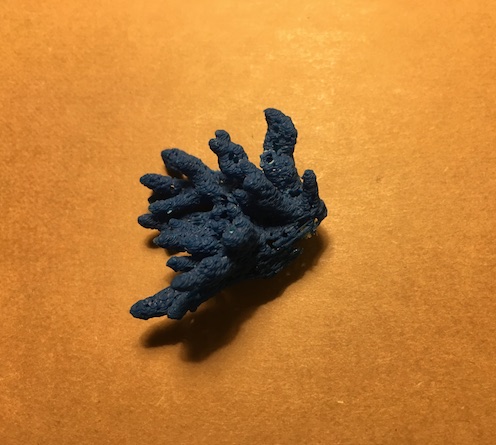
The finished object from the Form2 was much stronger than the partially finished object from the 3DWox. I imagine this is a result of the material rather than the tools themselves since you can use stronger filaments with the Wox.
Finished object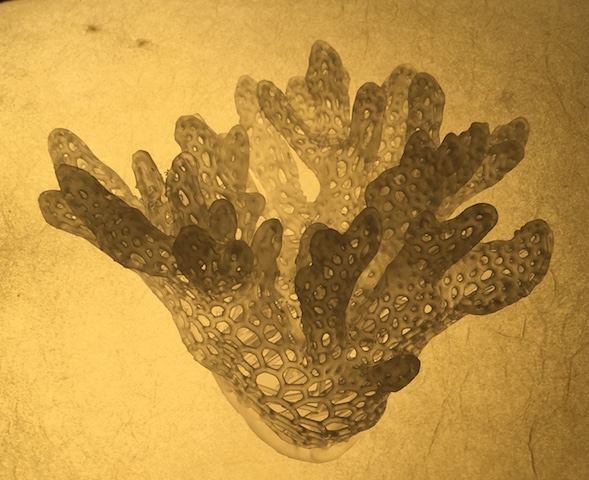
It still needs some redesign to create an object that can stand without falling over but is quite beautiful.
Files
Coral
Creature Scan zipped .stl
Frog Scan zipped .obj