learning Rhino
We got introduced to an overweliming amount of new software both 2D and 3D:
- 2D Design Tools: Inkscape, Gimp, QCad, Photoshop, Illustrators
- 3D Design Tools: 3D CAD, Blender, Freecad, Rhinoceros 3D, Grasshopper, Solidworks
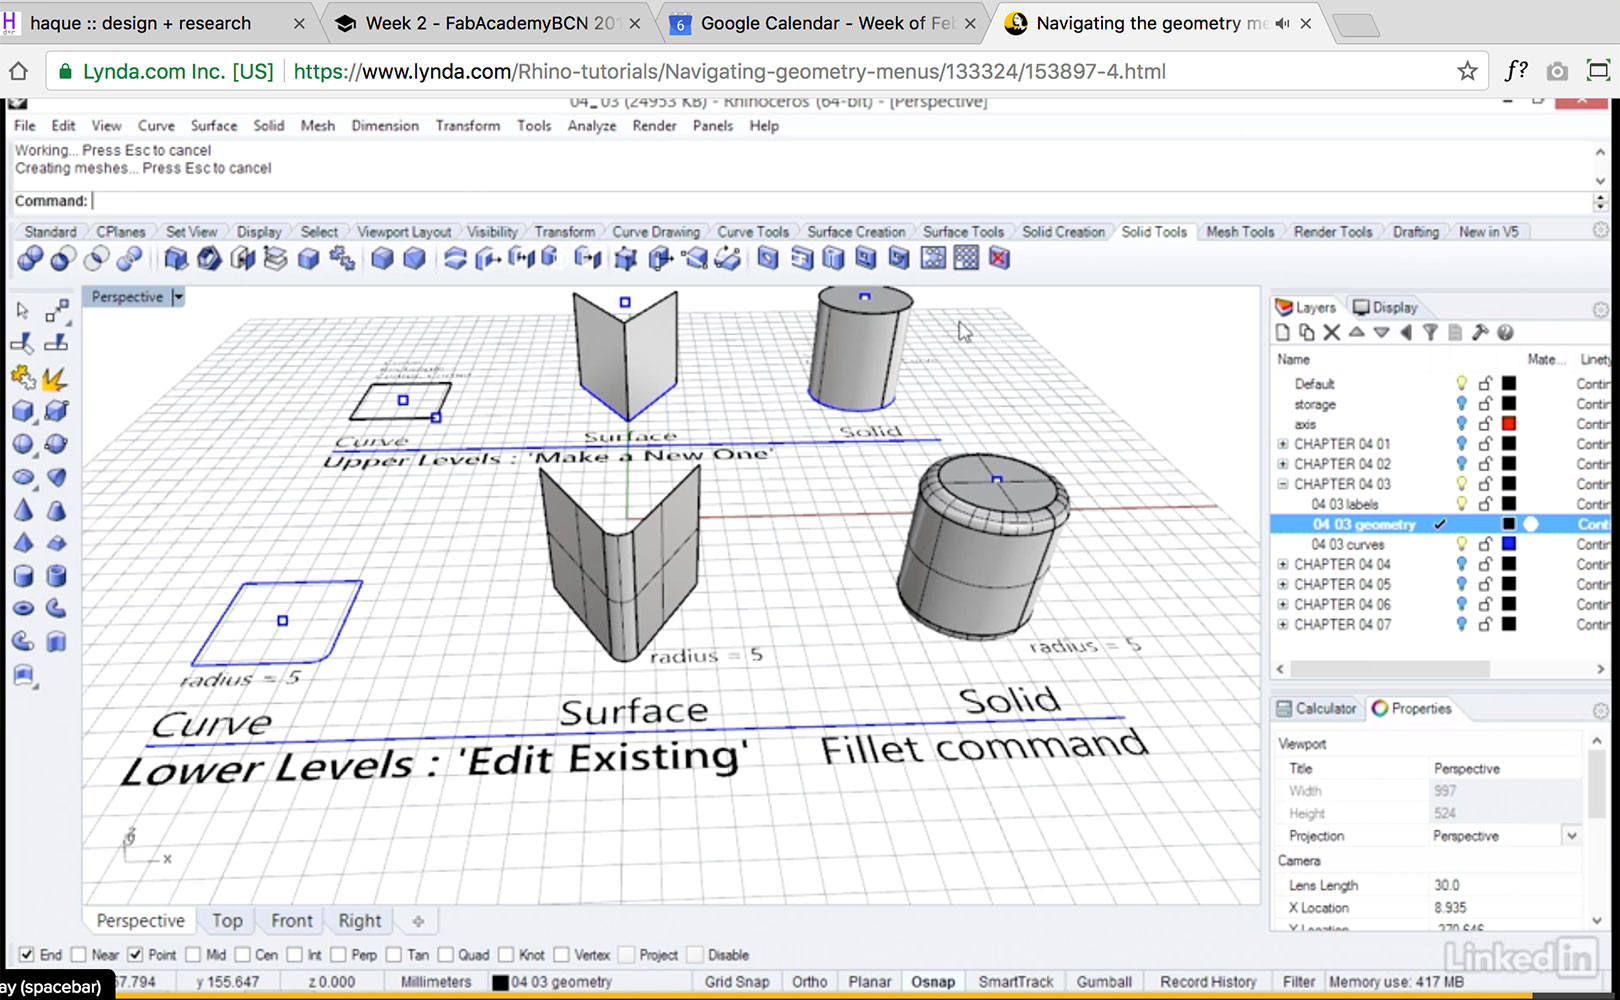
I already have experience in 2D sofwares such as Photoshop and Illustrator, I use them daily in my design work. The challange came when I had to choose a 3D software as I've never worked with any before. After broadly learning about what each software was capable of, I decided to focus on learning Rhinoceros. I thought it would be useful to learn, specially beacause it is a tool which allows to build most 3D things, it is not parametric, but still can be used to make 3D designs for all the machines we will be learning at the course. At this stage, I feel like it is the Photoshop for 3D desig.
I started off by doing this tutorial on Lynda.com, but I realised it was not a good learning process for me as it was too much information and not enough practice (plus I had to pay money for it), so after learning the basics I prefered to learn by doing.
My plan is to learn Rhino as I go. I know it will be slow and probably frustrating at first but I think it is the way to learn. I am going to be listing all the commands, tips and tricks I learn below for future reference:
Join, Extrude, MoveCrv, Trim
These are all basic actions that I might not remember.
Dimensions> Linear Dmimension / alignedDimension
For measuring distances / For measuring distance with angled lines
Fillet
Makes curvatures
Planar Surf
Turns selection into surface
File > Settings > Hatch Defines stroke of lines
File > Settings > Linetypes Defines fill of lines and objects
Array / Array Cv
Allows to repeat with equal distances in x, y and z.
Allows to distribute objects in space.
Write 'R' in console to set directions
Eg: R3,8,-3 = From the point where I am now, move to the next point which is x=3 y=8 z=-3
'Set CPlane by 3 points'
Allows to set the plane in diferent angles. Useful to draw from the top which simplifies vision. First you have to set x,y,z with lines, then apply the "set CPlane by 3 points."
<
Symbol for 'angle'
Block
When you define an objects to a block, everytime you change something, the change will be applied to all the objects set to "block"
2D modeling - Illustrator
My choice of a 2D modeling software was Adobe Illustrator. I use Illustrator almost daily for my design work, and I find it a fundamental tool in my everyday job. It is a vecotor based software and the interface has constant improvements making the workflow better and better, overall I think it is a very good program to use for 2d modeling.
I started by reducing my final idea into basic geometric shapes such as rectangles and spheres, once I had that drawn I went on by tweaking, deleting and joining each diferent part.
I also devided the diferent elements of the drawing in grouped layers which is a very useful thing to do if later on you want to edit something easily. I also added color outlines to the design to give it more contrast and make it more understandable and realistic.
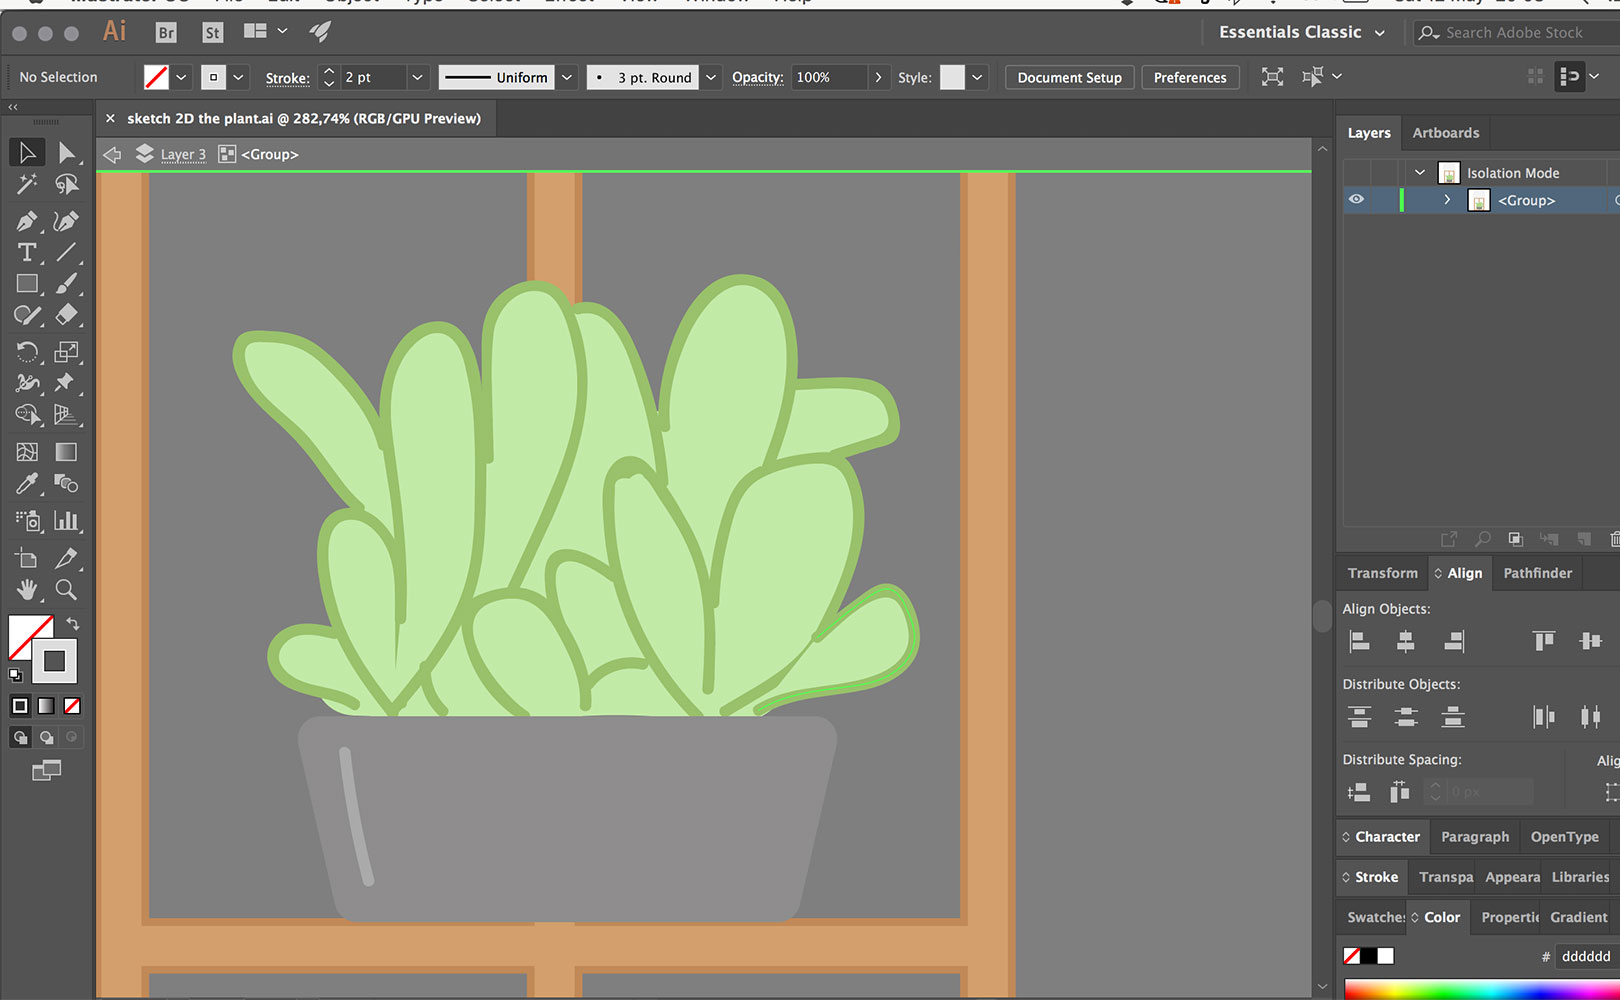
I decided to make a second view of the design with the stuff that would be inside of the dome. It is hard to know at this early point of the project, but I think the space should be big enough to accomodate all the components I'll need to make it work.

In the image below it can be seen a few of the different variations I tried out for the dome design.
This was a good exercice to start comunicating and deciding on the design of my project but I find it somehow too simplistic. I think the actual shape I had in mind doesn't come across as I want, this is probably due to the fact that I only drew it from a frontal perspective. I guess that by working on the 3D visualization it will make it easier to form an idea of the actual object and consecuently decide on the sizes and proportions of each part.

Files:
2D sketch(.ai)
3D modeling - Fusion 360
This assignment took me a long, long time. I have never worked with 3D software before, and this has been one of my first atempts. Even though, from the early point where I find myself I can clearly tell that dominating this kind of software will be crucial for not only building 3D objects but also in communicating and showing them to poeple. I chose Fusion 360 becuase it is a parametric tool that I think can be useful later on if I want to modify the sizes of my structure as I develop the project.
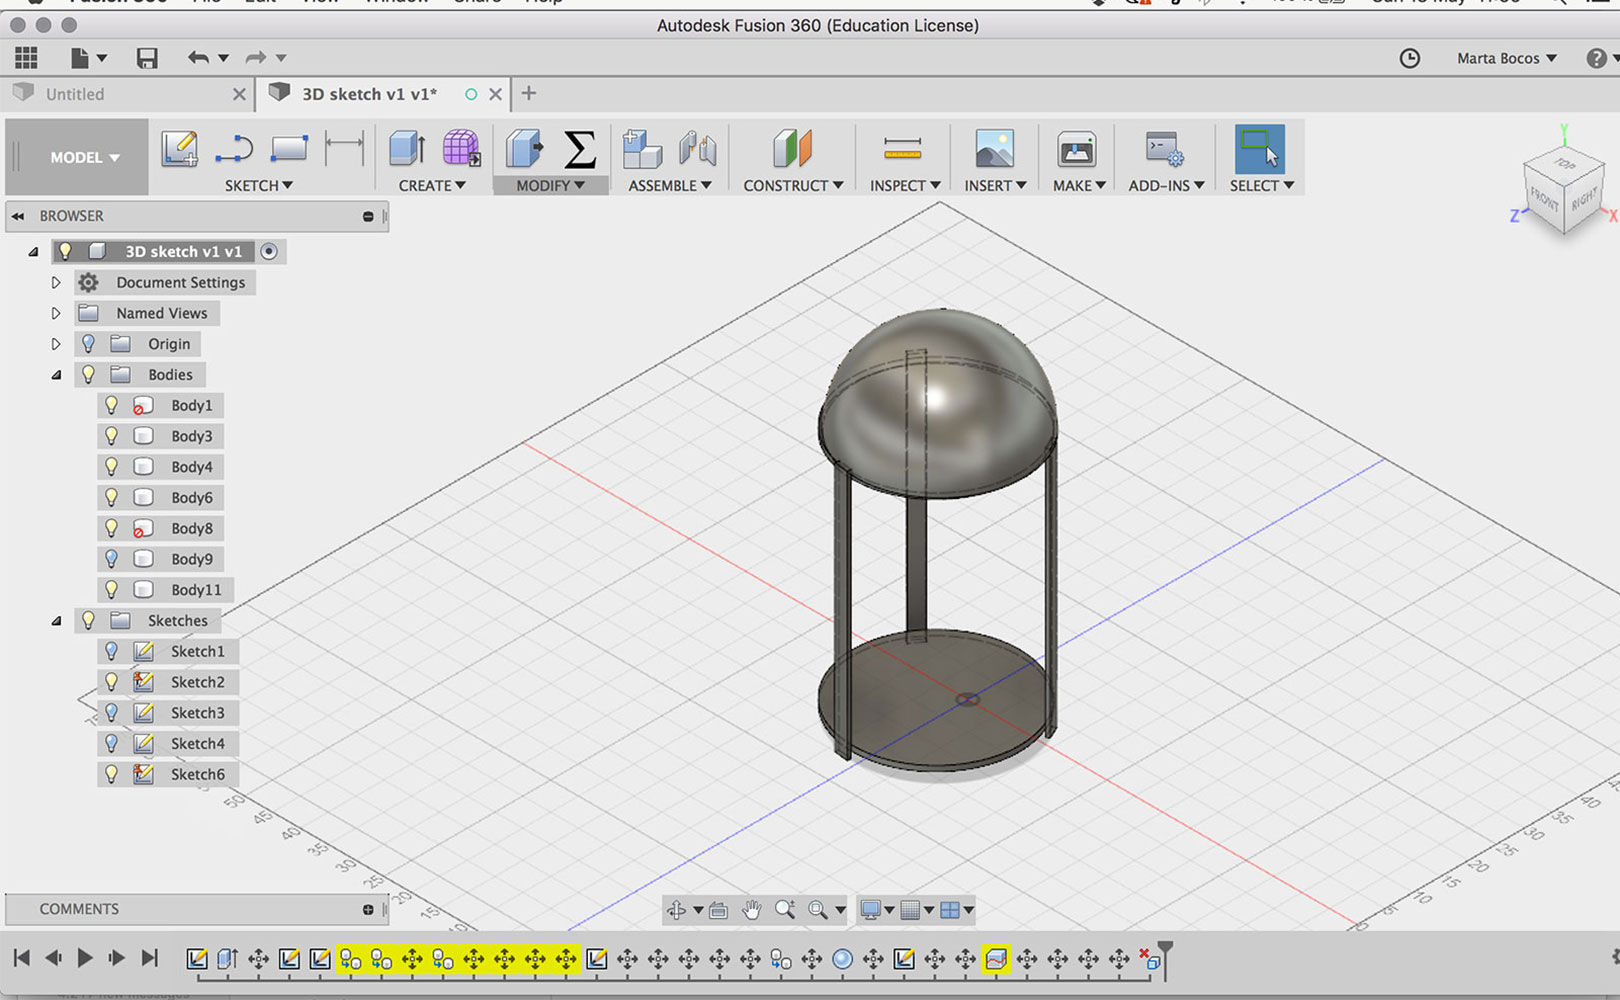
I started by getting familiar withe the software enviroment and testing and exploring everything. After that, I followed almost the same steps as I usually take in Illustrator: I sketched the basics in geometric shapes and from that I proeceeded in tweaking, extruding and merging shapes. I am not going to lie, it took a lot of trial an error, and touching things around to acomplish what I wanted, in fact, I am not happy with the final result yet, but my plan is to improve this visualizationa as I develop my skills.
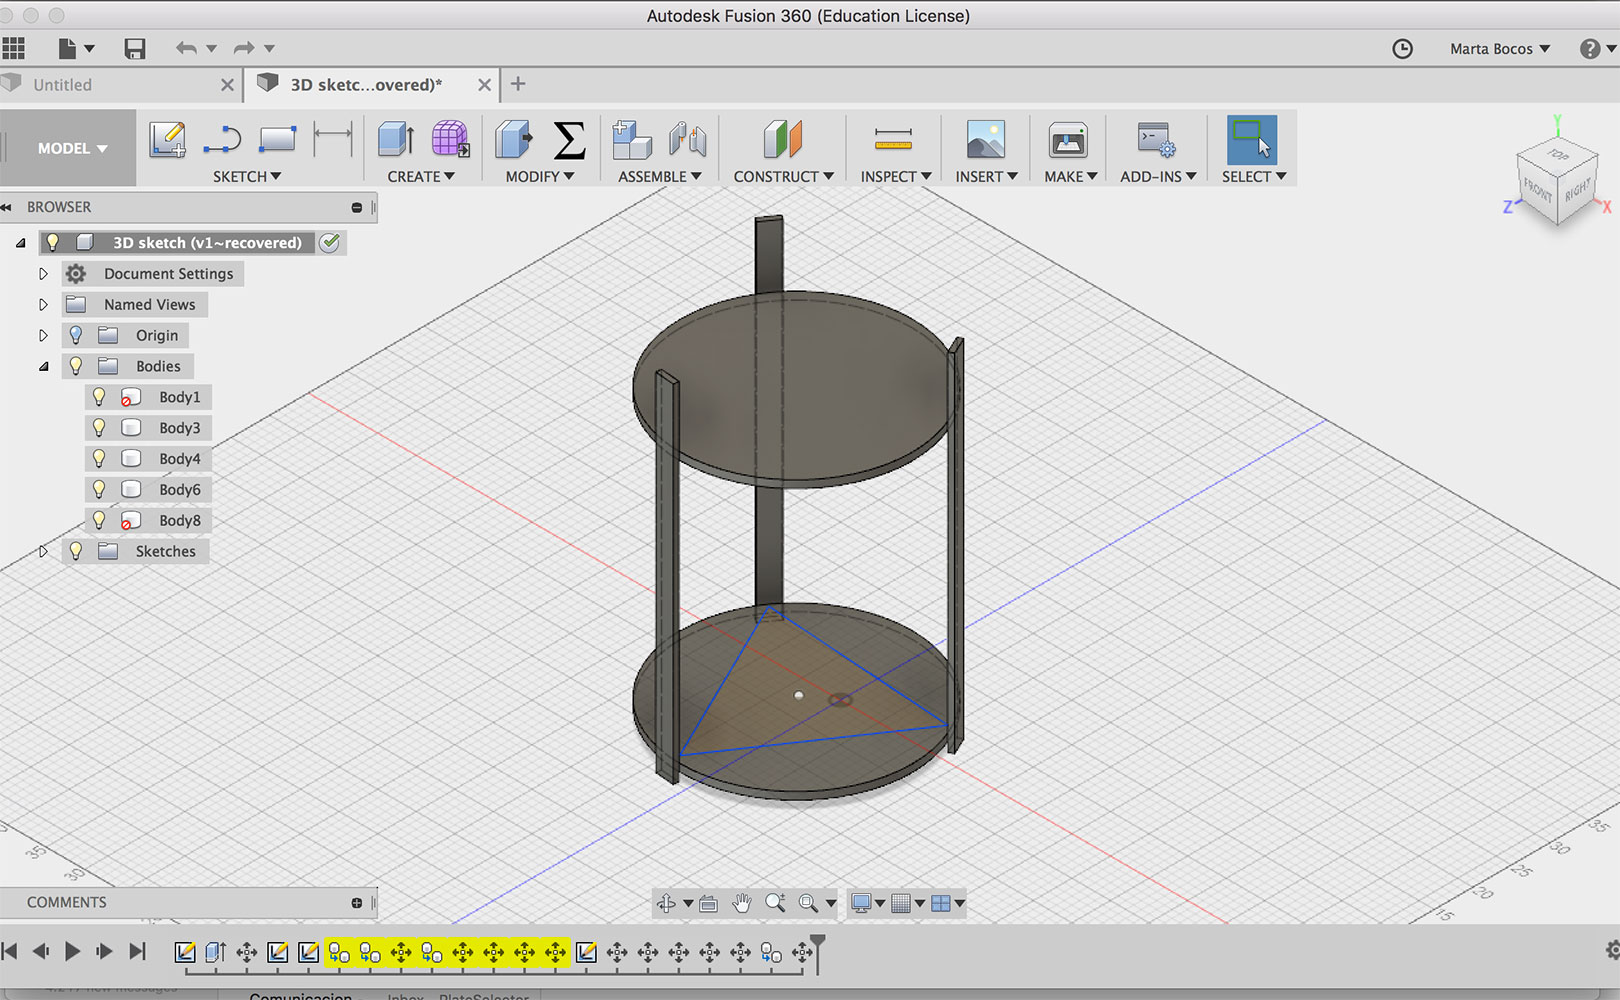
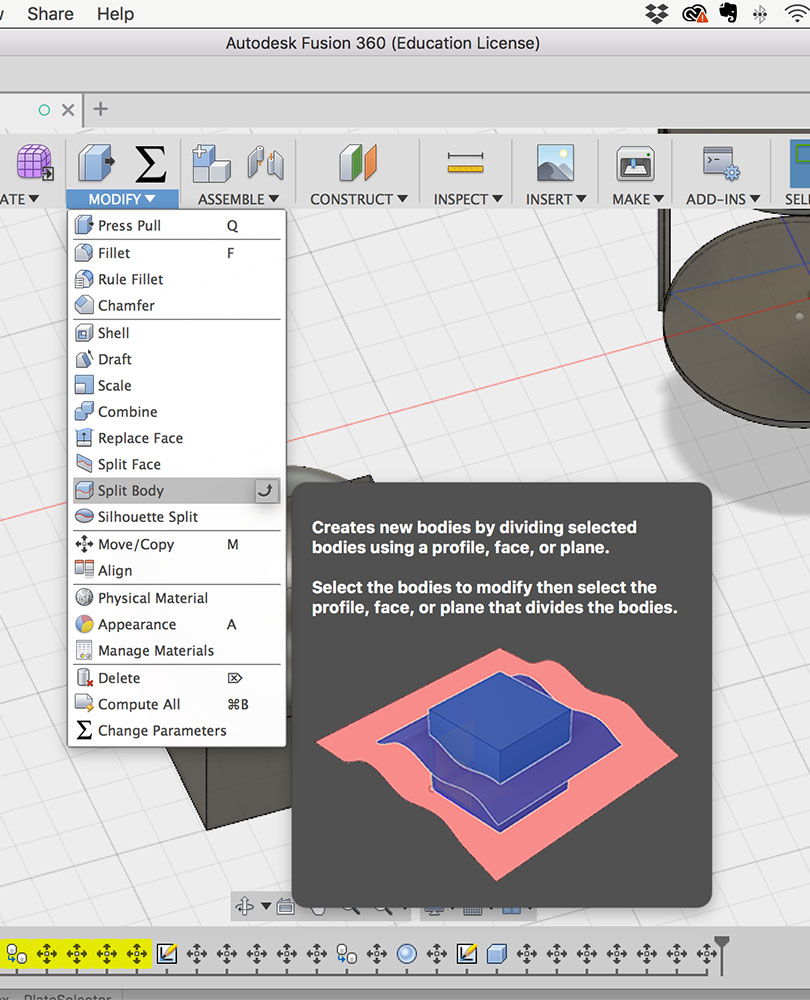
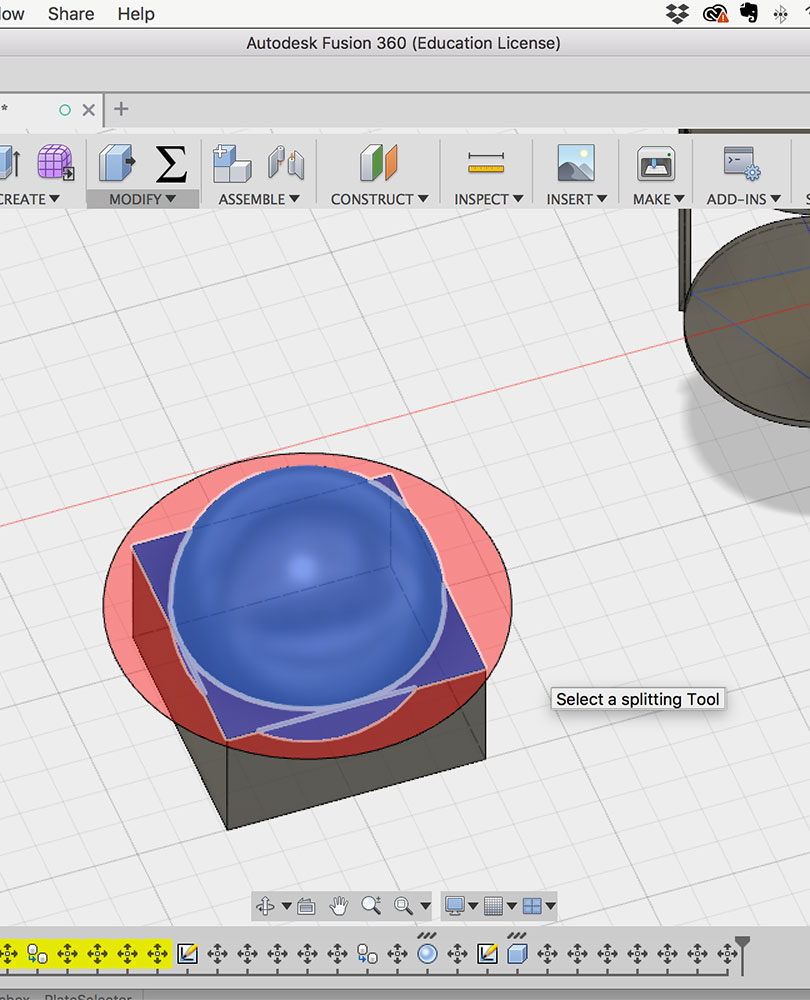
In the image above: I still don't know how to distribute and align things in space, so I drew a triangle to evenly distribute the legs of the structure. In the images below: a very useful tool I discovered called split body which is the equivalent to the "minus" in illustrator's pathfinder. I used the split body tool to create my dome by subtracting a box to half of the sphere.
A little playaround with textures and colors. I enjoy the fact that by adding textures you get a better sense of the object and how it will actually look when built. This is a part of Fusion that I would really like to learn more of, make great realistic renderings. Although having only grasped what Fusion is able to do, I am very excited to learn more as the posibilities it gives you are exciting.

Files:
3D sketch(.f3d)