
Week 10: Molding and Casting
 THIS WEEK´S FILES
This week assignment was to design and machine a 3D mold, then cast parts.
Tools
- Autodesk Inventor (2015 Pro): My cad software of choice to make the object's design.
- Fabmodules: We have it already installed on a laptop at the lab. Used to send the .stl design to the milling machine.
- Roland MDX-20 Milling Machine: To mill and cut the mold..
- Materials: Machinable wax, and Hydrostone.
Process
My original idea was to make some Fu dogs, which are stone scupltures that are put on chinese entrances as sort of "guardians". Considering that hydrostone looks more or less like the same material I thought it was a good idea. Sadly, after thinking how to make the mold, it turn out to be imposible using substrative means.
Therefore, I decided to go for something simpler. Looking around I found a 2D image of a dragon that I liked.

I decided to use Inventor to "copy" the image and extrude each part to different heights, giving a 3D effect. I took around 6 hours of sketching and extruding to make the design.
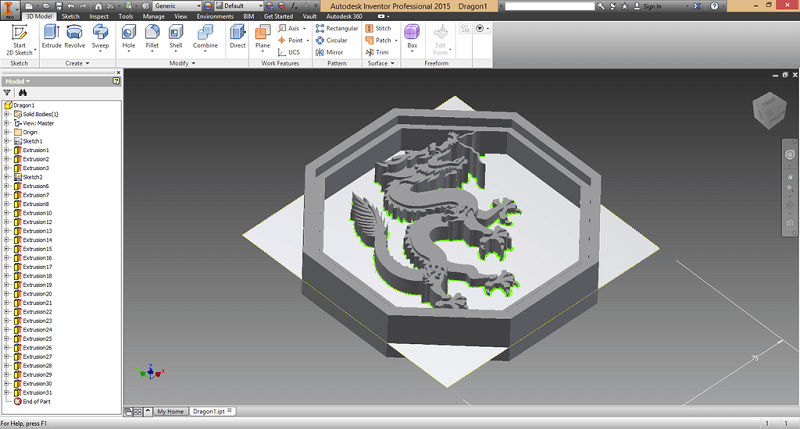
When I was about to finish, I remebered that the mills flute is of 1/8, and my model had a little to much detail. I still finish it as I had several hours onto it.
At the end, I noticed it was a little to big to get in the wax block so I resized it. Also, some fillets on some edges. I was quite satisfied with the final design, although I still wondered if the mill could make it.
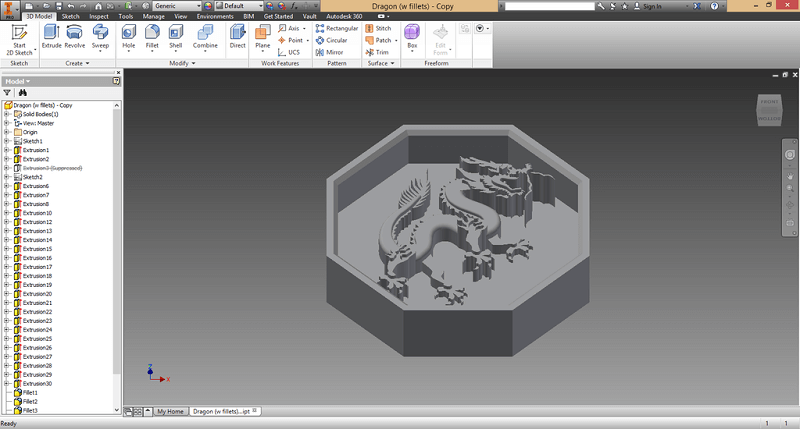
I created a block and placed my object to create the positive mold. I then exported it to a .stl file.
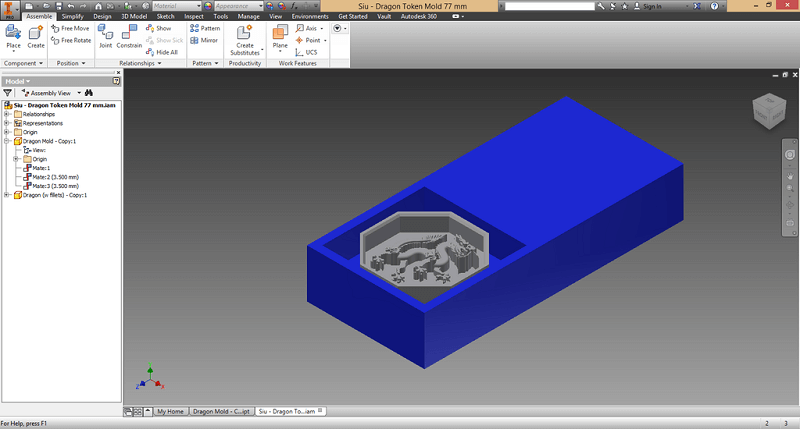
For the milling process I decided to use a 1/16 mill for the rough cut and a 1/32 for the finish cut. I couldn't use the 1/64 as the tip's lenght was around 1 mm and then it tapered into 1/8 inch, so it would mess up the whole design.
Setting up the mill was a rather bumpy process. At first, when uploading the .stl file to fabmodules (online ver.) the generated some random paths. Using the old version of fabmodules it did generate the path, but the path was sent to some misplaced origin. The final attempt was using the generated .png as source file. This time it worked.
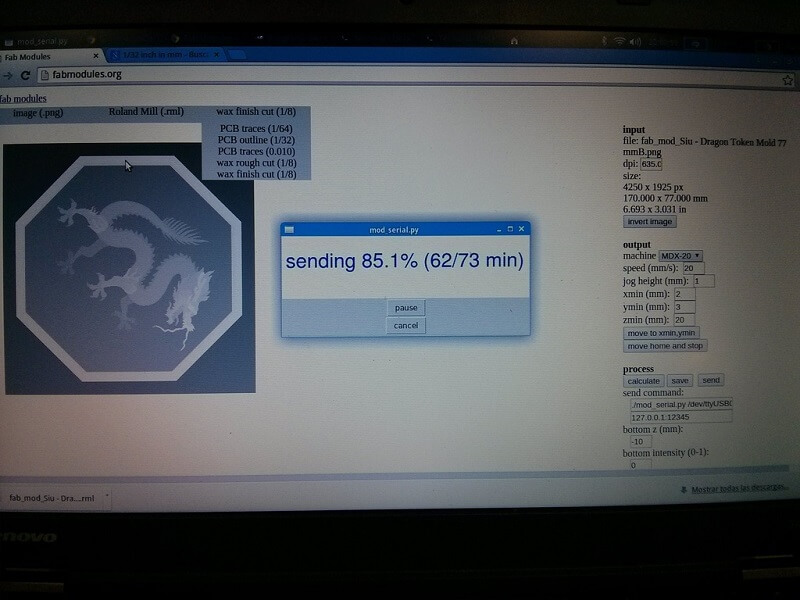
It took around 20 minutes for the rough cut and over an hour for the finishing cut.
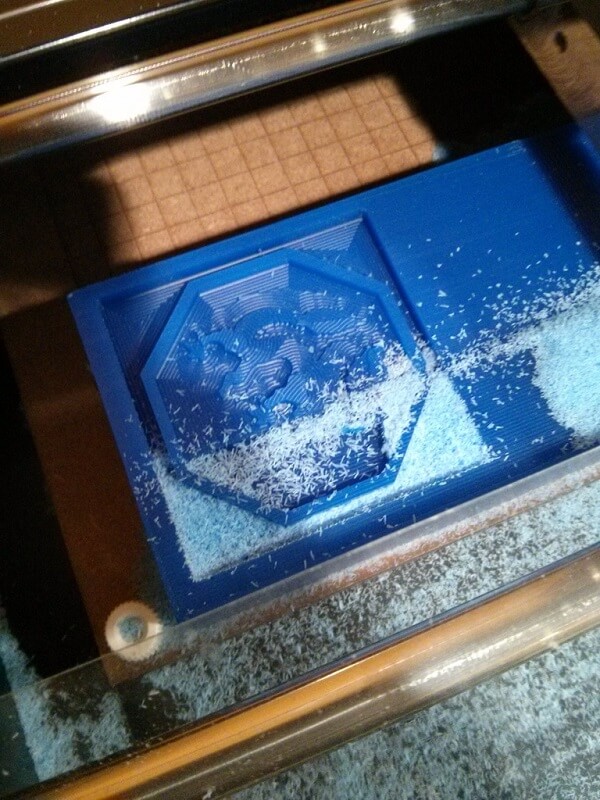
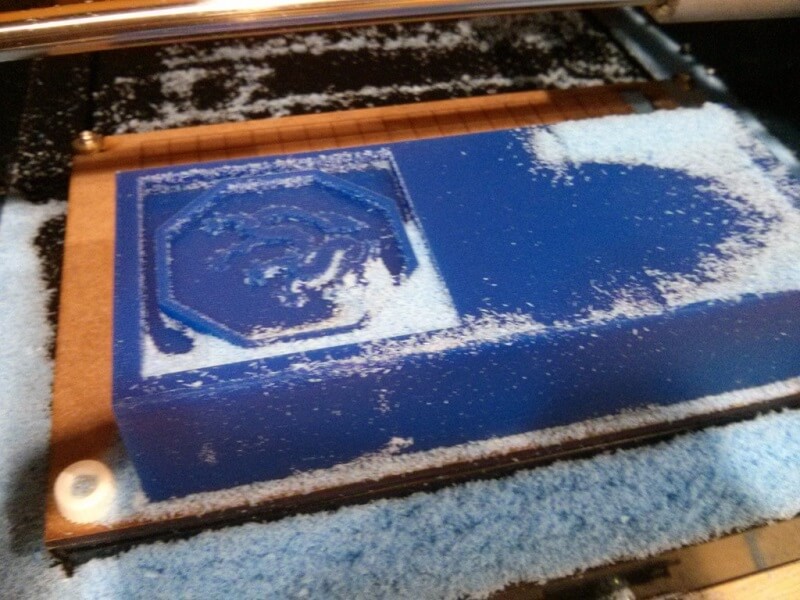
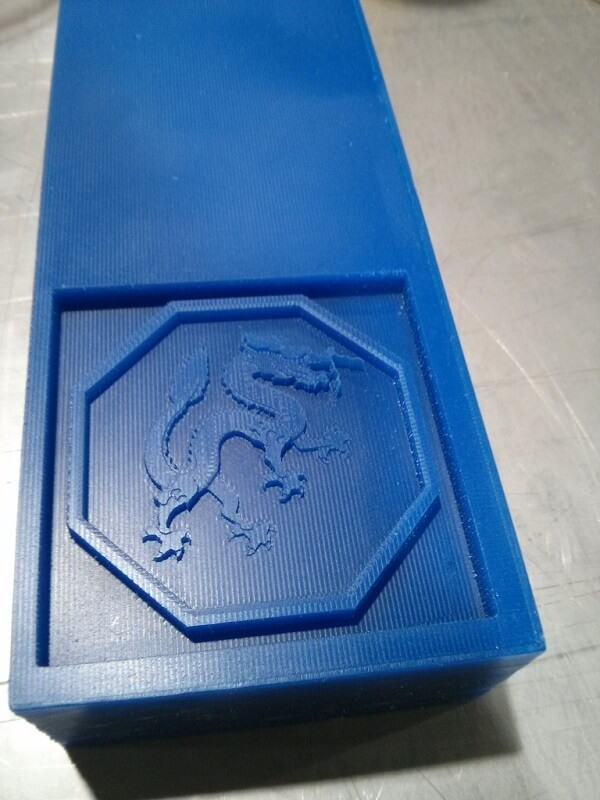
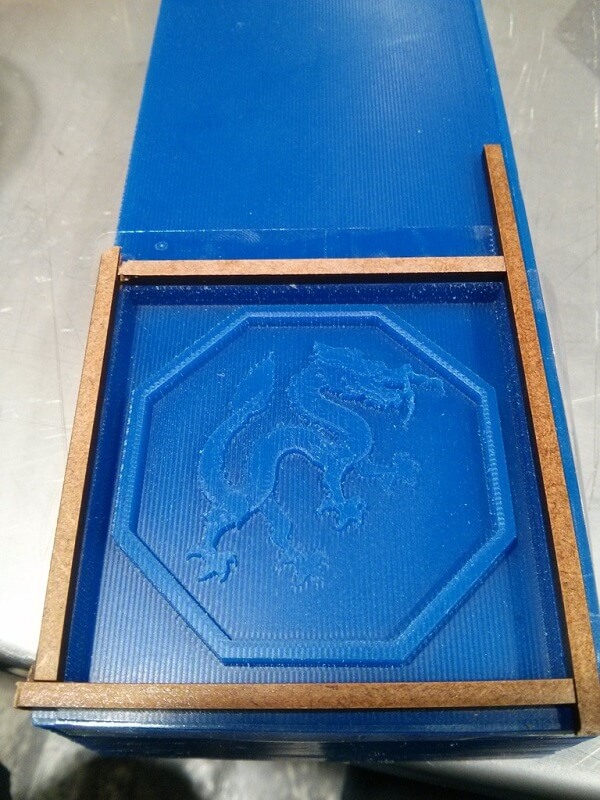
The final product was quite surprising. I caught most of the small details and the flute didn´t mess up the design.
For pouring the rubber to make the flexible negative mold, I pasted some pieces of mdf to create a taller wall. This was necessary as using the .png file made the design to be too superficial.
I prepared the mix but had a little trouble because of too much bubbles, so I had to keep on mixing for quite some minutes. When I was more or less satisfied I gently poured it in the mold.
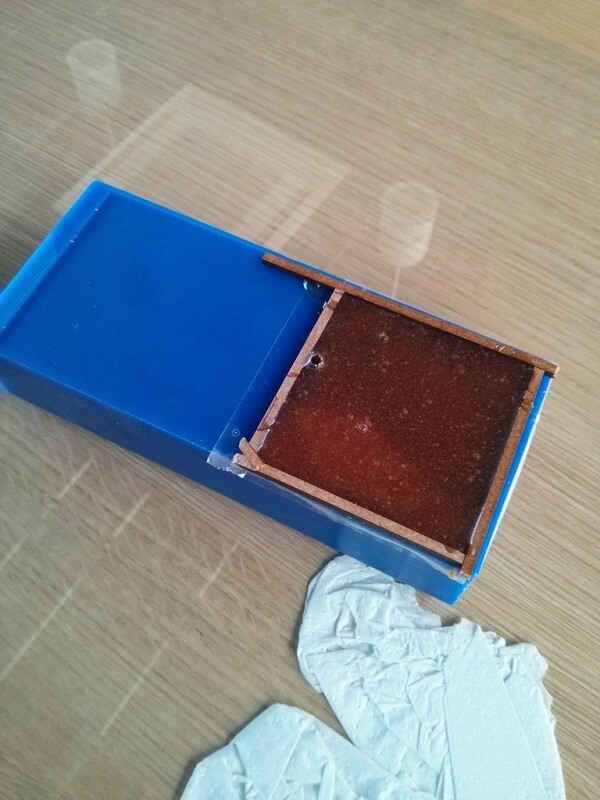
I left it overnight to settle (around 14 hours). Next day I found out that some big bubbles had formed. Luckily they formed bu the sides, so they did not interfered with the design itself.
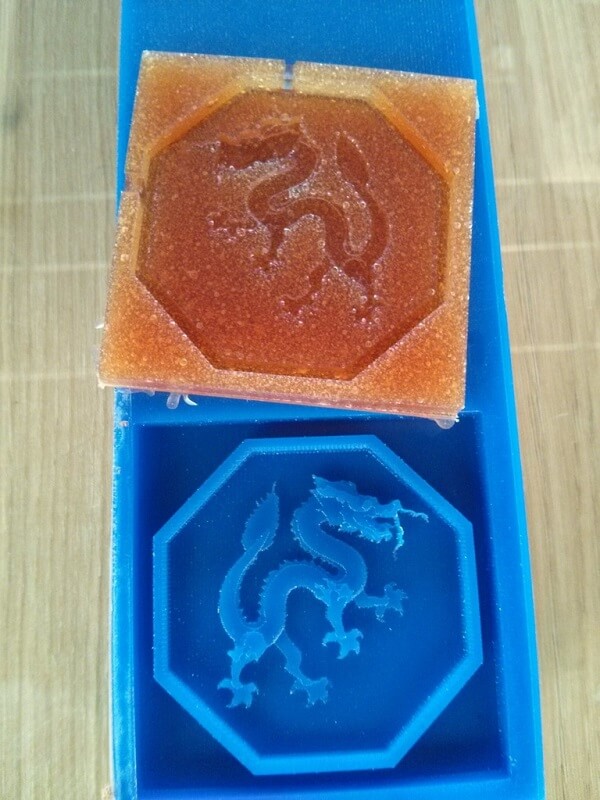
I prepared the Hydrostone mix and poured it into the negative mold.

And leave it to dry for around 6 hours.
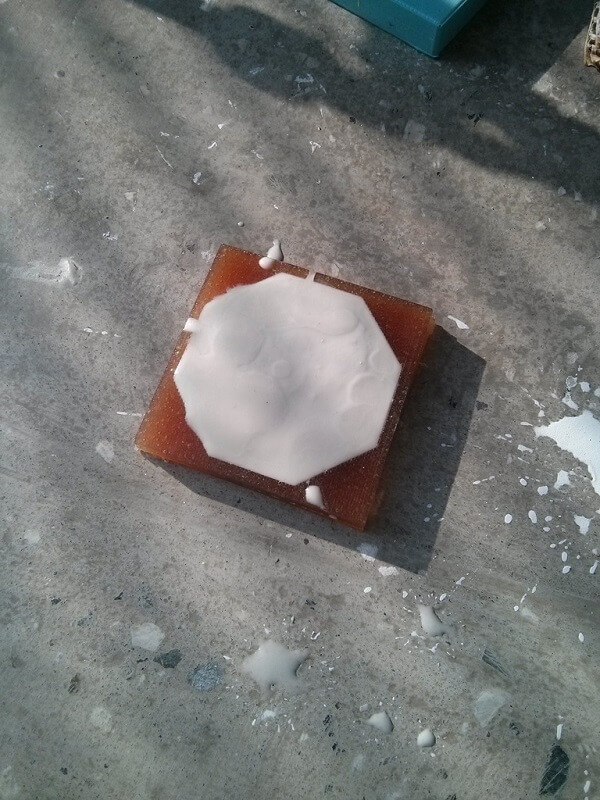
After waiting, I put the casted part still in the mold in the oven, heating at 300 °F for 15 minutes to settle it.
Out of the oven...
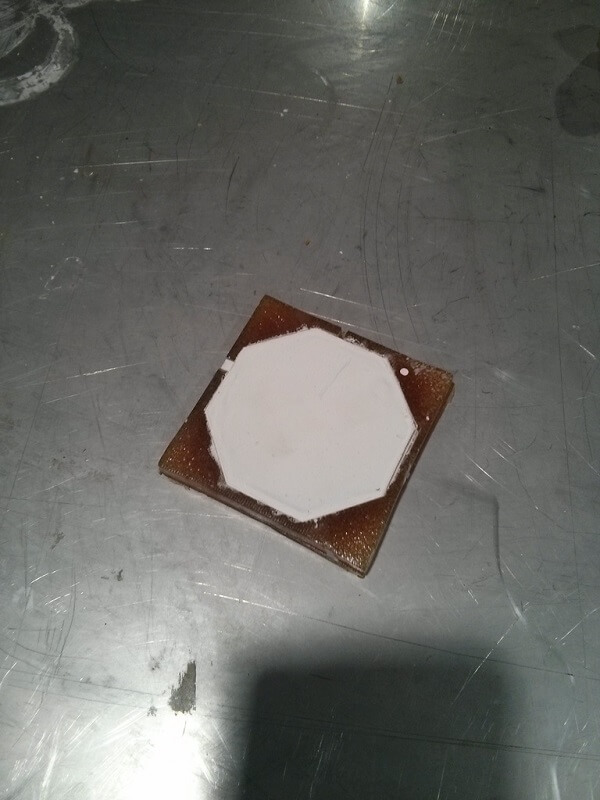
And out of the mold. The final part turn out better than expected, it caught much of the original details made in Inventor. Mostly, the only problem was some bubbles that formed in the negative mold, leaving some little bumps in the casted part, although they could be removed with tweezers.

Side note: When heating the negative mold, the heat made the small bubbles burst, so I cannot be used again (at least without losing some texture quality).