Rachel Legerski - Fab Academy 2015
3D Scanning and Printing
Week 5 Assignment
The assignment for this week is to design and 3D print an object (small, few cm) that could not be made subtractively and 3D scan an object (and optionally print it).
I have been really looking forward to this week! I have a few ideas for this project but I really don't know if they will work. I can't wait to try scanning and printing. There are three Fab Academy students working together on this project. We planned on working together because it is easier to learn the steps when you repeat them multiple times, it is also easier to document what is going on. It's a relief to have time to take notes and pictures while someone else is having a go at it.
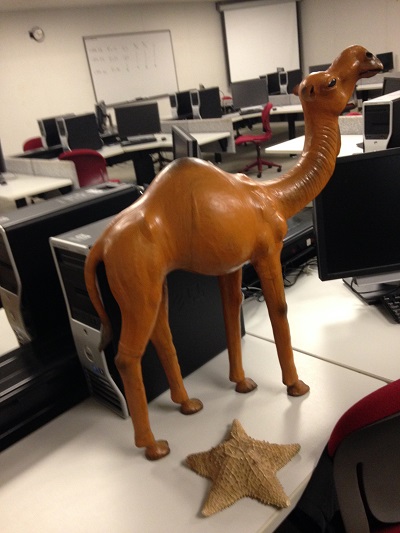
So my goal for this week is to scan and print a camel that I have at home. My mother in-law collected camels and we inherited a very large one. My partner in crime selected the starfish in the picture below.
Struggles
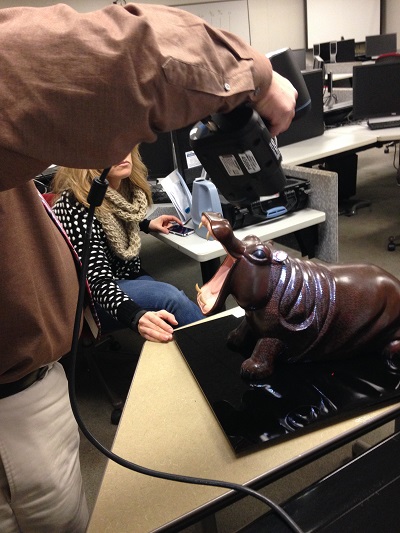
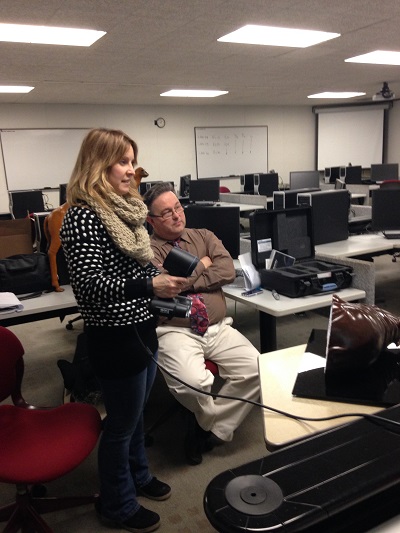
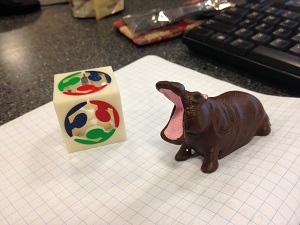
The stuggles this week are real! Working together is a great plan but the constraint is that it is very time consuming and we weren't able to get through all the items we wanted to scan. We started with Dan's hippo. The learning curve was steep on this for all of us. We learned about the program itself and about the limitations of the scanning process. It took awhile for each of us to learn how to handle the scanner. We took turns. See the following pictures.
Persistence and Success
So far, this week has been my favorite. I learned so much about scanning and printing. I also realized that there are limits to 3D scanning and printing. I've come to realize that this may not be the most useful tool in my tool box!
- Using a 3D scanner is pretty awesome. I wish we had more time today!
- It was great to work together, especially when we could take over for each other as our arms got sore.
- I was really excited to see Dan's hippo when he brought it back the next week. He took the time to paint it with acrylic so that it really did look like a miniature replica of his big hippo!
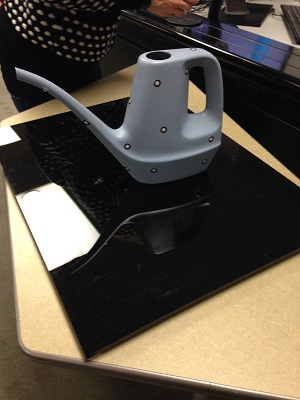
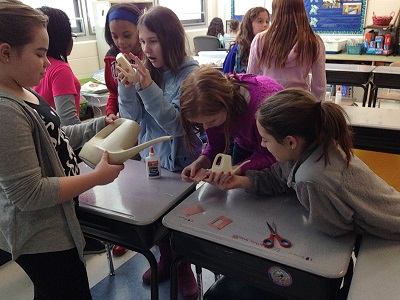
- We opted to use a watering can instead of my camel due to time constraints. The smaller size of the watering can allowed Gail and I both to get the object scanned and printed in two different sizes.

- I was pleased that Karen, the local instructor, invited me back to scan and print my camel (at a later date). So, check back later to see my camel!
Design:
Scanning a 3D Object
1. I used VX Elements (scan software) and VX Model (creates mesh).
2. I started VX Elements and hit scan.
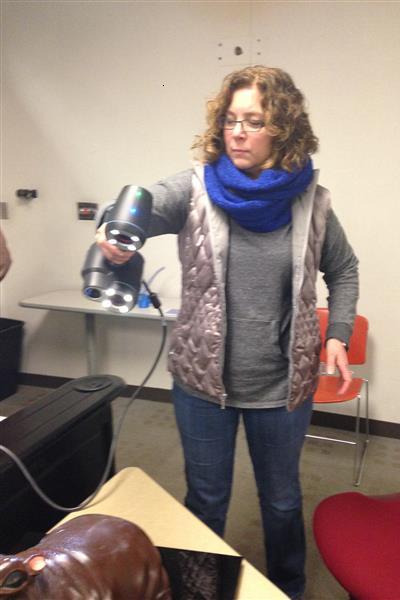
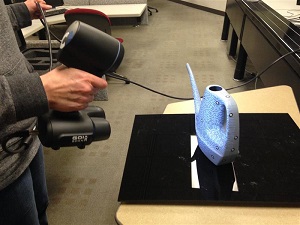
3. It was challenging to keep the scanner perpendicular to the object and keep the proper distance away. I was grateful to be able to change off with my partners in crime as our arms got tired!
4. I was able to turn the turntable while Gail and Dan took turns scanning, making it easier to stay locked in to the object with the scanner and getting a better image.
5. Dan's hippo was made up of 416,000 triangles OR 1.61 gig in the hippo mesh. WOW!
6. Watching Dan's challenges with his hippo and Gail's challenges with her starfish, we decided to skip my camel for the day. We opted to work using a simple watering can. Scanning the watering can went quickly, and I used dots as reference points.
7. After the scan was done, I went into VX model and used the "remove isolated patch" command to get rid of the scan of the table that I didn't want. I healed the mesh and saved the scan.
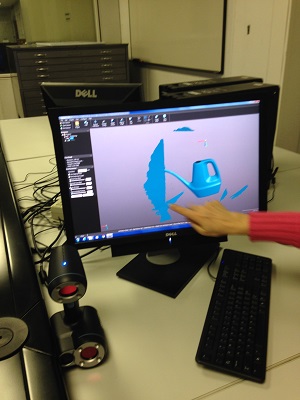
8. I opened the stl file in Solid Works to make sure the watering can was watertight and solid.
9. When I opened the file and selected Options then Solid Body, it didn't work, so I had to go back to VX and create a second mesh layer.
10. Next, I chose decimate to make bigger triangles where the watering can was smooth and smaller triangles in tight spaces.
11. I had to create a new plane so that the can would sit flat and parallel to the xy plane. (vertex selection, picked 3 points, align to origin)
12. Finally, I got to send it to the printer and wait!
Creating My Small 3D Linked Rings
1. I used Solid Works to design my linked rings.
2. I had to keep in mind that my oval had to intersect with another oval. It was really neat to watch a 2D image become then a 3D oval-shaped ring.
3. Once I had my ring, I created copies of it and placed it on either side of the original.
4. I had to be sure the front, top, and bottom planes were mated properly AND be sure that each ring had clearance from the other rings.
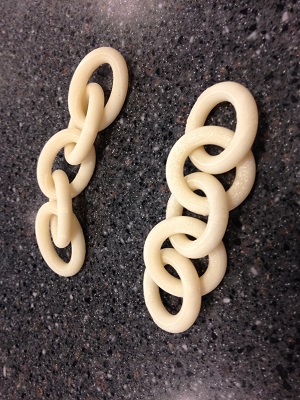
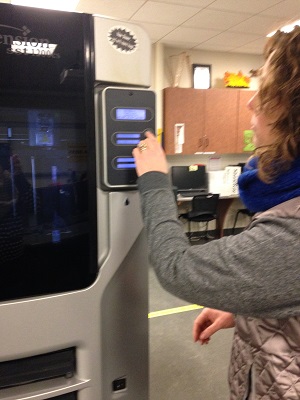
5. This was my first attempt using the ThreeD Printer.I found it amazing that I could create something solid from the bottom up that would eventually be able to come apart after the support material was removed. Pretty awesome!.
Design Files:
- Watercan Files
- Ellipse Rings Files
Back to index