Well, here's to the close of another challenging week at Fab Academy! I hope that we are able to program these boards successfully in the upcoming weeks!
Back to indexThe assignment for this week is to make the FabISP in-circuit programmer. That includes the following notes: David, Andy, Valentin hello.ISP.44.cad board components traces interior hello.ISP.44.res.cad board traces interior inventory microcontroller crystal USB connector ribbon connector Zener diode jumper firmware.zip USB power make clean make hex (sudo) make fuse (check programmer in Makefile, may need to repeat) (sudo) make program desolder SJ1 and SJ2 make IDC ISP cable, connecting header pin 1 to pin 1, check wires
Yikes! Another enormous challenge! I am hoping to make something like this:
Listening to the lecture this week caused me to sit and wonder how was I going to get this done? Looking at the end results is a bit intimidating. Can't wait to see how this works out!
So my goal for this week is to make a the FabISP in-circuit programmer. I looked over the options. Scott, our local instructor, tried to explain the differences between the boards. Being that everything is new to me, I really had a hard time deciding what to do. I finally selected the Andy board.
Where to begin? This is my first time working with electronics. Soldering is new to me. I've never used the Eagle program. The vocabulary is confusing. Trying to follow directions exactly and finding out that there are mistakes beyond your control. How can you do everything "right" and still not experience success? Though we experienced some successful moments, this week really was a struggle for me. I was definitely not a happy camper!
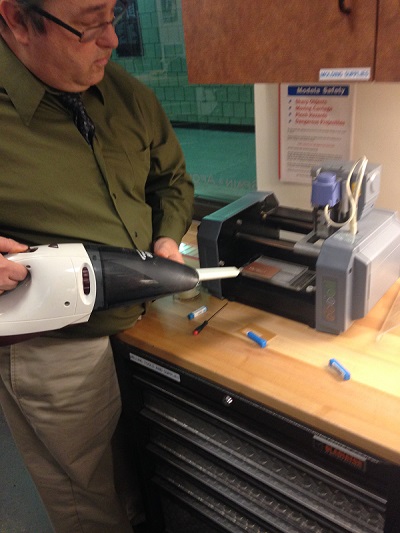
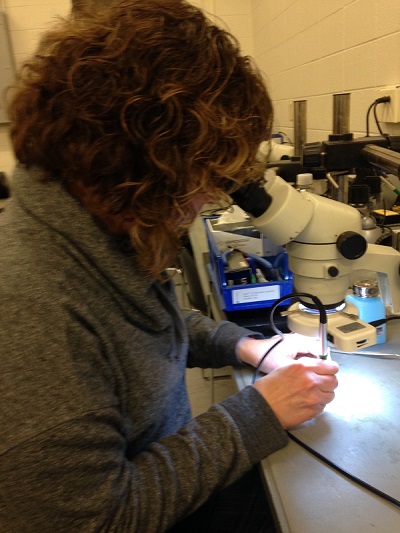
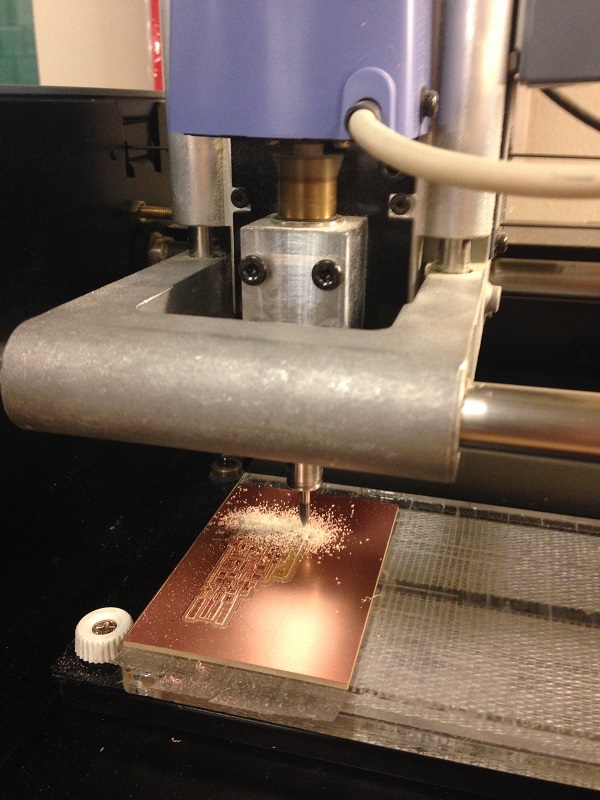
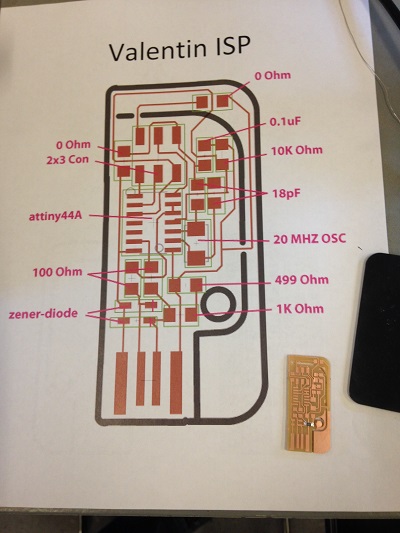
The first boards that we milled on the Modela had problems. We found traces that didn't quite belong or seemed to go no where. We had some dots milled onto the boards that shouldn't have been there either. I ( and some others in my group) changed to the Valentin board. Again, we all did the SAME thing but I was the only one who could get a green light. Not even sure how that happened. I was excited about getting the light to go green but felt bad for my partners in crime. One got a red light and the other got a blinking orange light.
My Steps:
Well, here's to the close of another challenging week at Fab Academy! I hope that we are able to program these boards successfully in the upcoming weeks!
Back to index