Persistence and Success
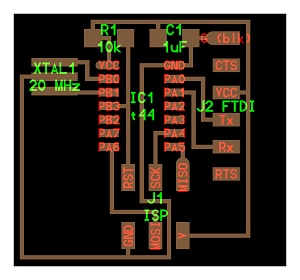
Eagle CAD is a program that I want to master. It is so challenging. I actually laughed when I found out that Eagle stands for Easily Applicable Graphical Layout Editor...easy for some but not for me! Here is the image that I started with.
Design:
- I started by opening a new project in Eagle.
- We had to add the Fab Library so that we could access the components that we wanted for our circuit.
- I thought that this step was easy. I matched up the diagram that I got from our Fab Academy page and just clicked and brought over the pieces I needed.
- Next, I connected wires to my components so that I could label and name them. Scott showed me that if you did it this way, the program connected the parts you label to each other. That was a relief because I was beginning to get confused as I tried to draw wires connecting each end myself. What a mess!
- When I was finished, I clicked on the little yellow icon that checks for you. I like that you can click on the arrows and it will show you what you need to review. I DO NOT like that you can't recheck again (at least, with this version)
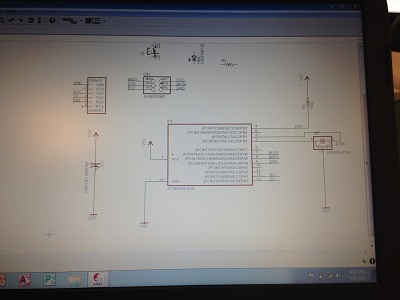
- Once I fixed my errors, I exported my schematic to a board. Scott showed me how to group the parts and drag them to the work area.
- Once I got to this step, I started by dragging components to where I wanted them. Sometimes I had to rotate a component to make sure that it was in the right direction
- The next step was to autoroute my design. The program looks for efficient ways to route the board. When it was finished, I was able to reroute somethings so that I could give myself some more room.
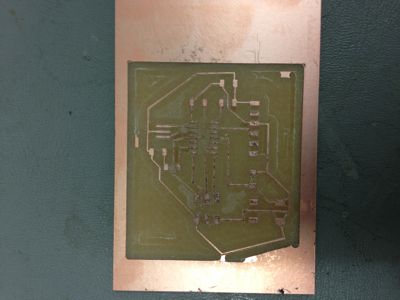
- Once the design was complete and ready to go, we milled it.
- On to soldering!
Project Files:
Back to index