Rachel Legerski - Fab Academy 2015
Composites
Week 12 Assignment
The assignment for this week is to design and make a 3D mold (~ft2), and produce a fiber composite part in it.
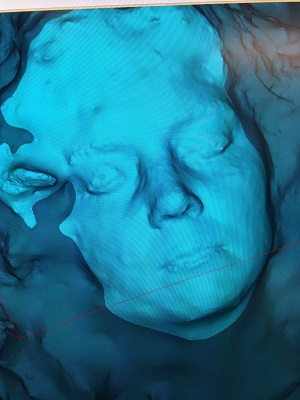
So my goal for this week is to make a 3D mold and produce a fiber composite part in it. I looked at some Fab Academy students' past pages for ideas. I saw a few ideas I wanted to try, but they didn't use a 3D program to create their mold. Our local instructor wants us to create a 3D mold using a program. I really want to find a way to make a mask or a mold of my face. Scott suggested using 123D Catch, an app available from the App Store. I downloaded the app but was not very successful using it. Not sure about the learning curve. I'll have to try later. Scott had the app on his phone. He took about 40 pictures of me, making sure to overlap the pictures and going in a complete circle around me. He took pictures from under and above allowing the app to capture me in a 3D format.
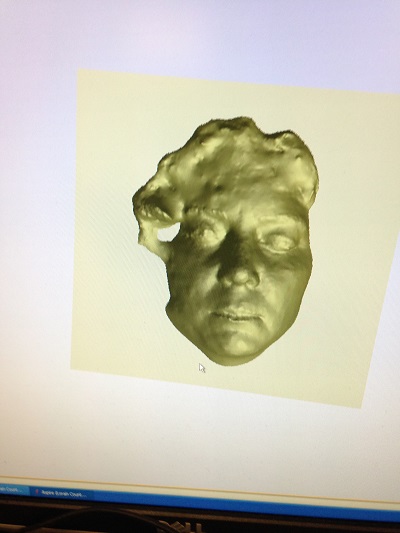
The app creates a 3D image on the phone. It was the oddest feeling to be able to manipulate my head and shoulders in a 3D format. Unfortunately, we were not able to manipulate the image to fit the size of our foam.The following week, I was able to work with Karen to use the 3D scanner. We imported the image and were able to create the files we needed to work with my face:
Struggles
- The struggles this week were related to finding an idea that would transfer to the assignment. I really wanted to 3D scan my face and make a mask from it. The 3D scanner was not available this week. In discussing my disappointment, Scott suggested
123D Capture. I really liked that idea. It will take some practice, but I see this as a fun assignment to use with students.
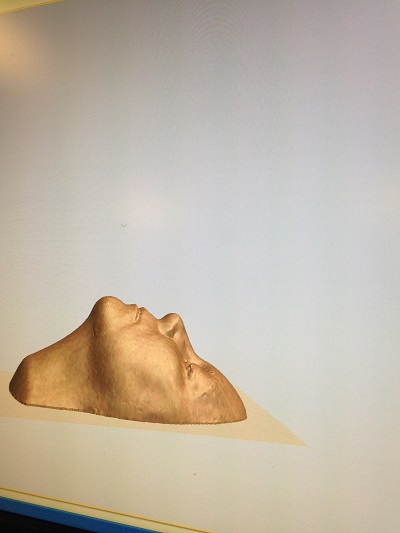
- After I imported my file, it was a challenge to scale my face to fit the pink foam sizes
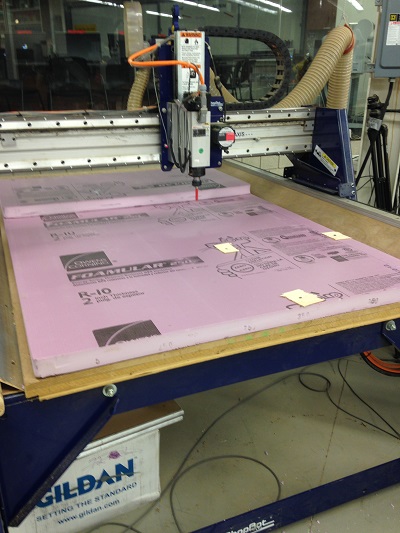
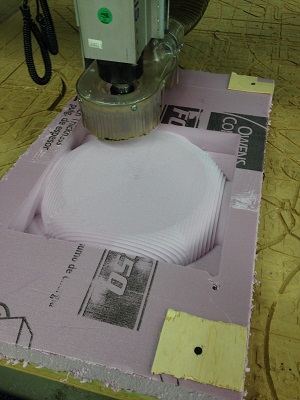
- The biggest challenge was finding appropriate feeds and speeds for the Shopbot for nontraditional materials (like pink foam). I spent too much time googling and searching for information on the internet. Eventually deciding to make a good guess!
- This week's assignment became more difficult the further in we got! Our shopbot was not able to handle the foam. We made multiple efforts over the course of three weeks. The problems led me to scrap the 3D face/mask idea for something much simpler.
- I ended up creating a circle in Aspire 4.0 extruding it to create a shape that I could manipulate and make into a half sphere that would eventually become my mold for a bowl.
Persistence and Success
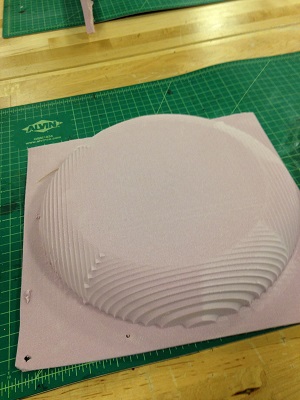
- I got a form that I liked. It took along time to find the way to center and and scale using Aspire 4.0.
- Once we got the shopbot updated and working, we were all able to get our molds milled. We used a 0.5" flat endmill. The speed is 12,000 rpm and the feed rate is 100 in/min.
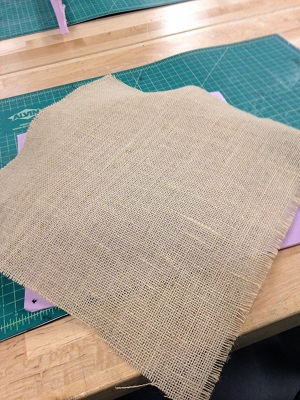
- After milling, I cut several layers of burlap that would eventually become the material my bowl will made from. See picture above.
Creating the Composite:
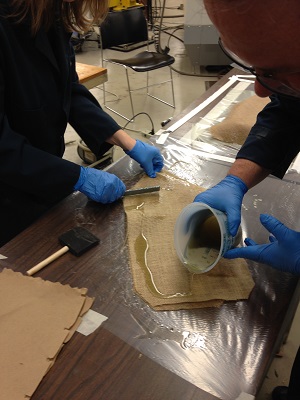
- The first step is to cut several layers of material. I chose burlap because I really like the texture and we had quite a bit available to us,
- After we cut the burlap, we cut several layers of an absorbent material that will act like a sponge to absorb the excess resin.We also cut plastic to protect the surface we worked on and really large plastic to cover our molds and make sure that wee could create a strong seal for the vacuum process.
- We cut a porous material to cover the mold. This material allowed air to get through to aid in the vacuum process but kept the material from sticking to the form. This made unmolding much easier.
- After covering the mold, we used the resin material to coat the burlap
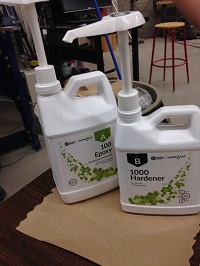
- Mixing the resin composite and coating the burlap became a team sport! We worked together to help each other to stay within the time constraints for the pot life of our material.
- After we coated the burlap, we covered the mold making sure to alternate the fabric so that the grain ran differently for each layer. This increases the strength of the final product.
- We covered the resin-soaked burlap with a layer of porous film. This allows the vacuum seal to work, allows the excess resin to be absorbed by the absorbent batting and helps make unmolding easier.
- We put several layers of absorbent batting on top and then the largest layer of plastic. We cut a small hole into the plastic to place the valve for the vacuuming.
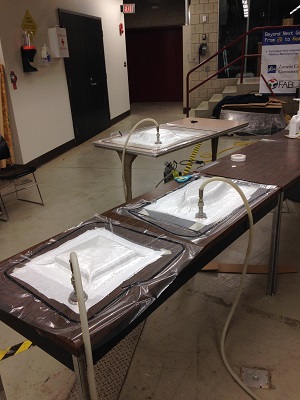
- We turned on the compressor and left for the night!
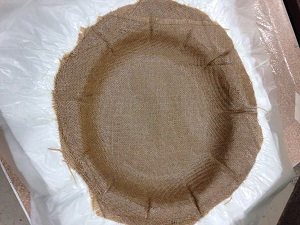
- We returned two days later to unmold our projects. Here is mine:
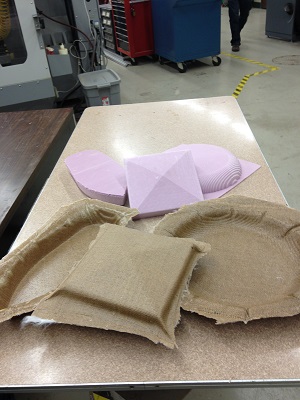
Here is a shot of all of our projects:
Project Files:
Back To Home