The assignment for this week is to design, make, and document a press-fit construction kit
A new challenge! First, to learn what a press-fit construction kit is! It is exactly what its name implies! A construction kit that simply presses together with interlocking tabs. Trying to keep it simple, Gail and I decided to try to create something that can be used in our classrooms. Our designs are not identical but are similar. We planned it that way so that we can each double the amount we will make and be able to share with each other so that we have more pieces for our students to use in our classrooms. We are currently in the middle of our winter which has been much colder than normal. Our students haven't been able to get outside on the playground so this project gives them another resource to choose from for indoor recess play.
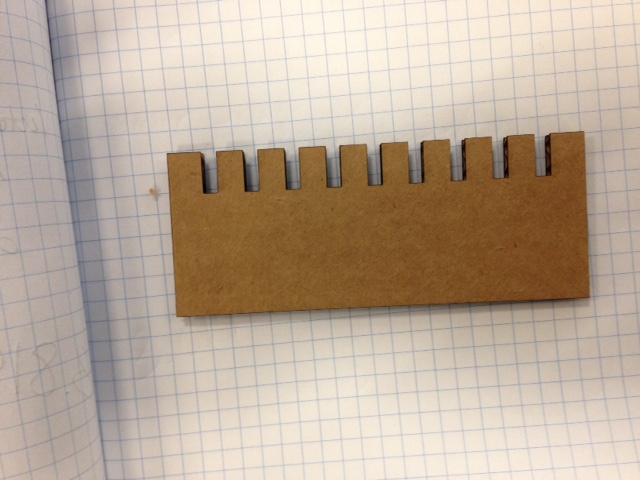
Scott, our local guru arranged for us to work with Tim. Tim taught us how to use Corel Draw to create a design that can that we can turn into directions for the laser cutter to create. We began by creating a rectangle with "teeth" of different thickness to help us find the setting we wanted for our press-fit building kits. Gail and I each did this and experimented with interlocking sizes until we found what worked best for us. We settled on .152. Here are the pictures of our first design:
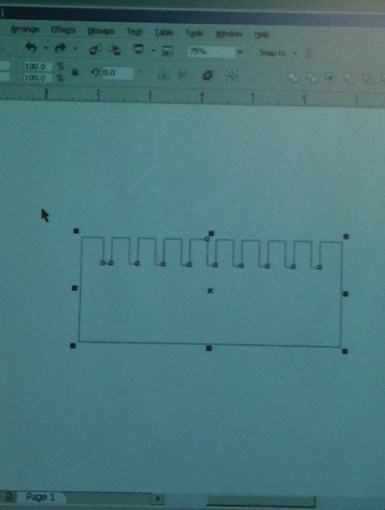
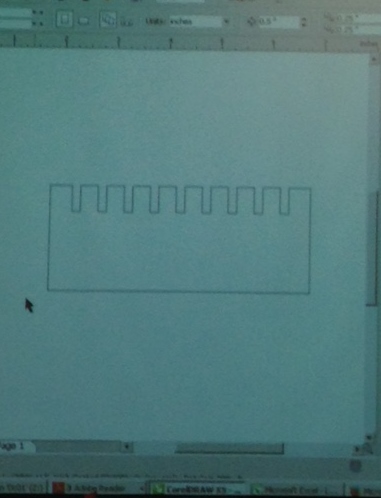
Always there are struggles! This week it was learning how to use a 3D program. Remember that this is not something a fifth grade teacher is familiar with! Thankfully, Tim was patient and walked us through this step by step. We had a lot to learn about using the program BUT we also needed to learn about the machine! This was new to us and we had never before used a laser printer.(I have a feeling that I am going to be saying this about everything we do each week!) I see now how last week's assignment was meant to help us as we move forward. Our first attempt we used measures of .161 to .169. All were too large to hold our material together. We went back to the drawing board, literally! We redesigned our piece with measures that ranged from .152 to .160. This worked much better. We settled on .152 to cut our tabs.
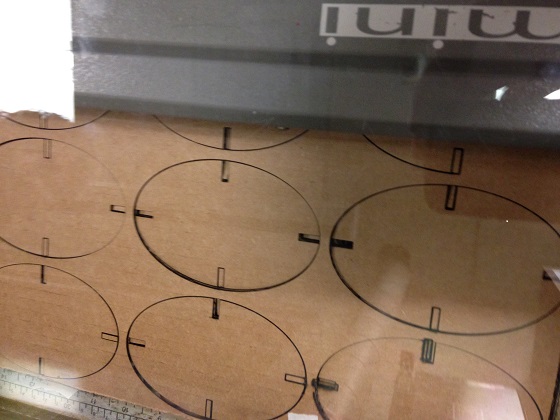
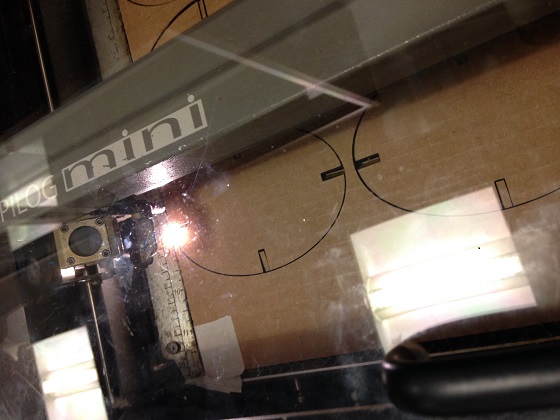
After creating our determined notch size, we went to work creating the pieces that we wanted for our building kits. I designed my shape in Corel Draw. I created a basic large oval. I struggled with the commands. What's the difference between copying and pasting and cloning? Learning how to find the midpoint was a challenge for me. I am not a precise person. So far, "getting it close" has always been good enough for the things I've had to create in my life. I leave the precision to my husband, a very talented cabinet maker! Gail and I supported each other and with encouragement from Tim and Scott, I experienced success! I learned how to properly use commands such as "step and repeat" and "group objects". Gail created rectangles and I created ovals to use as building materials. We worked together to create a set of 1" circles to act as connectors.
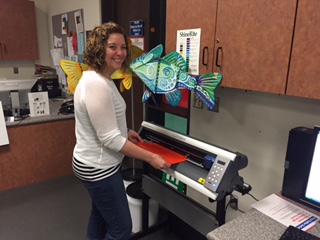
In my personal fabrication class, I learned how to run the vinyl cutter. I am planning on using the vinyl cutter in my final project. I want to cut the Cleveland skyline and place it in front of the art work. Here is a picture of me using the vinyl cutter.
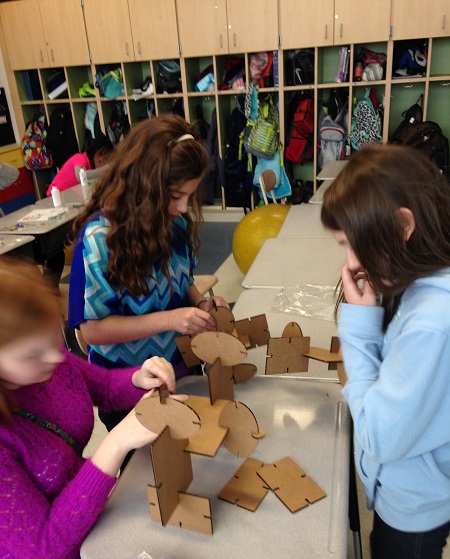
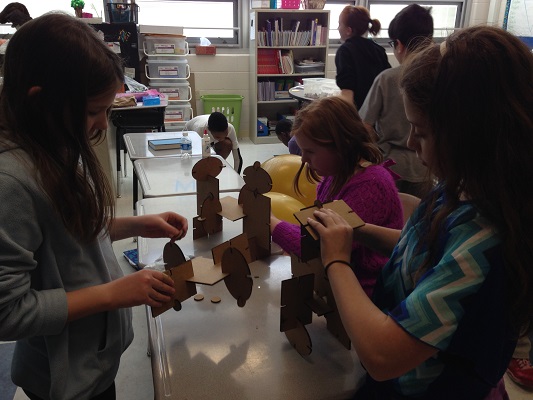
After returning to the lab on Friday night and working with Scott and Gail, we had enough of our building kits to take back to our classes. Here are some pictures of my students using the press-fit kits. The best part was that they saw them on the table and initiated their use. After they had been playing with them for awhile, they asked where they came from and I was proud to be able to say that I designed and cut them out using a laser! The students immediately asked what else could we design and add to our building kit. I told them that when I catch my breath and get a few free minutes in my FAB Academy training, we'll definitely create other shapes and sizes!