Lesson n. 3:Computer-controlled cutting
This week we had to design, make, and document a press-fit construction kit.
Laser Cutter
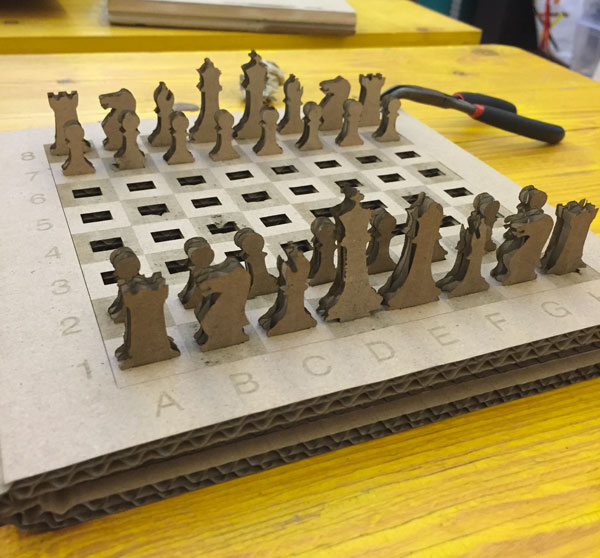
This was the first time I used a laser cutting, and for assignment of this week I decided to make a portable version of chess.
My initial idea was to create a "book" of wood in which the cover served as a chessboard, while inside there are the pieces in their own space.
Considering it was my first experience with this machine, it seemed more reasonable to use the cardboard: it is less expensive than other materials and for all the tests that I should have done it seemed like the best choice.
Morehover the use of cardboard, in my opinion, will let you understand immediately how the cut changes according to the type of settings that you set.
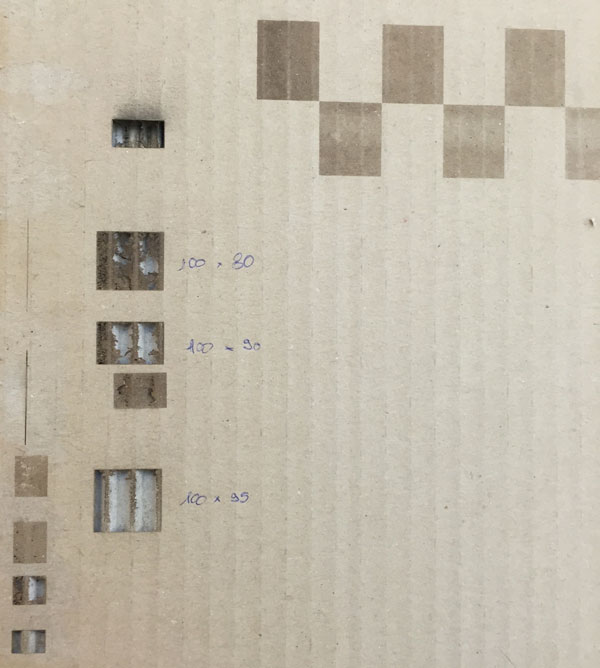
In fact, the first step was to find the right settings for the operations I needed (cutting, engraving,...).
I finally got the following values:
- to cut the cardboard I set power 100% - speed 7%;
- to engrave the cardboard I set power 30% - speed 100%;
- to remove the frist layer of the cardboard (leaving intact the other) power 95% - speed 100%;
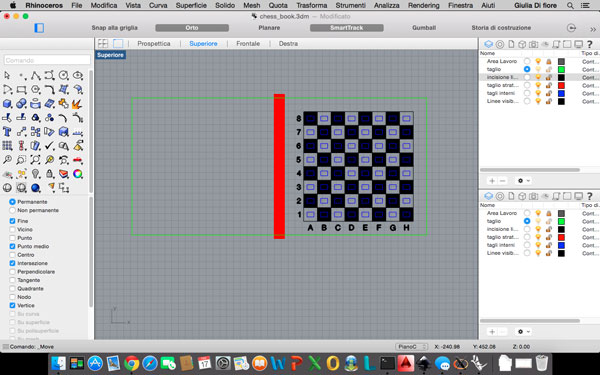
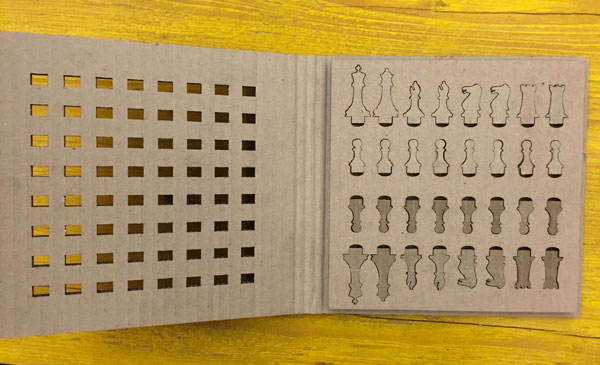
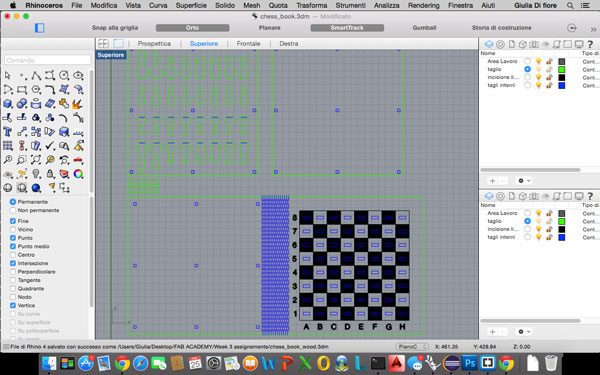
After making tests on the cardboard I started drawing the design on Rhino, using a different layer for each operation (cutting, engraving,...). First of all I designed the main structure of the "book" in which I then inserted the board:
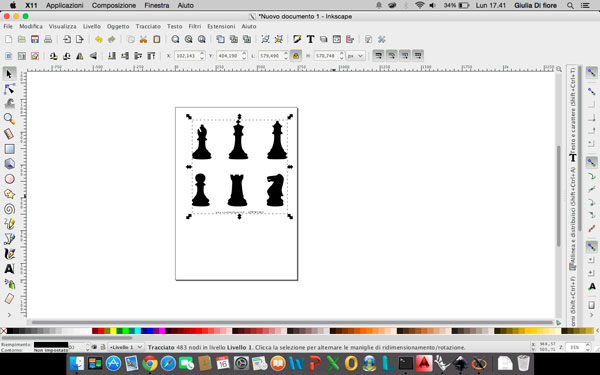
Using Inkscape, I got a vector image of chess pieces that I later imported into Rhino to create the pieces and the spaces for them.
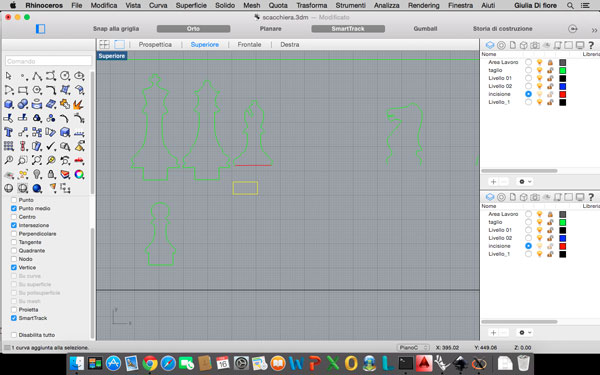
Once imported pieces in Rhino I've modified them by adding a lower range to make sure that you can fit on the board when you use it.
To differentiate the white pieces from those blacks I engraved the cutting area, front and back, of the blacks pieces.
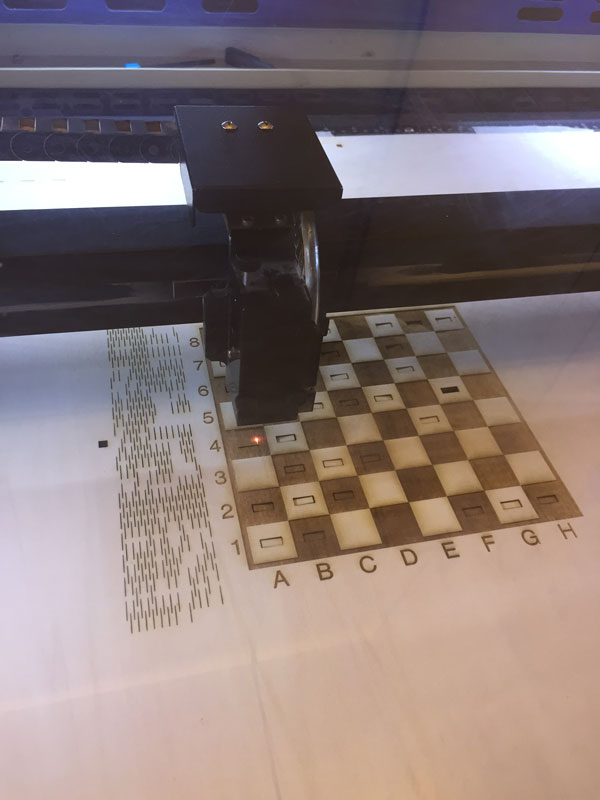
Once sure of the project (layer, positions, ...) I ran the last test to make sure everything is ok, after which I started cutting.
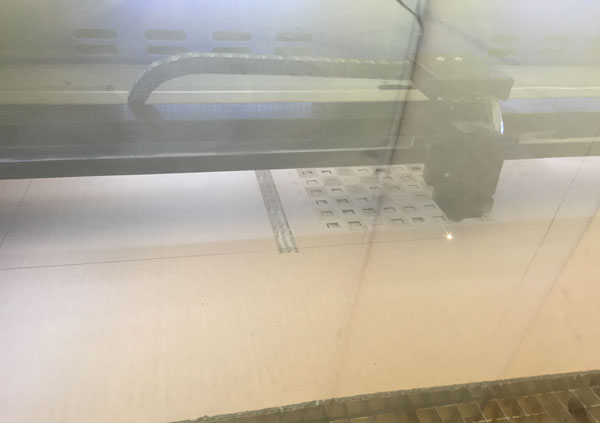
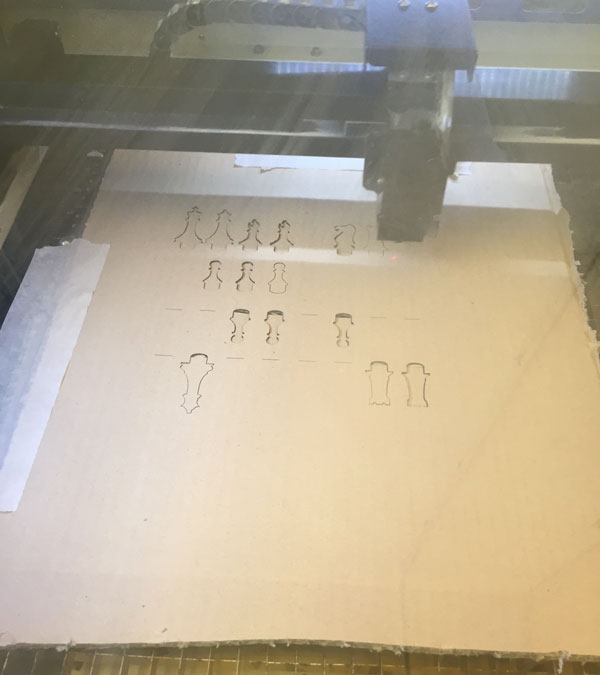
Cutting accuracy is impressive, even on cardboard that is a material of variable thickness and not regular.
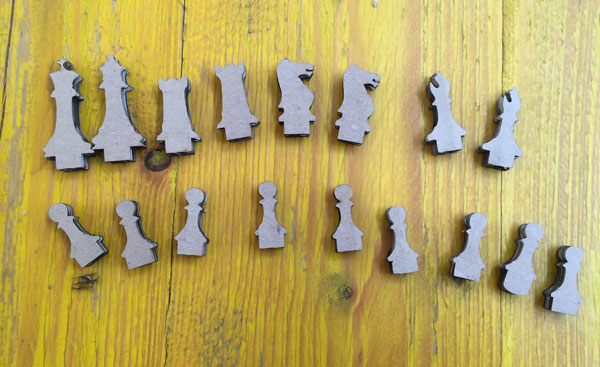
At the end the final result is this:
Final Consideration:
As a first attempt I can be satisfied of my work.
I'd try to make it in wood, in order to solve all the structural problems that I encountered using the cardboard. I must also admit that the use of cardboard for the realization of my first project was the right choice in fact, if I had chosen another one, given the numerous trials and tests, I only wasted material certainly more expensive.
Update 23/02
As mentioned in the final considerations, it was my intention to implement the same project but plywood, to better understand some concepts like the joints and the ability to bend the wood.
I started from the Rhino file created for the project in cardboard, I made some changes to make it functional for use whit the plywood:
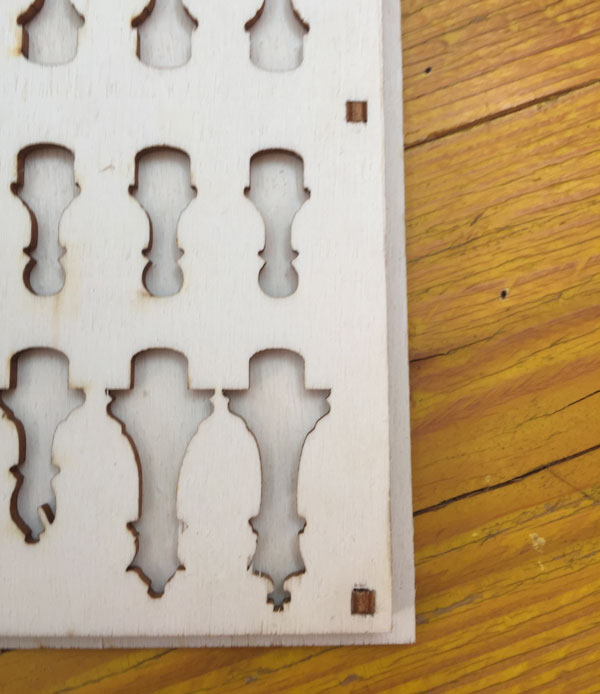
- I changed the size of the holes in the board in order to use plywood 4mm;
- I have added a series of cuts (pattern) in the central part to ensure that the wood can be bend;
- I added 9 holes on the plan whit the accommodation of the pieces and on the back of the board to be able to fit together the two pieces with small pins;
- I created the pins 9 to allow the fixing of the pieces;
You can see some of the changes in the picture below:
After some routine tests to find the right settings I found the following values:
- Cut: 100% Power - 7% Speed
- Engrave: 80% Power - 80% Speed
Once sure of the settings, I have sent to the printer the project trying to accomplish everything in a single process through the proper use of the colors of the layers.
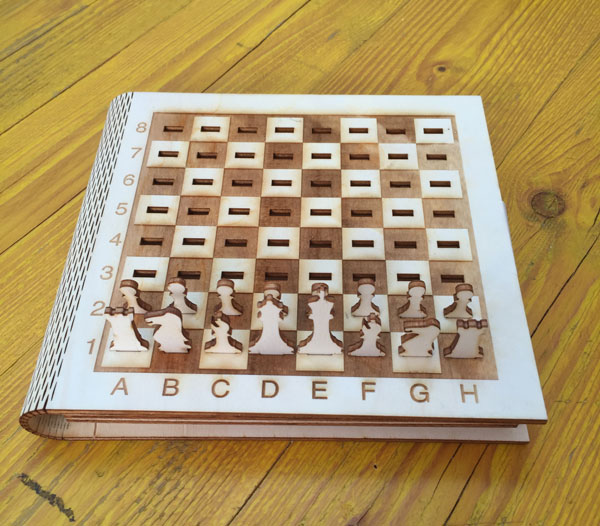
After that, I have assembled the pieces whit the pins:

This is the final result:

Vinyl Cutter
Another exercise to be completed this week was to make something with the vinyl cutter.
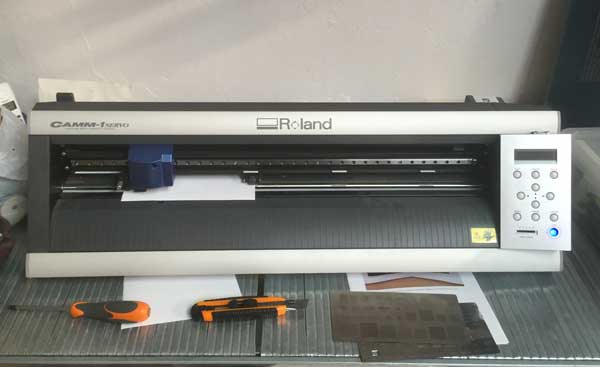
A vinyl cutter (or vinyl plotter) is a computer controlled plotting device with a blade instead of a pen. A vector based design is created in a software program and then sent to the cutter where it cuts along the vector paths laid out the design. The cutter is capable of moving the blade on an X and Y axis over the material, cutting it into any shape imaginable. Since the vinyl material comes in long rolls, projects with significant length like banners or billboards can be easily cut as well. The one major limitation with vinyl cutters is that they can only cut shapes from solid colors of vinyl. A design with multiple colors must have each color cut separately and then layered on top of each other as it’s applied to the substrate. Also, since the shapes are cut out of solid colors, photographs and gradients cannot be reproduced with a standalone cutter.
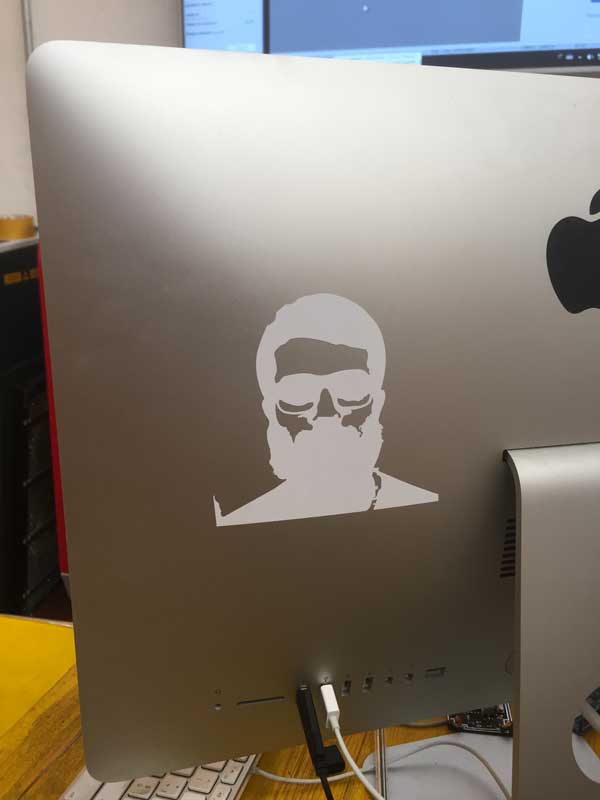
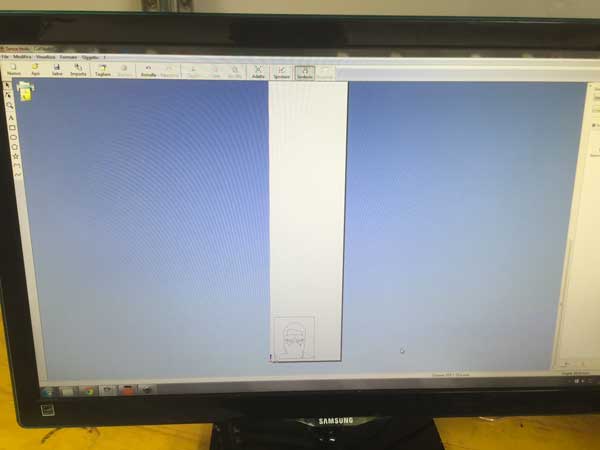
For the exercise I used a photograph imported ikscape
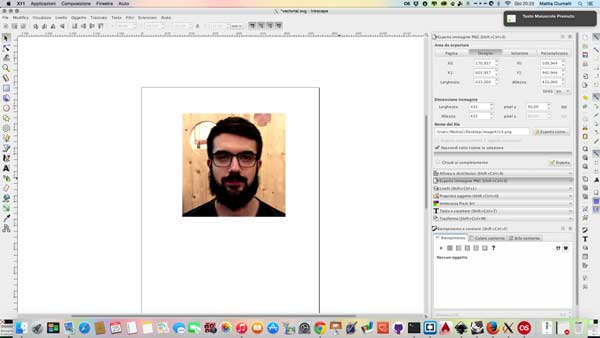
once imported I turned into vector, using "Vectorialize bitmap"
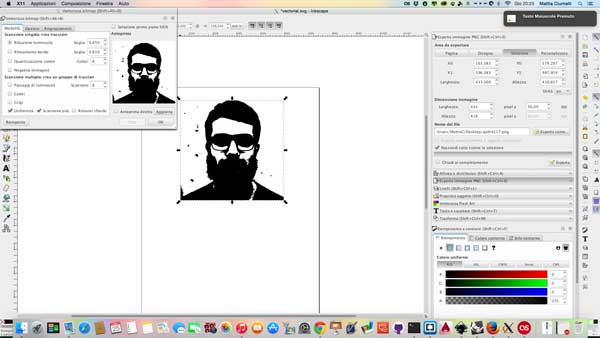
then I clean the image, removing any excess part
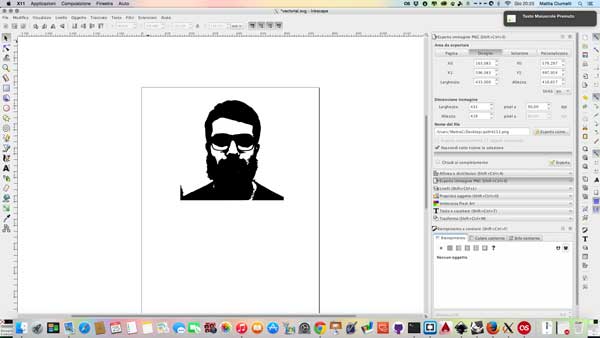
Once ready the picture, I exported in jpg and after i have imported into CutStudio, the management program of the vinyl cutter and I created the contours that then the machine will cut
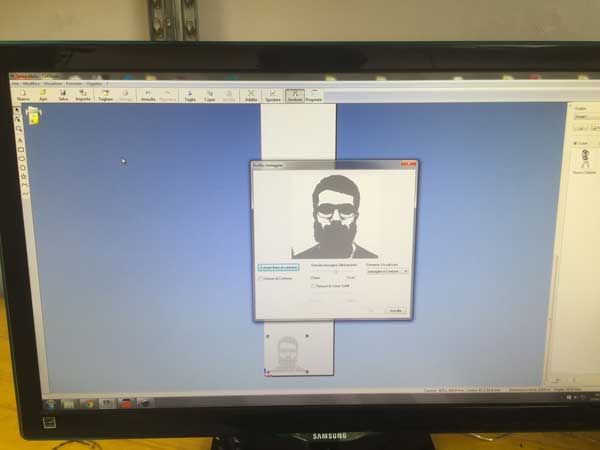
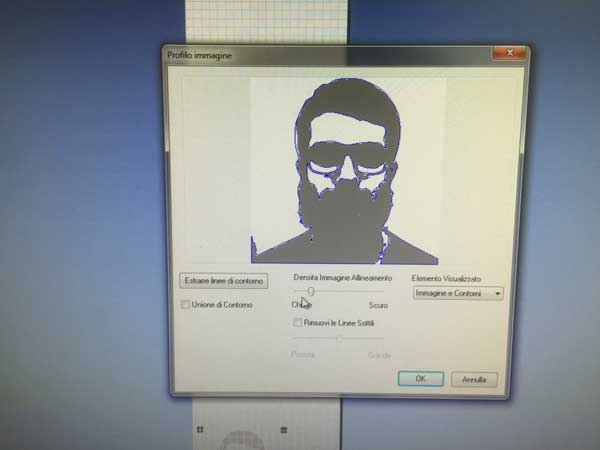
Once created the outline, I cut the file
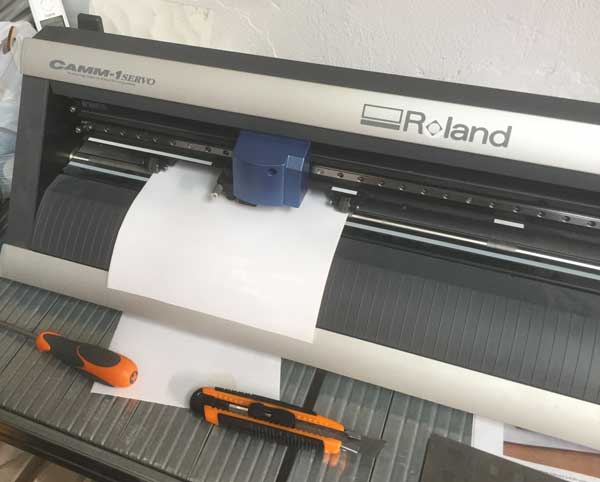
After the machine has finished, I cut off the piece of paper used and removed the outer skin
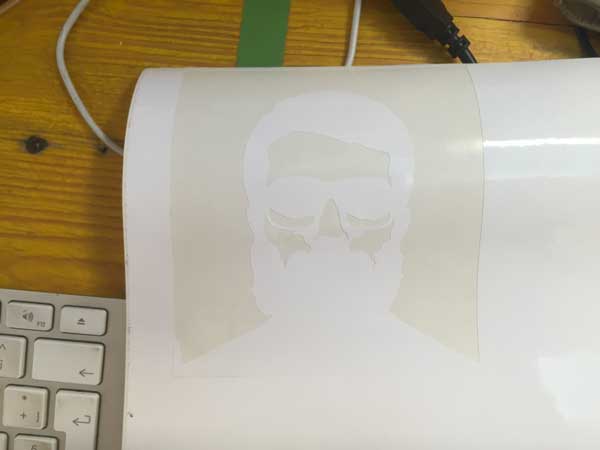
and this is the final result!