| Index About Me |
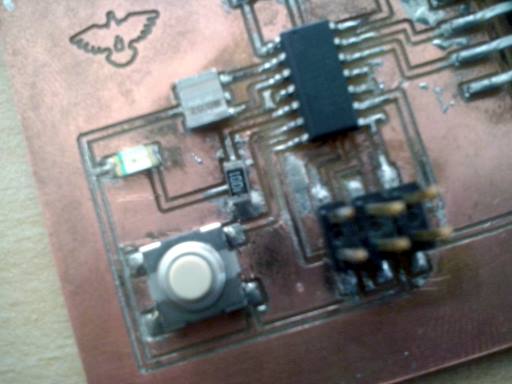
Embedded Programming AssignmentThis assignment was chanllenging, fun, and even strange to some point, details following.First, I started when Electronics Design Assignment , with the HelloBoard I had already designed, routed and soldered, back then it looked like this, for many reasons it would not end up looking as pristine. 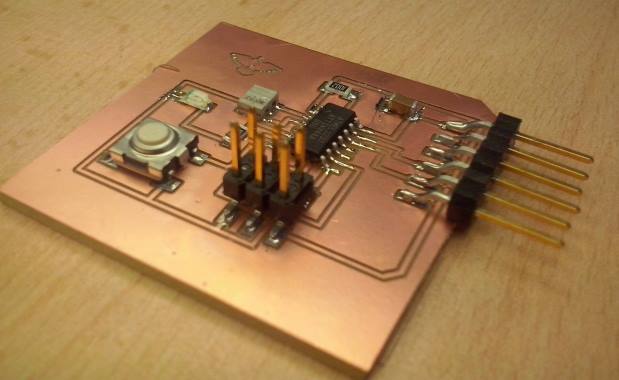 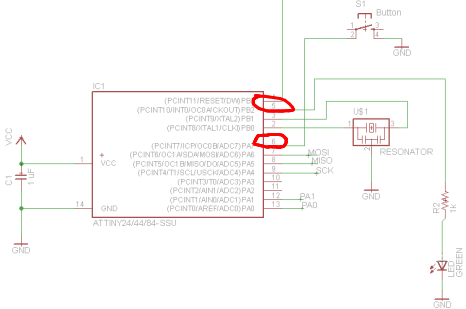 Knowing this, it
was time to check out for real if the board really worke. I used the
"hello board" program supplied in the academy site for this.
However, as I tested in Ubuntu, it did not work, something
was wrong with the board:
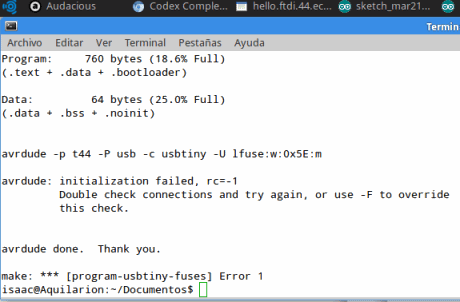 The results were
not fruitful at first, and as I tested, the board had several shorts,
apparently different regions of the board that should be insulated from
one another because of the tracks milled were not, so I used a cutter
to separate them.
A strange event happened during the weekend. I kept my boards in the front pocket of my briefcase, but as it was being washed, the Helloboard was put into the grey water along with the briefcase, where it stayed until monday morning, it was not looking so good:
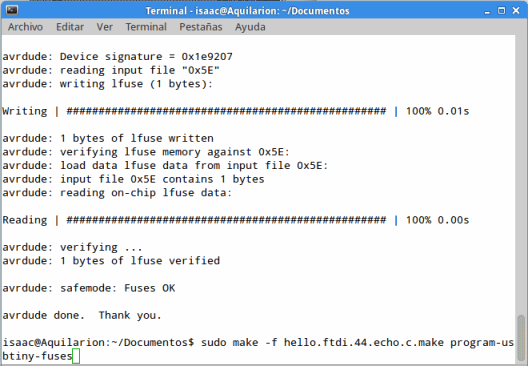
 My instructor, Roberto, checked the old board and told me that everything seemed fine, so I decided to give it a go with the command sudo make -f hello.ftdi.44.echo.c.make program-usbtiny-fuses and it worked!
Afterwards, I
used sudo
make -f hello.ftdi.44.echo.c.make program-usbtiny to
program the board, with success, finally, I checked the program using a
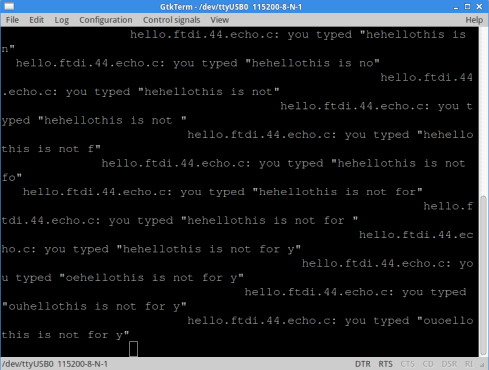
serial port monitor (in Ubuntu I used gtkterm).
Previously, I checked the serial port monitor setting, following the
guidelines found in this assignment page from the
previous Fab Academy. As expected, the program made the echo work
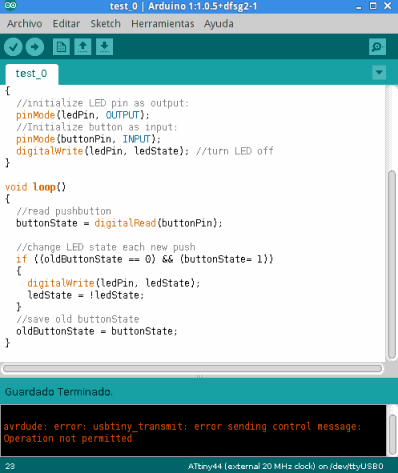
Since the board worked, it was time to move on to a different stage of programming. So I switched to Arduino IDE. The first thing was to install the Attiny 44 board file, I used the github for the boards library and the instructions for adding them to the IDE from the High-Low Tech Group Tutorial, however it would not suffice as root permissions were needed in order to load the program from the IDE into the Hello Board.
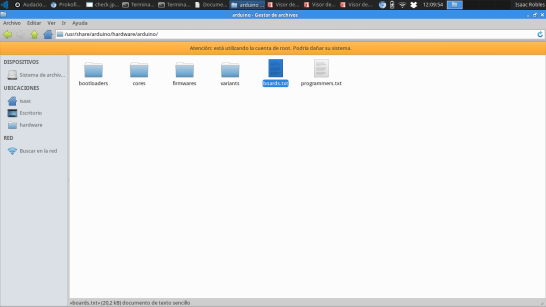
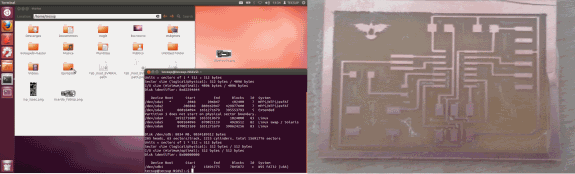
As I Opened the IDE as root, the Attiny libraries were not available and the tutorial instructions for adding them did not work, the approach I had to take was a little more radical (and windows-like). I entered the Arduino Binary folder in Ubuntu as root (/usr/share/arduino/) and added the board info from the repository into the already existing boards.txt file (in the hardware/arduino subfolder), and the tiny8 and tiny14 folders under the variants subfolder which is shown in the picture below:
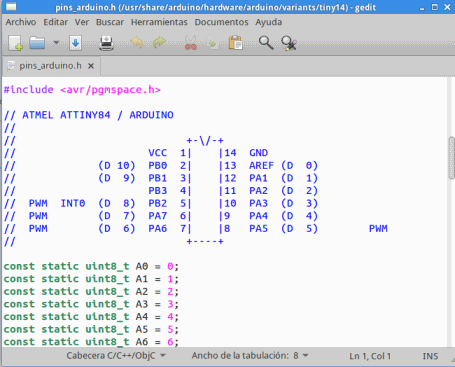
The next was to estblish the analogy between the Attiny pins and the arduino Pin system, fortunately, the pins_arduino.h file from the repository was pretty straighforward in explaining this.
In my case the
analogy worked thus: Knowing this, I started checking the board using Arduino example codes, just adapting the pins as the library suggested: 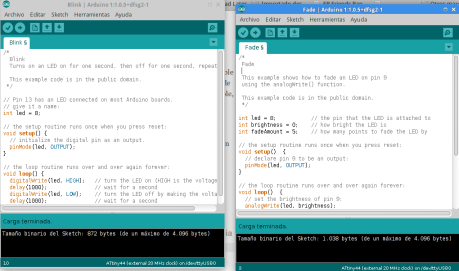 The programs loaded
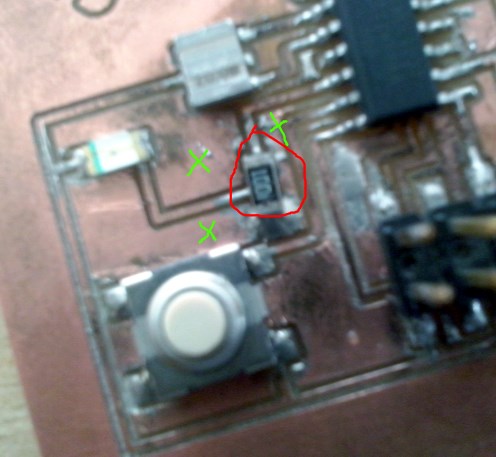
as expected, but then I realized the LED was not working. Another
hardware failure, reviewing the board once again, I found the most
likely responsible for the malfunction:
The 10k resistor (in
red) was poorly soldered to the board and was this originated somehow a
short between several exterior regions (marked in green) I had to use a
cutter, resolder the resistor (the board tracks had already disattached
from the surface, so I needed to add superglue to keep them in place)
and be extremely careful and patient with it, almost lost it and jumped
to the contingency board, but in the end, it worked. Another funny
thing occurred: the button was too sensitive and worked almost like a
proximity sensor. Actually, if you just touched the exterior region of
the board with your fingers will result in the LED going ON.
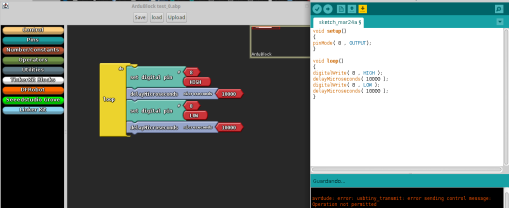
Since the program worked, I attempted to build something using a different tool, so I downloaded and Installed Ardublock:
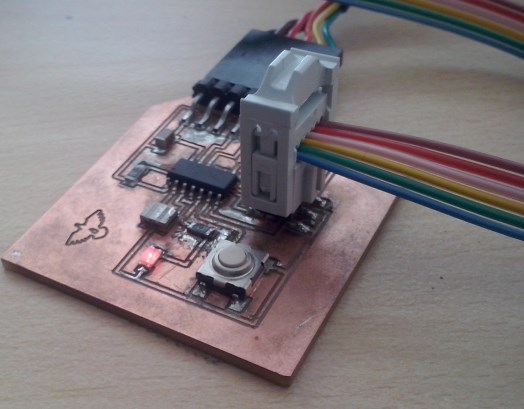
The user interface was simple and straightforward and simple, once the "upload" button is clicked, the corresponding code is shown in the IDE and uploaded to the board, in the image above, the program was not uploaded because of the lack of root permissions, so, in order to test the code, I had to run arduino as root, fortunately the workflow described lines above just let me upload the code and test the results. In this case, the LED turned on, but it really didn't seem to blink at all. I summarized the succesful programs so far, a blinking and pushbutton programs results in a single video, below: The other part of this assignment (the first part indeed) was to read a microcontroller datasheet, I read the Attiny 44A datasheet, the most interesting part was this, since it was mandatory in order to know how to program the Microcontroller: 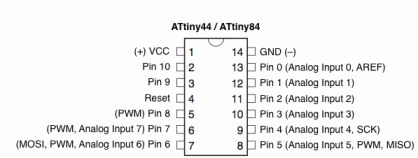 In my case, I chose Pins 5 and 6, which are Analog Inputs and also work as PWM, which is useful if you are trying to control a device using degrees of intensity (for instance, when trying to make the LED light fade) There is still a lot to learn, and all of this knowledge will be most useful facing my final project. In the end, it was a very challenging assignment, and i got to learn quite a bit about electronics and programming, I tried other environments (S4A, Mind+, Atmel Studio) however, I was not able to go through the minimun learning curve for this tools in time. On a more realistic note, I have almost forgotten all of my knowledge of C language, still, the job was done, even with these two battered boards.
Conclusions?Design, Design, Design... if the design makes a part somewhat complicated to mount, it's better to rethink, redraw, rerout, whatever it takes. Second, check for SHORTS, they can be everywhere (a remedy for this is milling the board with offsets= 0... or not) Third, if your board does not work, DO NOT jump inmediately to mill another one, be patient and work it out. Fourth, check your connections, they do not work the same in different OSs, plus, sometimes Drivers are needed Fifth, get as informed as you may possibly be while working, it is very likely that the problem you may be facing has already happened to someone else, do not give up hope. |