Embedded Programming
The assignment for this week is to read a microcontroller data sheet and to program the echo hello-world board to do something, in as many different programming languages and programming environments as possible.
The Eagle design
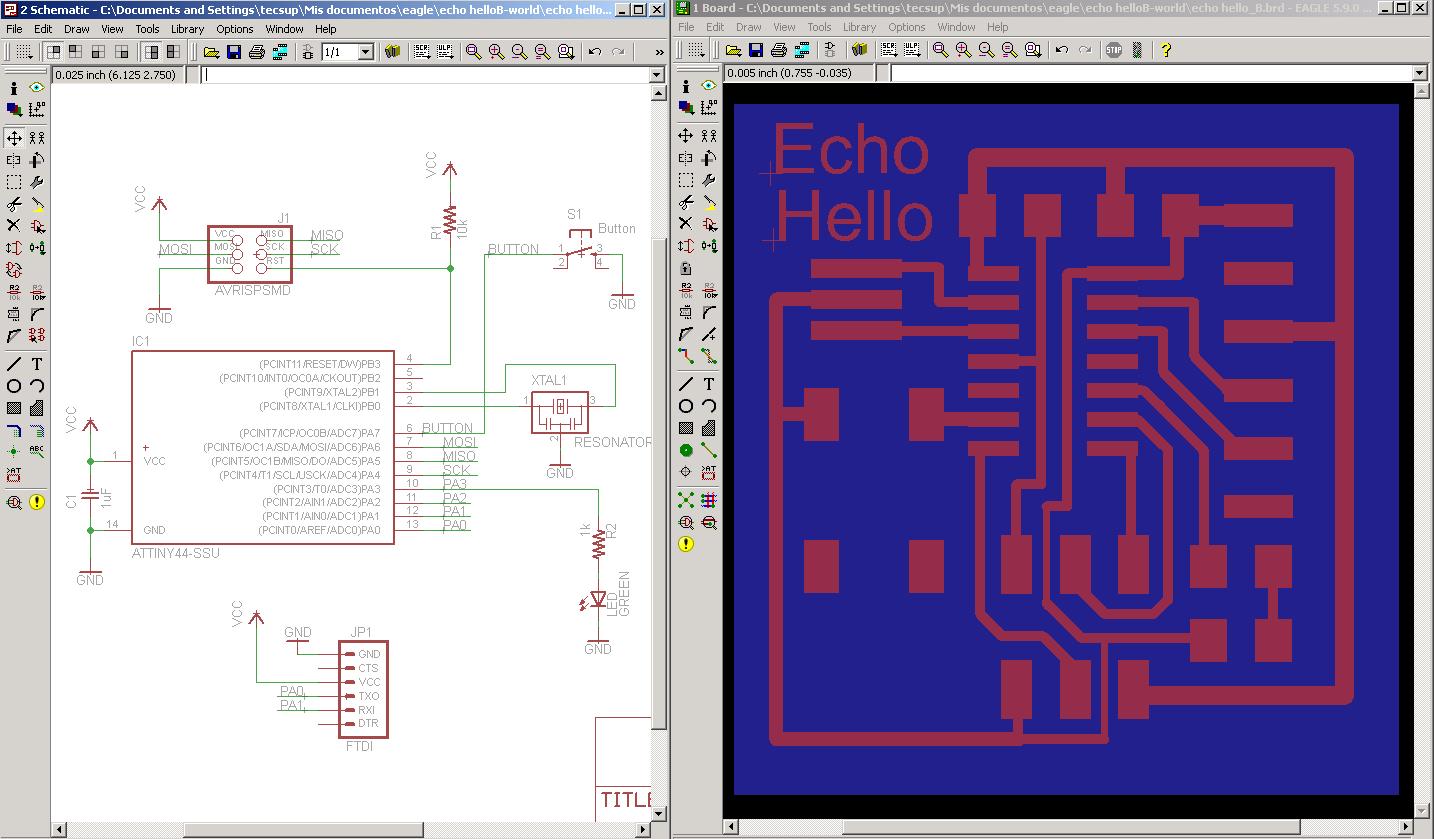
Two weeks ago we add a button and a led to the echo hello-world board, so I connected the button to the port pin PA7 and the led with his resistor to port pin PA3.
Processors' Architecture and Atmel AVR Microcontrollers
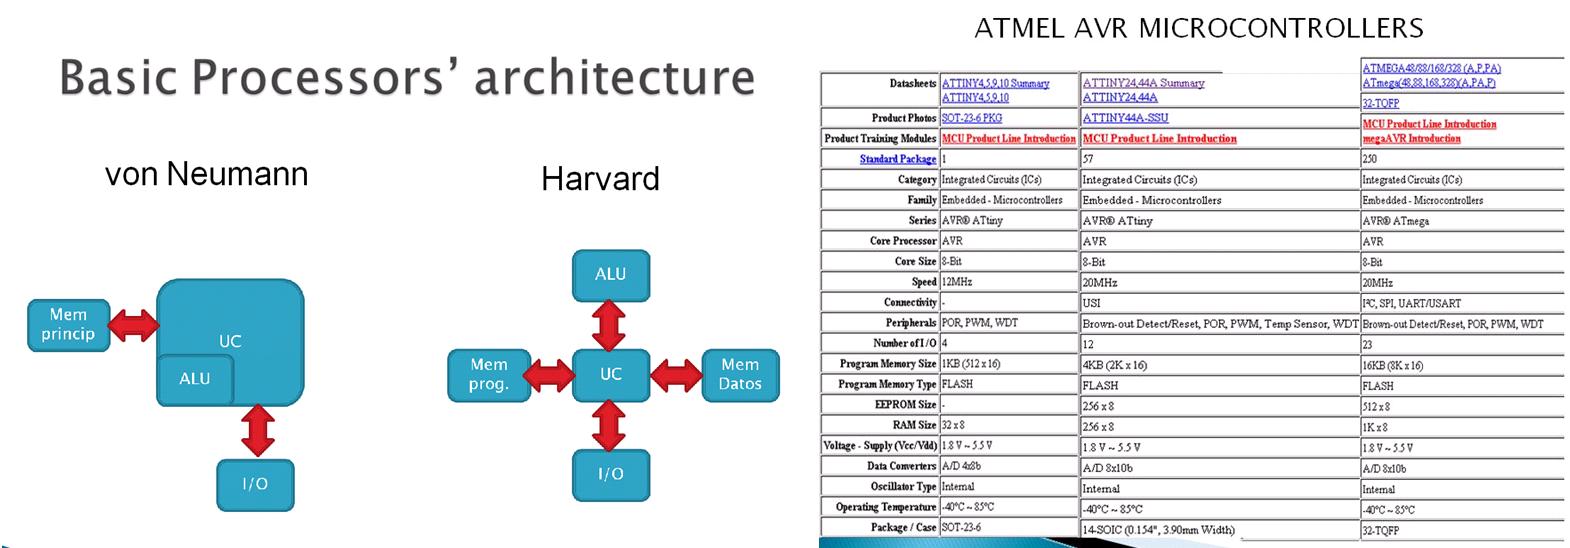
The AVR is a modified Harvard architecture 8-bit RISC single chip microntroller. The AVR was one of the first microcontroller families to use on-chip flash memory for program storage, as opposed to one-time ROM, EPROM or EEPROM used by other microcontrollers at the time. The table below compares some AVR devices.
Programming
I programmed the echo Hello-world using Arduino IDE and AVR Studio environments, for this was very helpfull the following tutorials http://academy.cba.mit.edu/2012/labs/providence/tutorials/09.html and http://fab.cba.mit.edu/classes/MAS.863/people/prashant.patil/ep.html.
Following the tutorial for programming with Arduino, we have to:
- Download the Arduino 1.0, ATtiny.zip and FTDI drivers
- Create a folder called "hardware" in the Arduino sketch folder and copy inside the ATtiny folder
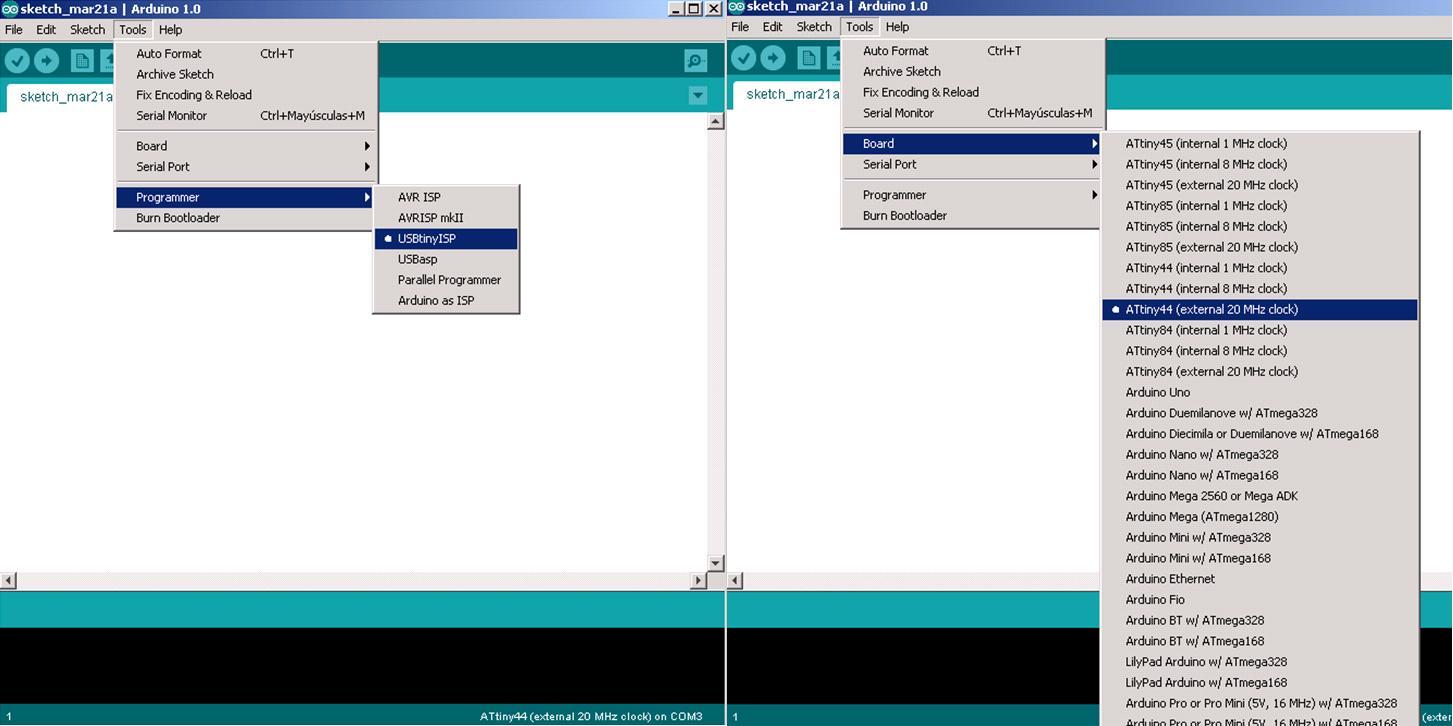
- Restart the Arduino environment and look for ATtiny entries in the Tools menu
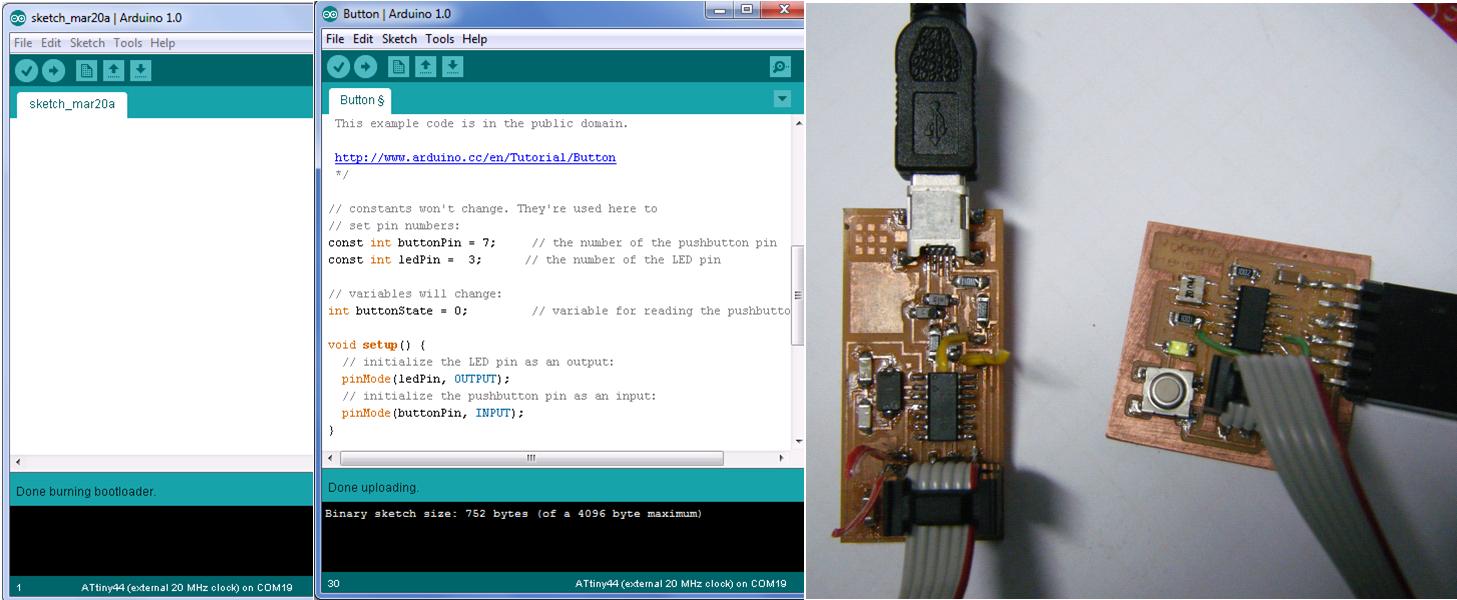
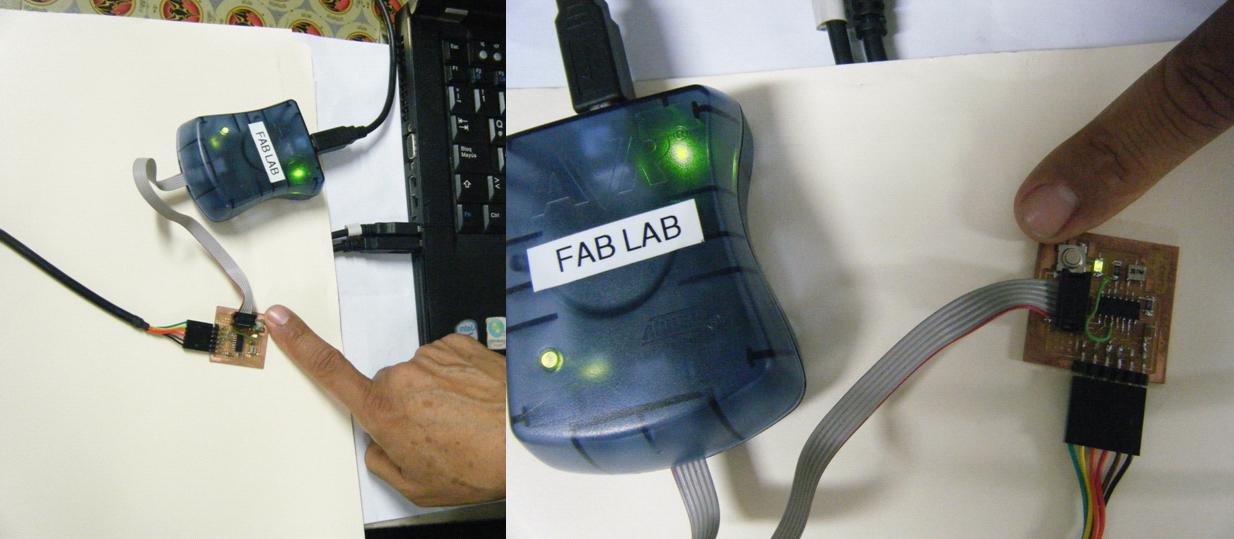
- Connect the cable between the fabISP programmer, the echo hello board, the miniUSB from the fabISP and the computer and finally the FTDI connector from the echo hello board and the computer
- Select the "ATtiny44(external 20 Mhz clock) from the tools menu
- Run "Burn Bootloader" from the Tools menu
- From the examples menu open the Button file and modify the ports' pins
- Program the board seleccting USBtinyISP from the Tools menu
- Press the button to turn on the led
Programming with AVR Studio
- Download the AVR Studio from http://www.atmel.com/tools/ATMELAVRSTUDIO.aspx and install it
- Go To File -> New -> C Executable Project (avrled.cproj). Click OK.
- In the Device Selection window select the Attiny44A
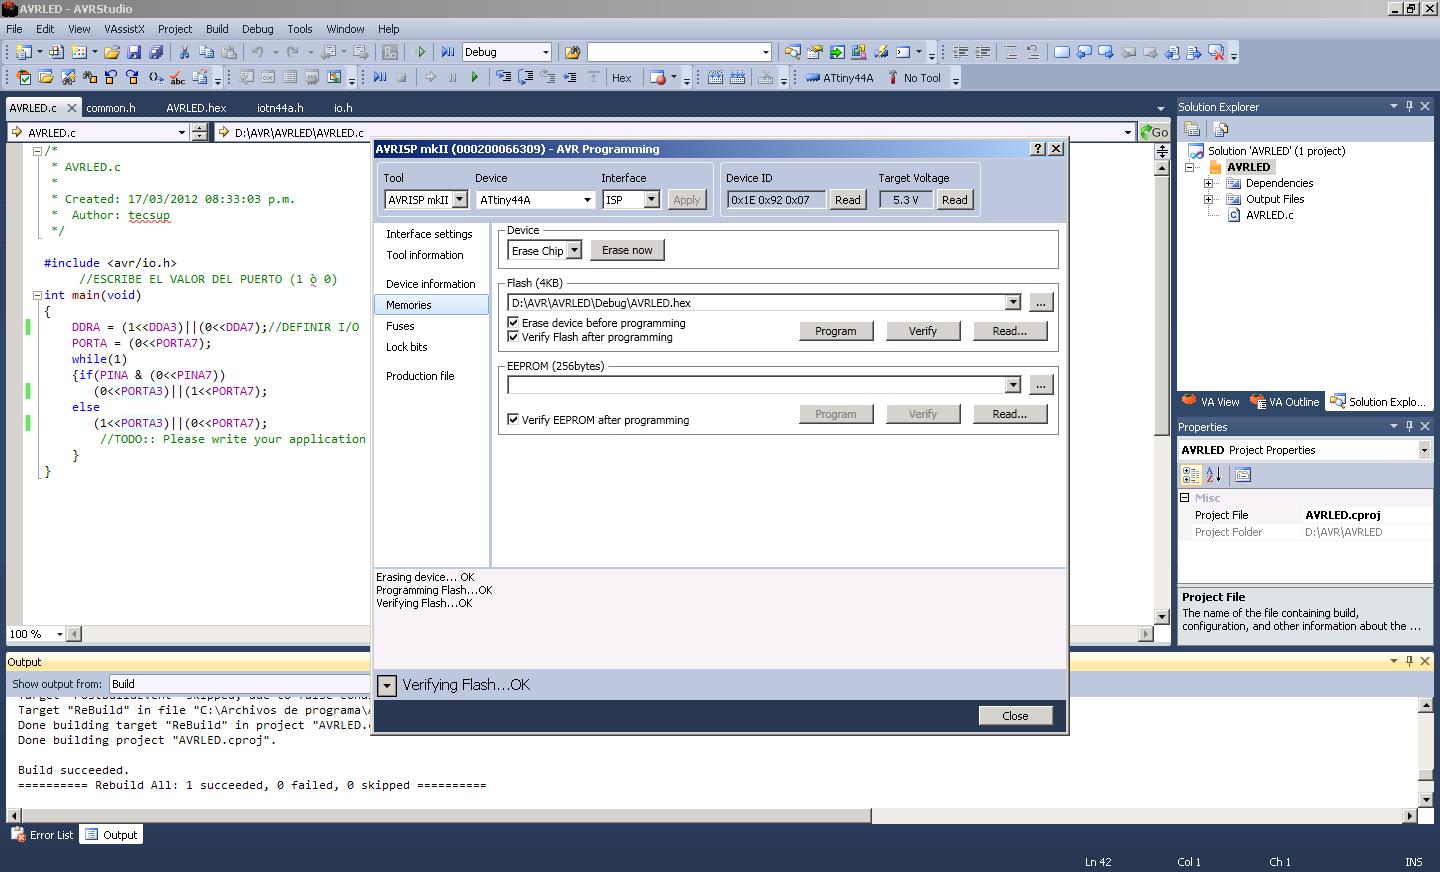
- In the C file opened, write the code for the program. Once finished writing the code, Go to Build - > Build<AVRLED> or simple click the Build button
- The program will compile the code and if no error, a <AVRLED>.hex file will be created in the project directory which we have to upload to the micro-controller.
- Connect the ISP pin of AVRISPmkII to the echo hello board. Go to Tools -> AVR programming. In the "Tool" menu list select AVRISP mkII. In Device select ATtiny44A. Click on "Read" button below Target Voltage.
- For programing go to "Memories" Tab, browse to the projectfolder/Debug and locate the avrled.hex file, then click on "Program" button. If programmed The message at the botton should read " Programming Flash OK".
- Press the button to turn on the led
Final comments
This has been a great assignment, very useful for my final project, I"ll be waiting for the "Input devices" lesson.
I must thanks also the great work of my partners Felix, which got a lot of information about the assignment and Henry which milled several boards to test different locations for the button and the led at the microcontroller ports' pins.