Week #9 || Molding and Casting
Software used:
Machine used:
Setbacks:
1. Designing a Piece
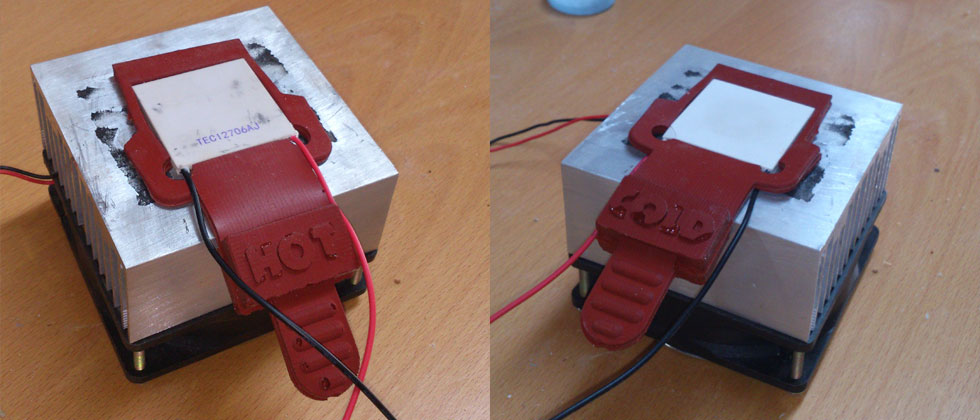
After a break from designing my final project last week, this week I wanted to continue designing and making something for my final project. I have changed my approach to designing my final project last week as well, so I am now making a fresh start. I have begun testing the main function of my project, which centers around the heating and cooling capacities of a peltier element. I have bought a setup with a heatsink and a fan to run tests with. I made a replica in Rhino of this setup, and will begin to start making elements around it according to it's needs. So, I'm going to a shape follows function design.
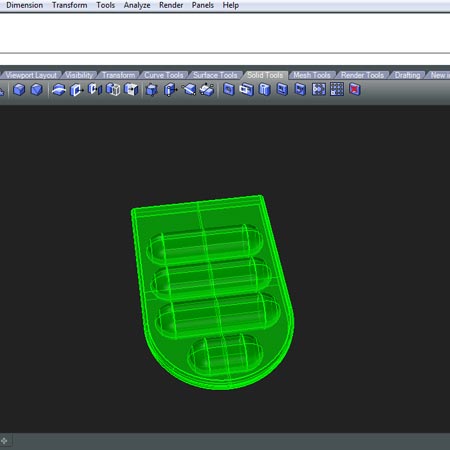
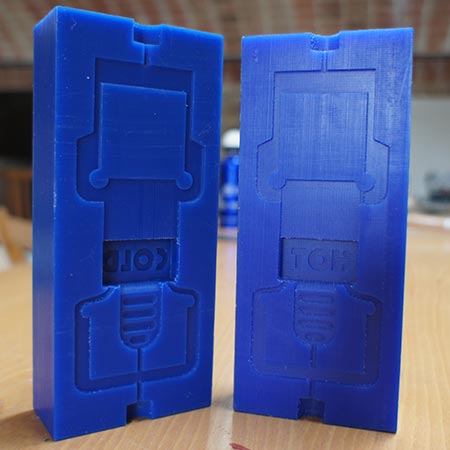
Begining with the main function, the switching between heating and cooling, I needed to design something to turn over the peltier element within the setup. I don't want people to have to unscrew anything, and remove and flip the peltier element like that. So I thought of a little rubber piece to snap-fit around the peltier element, which could easily slide in and out of the heatsink setup. That way the intervention for the user is minimal, and is no hassle at all. The pictures illustrate the design approach of this piece.
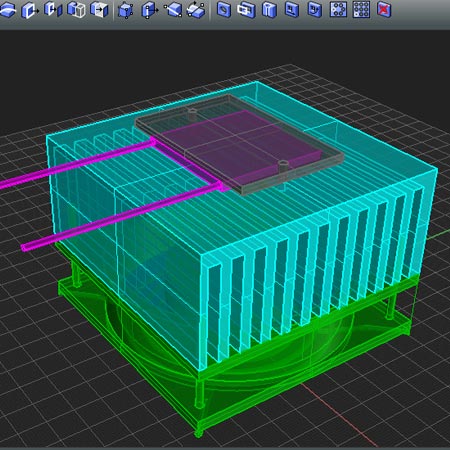
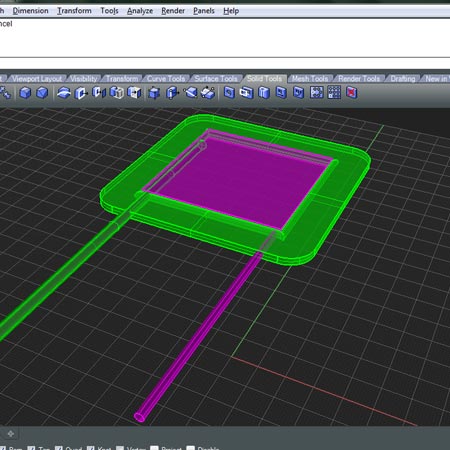
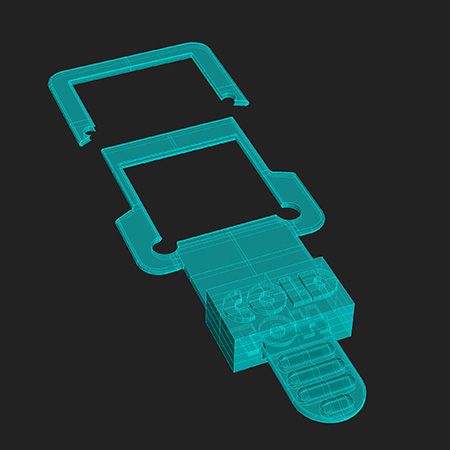
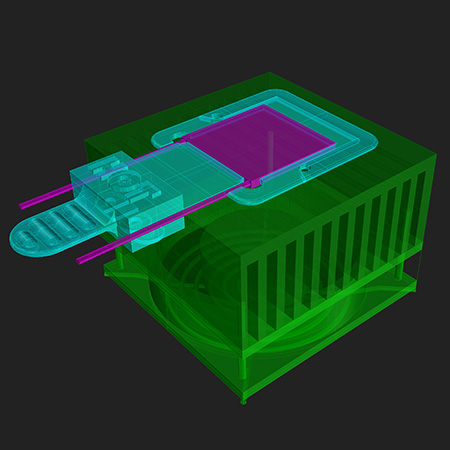
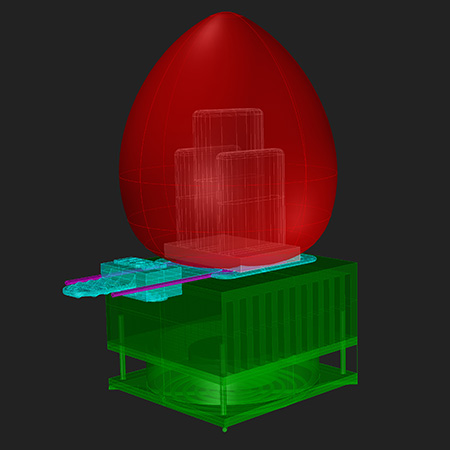
The red part on top illustrates a thermall mass sitting on top of the heatsink. The peltier element 'flipper' does not interfere with other parts of the temperature control element, and in theory can be managed easily.
2. First try
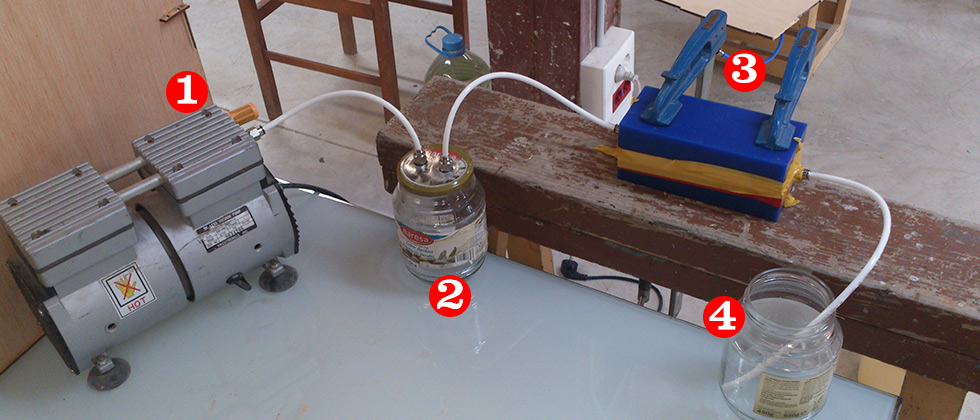
The setup for the injection molding was thought of by our teacher Ferdi. He thought of using a vacuum air pump for sucking the material into the mold, and at the same time that action would suck out all air bubles. The setup works as follows:
- The vacuum pump sucks air and viscous material through the connected pipes. One end sits in the material, the other end connects to the pump.
- Between the mold and the pump there needs to be a chamber for the exchange of air and solid material. Once the solid material has been sucked through the mold, you need to prevent it from being sucked into the pump. So when the material is seen in this jar, it means the mold has been filled and you can stop the motor.
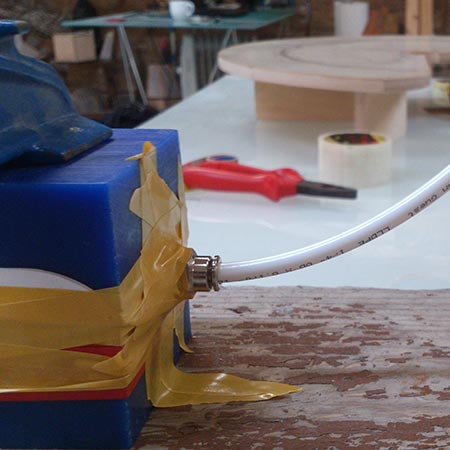
- The mold has two connectors, one entry and one exit. Make sure the mold is completely airtight.
- The far end of the connected tubes sits directly in the material you want to fill the mold with. Make sure the tube stays submerged.
Sadly, after a long day of mixing, stirring, setting up the pump and preparing everything, it turned out my mold had an air leak, so no material was sucked into the mold, despite having used silicon to seal the connectors. By the time I noticed this, the liquid rubber had already set, and could not be used anymore.
3. Second try
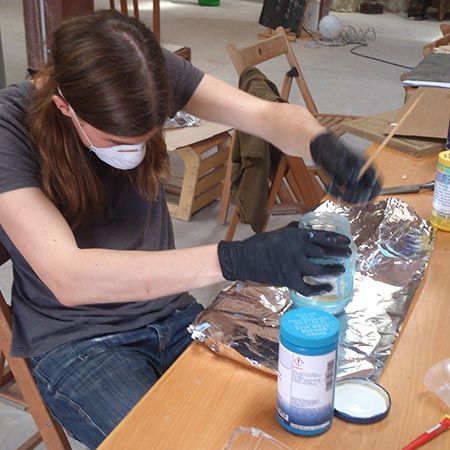
It took quite a while to for the second try to take place. Finally, it happened on 26-05, two months after the week assignment, and now finished with moderate success. I spent the day with my colleague Martin Gutmann, because he also needed to finish his Molding and Casting assignment. I retried the same process, using the setup described above. This time I used a lot more silicon to seal the connectors. It was however still not 100% airtight, and our vacuum pump had a lot of trouble to suck the thick rubber through the thin pipes and traces in the mold. After about 5 minutes we had to stop because the material was starting to set. I opened the mold to see what had happened:
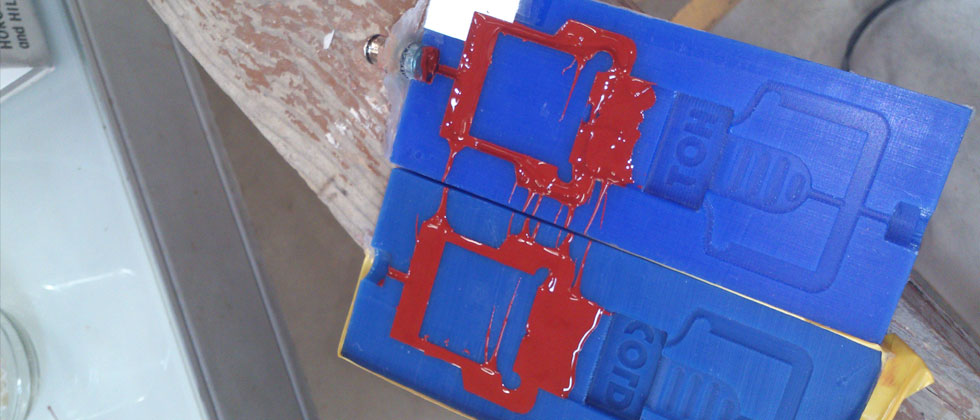
The material had started entering the mold, but could not make it all the way through. What did come in though looked very good! I decided to not let this chance go by, and to save the situation I did the following: I poored the left-over material over my molds, and used a piece of thin plywood to scrape the material into the mold. I repeated this a few times, trying to press the material in and leave flat surface behind, so that both halves could be joined into a single piece.
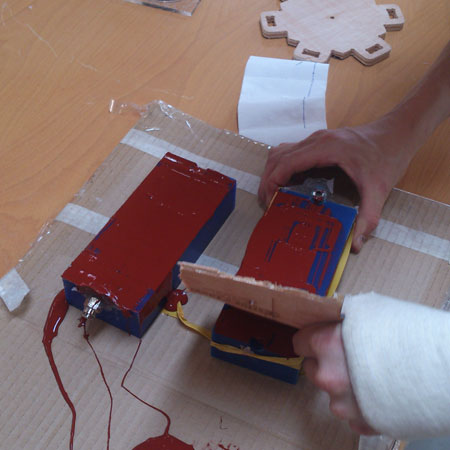
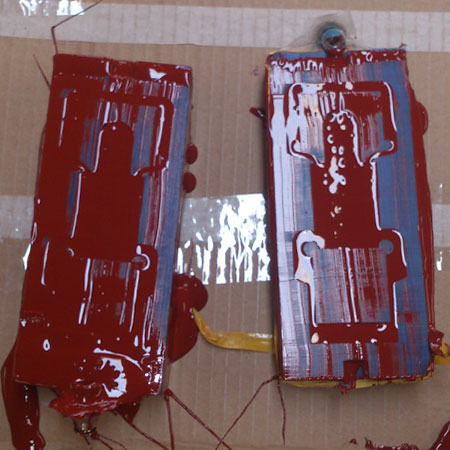
It actually came out very nicely, the two pieces joined together almost seamlessly to create the part I designed. There were still some airbubbles, but I'm happy with the result.
Like I wrote before, I won't use this piece, because I will regulate the temperature with electronically with an H-bridge. But I kind of love this little thing, after having been on my mind for 2 months :)