This week , the assignment is about molding and casting which will not be something easy to do. It is all about waiting rather than than performing the process of making the product.
I always wanted to make the ironman chest piece that he placed it in his chest. I used Autodesk Inventor to draw it out.
Below the picture is the ironman chest piece drew by me.
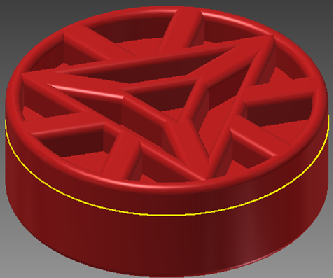
This week, we will be using wax as the material and using Roland 2D Router Machine to cut out the shape of the ironman chest piece for making the mold.
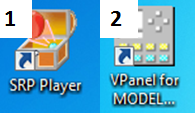
I will need to program the Roland 2D Router Machine for it to cut my model. The softwares that I will be using are SRP Player and Vpanel. SRP Player will used to program the machine to run automatically and Vpanel is used to run the machine manually for setting up the machine.
1) SRP Player will used to program the machine to run automatically
2) Vpanel is used to run the machine manually for setting up the machine
The below shows a screen shot of the Vpanel used to control the machine manually.

The SRP is quite friendly user software, I need to convert the file to .stl format and the machine will convert for you by itself. You will need to program some parts by your own. Quite straight-forward.
1) Input the overall size of the raw material and orientation of the model, type of milling used (rough or smooth)
2) Enter the size of the model and create the toolpath for the model
3) Choosing the cutter that is used to cut for the different operation (example : cutter used for fininshing)
4) Preview the result of the model that will be cut out

If the preview is fine, you can proceed to cut. The machine will begin to cut out the model for you.
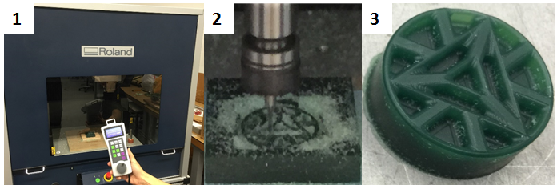
1) This is Roland 2D Router Machine that I will be using to cut out my model
2) Photo taken while the machine is cutting my model
3) My end product from the machine
Click on the picture to take at a look of the video (MDX cutting out the Ironman Chest piece)
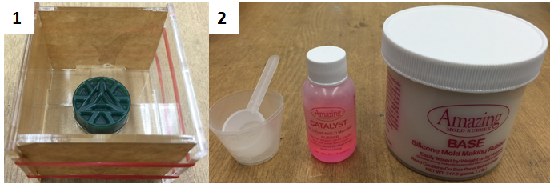
After successfully cutting out my model, I am going to make my mold for my ironman chest piece. I am using AMAZING mold rubber to make my mold. Together with silicone mold making rubber base and catalyst, I will create my mold for my model.
1) The acrylic box used to build my silicone mold for my model
2) The brand for my silicone mold AMAZING mold rubber, silicone mold making rubber catalyst and base
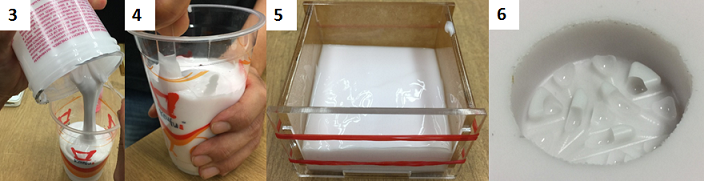
3) Pouring of the base into a cup
4) Mixing the base together with the catalyst
5) Pouring the mixture into the acrylic box after few mins of stirring the mixture
6) The silicone mold was formed after a day of waiting
After waiting for the silicone to dry up, my mold was a failure due to too much bubbles were formed when pouring in the silicone mixture... I have to redo again... I was unlucky...
I learned my lesson in how to remove the bubbles from the silicone mixture. My team mates told me that I need to knock lightly on the base of my mold continuous in order to remove the bubbles. I try doing my mold again but using another brand of silicone mold because Roy and I finished up the previous one. Haahaahaa...!!!
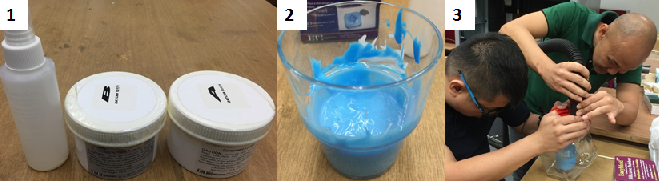
1) The brand for my redo silicone mold Easy Mold, Solution A and B with the catalyst
2) Mixture of the silicone mold is done
3) Vacuum out the air from the silicone mold after that I start tapping the mold on the table to remove the bubbles from the mold
This time, it was a success... Thanks to my team mates, Rodney and Roy... They helped me a lot... The photo below shows the mold for my model.
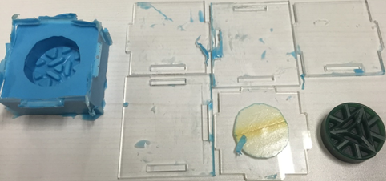
1) Photo of my first silicone mold and my redo silicone mold with my ironman chest piece
2) Bubbles on the first silicone mold
3) Good finishing on the redo silicone mold
After finishing with the silicone mold, I am all ready to start on my casting for my ironman chest piece.
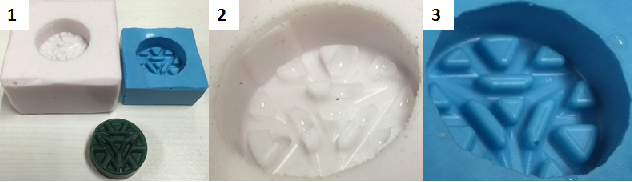
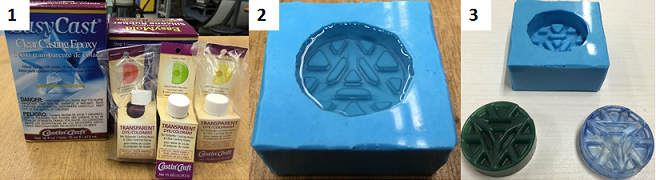
1) The brand for my casting Easycast, Clear casting epoxy solution which there are two solutions that must mix evenly (Important) comes with colours
2) Mixture of casting epoxy in my mold with a little blue dye
3) Complete of my casting of my ironman chest piece together with the mold and original ironman chest piece
I really learned and enjoyed so much doing molding and casting which I will try again.