For this week, I am about to do something really interesting. I have fabricated big scale projects from CNC milling machine and now I am fabricating PCB from it.
I was given the drawing of the PCB and I need the to download the drawing and open through a software called Eagles (used for PCB).
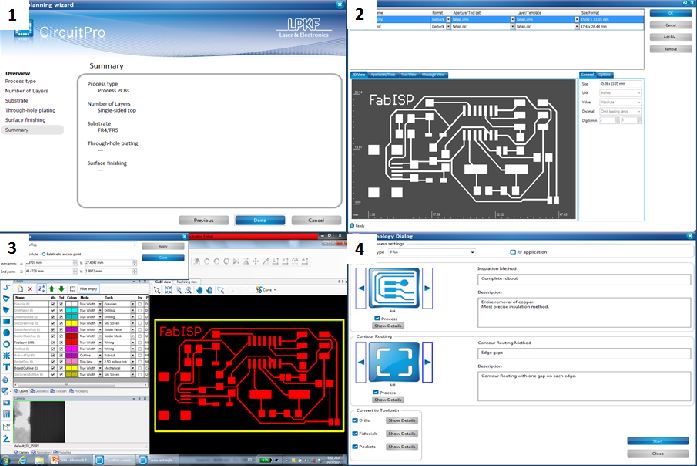
I am cutting out the PCB from milling machine using Circuit Pro and LPKF Laser and Electronics Milling Machine. (Pictures below)

1) Selection of the PCB Material and processes
2) Selection of the File format use to produce the board
3) Set the area of the PCB
4) Set the cutting layout and area of the PCB
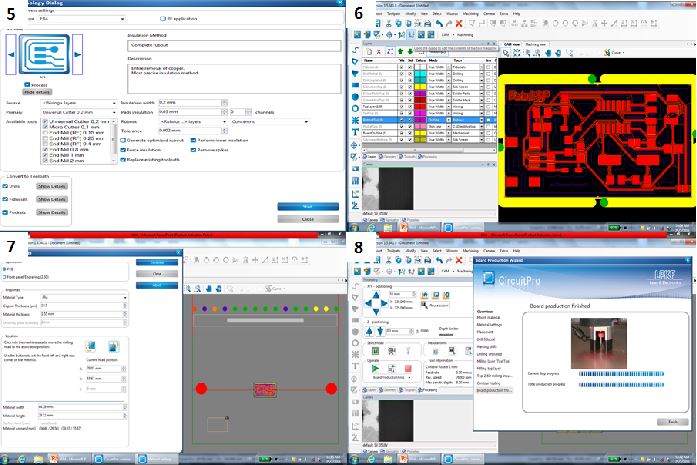
5) Selection of tools use to cut the PCB
6) Show view of the PCB after completion of cutting
7) Setting position of the PCB to be cut on the board
8) Board production completion
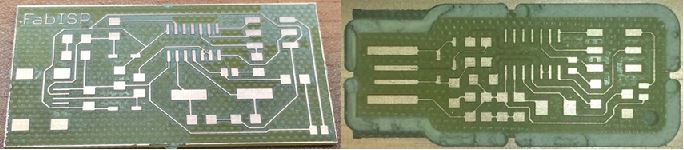
Below are two pictures of the PCB cut out from the milling machine.
The PCB on the left-hand side is a test cut from the PCB milling machine and the PCB on the right-hand side is the actual cut out for the end product use for soldering.
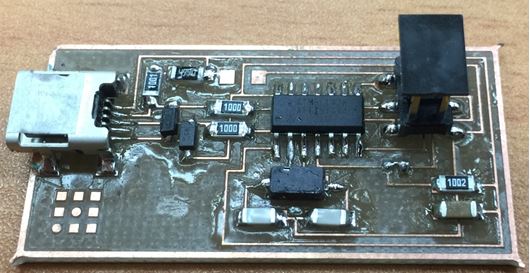
Time for Soldering. It's been a long time since the last time I did soldering. I always hate to do soldering because I am not able to control my hands. This time was a big surprise to me as I am enjoying the soldering process because I seems to get my hands on it. My buddies taught me well and I am doing it pretty well. Below are photos of me doing the soldering and you can see how much I am enjoying it.

My Final Product is finally OUT...!!! This is my PCB which I am pretty satisfied with it.