This is something that I am curious about. I know that composties are very popular in the market now. I never have a chance to get in contact with it.
For this week assignment, we have some constraints because we are asked not to use carbon fibre and glass fibres due to potential hazard. We were recommended to use burlap as the fiber and epoxy as th resin.
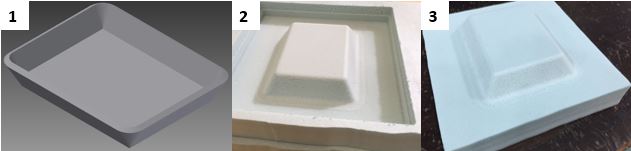
Before I start on composite assignment, I will need to design something out for my project. I am going to make a simple container for my wife to put her jewelleries.
1) Using Autodesk Inventor to draw out jewellery container
2) Cut out the shape using Roland MDX-540 (Material : Foam)
3) Mold cut out from the Roland MDX-540
Moving on to the Composite Lab, I am looking forward to make my project out of the composite material.
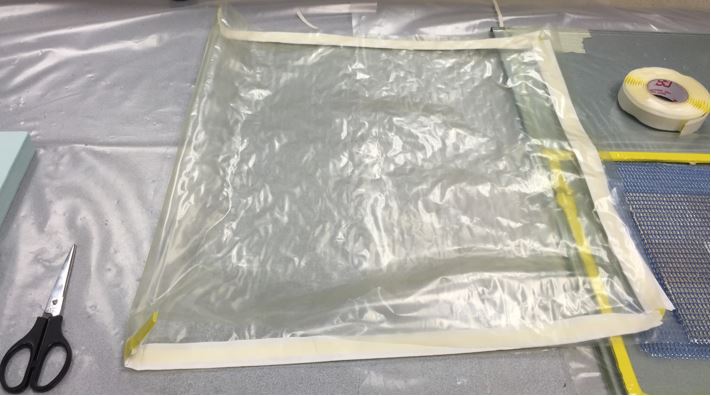
I need to prepare a piece of fabric and breather to be place in the vacuum bag. Other than the vacuum bag, there are epoxy resin, sealant tape, tubings and vacuum pump needed for the process.
Below is a picture of the vacuum bag with the breather and the sealant tape.
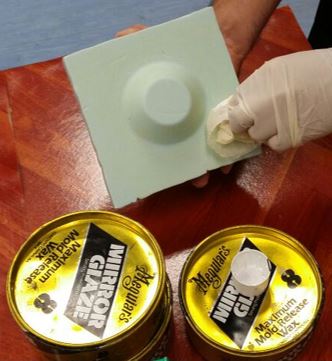
Next thing, I will need to apply a layer of release wax film on the mold in order for the the mold and workpiece to seperate easily.
Below is a picture of the release wax that I am using for my project.
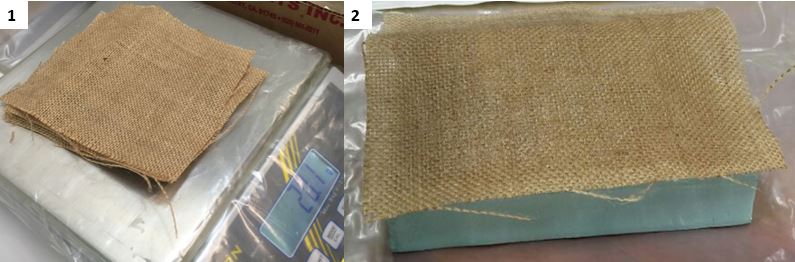
I am done with the mold part, going on with the composite material. I have to cut out the burlap size for my project and weigh it. The weight of the resin must be proportional to the burlaps so to have the best results.
1) Burlaps on the weighting machine
2) Checking the sizes of the burlaps with the mold
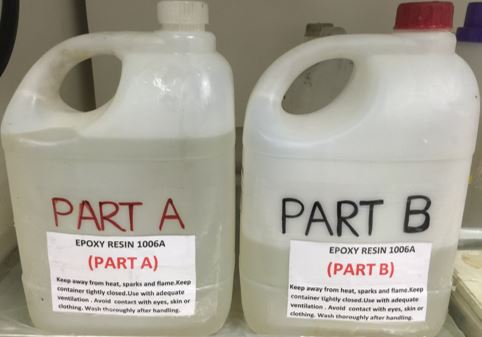
For the resin part, we have to mixed two type of resin in order to form the composite.
Below are the descriptions of the substance that I am using.
Part A:
Reaction product of epichlorohydrin and bisphenol A
Part B:
Isophoronedimine
Benzyl Alcohol
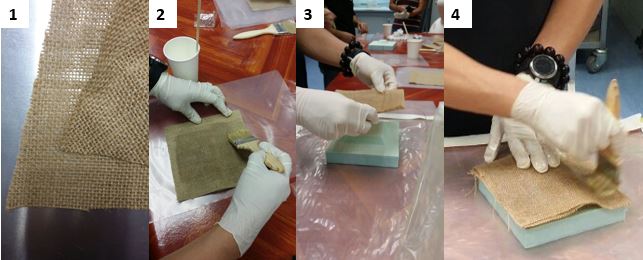
1) Preparation of the burlaps
2) Applying the epoxy resin on the burlap
3) Placing the burlap on to the mold
4) Appling the rest of the epoxy resin to the burlaps
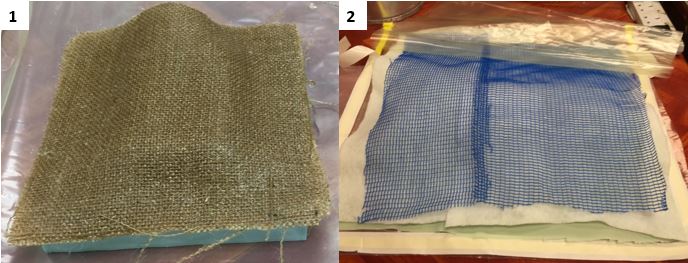
After applying rest of the epoxy resin on the burlap, we will need to place it in the vacuum bag creating earlier on.
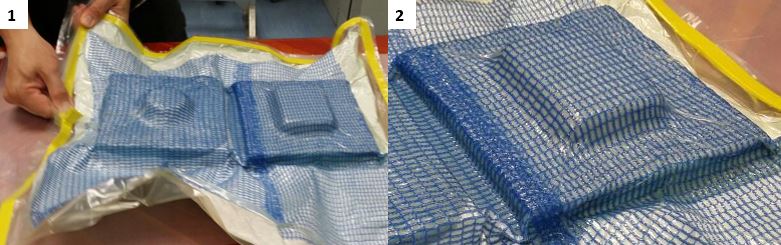
1) Burlaps soaked with epoxy resin placed on top of the mold
2) Getting ready to place in the vacuum bag
This part is where I am going to vacuum out the air which will form the shape of the mold. Below is a picture of the vacuum pump.
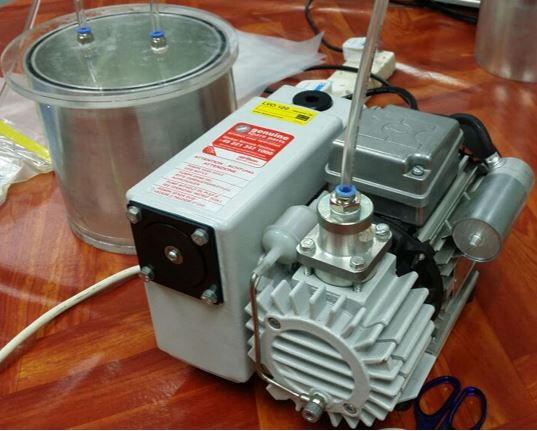
This is the crucial part which I am going to vacuum the project in the vacuum bag. The key thing is to make sure after vacuum, the bag has no leakage if not the shape will not be form properly.
1) Checking on the vacuum bag to make sure there is no leakage
2) Checking whether the burlaps filled with epoxy resin are forming well on the mold
When everything is done, I will need to switch on the vacuum for the burlaps filled with epoxy resin to cure.
After 8 hours, I need to seal up the tubing connecting between the vacuum bag and pump and switch off the vacuum pump. Continue to allow the project to cure overnight.
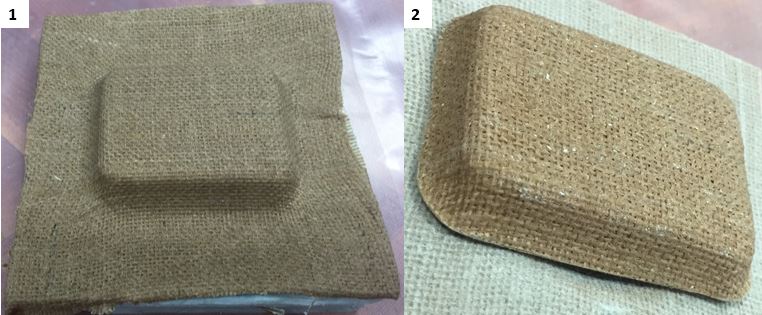
Finally a night of waiting, my jewellery container is formed. It might look simple but it gives me a sense of satisfaction. I hope to give my wife a surprise after I spray it with her favourite colour, pink colour.
1) After removing from the vacuum bag, this is how it looks like (Simple but nice)
2) This is my final product after cutting and trimming
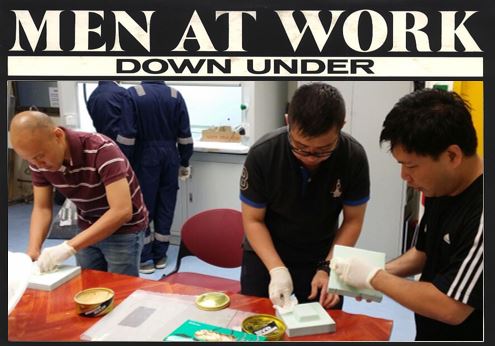
The feeling was great and I will try again after I completed the course. Just before the end of the of the project, I would like to show a photo of MEN AT WORK.