pamela chami
  • home
  • about me
  • project
  • assignments

week07

Embedded Programming

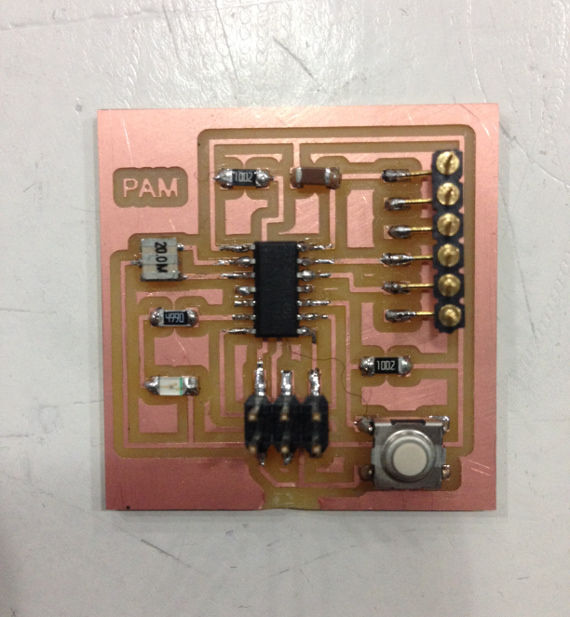
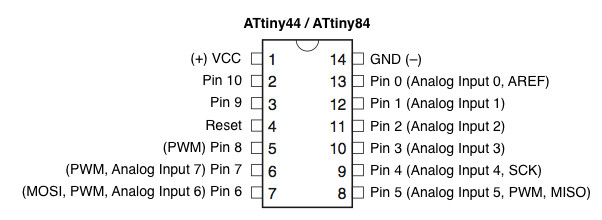
This week assignment is to program the ATtiny44 microcontroller on the Hello Button + LED board that we made during the Electronics Design week using the Arduino software.

Smiley face

Here are the steps I followed to programm the board:

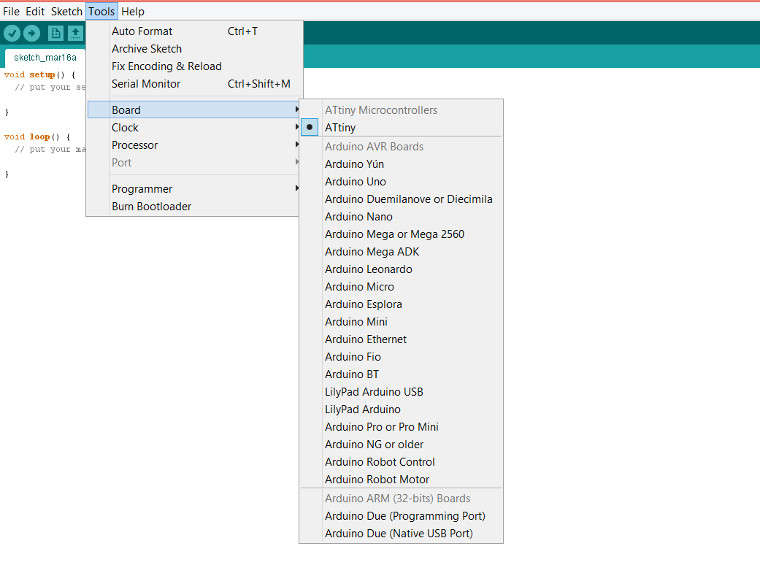
1/ Installing ATtiny in Arduino

  • First download the ATiny zip file and unzip it. It should contain an 'attiny' folder.
  • Smiley face

  • In the Arduino folder, create a new subfolder called 'hardware' in the sketchbook folder and copy the 'attiny' folder from the unzipped 'ATtiny-ide-1.6x.zip' to the 'hardware' folder
  • Smiley face

  • Restart the Arduino development environment. Then, the ATtiny should appear in the Tools > Board menu
  • Smiley face

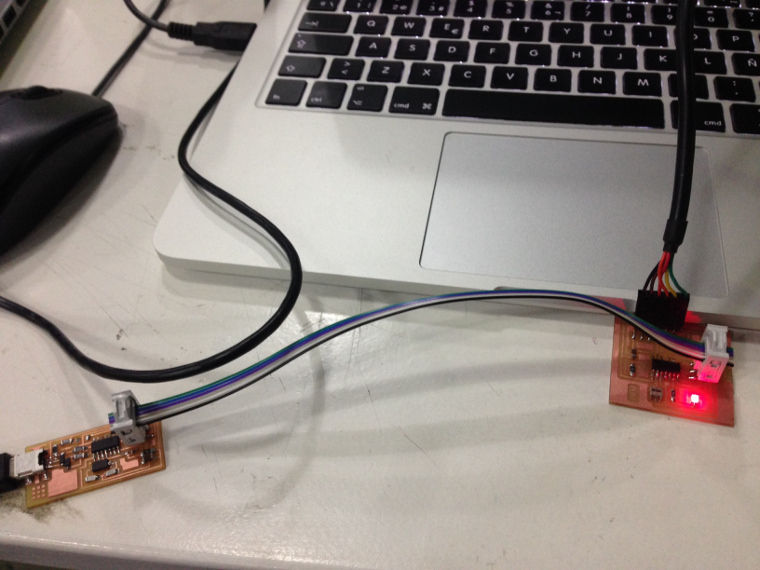
    2/ Power and connect the boards

  • Provide power to the ATtiny and connect it to the programmer (FabISP).
  • It is very important to connect all the pins (MISO, MOSI, SCK, RESET, VCC, and GND) of the programmer to the corresponding pins on the ATtiny. Below there is a list showing the difference between the microcontroller pins and the Arduino pins. The next step is to connect the programmer to the ISP header on the LED + Button board and power the LED + Button board with an FTDI cable
  • Smiley face

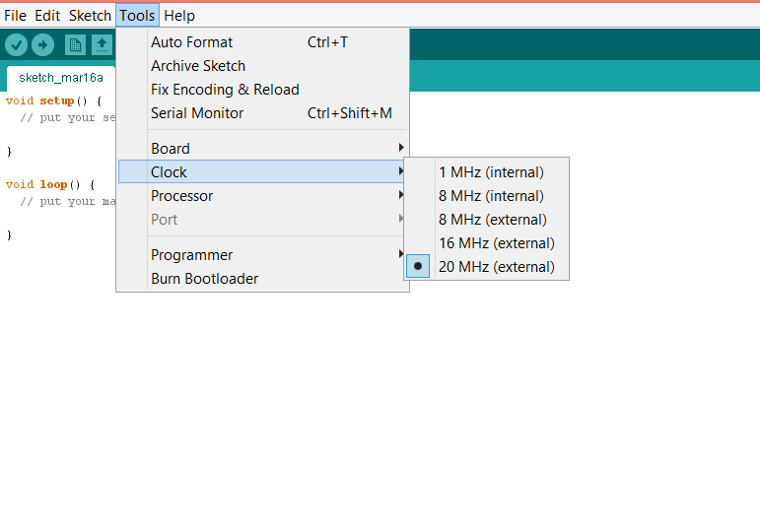
    3/ Configuring the ATtiny to run at 20MHZ

    Smiley face

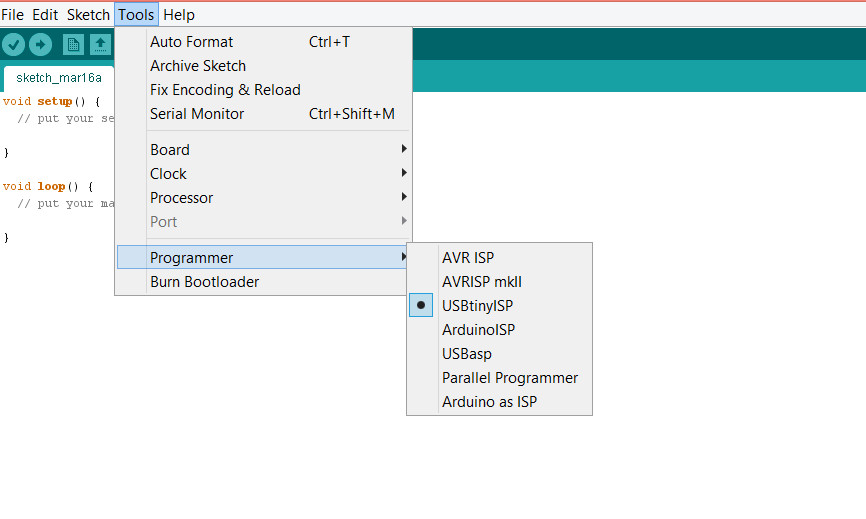
    4/ Select the programmer

    The programmer I used is the FabISP we made during the Electronics Production week and once it is connected to the computer it will appear in the Arduino software as the following. We should select the following to be able to program the hello Button + LED board.

    Smiley face

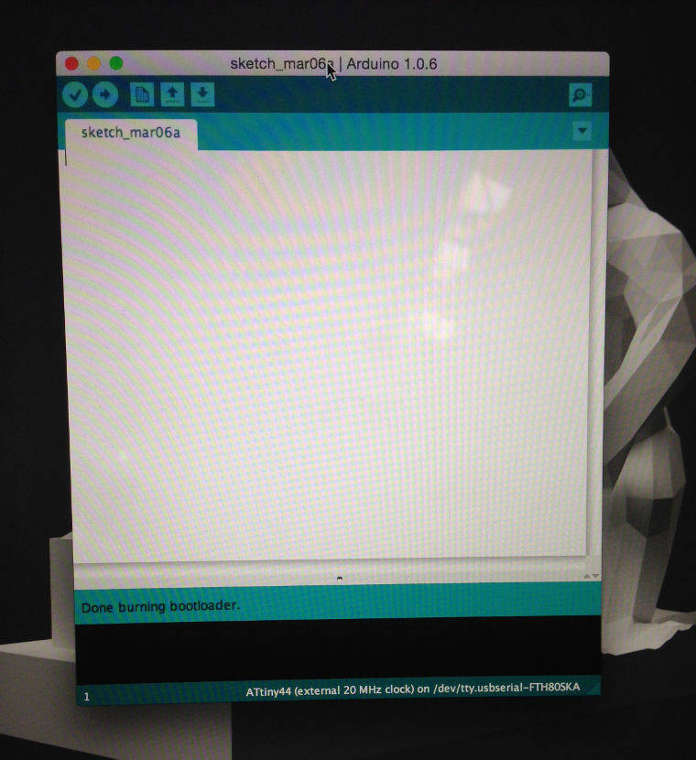
    5/ Burn the Bootloader

    Once the boards are connected and powered, the last step is to burn the bootloader.

    Smiley face

    Smiley face

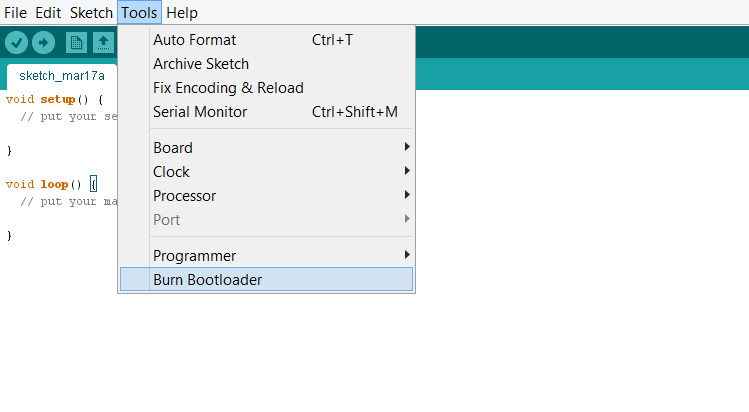
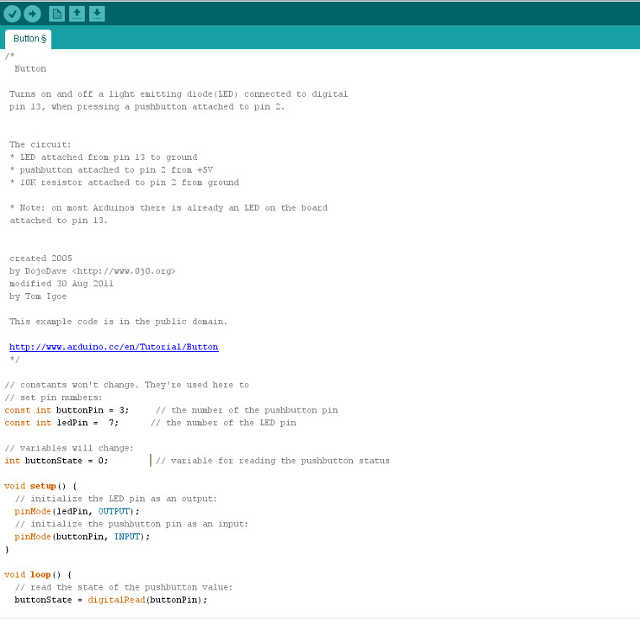
    6/ Programmed the board

    To program the board, after doing all the steps mentionned above, we should select one of the program examples in Arduino. I have selected the button example for changing the code.

    Smiley face

    It is very important to change the pin numbers to correspond to the pins used for the LED and the button on the Hello Button + LED board. The pinouts on the microcontroller ATtiny are different from the arduino code, which is important to verify and understand before programming and connecting the two boards together.

    Smiley face

    Smiley face

    In my case, the number of the pushbutton pin is 3 and the number of the LED pin is 7, which we have to change in the Arduino settings as the following and press upload:

    Smiley face

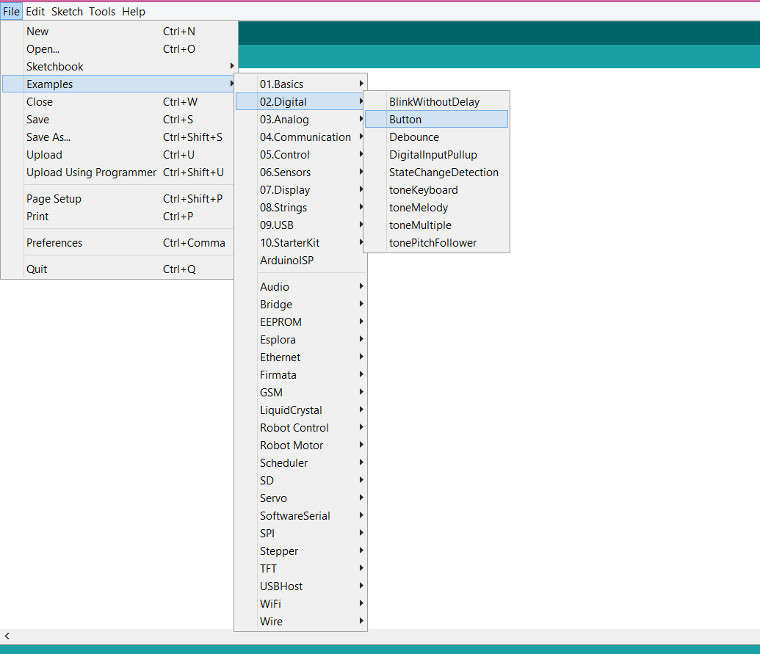
    Embedded programming from Pamela C. on Vimeo.

    Download the file here : Arduino - button

    Fabacademy.org | Copyright © pamelachami | Design by pch