pamela chami
  • home
  • about me
  • project
  • assignments

week04

Electronics Production

This week assignment is about electronics production . We have to make a FabISP in-circuit programmer. There are 3 steps to be accomplished in order to achive it:
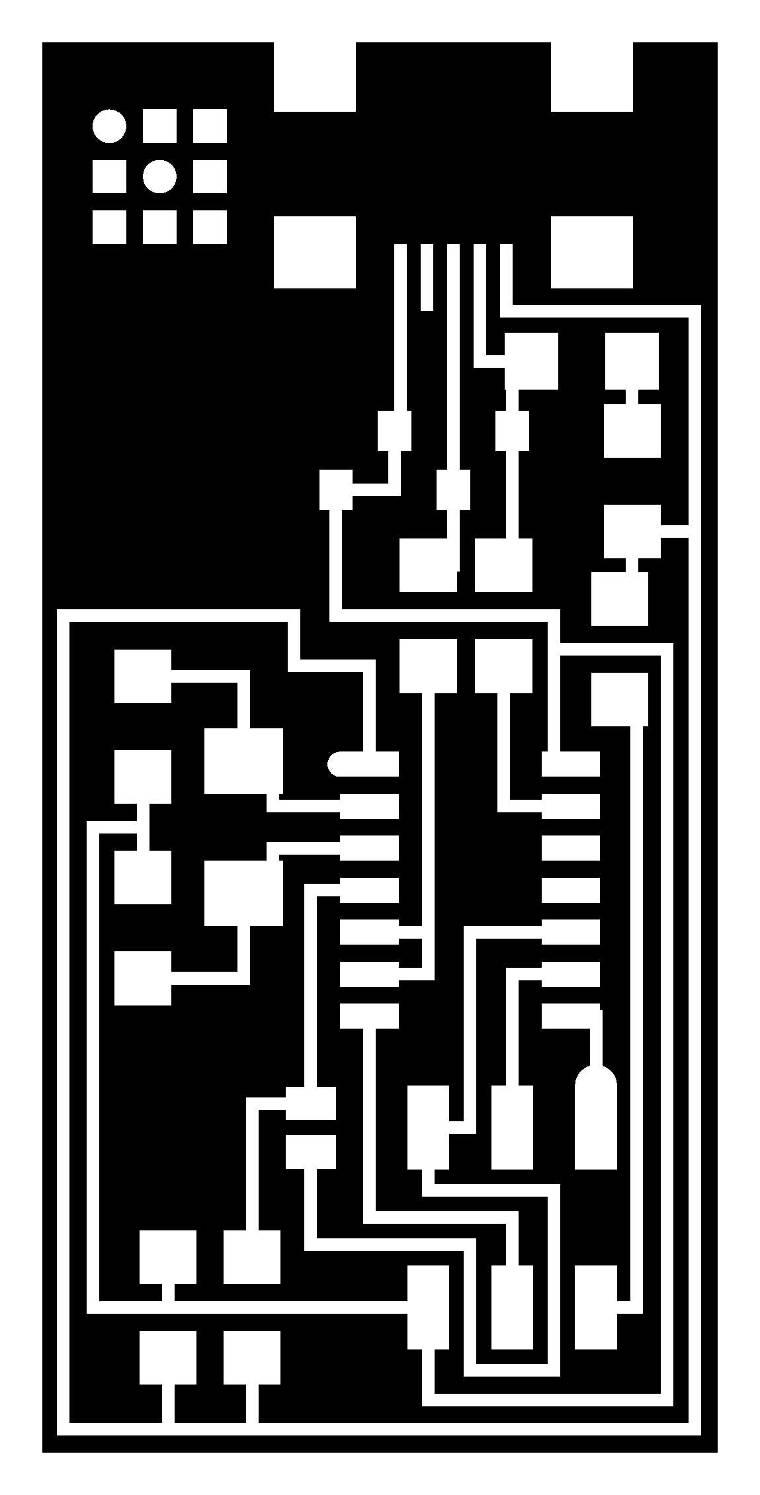
  • 1- Milling
  • 2- Stuffing
  • 3- Programming
  • Milling:

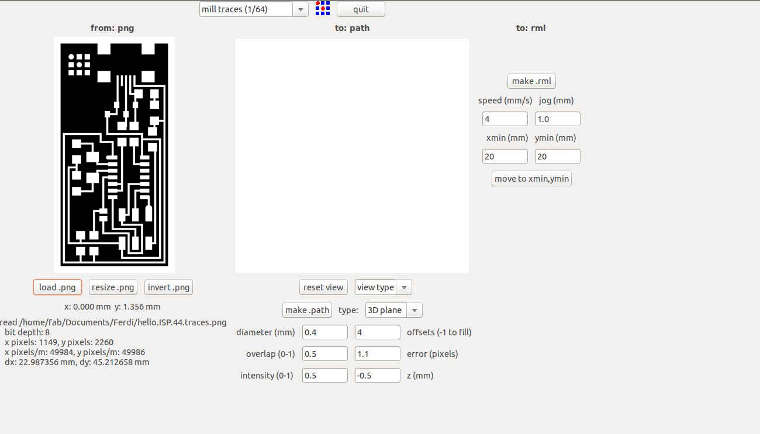
    The first step is to mill the PCB board. I have downloaded these two following images of the hello.ISP.44.cad to start with: traces and interior.

    Smiley face Smiley face

    Few steps to follow before proceeding with the milling. Starting with the preparation of the modela machine and the board to mill:
  • Always start by cleaning the board and the modela machine. This step should take the most attention and care.
  • Work with two boards: sacrifice board which is going to be use as the base board to avoid destroying the metal plate and the second board is the milling board. These two boards should be FLAT.
  • It is very important to make sure that all the surfaces of the boards are flat and glued carefully with a clean double side tape onto the metal plate.
  • Place the boards perfectly aligned with the metal plate and the machine. Then lock the metal plate into the machine with the screws after verifying that the boards are perfectly flat and aligned .
  • Smiley face

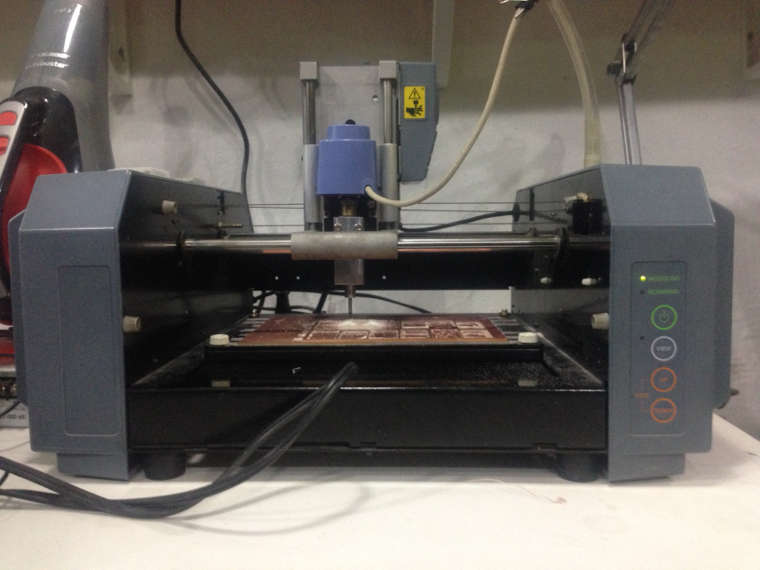
    Once the boards are perfectly glue and in place, we need to print the two images downloaded using the FabModules:

  • 1- Make input: images.png to output:RolandMDX-20.rml
  • First thing to do to is click on View and set the origin X and Y and the Z point by lowering the bit so it touches slighty the copper plate.
  • 2- Load .png
  • 3- Fix the preset of the traces
  • 4- Make path
  • 5- Make rml
  • 6- Send it and begin milling
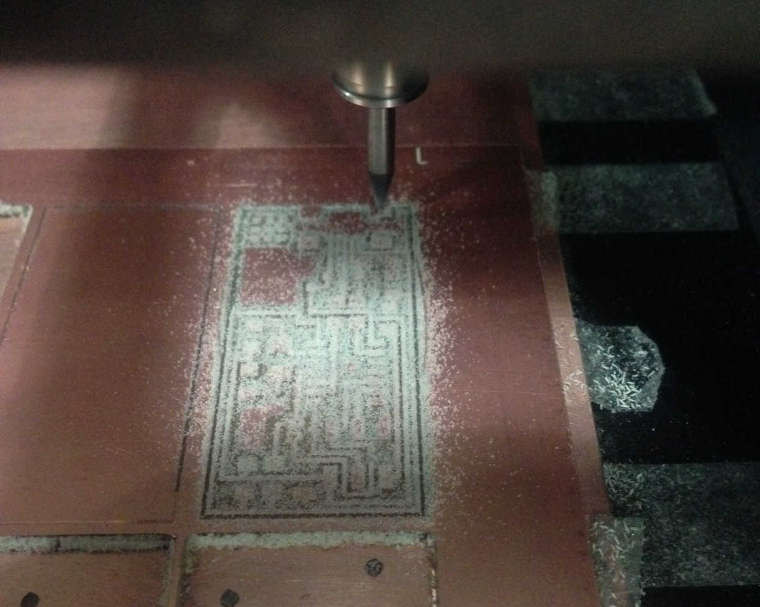
  • First step, mill the interior.png as a test to verify that the machine is correctly set.

    Smiley face

    Smiley face

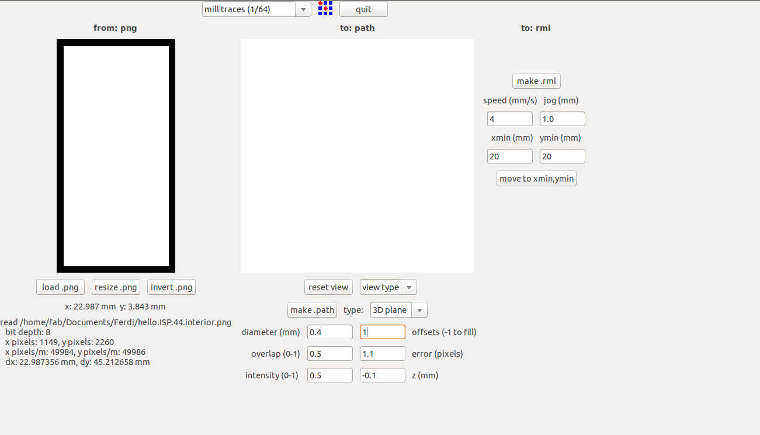
    Second step, mill the traces.png with new presets

    Smiley face

    Smiley face

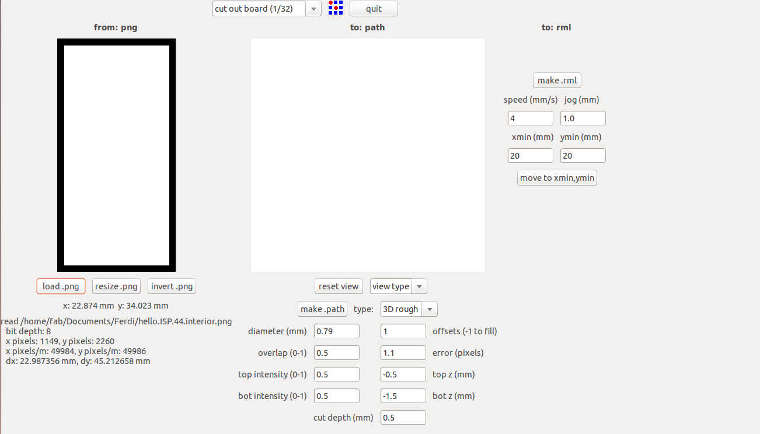
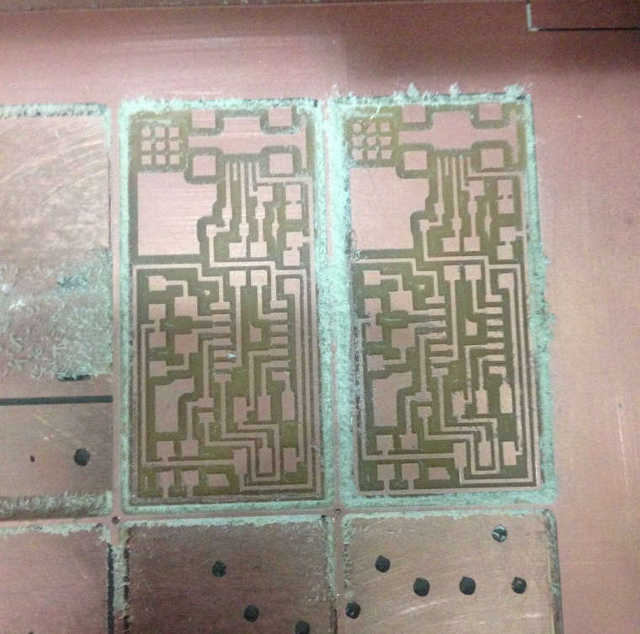
    Once the board is finished, It should be cut out with the following presets:
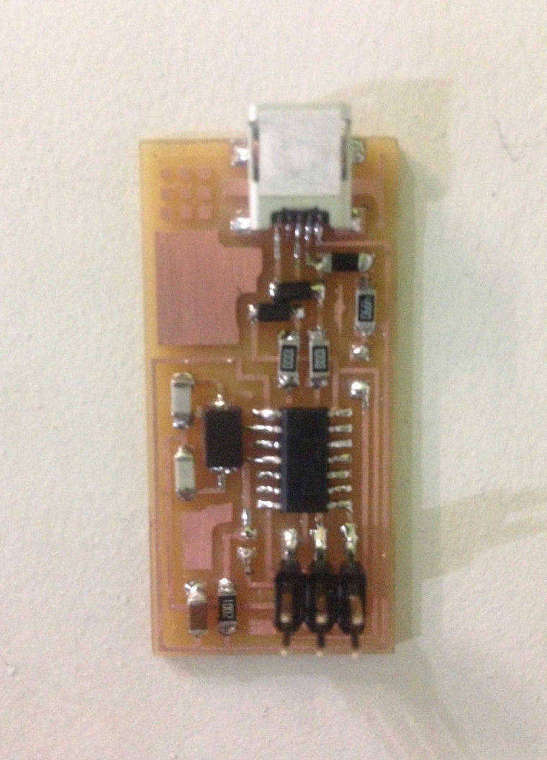
    Smiley face

    Smiley face

    Stuffing:

    Before beginning with the stuffing, The PCB board should be cleaned with some alcohol and polished the copper gently with a steel wool. Here is the list of the components that should be soldered to the PCB board that I have selected: Smiley face

    Smiley face

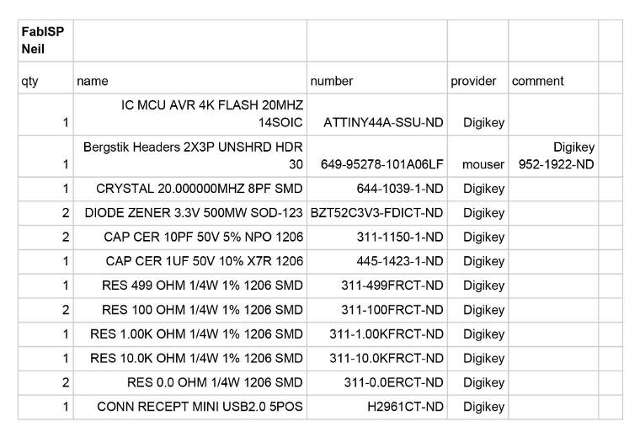
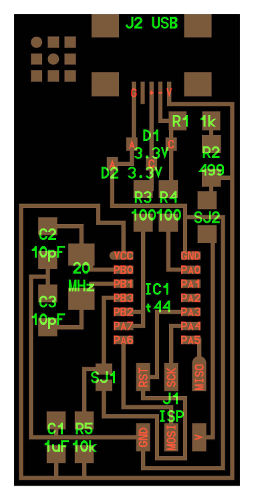
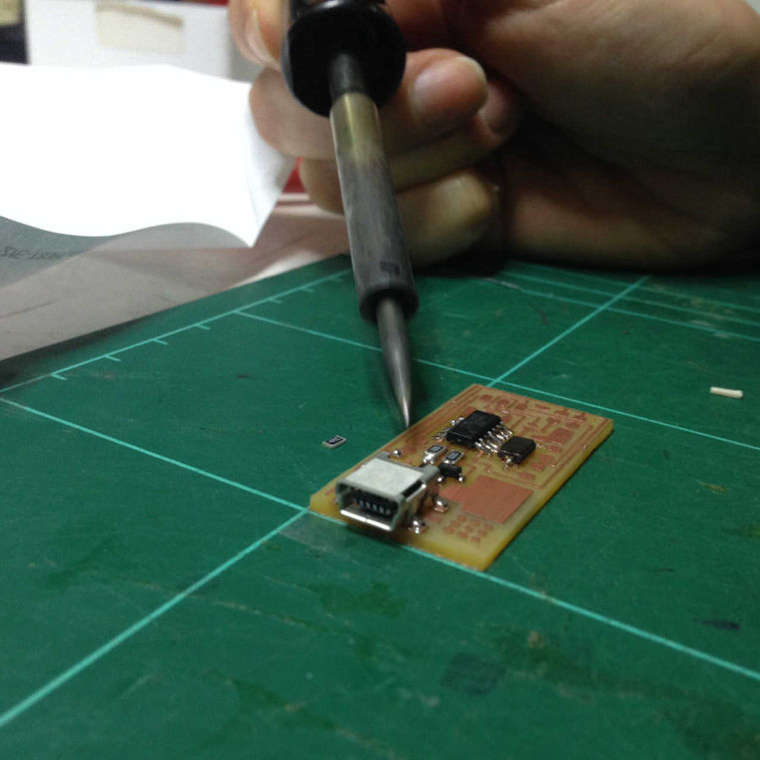
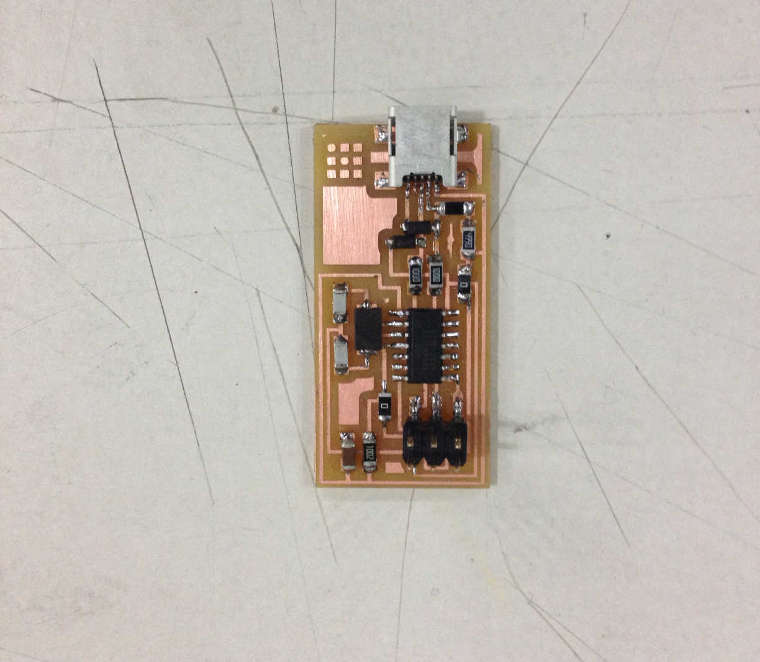
    I have followed the steps of the following tutorial Fab Lab Providence which explains clearly how to sloder the component in their right place and direction. Orientation is very important for some components and should be placed in the right way.

    It is very important to always:

  • solder from inside to outside , bottom to top
  • avoid to solder two components tracks together,otherwise the board might not work.
  • Smiley face

    Smiley face

    Programming:

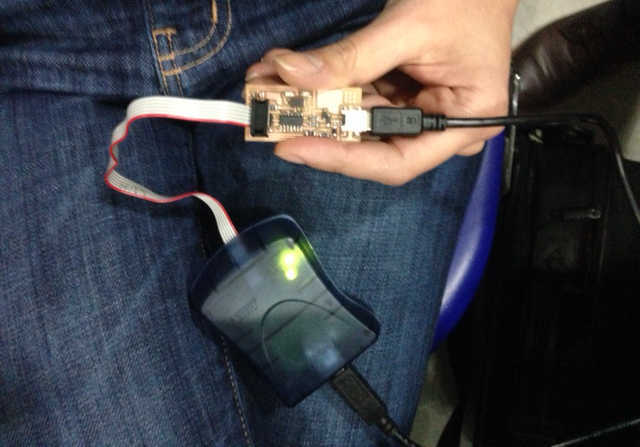
    To program the PCB it is necessary to install the AVR program for the operating system and download the FabISP Firmware folder. Then I Plugged the mini USB connector for the FabISP into my computer and separatly plugged the programmer that is connected to the 6-pin programming header to the computer as well.

    On the command window :

  • Make clean
  • make hex
  • make fuse
  • make program
  • If the light is green, the FabISP should be programmed and ready to be used.

    Smiley face

    After following these step, I had to connect the FabISP to another computer to verify that it is working correctly.

    And finally the last step is to remove the 0 ohm resistor and start progamming other boards !!!

    Smiley face

    The following tutorial was a lot of help for the programing: programming tutorial

    Fabacademy.org | Copyright © pamelachami | Design by pch