Learning Kokopelli
Milling
Orders and procedures introducer.
Some microcontrollers could be programmed while installed, they are called
"In-system programmer" or ISP. There are many ISP protocols, we will use
the AVR developed by Atmel because all the microcontrollers that we will
use are Atmel.
During the Fab Academy we will perform several electronic circuits and
they will needed to be programmed the microcontroller to perform actions
between the inputs and outputs. The ISP will allow us to program a
microcontroller.
During this week we will get used to several tools available on the Fab
Lab: Kokopelli software, Model, Soldering, etc.
Make the FabISP in-circuit programmer.
Download hello.ISP.44 files from Fab Academy web page,
get used to Kokopelli, learn how to mill a Printed Circuit Board (PCB)
on Modela MDX-20, learn how to soldering components and installing firmware.
Content (linked):
Assignment:
FAB ISP TUTORIAL
On Fab Academy web page, there are several alternatives ISP.
I have chosen Neil's ISP (hello.ISP.44) for two reasons:
1. It seems easier to solder than others.
2. I prefer to connect the ISP by an USB cable, in order to have all PCBs
far from my PC and the ISP full supported on the table.
According to Anna Kaziunas, Neil's hello.ISP.44 is based on David Mellis's
FabISP wich is based on USBTinyISP, wich is based on Dick Streefland's
Atmel USBtiny.
There is a new file extention that I have ever seen, used at Fab Academy
(.cad):
This file extention belongs to Kokopelli. With Kokopelli you can edit
a PCB through code lines. It is developed by Matt Keeter and Neil
Gerghenfeld.
A basic Kokopelli tutorial
here.
If you know how it works Kokopelli, you will need just the file.cad, becouse
traces, components and interior are made from file.cad:
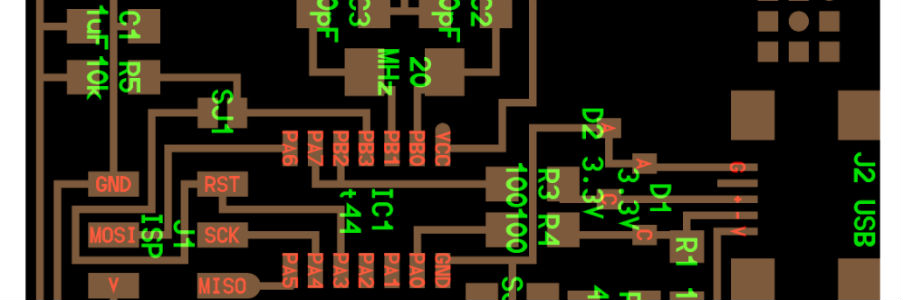
hello.ISP.44.cad
board
components
traces
interior
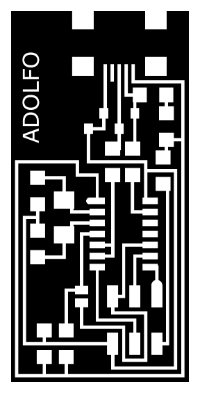
I had edit the hello.ISP.44.png and add my name. I've tried
to mill it but I couldn't. Then I come back to Neil's PCB traces.
After all, I realize that while editing, I have reduced resolution very
much and that were not good for Modela. This is something to consider!
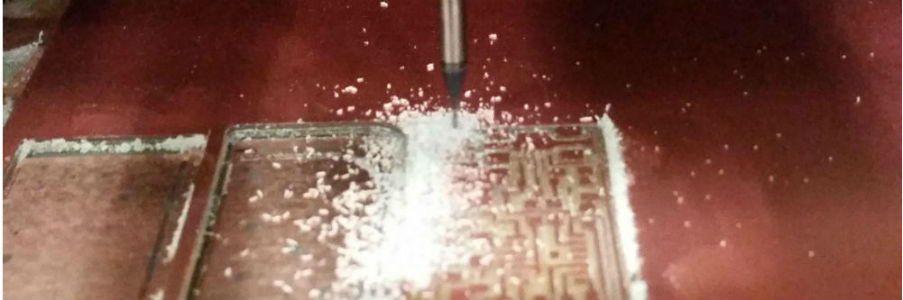
First, open the fab modules:
a.- Open a terminal
b.- Tape: fab
c.- Choose Roland Modela
d.- Input format: image (.png)
e.- Output: Roland MDX-20 mill (.rml)
Settings on fab modules Roland MDX-20 for traces:
f.- Mill traces: (1/64)
g.- Load.png: hello.ISP.44.traces.png
h.- Offsets:4 z(mm):-0.5
i.- Make path
j.- Make.rml
k.- Check: total size, zero point (move to xmin, ymin).
l.- send it!
Settings on fab modules Roland MDX-20 for interior:
f.- Mill traces: (1/32)
g.- Load.png: hello.ISP.44.interior.png
h.- Offsets:1 z(mm):-1.5
i.- Make path
j.- Make.rml
k.- Check: total size, zero point (move to xmin, ymin).
l.- send it!
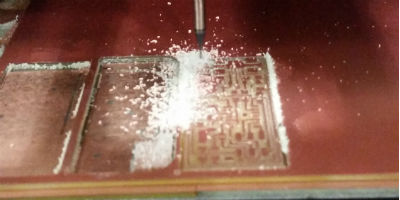
Chect list to work with Modela:
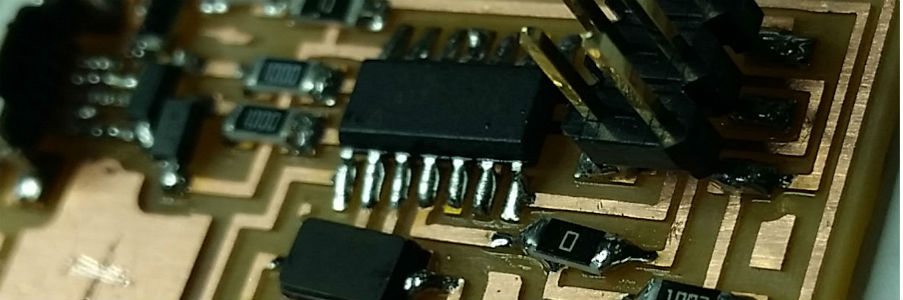
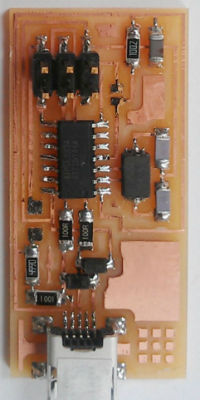
Solder the components on the PCB with tin thread using an iron.
This is very manual step. You will need be handy with iron and tin thread
to solder all the components on PCB right. Practice is caught after a while.
AVR is the protocol used in Atmel, so this will be the very first to do:
installing AVR on my PC.
I have followed this
tutorial.
Here it is my FabISP finished.
