
Screen, keyboard and mouse
When we think in a interface, probably is something that you can interact
with the computer screen, keyboard or/and mouse.
Step by step, new interfaces are ready to use. Sensitive, olor, touch,
or combination of anyone. Let's work with the classic interfaces: screen
and buttons.
Show a LED blinking, blink at the same time a screen green window, push a button and change the blinking frequency in both.
Content (linked):
Assignment:
Blink red and green
First step is to program a board (used in week 6) with arduino.
I wish that a led blink slowly and when a push a button, blink faster.
Finally, send via seria a "n" if the button is "not pushed" and send a
"p" if the button is pushed.
Easy script.
At Processing, I wish that open a window and change the background color
depens on the character coming from serial port. Change to green background
color when the red led is blinking.
Finally, de effect is:
- Green window and Red LED blink at the same time
- The blinking frequency depen on the button.
Let's work!
Description:
First I included software serial in order to communicate via serial port.
Then, define mySerial as Serial and activate input and desactivate output.
Defined LED and Button pins and inicialize button state as "off".
Start using serial at 9600 rate and defining ledpin as output and buttonpin
as input.
Inside the void loop I code a infinite loop, reading the button. If button
is on then blink fast the LED and send a "p" throught serial port. If button
is off (not pressed) then blink slowly the LED and send a "n" via serial
port.
Description:
First import processing serial library. Open a window 640x360, define
myPort as the serial port used.
Capture string value from serial port, if value is "n" then change color.
That will produce a blink everytime blink the LED on the board.
In this video you can see how it works on the PC screen processing software.
The PCB is connected via serial port (FTDI) to the Lap Top.
You can see the ISP connected too, while it was been programming the microcontroller.
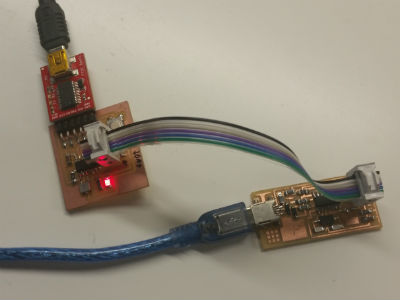
This is all in action!