C o n t a c t F a c e b o o k S k y p e I n s t a g r a m P i n t e r e s t H o m e
08. Embedded programming
Read a microcontroller data sheet and program your board to do something, with as many different programming languages and programming environments as possible
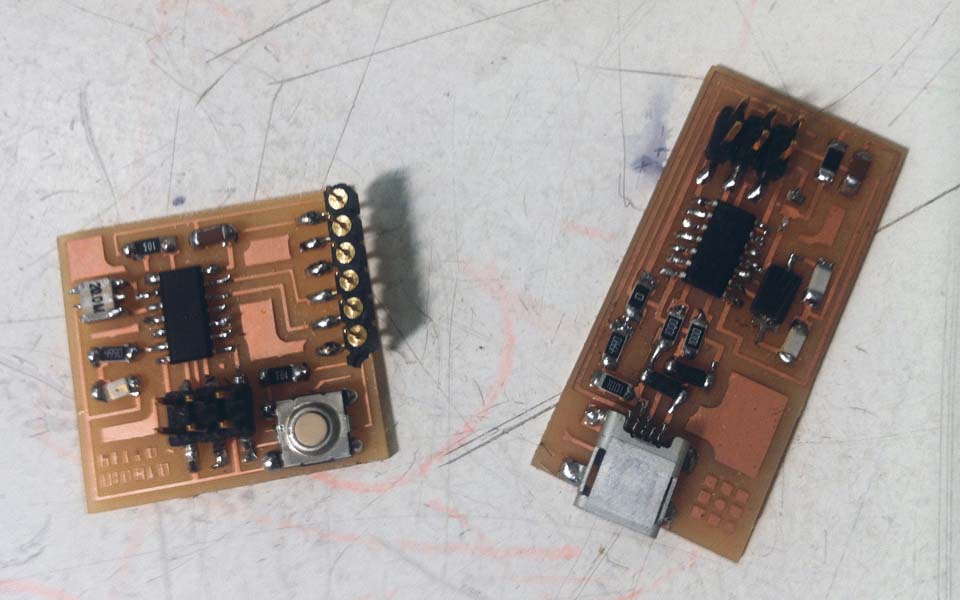
For this assignment, the FabISP that was made in Week .04 and the modified HelloEcho board made in Week .06 will be required. Now we will used these stuffed boards to program them in order to do something. In addition to these boards, a some softwares will need to be installed. The softwares necessary for programming can be found at the following links:
Arduino IDE software
ATtiny Board files
FTDI drivers
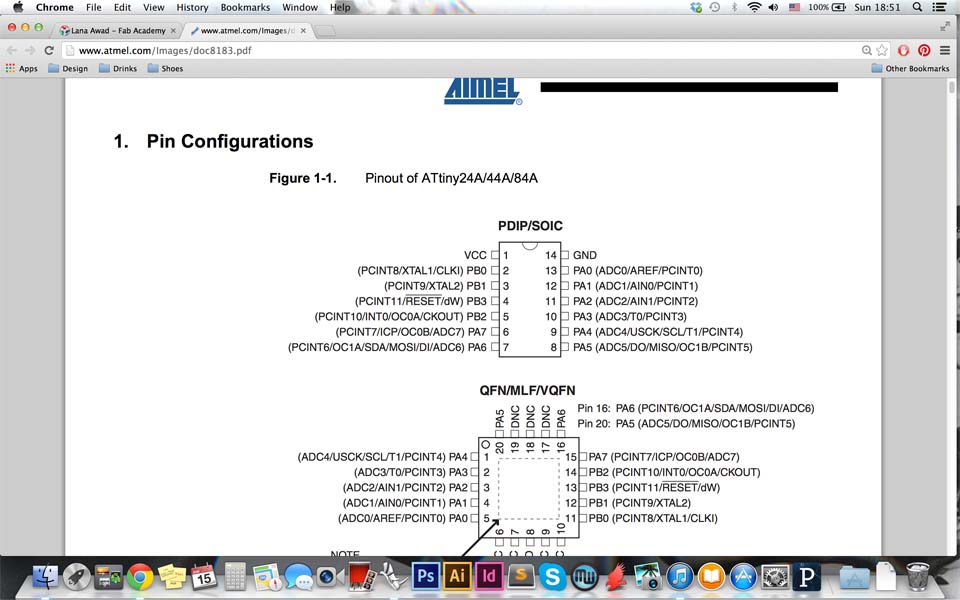
In addition to programming the board, it is also necessary to learn how to read a microcontroller data sheet. For the modified HelloEcho board, its necessary to reference the ATtiny 44A microcontroller datasheet. This datasheet is very informative in understanding how the pinouts on this microcontroller work and how they relate to a standard Arduino pinout.
Once the necessary softwares have been downloaded the installed, the ATtiny will need to be powered and connected to the FabISP. The modified HelloEcho board will be powered by the FTDI cable connecting to the computer and a 6 pin header connector will connect the FabISP to the modified HelloEcho board. Now the board is ready to be configured.
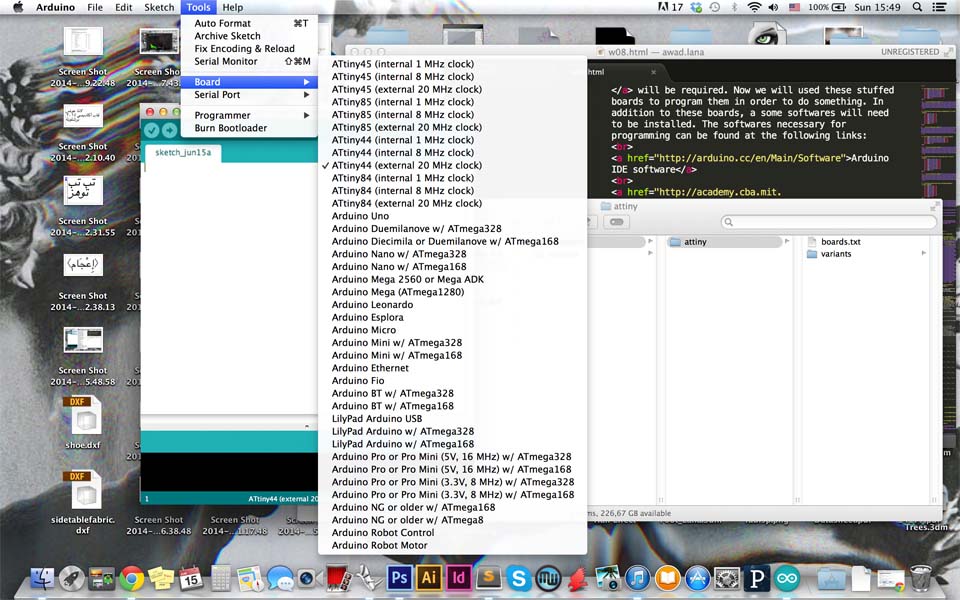
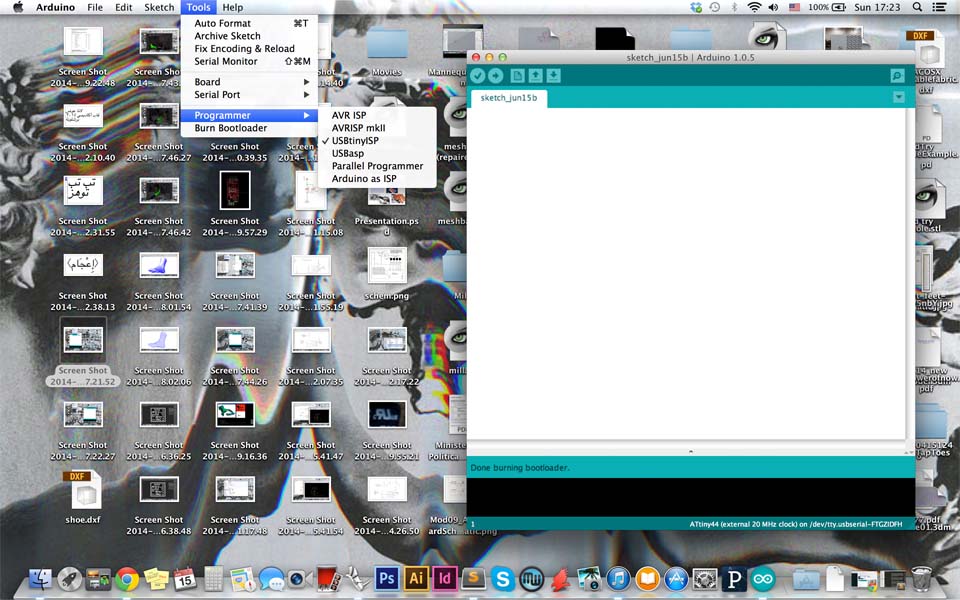
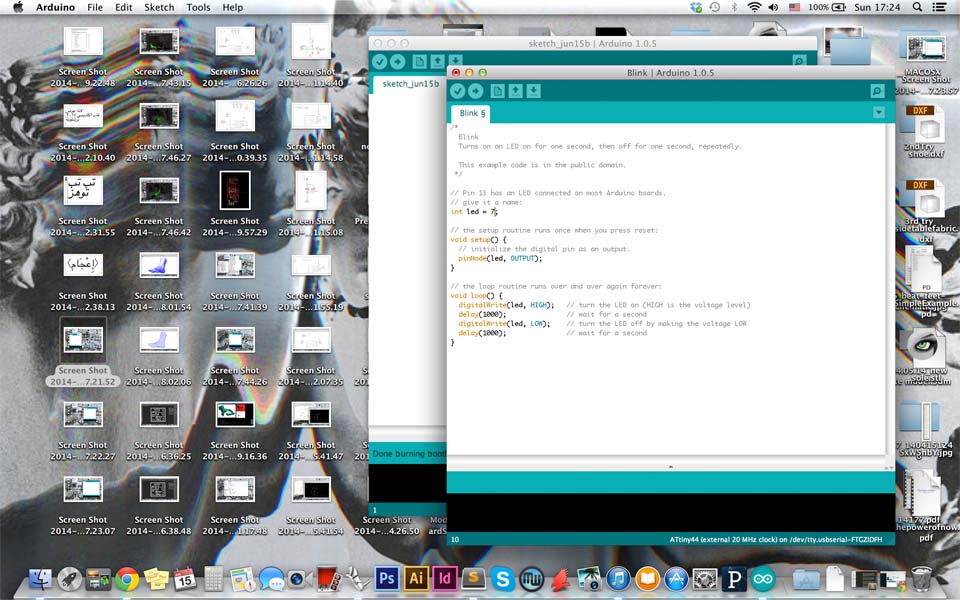
Open Arduino and set the board by going into Tools > Board > ATtiny44 (20 Mhz Clock). Then the programmer needs to be selected under the Tools > Programmer > USBtinyISP. Once the board and the programmer have been set, the board is ready to be programmed. To do so, go to Tools > Burn Bootloader.
To upload a program onto the board, refer back to the pinout schematic for the ATtiny44A from the datasheet to know which pins correspond to which ATtiny44 pins. From these diagrams, it's clear that the LED pin is connected to pin 7 and the button pin is connected to pin 3. This is vital information in order to modify an Arduino code to work onto an ATtiny microcontroller.
The simple blink sketch example on the Arduino IDE will be modified and uploaded onto the modified HelloeEcho board. To do so, first open the Simple Blink sketch from the examples menu by going into File > Examples > 01. Basics > Blink. To modify this sketch so that it works on an ATtiny44, the int led = 13 needs to be changed to match the corresponding pin number of the ATtiny44 pinout schematic, in this case: 7. Once the pin number has been modified, the code is uploaded through the upload button in the top-left corner on the IDE. The LED blinks on and off every 1 second, as programmed by the sketch.
Download the corresponding files here.