
HOME
ASSIGMENTS
CONTACT
DOWNLOAD FILES
FINAL
PROJECT
Input Device
Testing Arduino + Processing
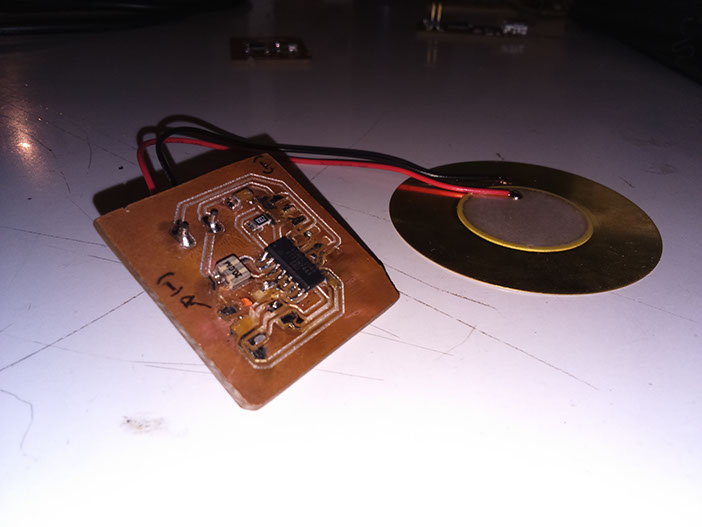
Initially my plan was to implement a piezoelectric sensor to convert the pulse or percussion into a digital signal so Processing can become them in audible musical notes, the idea was to define a range of input data and translate it in a tonal register to compose melodies capturing the vibration of the objects.
> In this video I simulate a possible program with a potentiometer:
Fail 1
Fail 2
Hello.Light
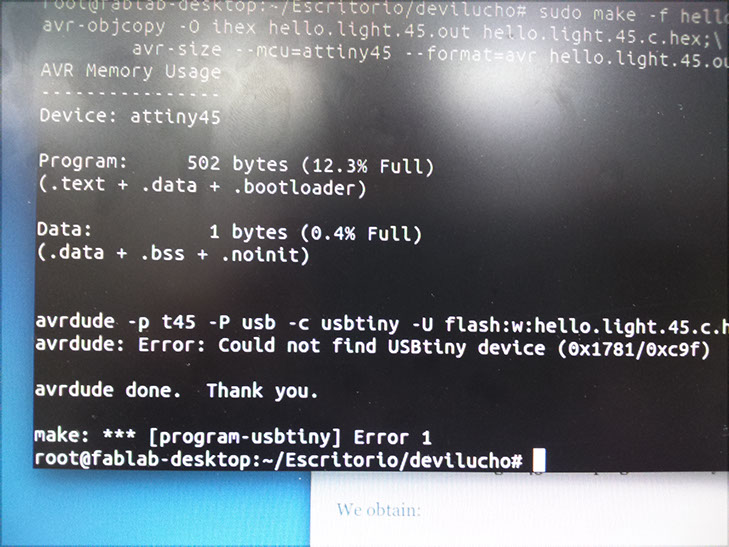
Burning the program in Ubuntu
1. Download “.c” and “.make” files HERE
2. Open terminal
3. Log in as root
4. Go to the carpet with de downloaded files
5. Enter: sudo make -f hello.light.45.make program-usbtiny
6. Enter: avrdude -p t45 -c usbtiny -U flash:w:hello.light.45.c.hex
7. Enter: sudo make -f hello.light.45.make program-usbtiny
This is the first code, it works with arduino using the Analog Inpot (A0):
int datoRead, datoWrite=0;
void setup() {
// put your setup code here, to run once:
Serial.begin(9600);
}
void loop() {
// put your main code here, to run repeatedly:
for(int x = 0 ; x<10; x++)
{datoRead = analogRead(A0);
datoWrite= datoWrite + map(datoRead, 0, 1023,10, 110);
}
datoWrite = datoWrite/10;
Serial.write(0);
Serial.write(datoWrite);
delay (50);
datoWrite=0;
}
This code is from the Fabber Michael Hurtado, he made the Academy in 2014:
import arb.soundcipher.*;
import arb.soundcipher.constants.*;
import processing.serial.*;
Serial myPort; // Create object from Serial class
int val; // Data received from the serial port
int sensorData; // Data recieved from the serial port with 1,2,3,4 framing numbers filtered out
int highVal; //high value read in from Neil's C code
int lowVal; //low value read in from Neil's C code
int actualVal; // adjusted sensor value
float eps = 0.5;
float filter = 0.0;
int NUM_PARTICLES = 200;
float w=500,c;
ParticleSystem p;
SoundCipher sc = new SoundCipher(this);
void setup()
{
smooth();
//size(displayWidth,displayHeight);
size(640,480);
background(0);
p = new ParticleSystem();
strokeWeight(4);
String portName = Serial.list()[0];
myPort = new Serial(this, portName, 9600);
}
void draw()
{
if (myPort.available() > 0) { // If data is available
val = myPort.read(); // read it and store it in val
if (val > 4) { // Filter out the framing numbers: 1,2,3,4
highVal = myPort.read(); // read the high value sent from sensor and store it
lowVal = myPort.read(); // read low value from sensor it and store it
actualVal = 256 * (highVal + lowVal); // getting the actual value of the sensor
filter = (1-eps)*filter + eps*actualVal;
println("The actualVal is " + filter); //print to the screen
}
colorMode(HSB,w);
//c=255*sin(mouseX*mouseY/255);
int d=(int)filter;
c=map(d,0,1024,0,500);
sc.playNote((int)c/10, 100, 2.0);
//println(frameCount);
noStroke();
fill(0,5);
rect(0,0,width,height);
p.update();
p.render();
}
}
class Particle
{
PVector position, velocity;
Particle()
{
position = new PVector(random(width),random(height));
velocity = new PVector();
}
void update()
{
velocity.x = 20*(noise(filter/10+position.y/100)-0.5);
velocity.y = 20*(noise(filter/10+position.x/100)-0.5);
position.add(velocity);
if(position.x<0)position.x+=width;
if(position.x>width)position.x-=width;
if(position.y<0)position.y+=height;
if(position.y>height)position.y-=height;
}
void render()
{
stroke(c,w,w);
line(position.x,position.y,position.x-velocity.x,position.y-velocity.y);
}
}
class ParticleSystem
{
Particle[] particles;
ParticleSystem()
{
particles = new Particle[NUM_PARTICLES];
for(int i = 0; i < NUM_PARTICLES; i++)
{
particles[i]= new Particle();
}
}
void update()
{
for(int i = 0; i < NUM_PARTICLES; i++)
{
particles[i].update();
}
}
void render()
{
for(int i = 0; i < NUM_PARTICLES; i++)
{
particles[i].render();
}
}
}
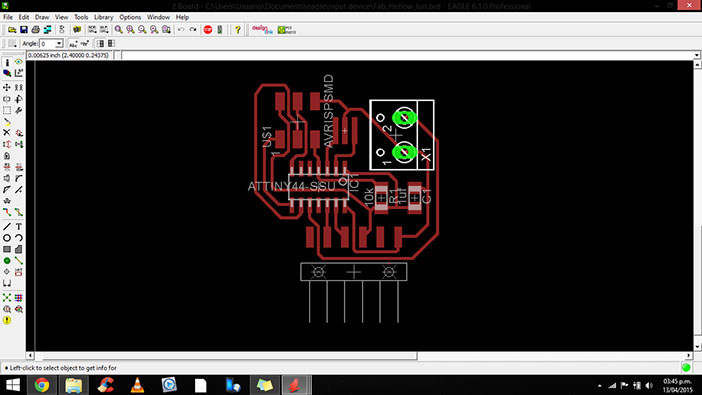
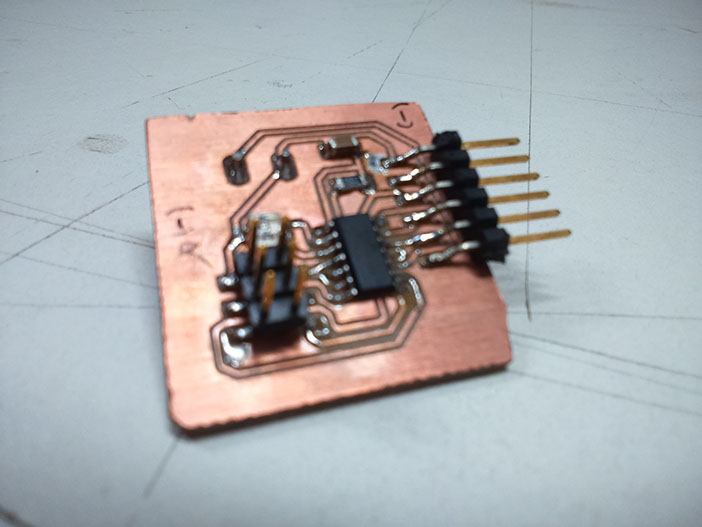
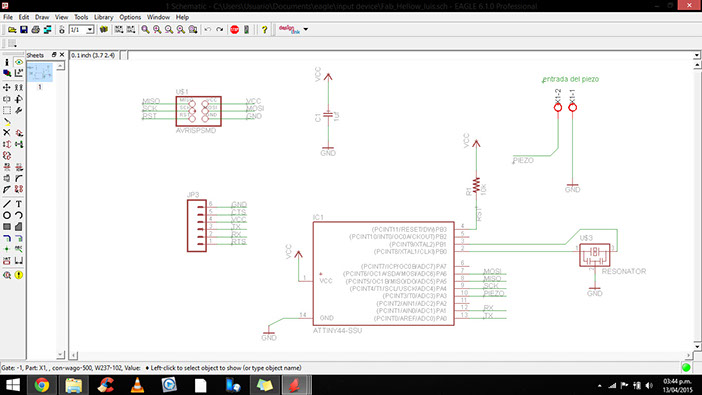
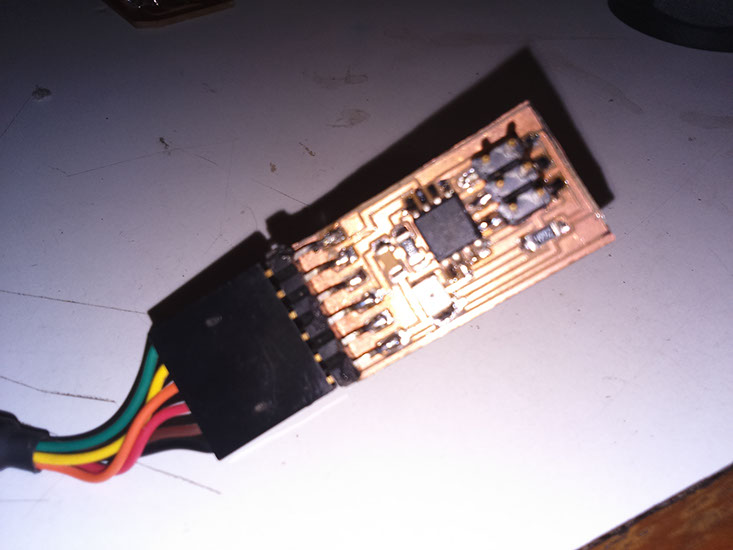
Using the knowledge gained in previous assignments, I started to mill the plate previously designed in Eagle, once replaced the potentiometer with the piezoelectric and changed the pin arrangement of the analog inputs for the corresponding pins of Attiny44, the program arduino doesn´t burned the program, then found out that Attiny44 has no serial communication library for that reason Processing could not read the sensor data.
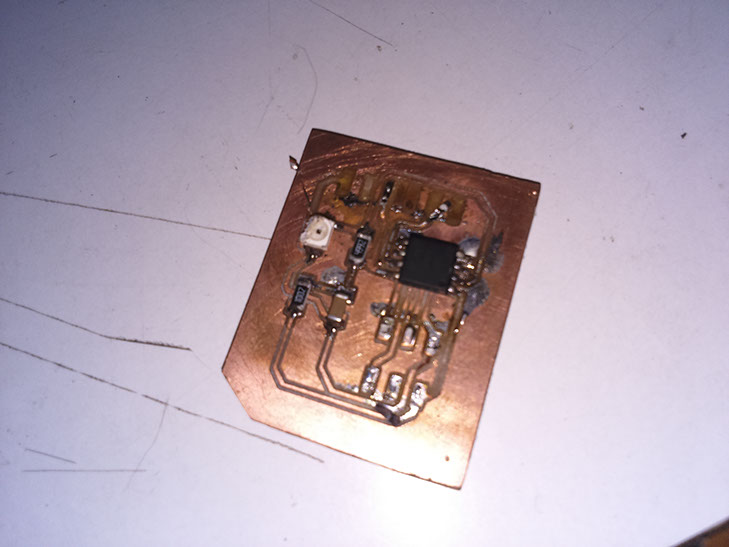
Disappointed and eventually decided against designing a variant of the routing of Hello.Light examples of allocation, great was my surprise when I noticed that confused the value paw Reset the ATtiny45, and for that reason I had problems because again the board did not burn
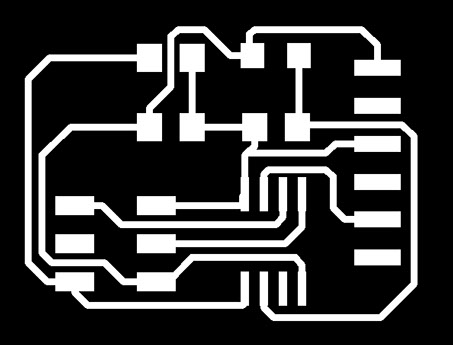
Finally I decided to replicate the light sensor of the examples of the assignment, I proceeded to download the routing and other files from the page of Fab Academy.
Processing
Video