Computer-Aided Design
Project Representation
This week´s assigment consisted in representate our design in diferent 3D and 2D softwares.
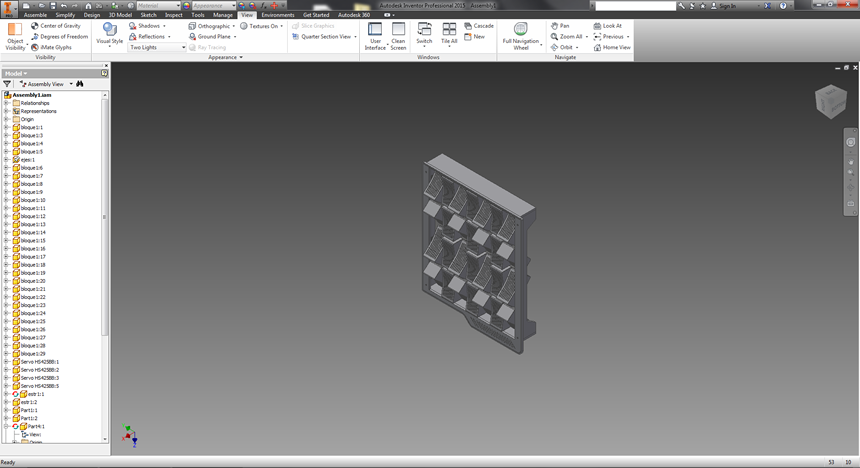
Last week i was already experimenting with the software Rhinoceros for modeling my proposal this week i started by modeling my project on Autodesk Inventor a realy good software for mechanical design, i chose this one because i needed to simulate some movements, what is realy easy whith inventor´s constrains.
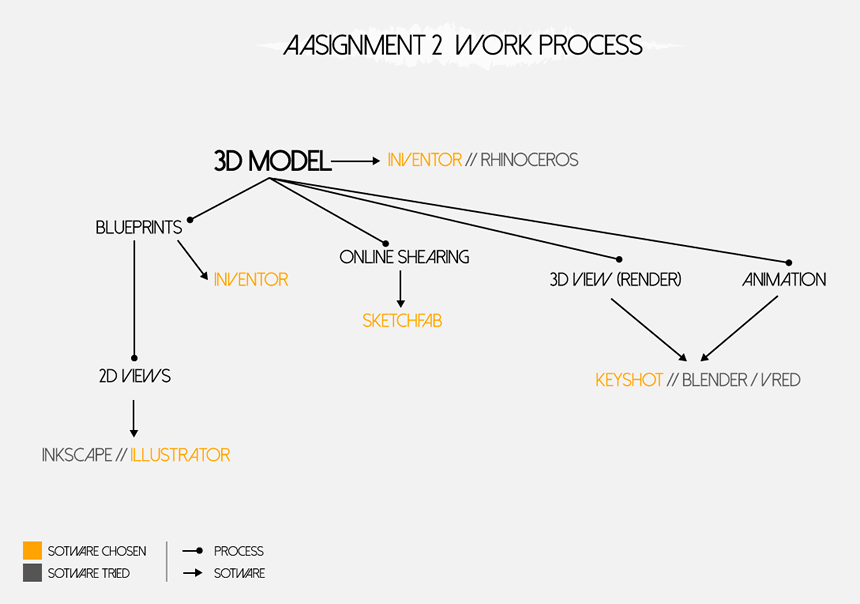
Im trying a diferent mechanism than the one i proposed last week, the software was realy helpfull and easy to use for achiving what i wanted to representate, the main diference whith this software an rhinoceros is the way of work in inventor you work the parts on independent files then you assembly them on an assembly file by adding constraints, in rhinoceros you work on the same file and environment with al the pieces.
Here is a link to an Inventor's tutorial
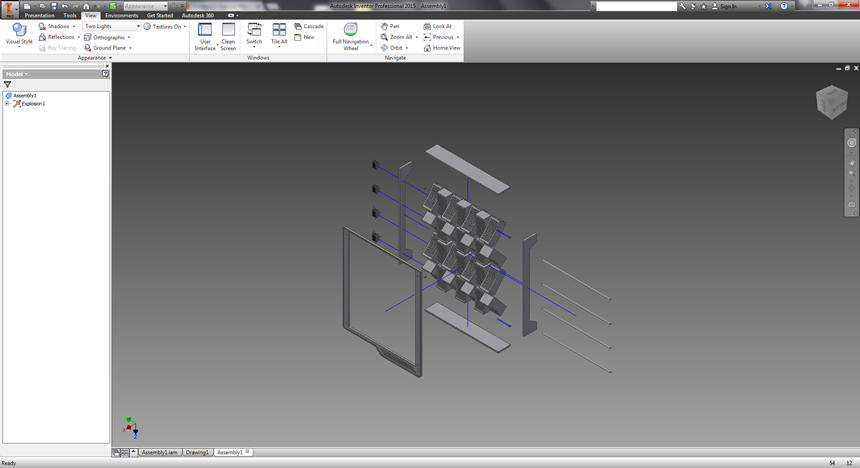
Then for transforming this 3D model to a visual representation y tried diferent ways, first with the inventor's built-in utility for blueprints i got some 2D diedric views and a exploded one, next i exported the file to PDF (save the lines like vectors), and opened in a vector editor software i tried Inkscape and Adobe Illustrator, First i tried illustrator and worked realy well, then i tried inkscape but it was runing realy teh file realy slow so i decided to keep working on illustrator, by using this program i had the posibility of editing the 2D views by simply moving the nodes and also to add color to the diferent views.
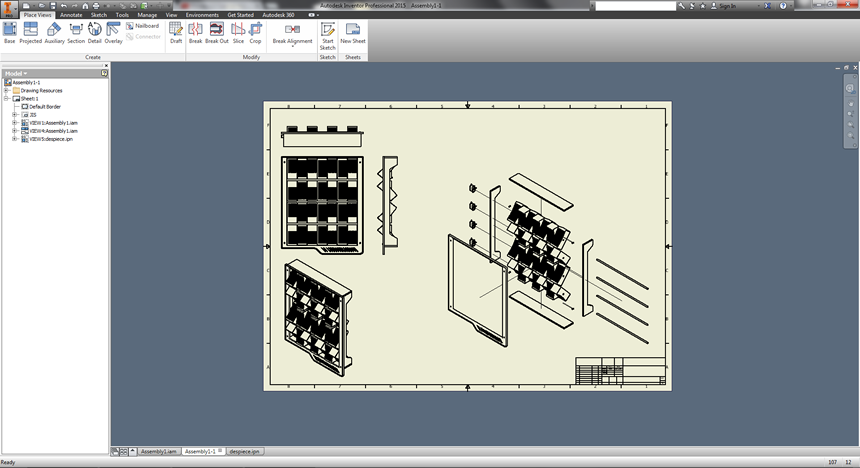
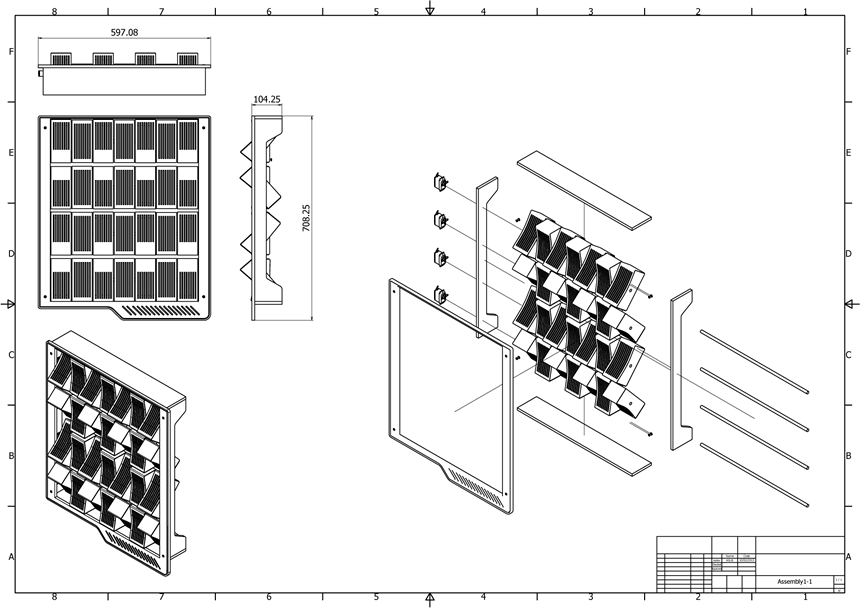 Simple Blueprint.
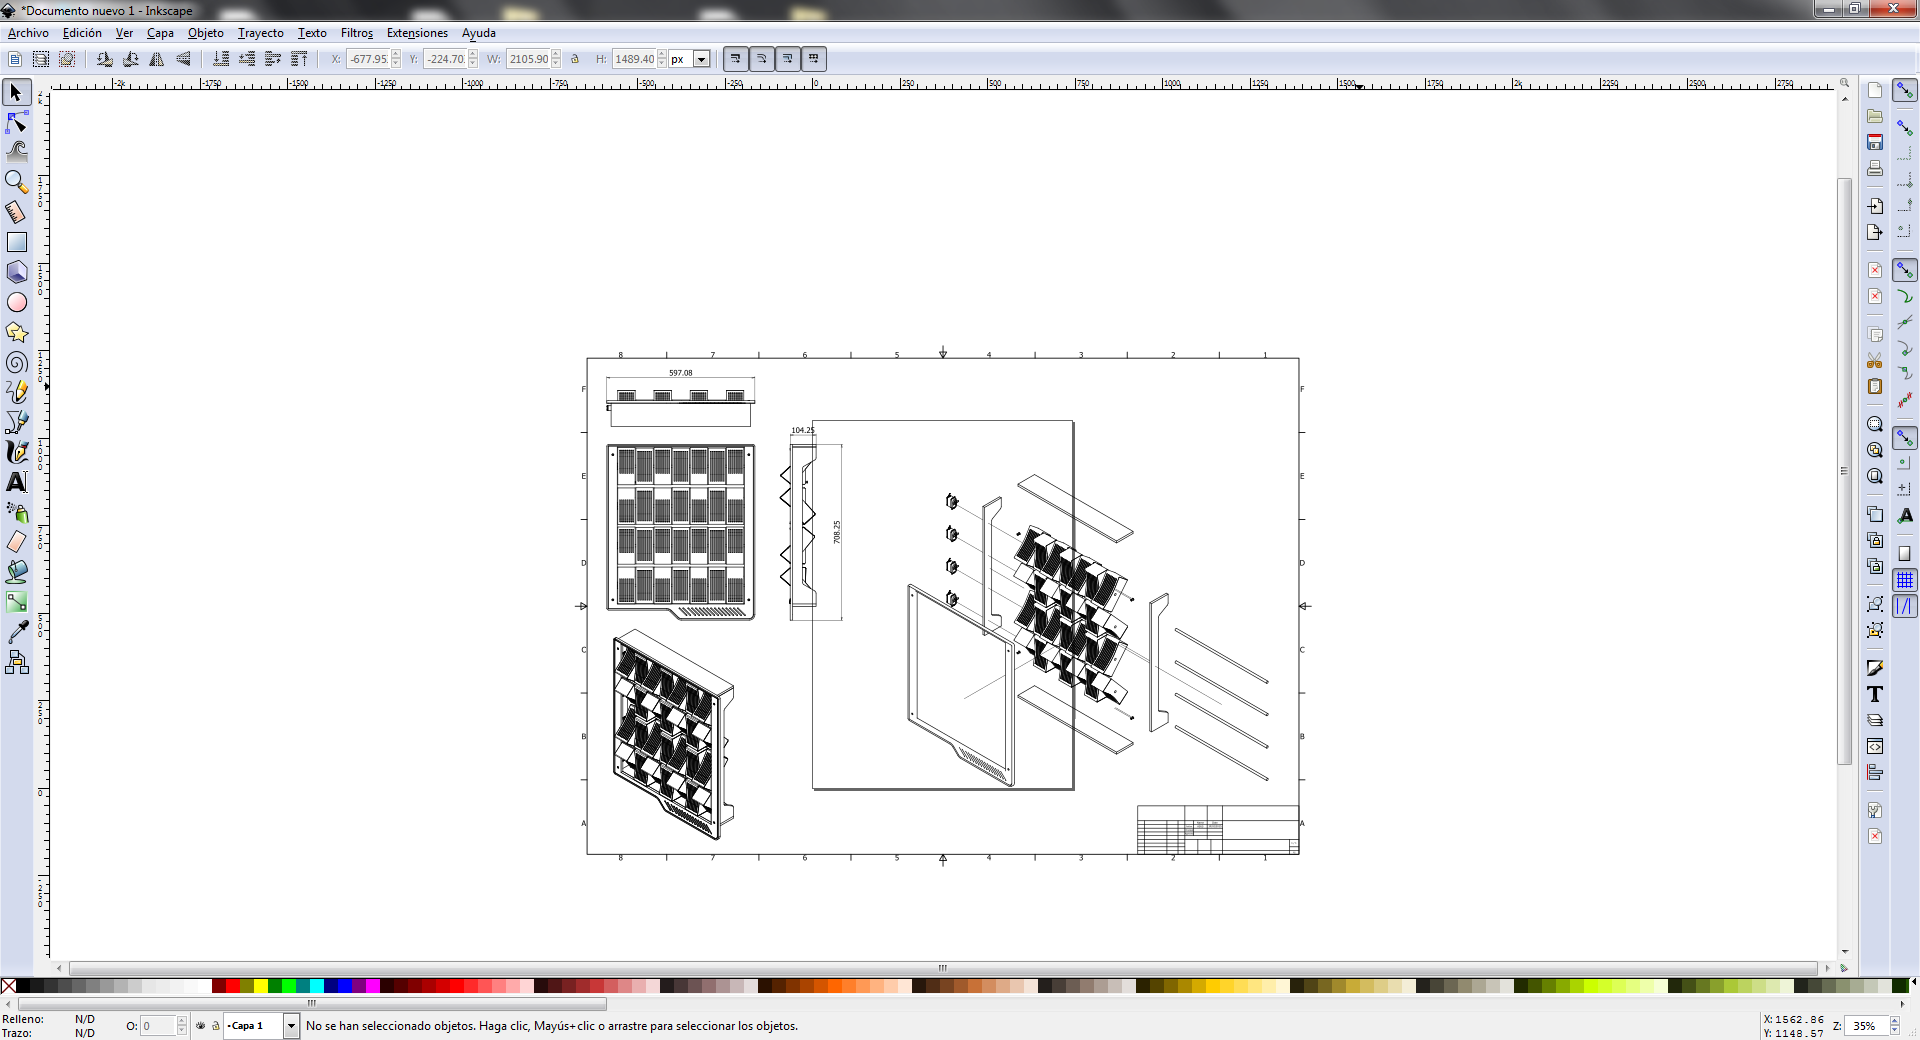
Blueprint opened on Inkscape.
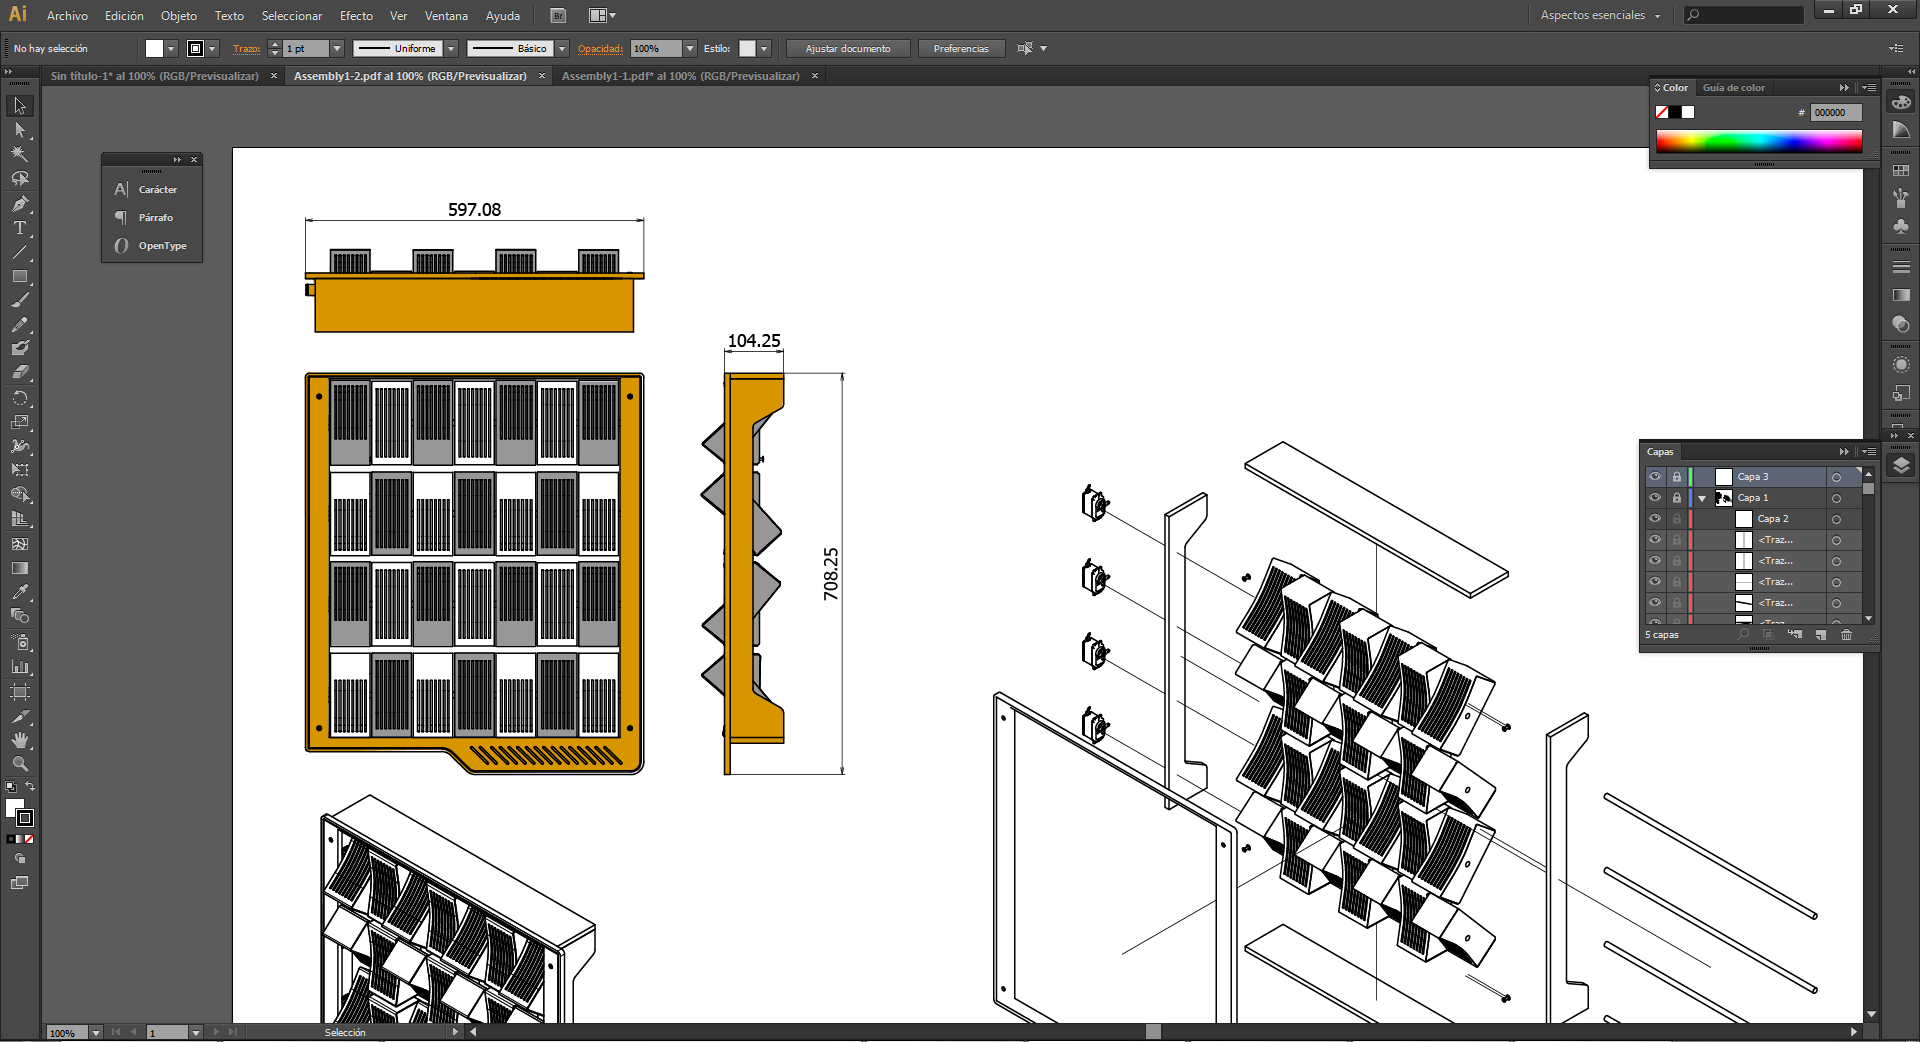 Painting the views on Illustrator.
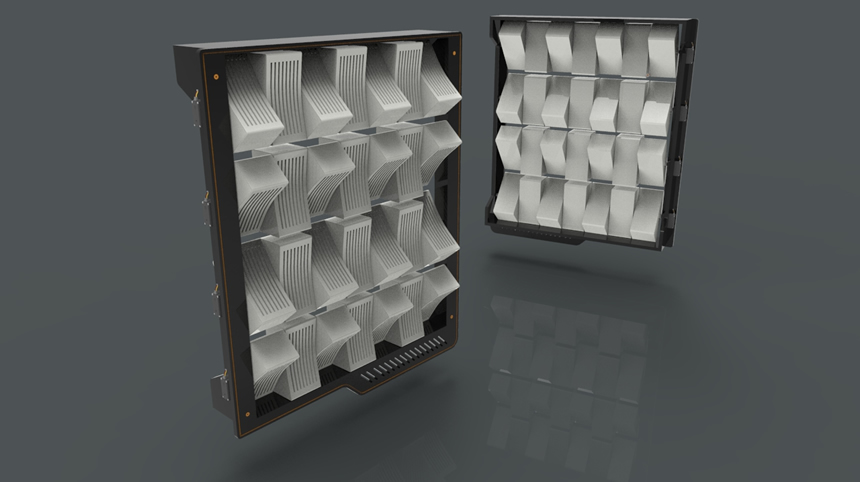
The next way was rendering and animating the 3D model, itried 3 softwares for this part, first i tried keyshot from luxion, and the program is realy easy to use and the resulting renders are also realy good, itried a little blender and VRED from Autodesk but to achive a realy good render the steps were way more complicated, in keyshot you already have materials and environments ready to use, in the other programs yo have to build each material and teh final output is going to be as good as keshot only if know how to work whith the program realy good, so in balance i prefered keyshot. whith this software first i added the materials ,set the lights and color of the environment and adjusted the camera settings for rendering some static views he results were realy good, next i watched some tutorials on youtube an i made an animated simulation of the movement of the panels, i liked the result.
Here is a link to keyshot tutorials
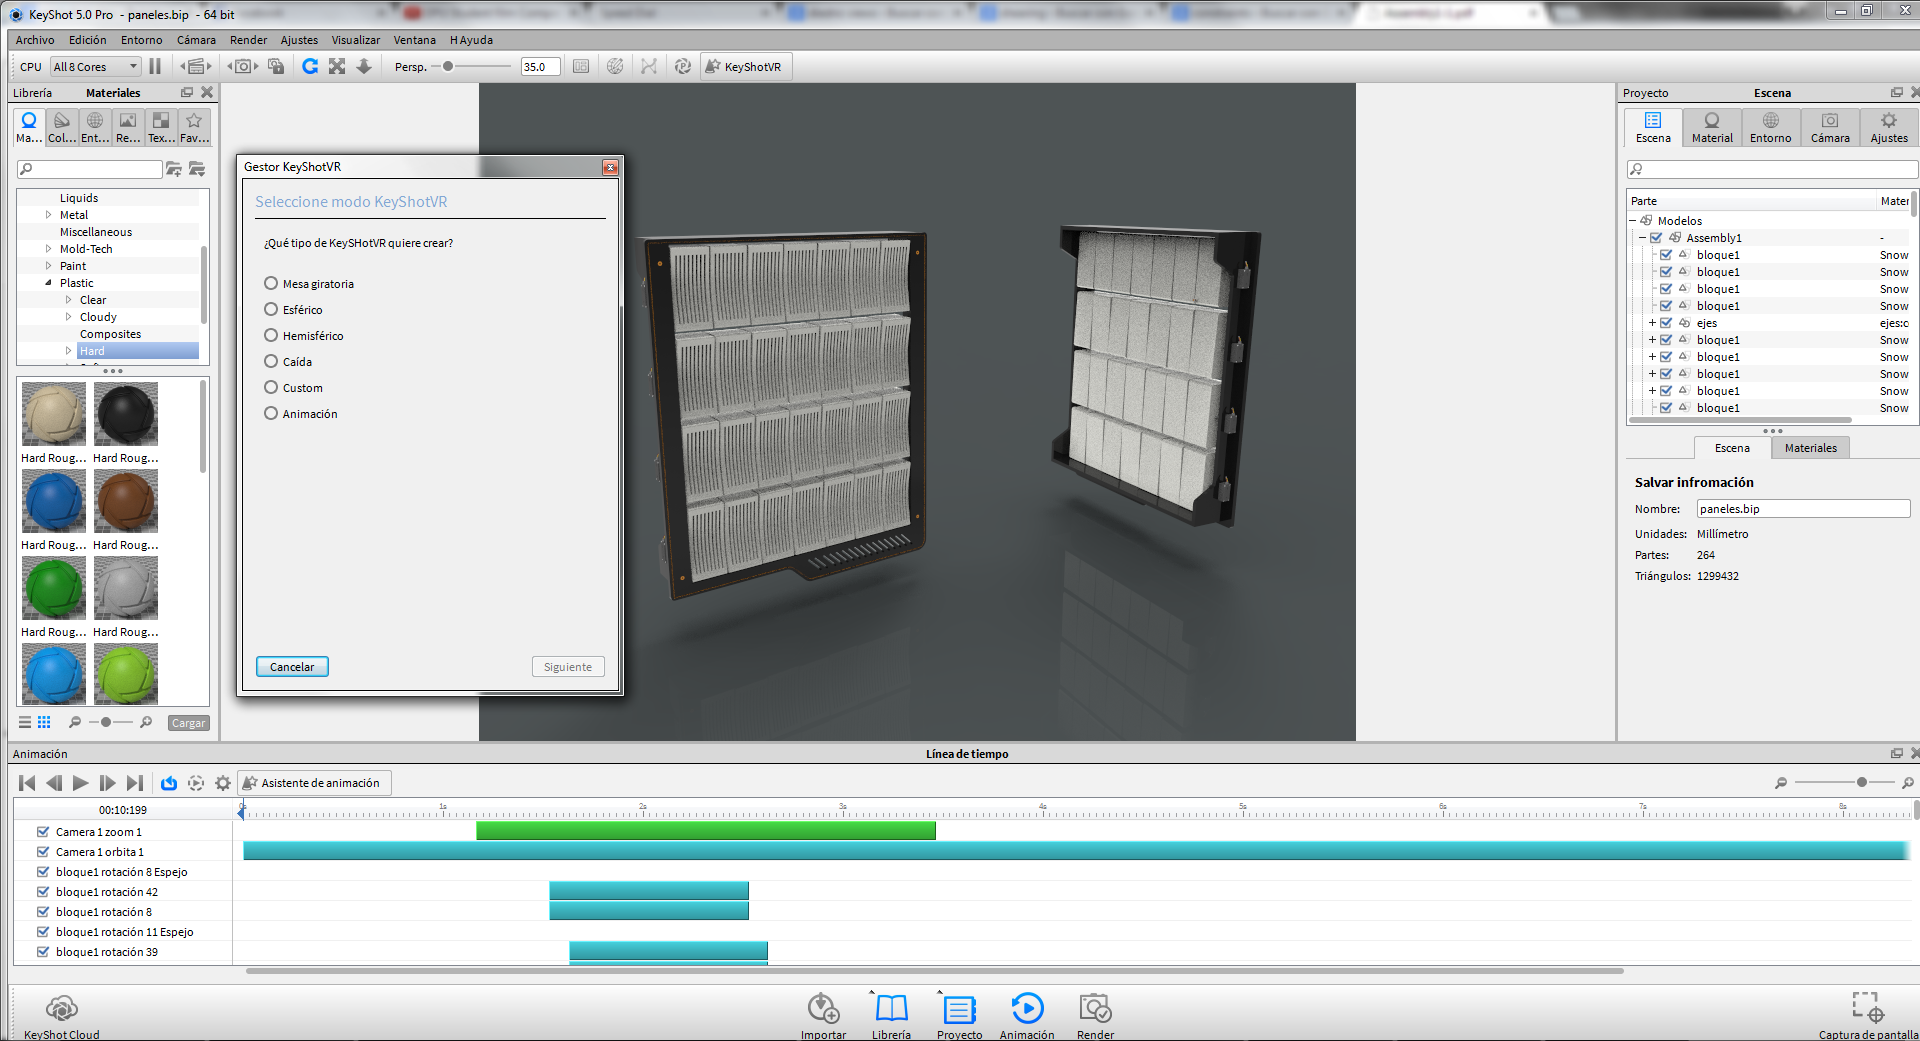 Keyshot Interface
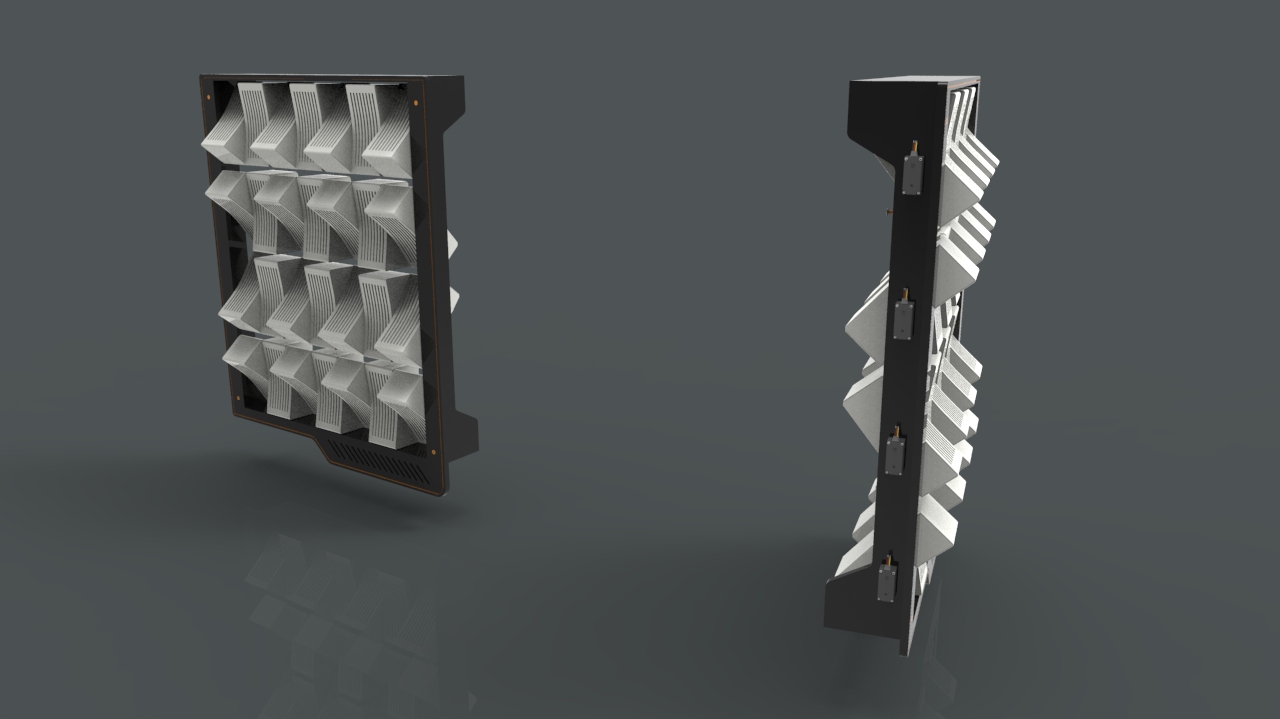 Renders
Keyshot Animation.
Finaly the last way of representing and shearing my proposal was to upload my model to an online aplication for 3D visualization, the aplication is called Sketchfab, is free to use and is realy helpful for shearing your work, to achieve this i exported my 3D model to STEP format and i opened on rinoceros where i exported it in .3DS format, thene i uploaded my model to sketchfab's website (you have to register)
Here is a link to Sketchfab
Acoustic Panels by Wilhelm Schütze on Sketchfab