W4. make a FabISP in-circuit programmer
production (cutting + assembly + soldering + programming)
This week we had to make an Fab ISP programmer, it is our first PCB fabricated in the Fab Lab. First we made a trip to the electronic warehouses to look for the pcb materials and components.
It is not the same model of components but the ones on the list will be arriving soon. We decided to experiment with fabrication of pcb printed circuits to use the SRM-20 and to practice the assembly process.
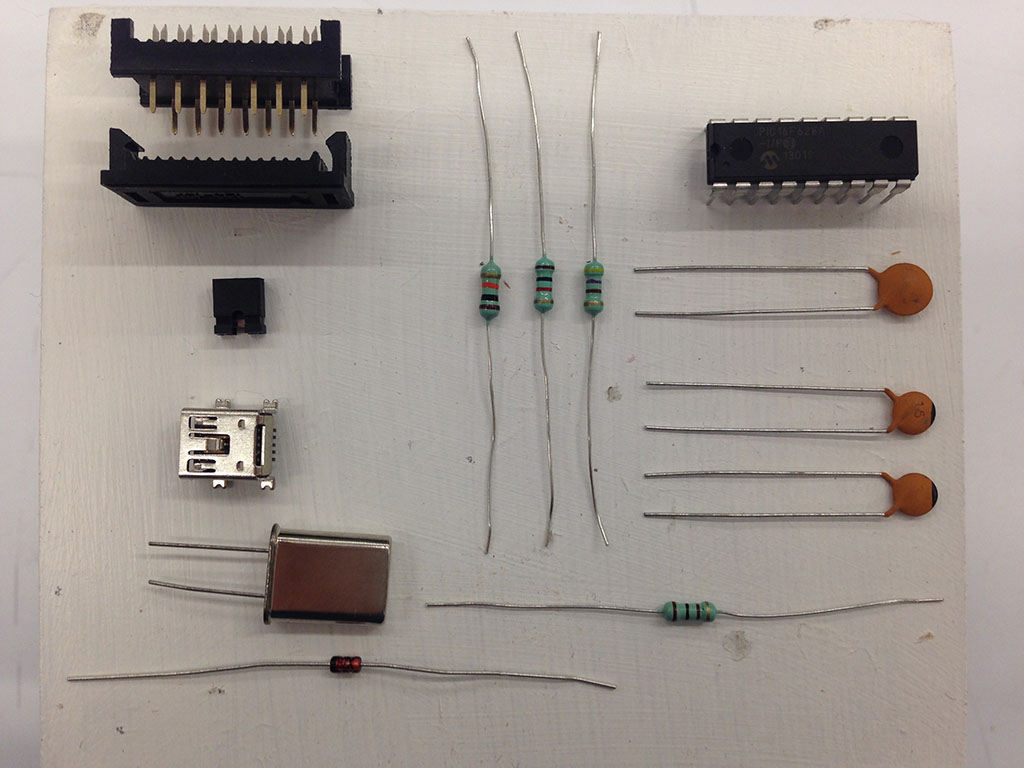
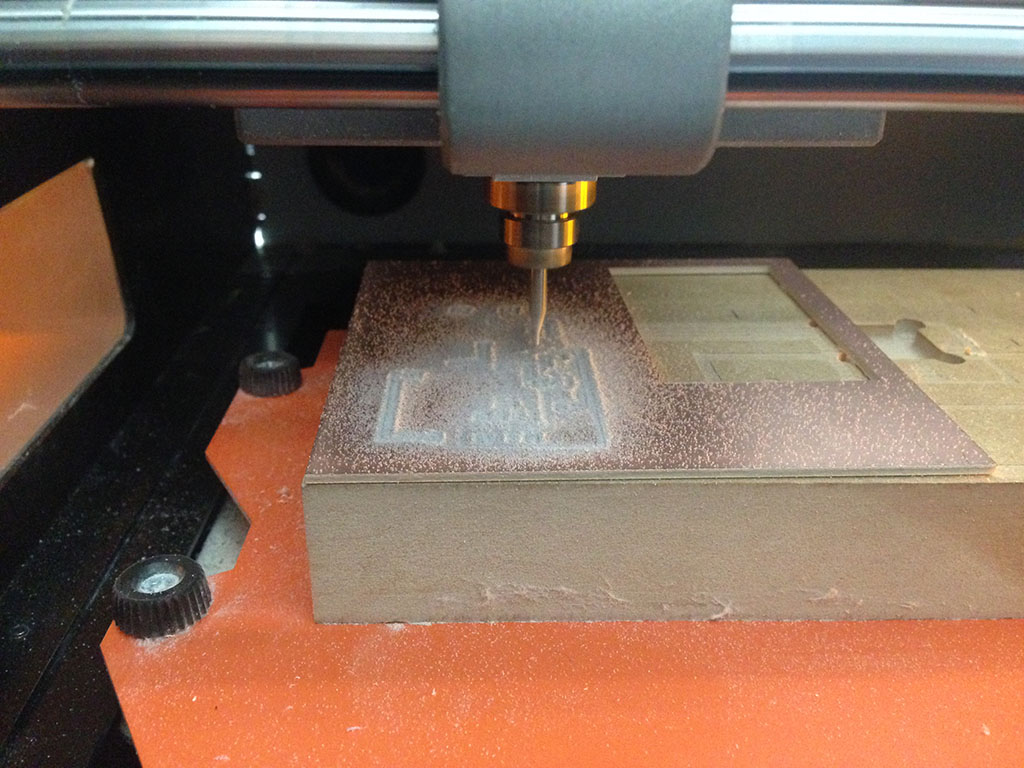
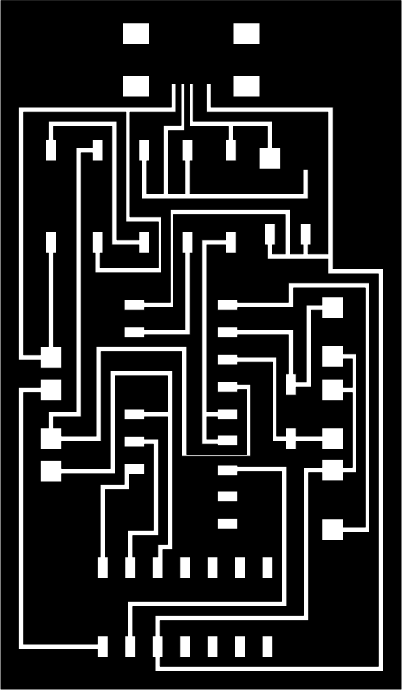
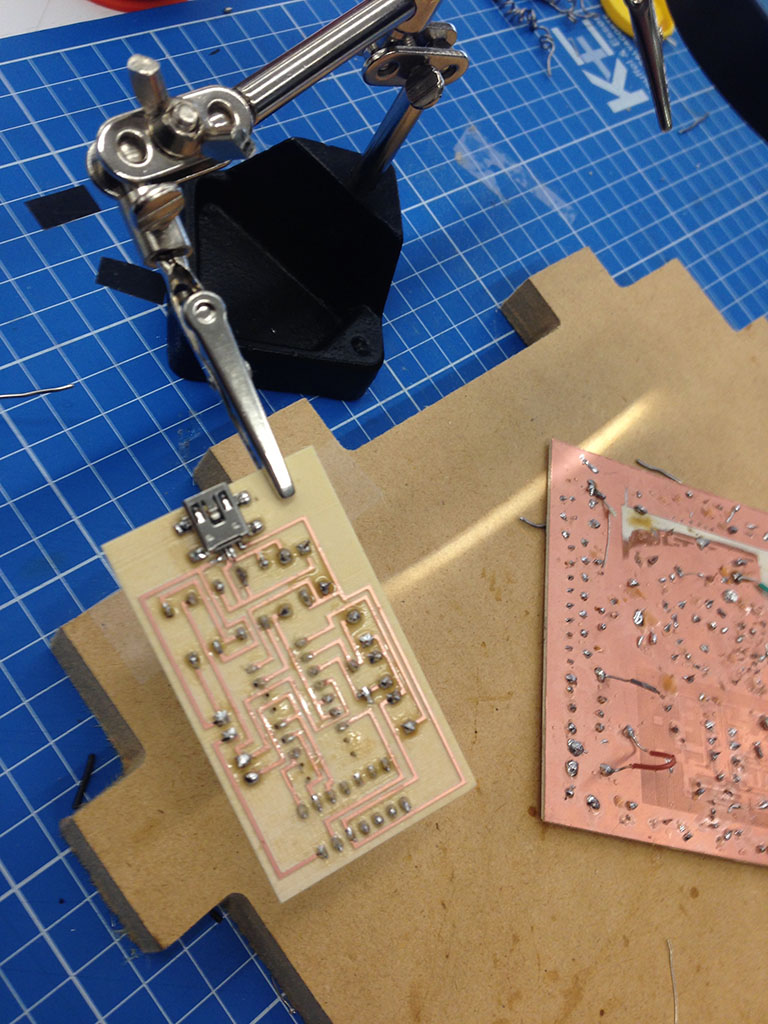
Due to the size and characteristics of the components the circuit had to be redesigned (Fernando Meneses). We tried with the 1/64 ad 1/32 pen knives but after four attemps we decided to use the 1/32″ endmill.
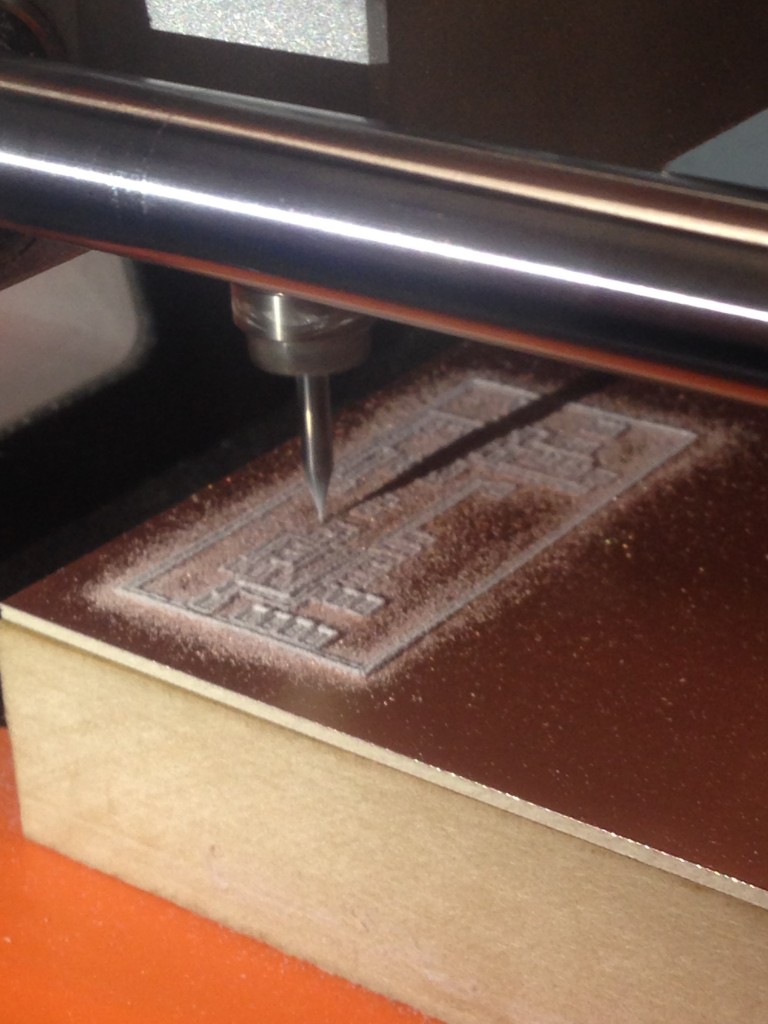
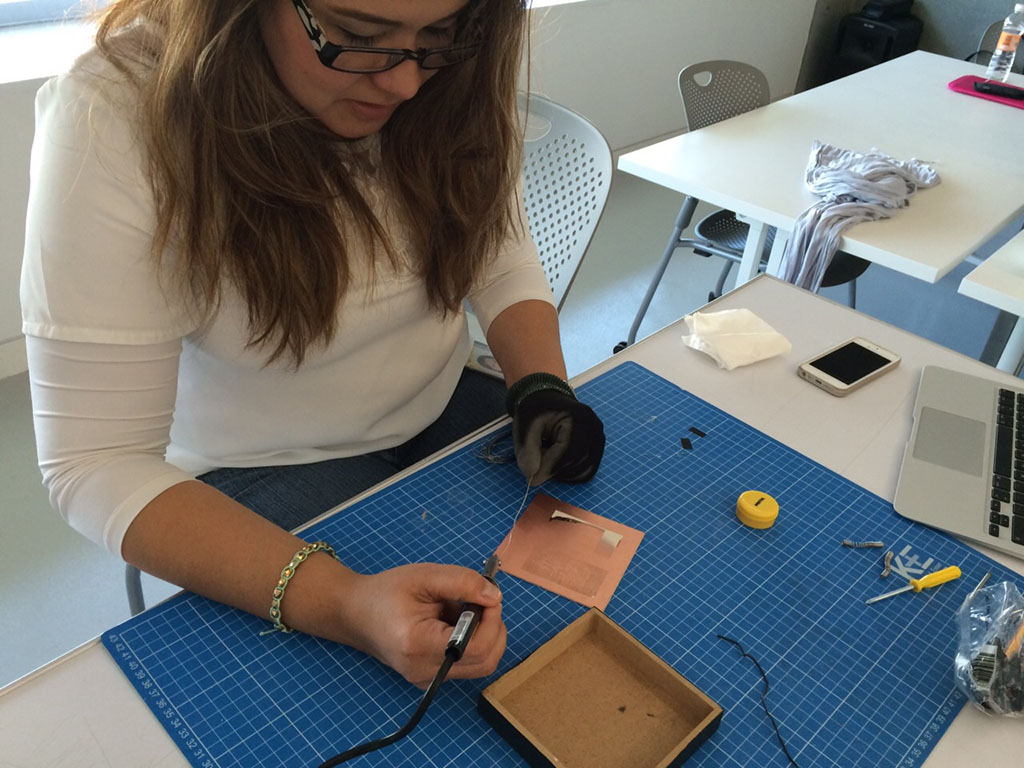
After cutting the circuit lines, drill the holes, scabble the material and cutting the edges, I practiced with the soldering. At first it was difficult but after 1 meter of welding material a pcb looked like this…
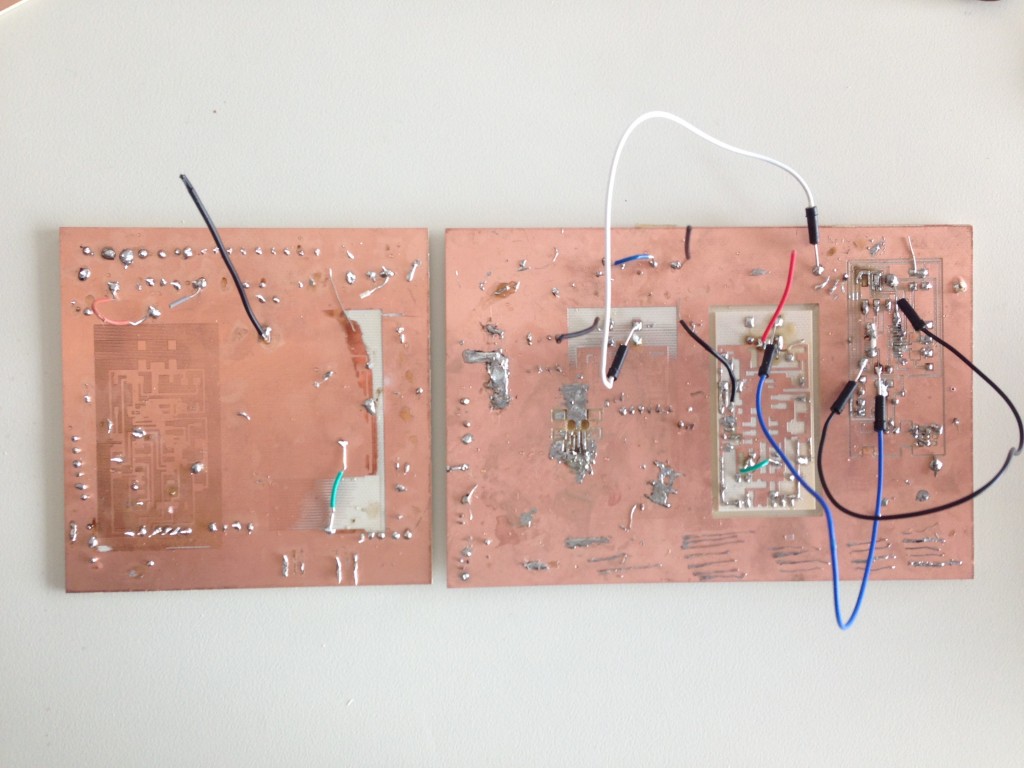


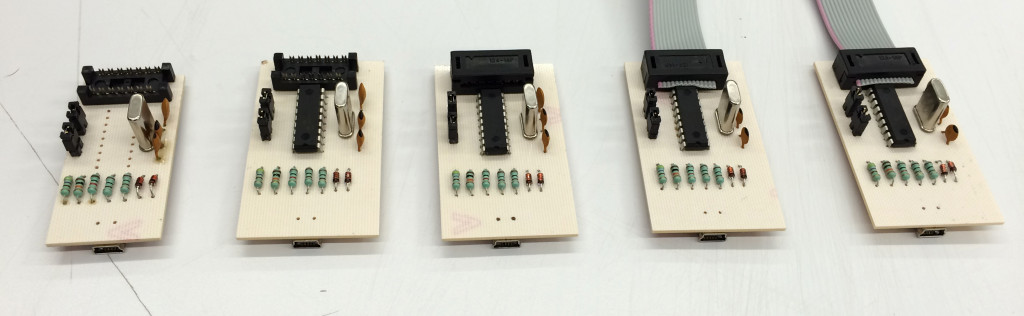
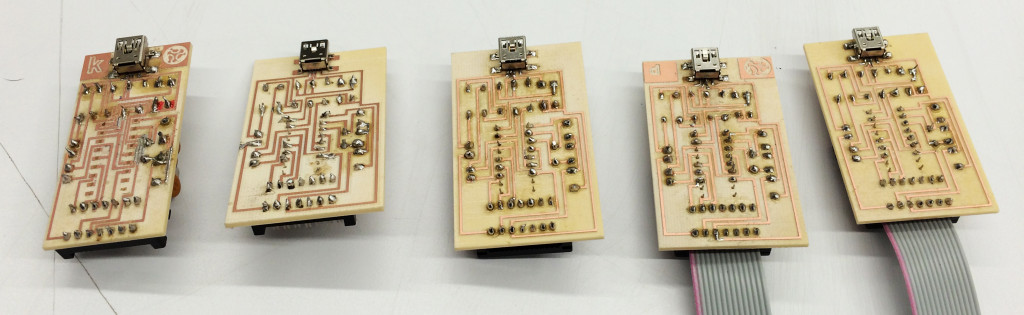
These are the five pcbs that were fabricated by our team (Daniela, Fernando; Patricio, Rafael and me).
updated:
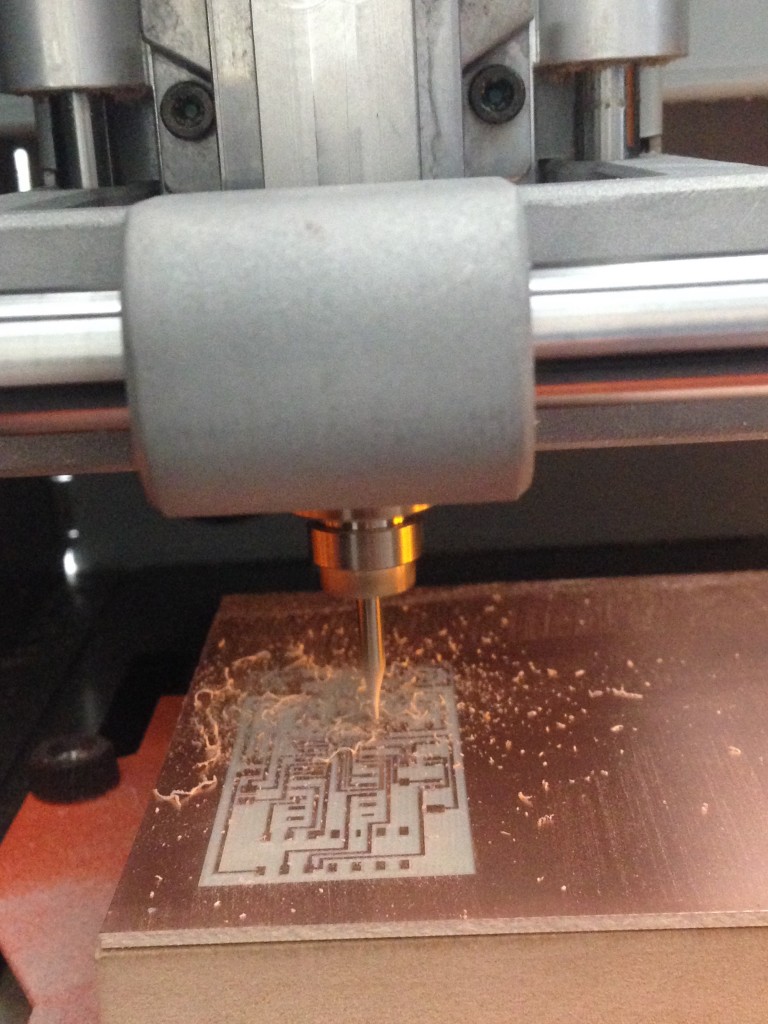
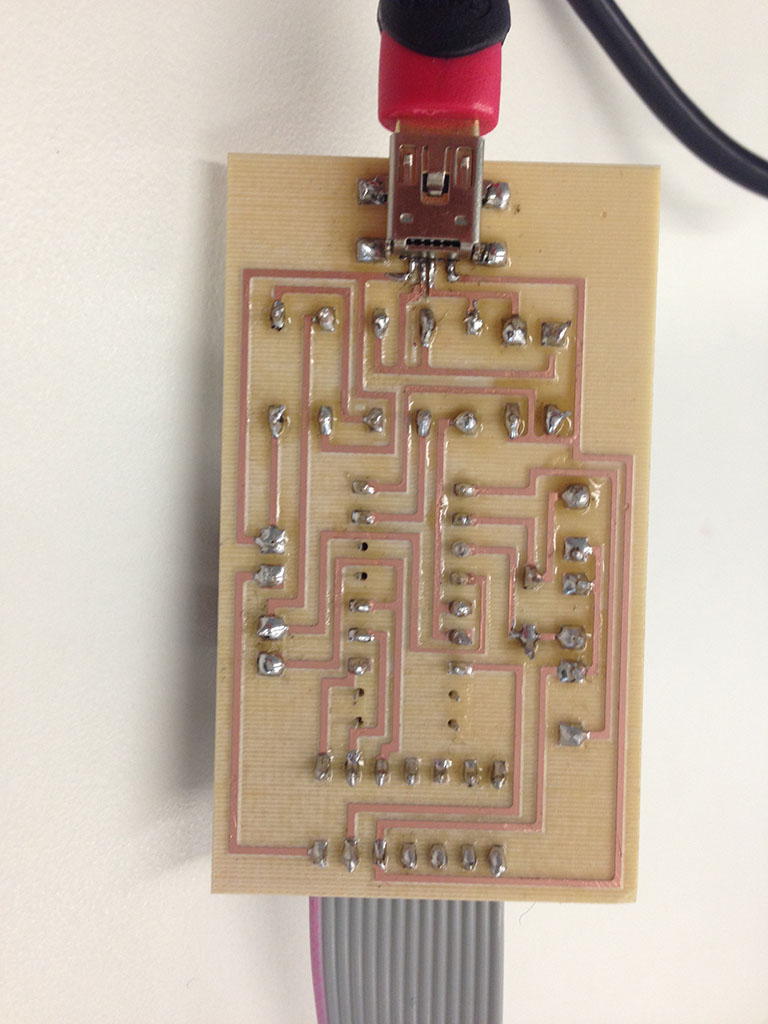
After receiving the smd components I used the design for FabISP with the 20mhz crystal and cut it. This time I am using the FR1 instead of FR4 and the cutting process was done in a shorter time, approximately 2 hrs. I used the following parameters with the SRM-20 ROLAND.
- 1/64″ endmill (flat)
- engraving process
- the material I selected is magnolia and I use the pre established parameters
- for the routes and edge – exterior cutting; for the finish – center cutting
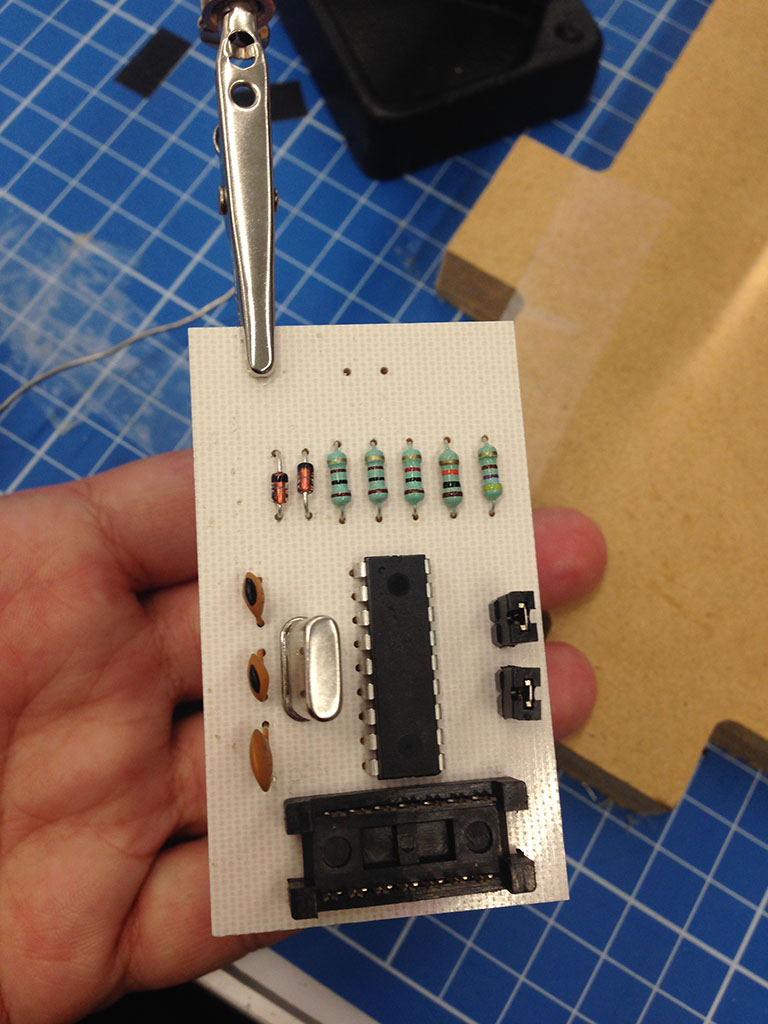
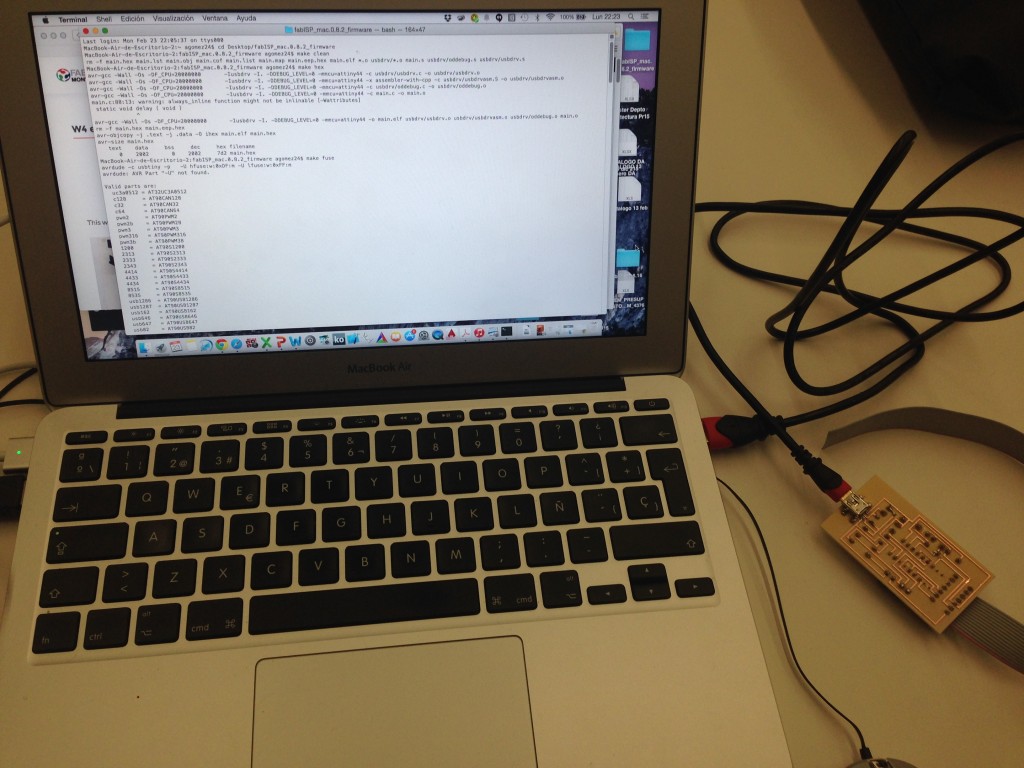
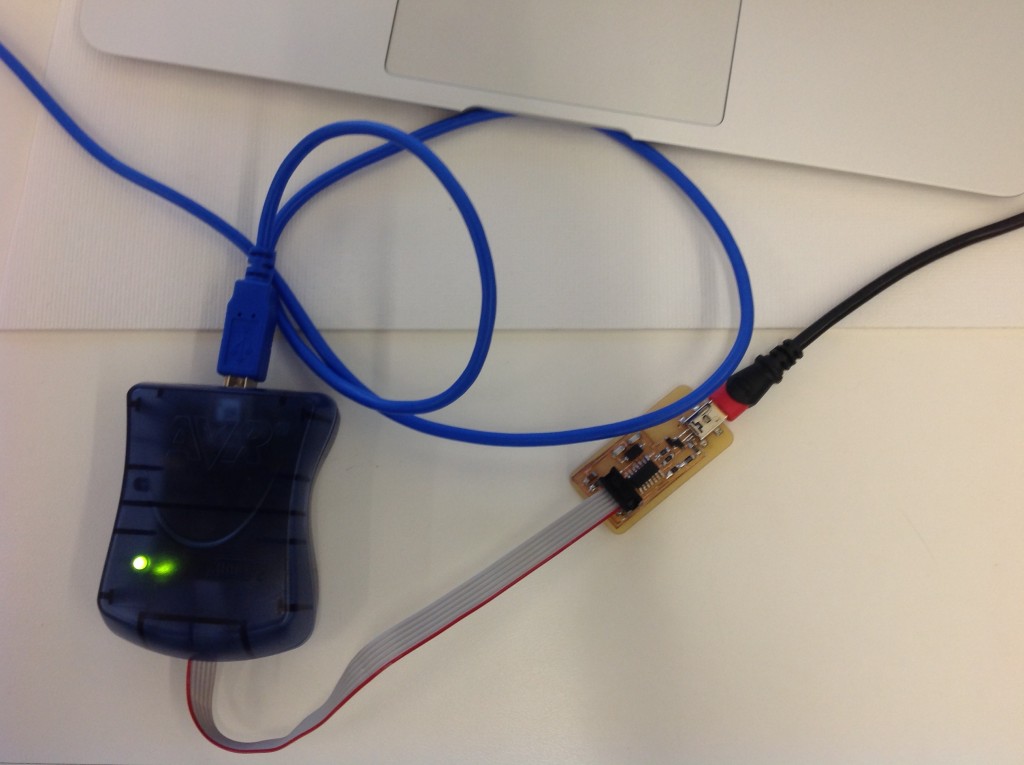
The solding of the pieces is complicated but with the practice and good tools it is possible. I try to program it but it did not work, I think that the problem is the soldering.
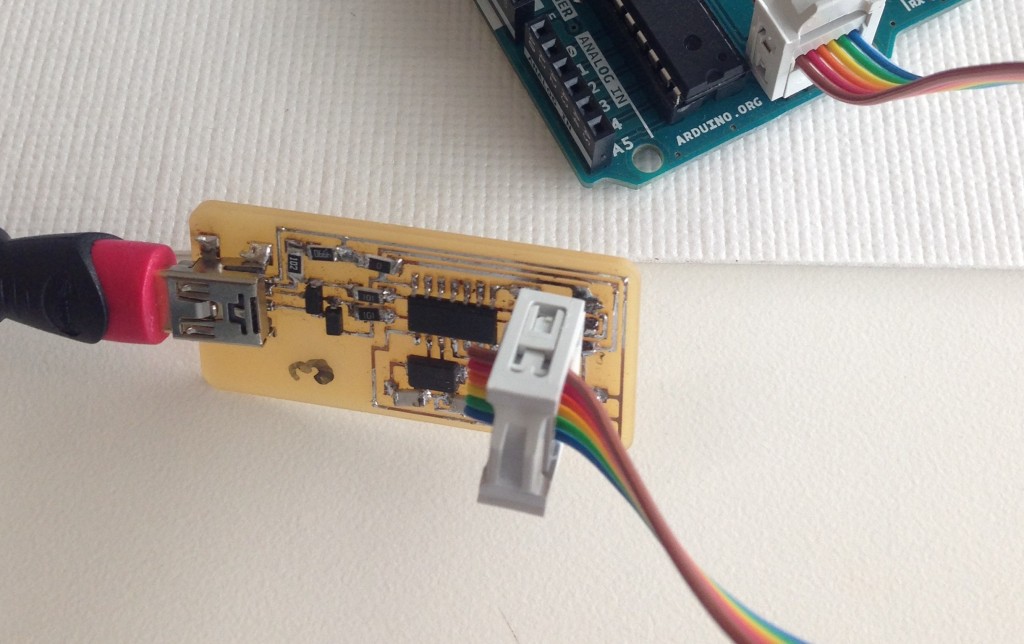
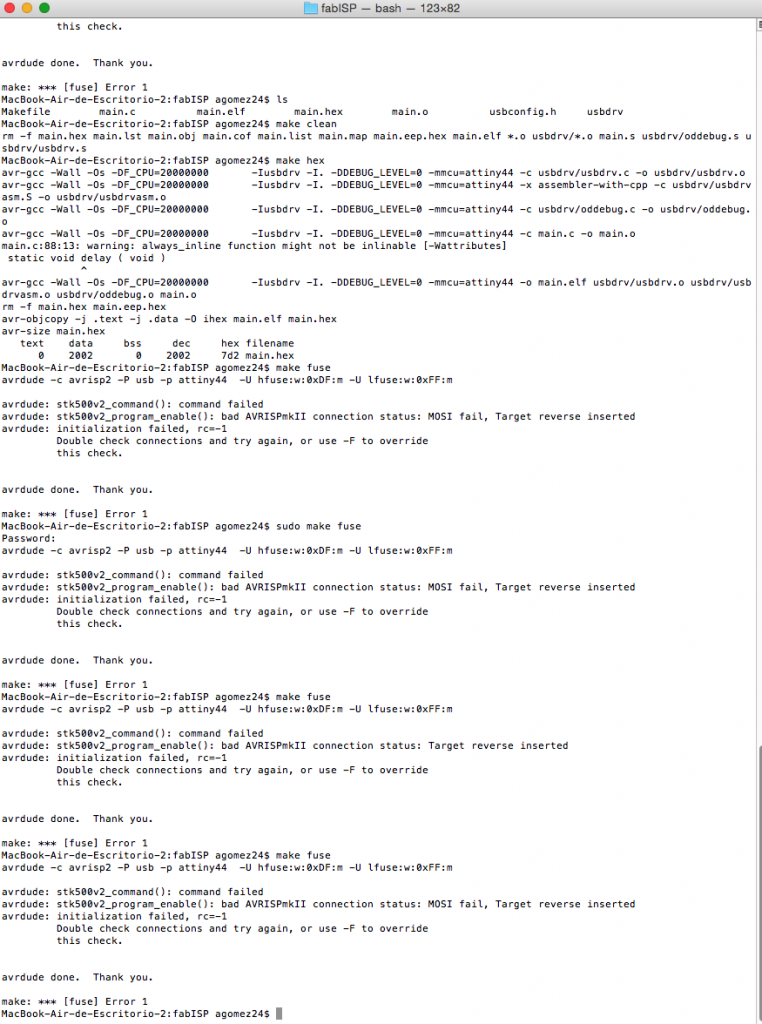
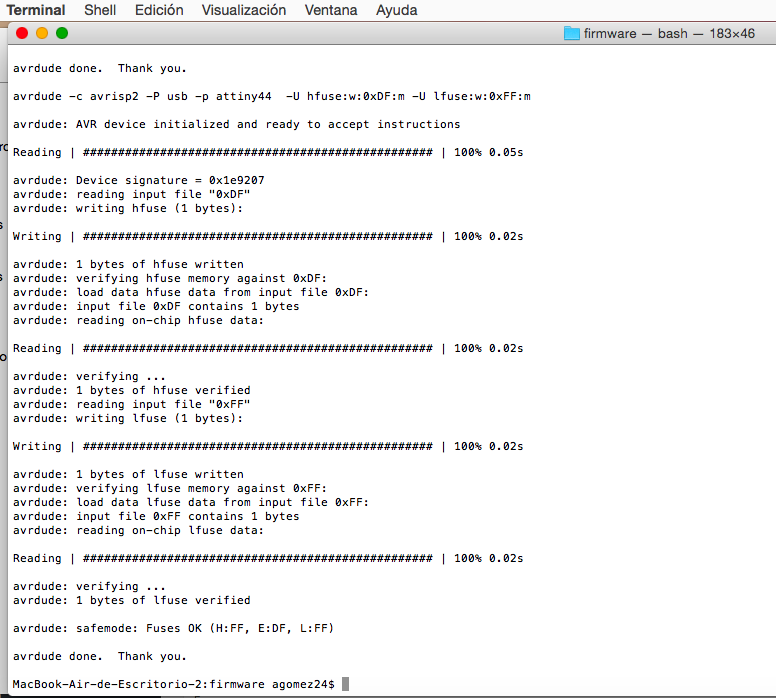
I tried to upload the code by the terminal but I got an error, it seems that I have to check conections and soldering.
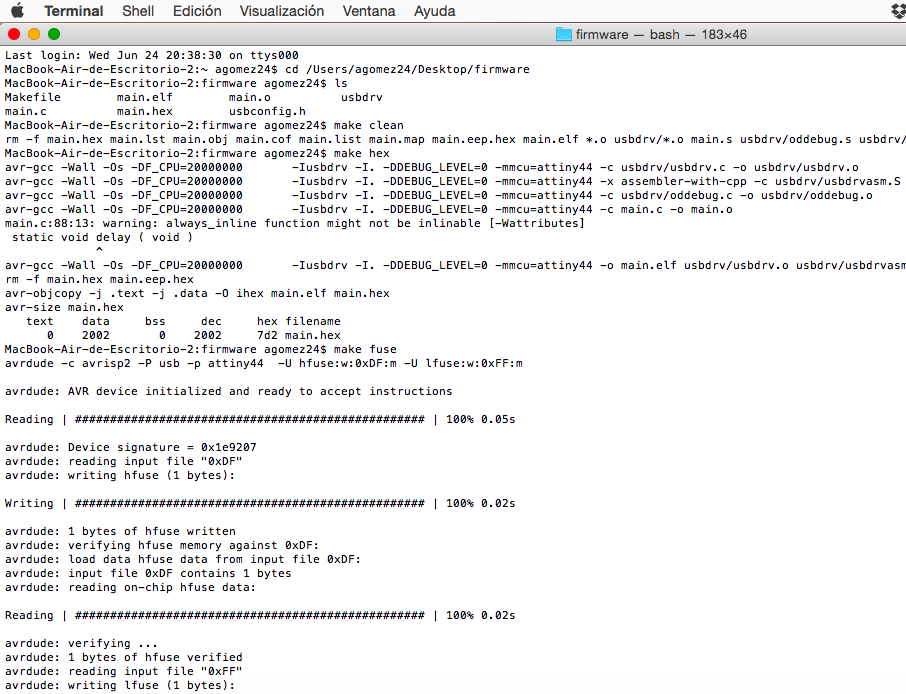
After reviewing the soldering I tried again and the programming was successful. I follow the instructions to upload the code.
- upload “firmware”
- make clean
- make hex
- make fuse
- make program
_________________