3D PRINTING
For this activity I thought to make a object that can move like a mesh or a tissue; I did two tests using the same system but with two different configurations, different sizes and two different printers; the first one, as I will explain below did not worked very well but was really interesting for the things that I learned and observed from the errors, while the second was more successful, as you can see in this short video; for now they are just a small tests, but both of them have generated on me the desire to experiment with those kind of elements.
Here I will expose all the steps:
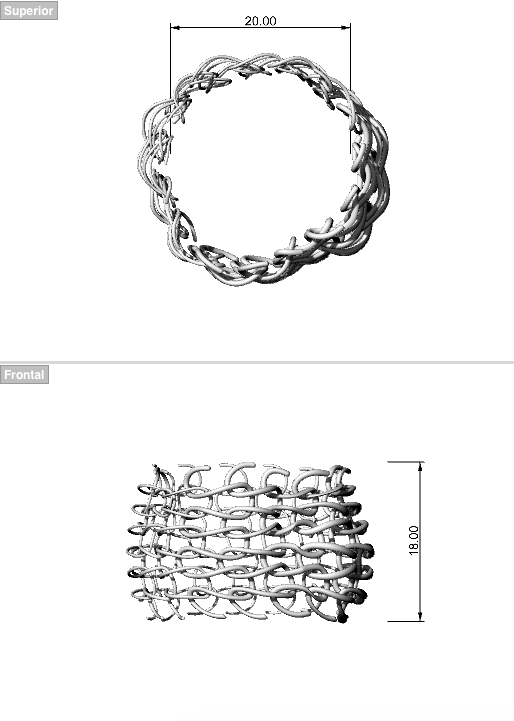
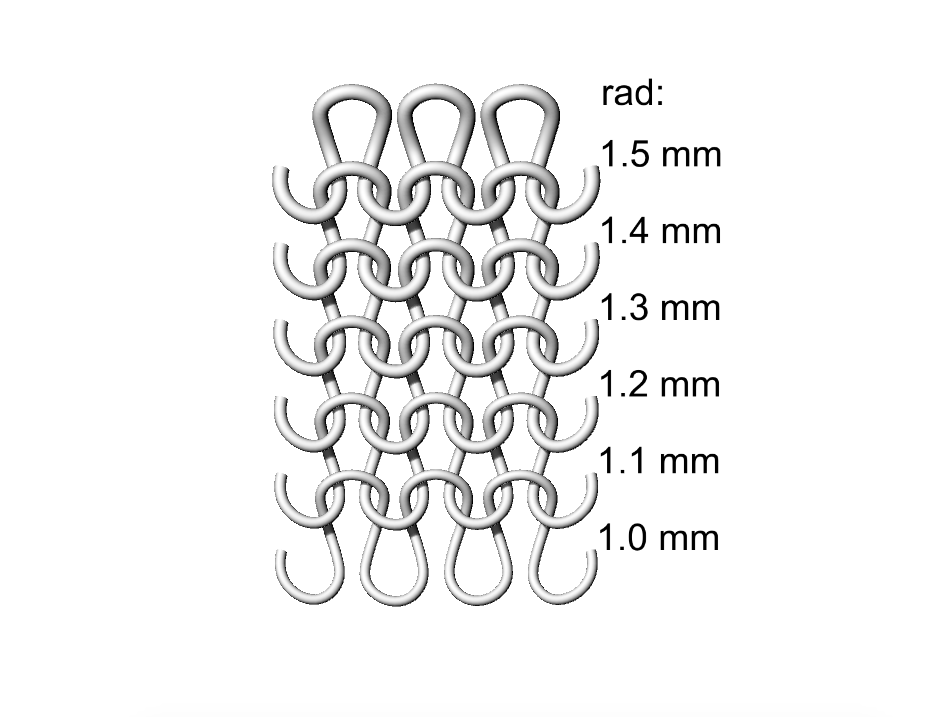
At firs I drew a simple element, that can generate a “chain”.
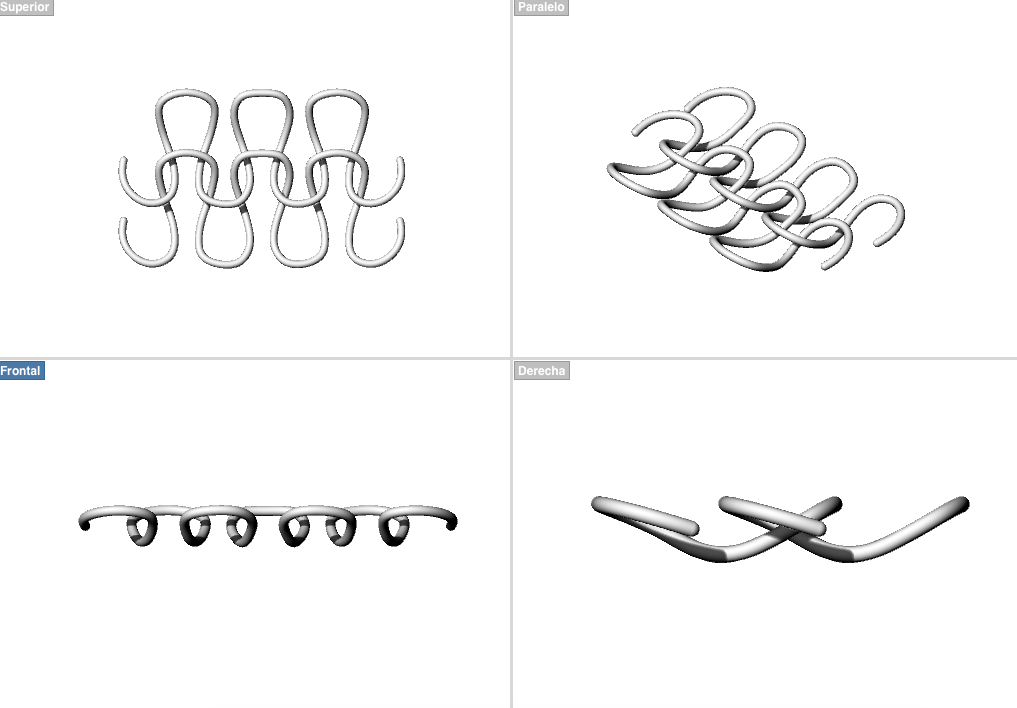

then I prepared the elements to do some test:

test 01:
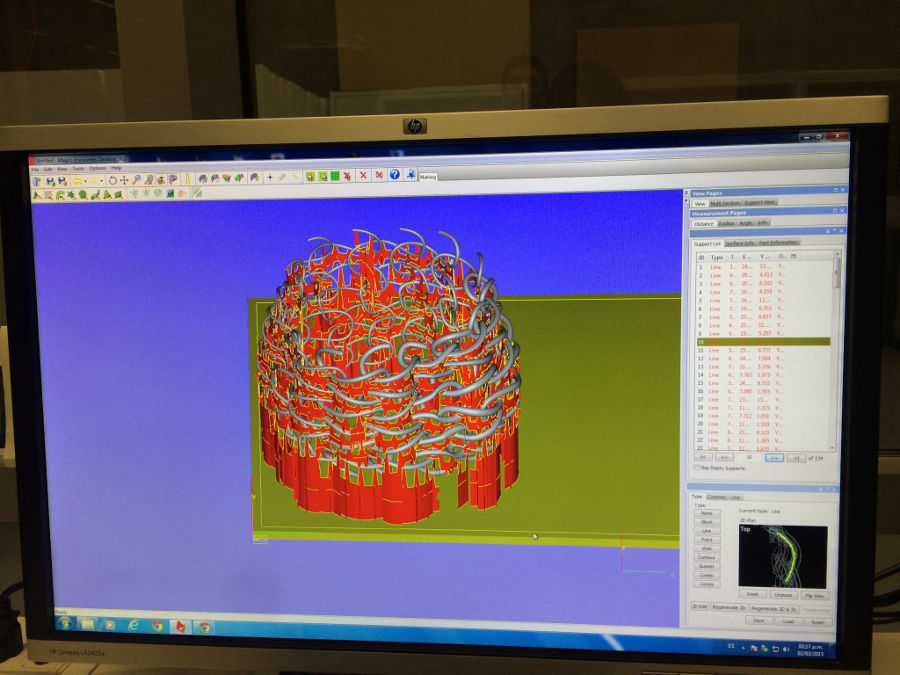
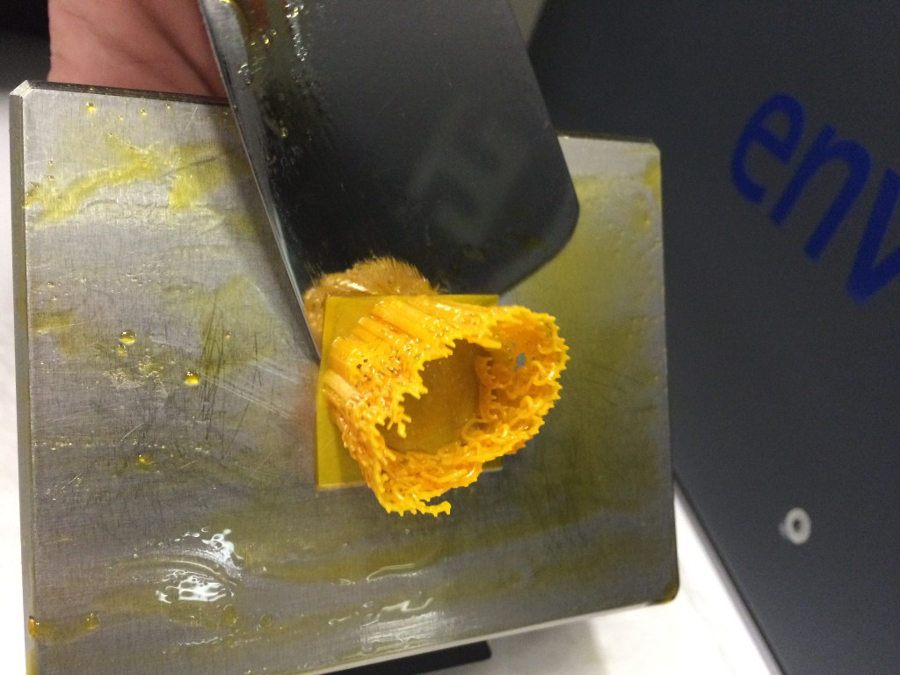
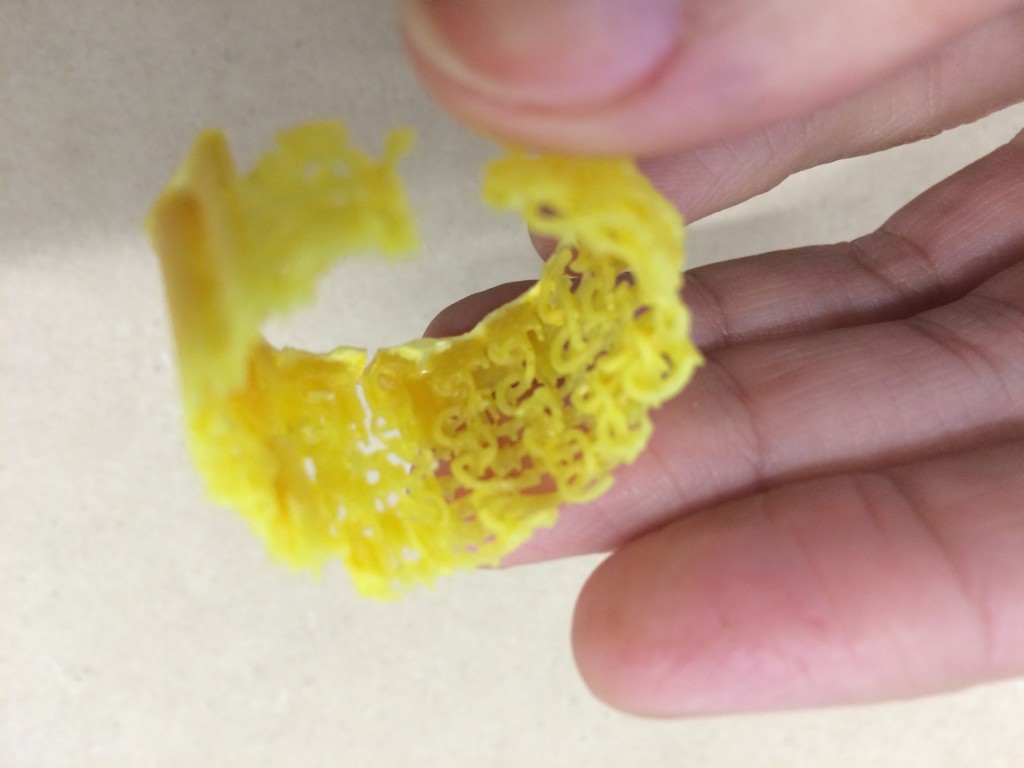
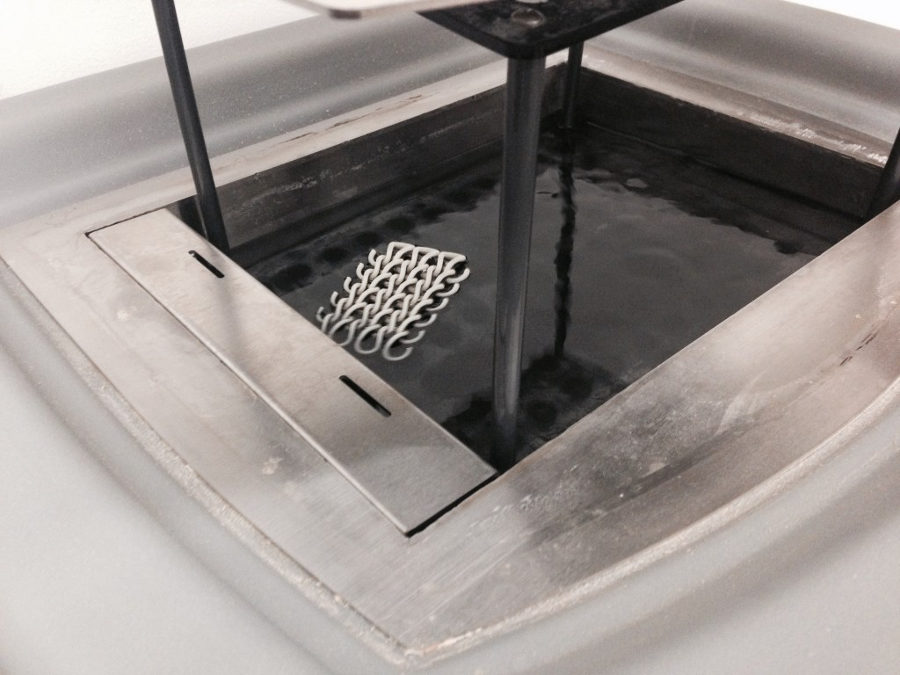
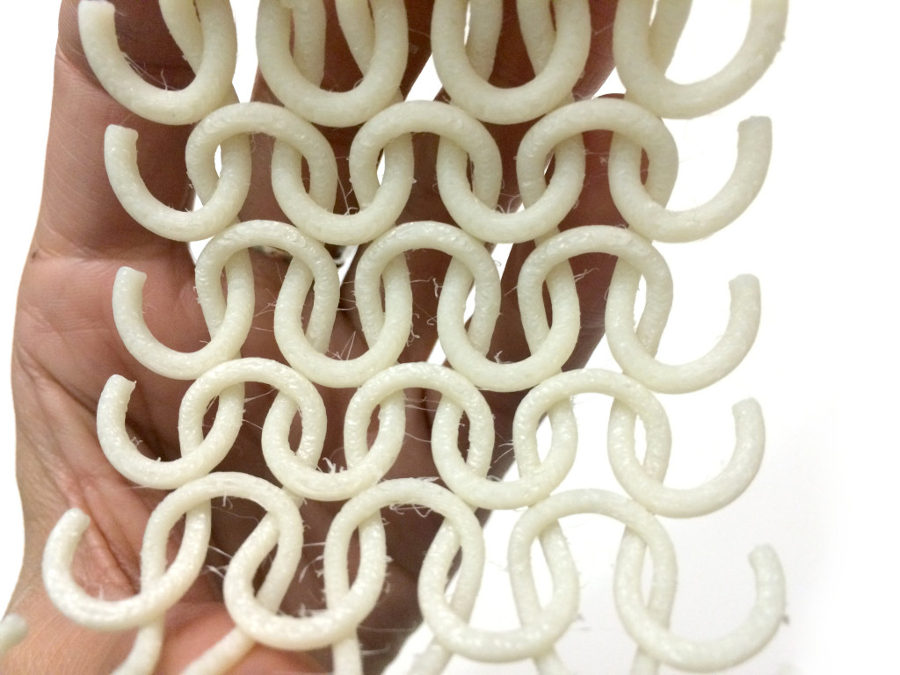
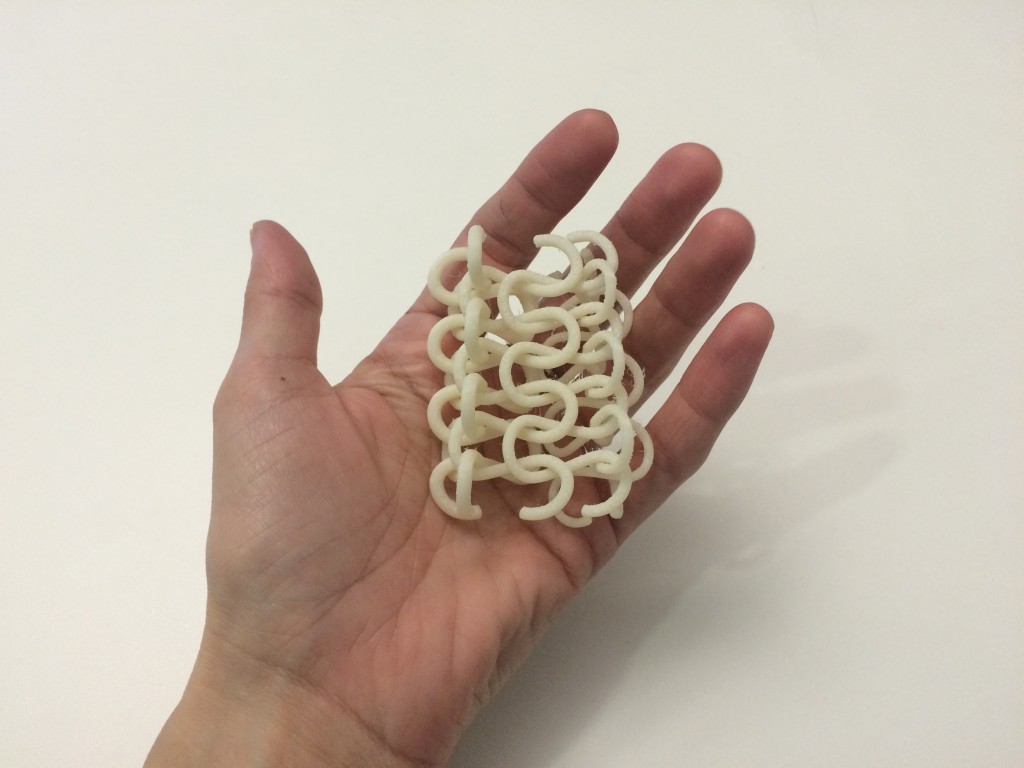
I decided to do a first test in a very small size, thinking to use the printer “Aureus EnvisionTEC” that I had already used in the past to make small objects, but all of them was closed or filled shapes. The element that I selected for this test is this one, with very thin thickness ( from 0.10mm to 0.45 mm).
Finally I selected this one, that forms a kind of an irregular ring:
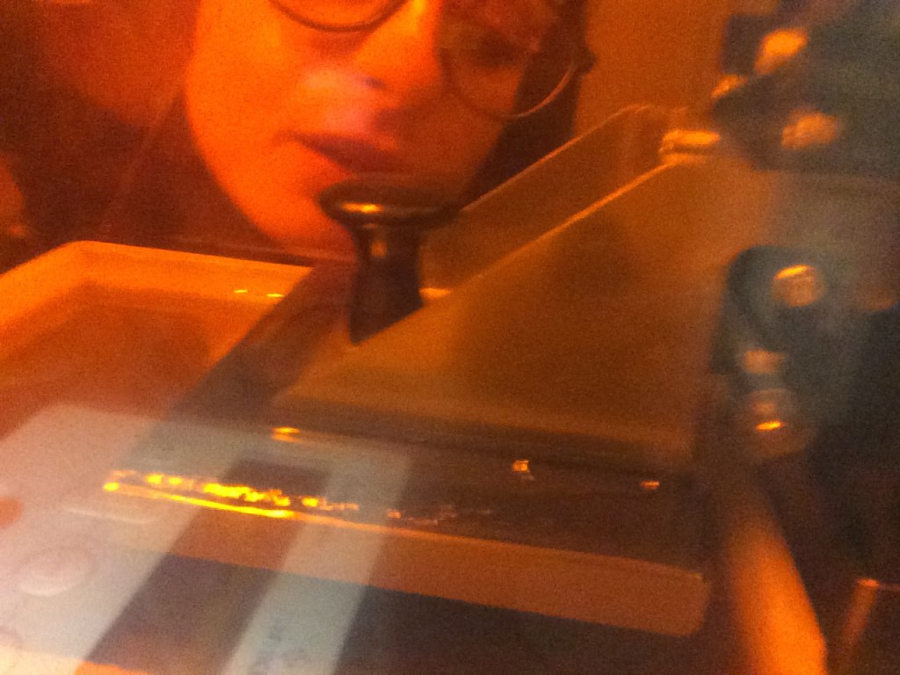
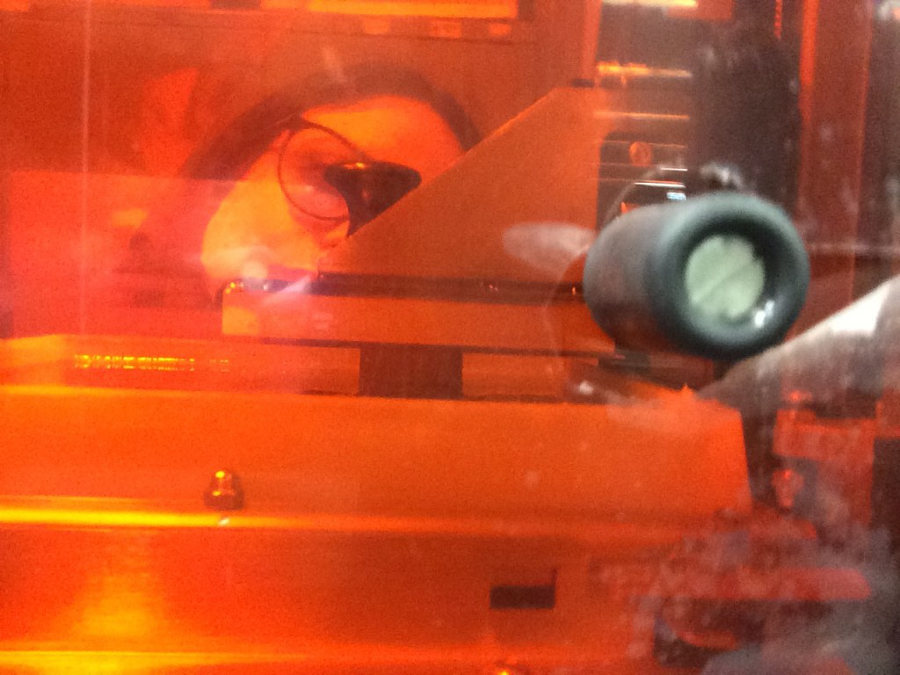
the printer: Aureus EnvisionTEC
The printer Aureus EnvisionTEC is based on the principle of photopolymerization, (stereolithography) and works with resin (is a liquid ultraviolet curable photopolymer). This machine, in general is used to make models very small in high resolution, with detailed elements, principally for jewels … and I am fascinated specially for the detail of the finishing, but I don’t have much experience with them.
 3D printer SLA
material: resinEC500
resolution: 0.0010 inch – 0.00014 inch
tolerance: 0.00017 inch
max. print area: 6o x 45 x 100 mm
the process
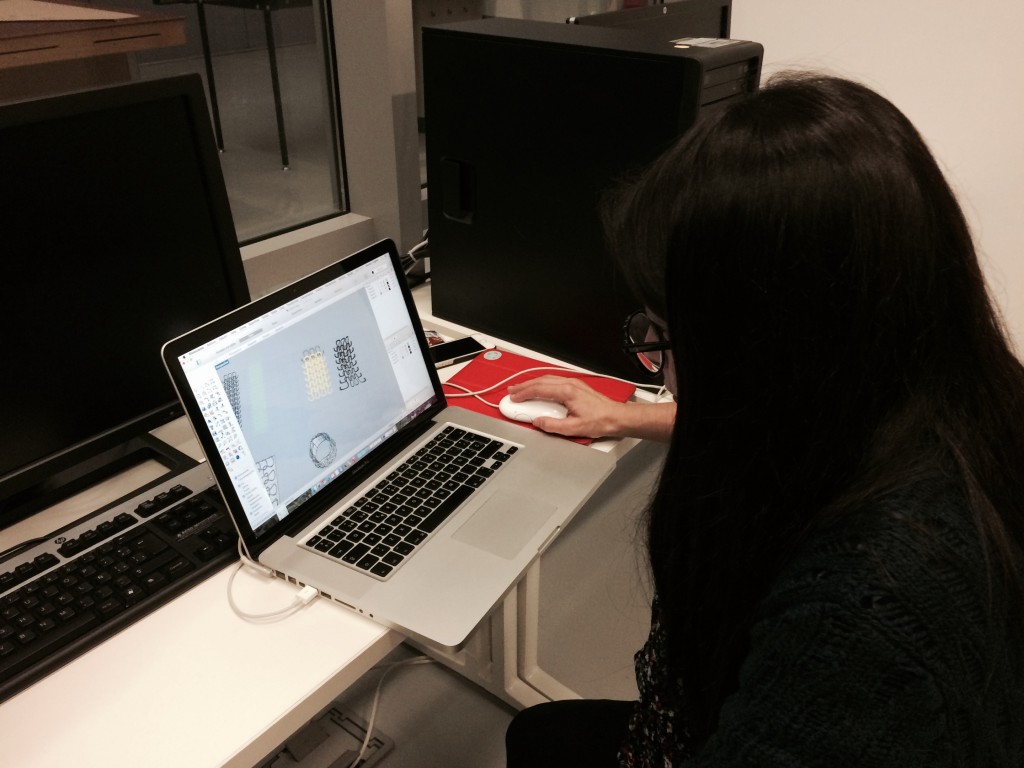
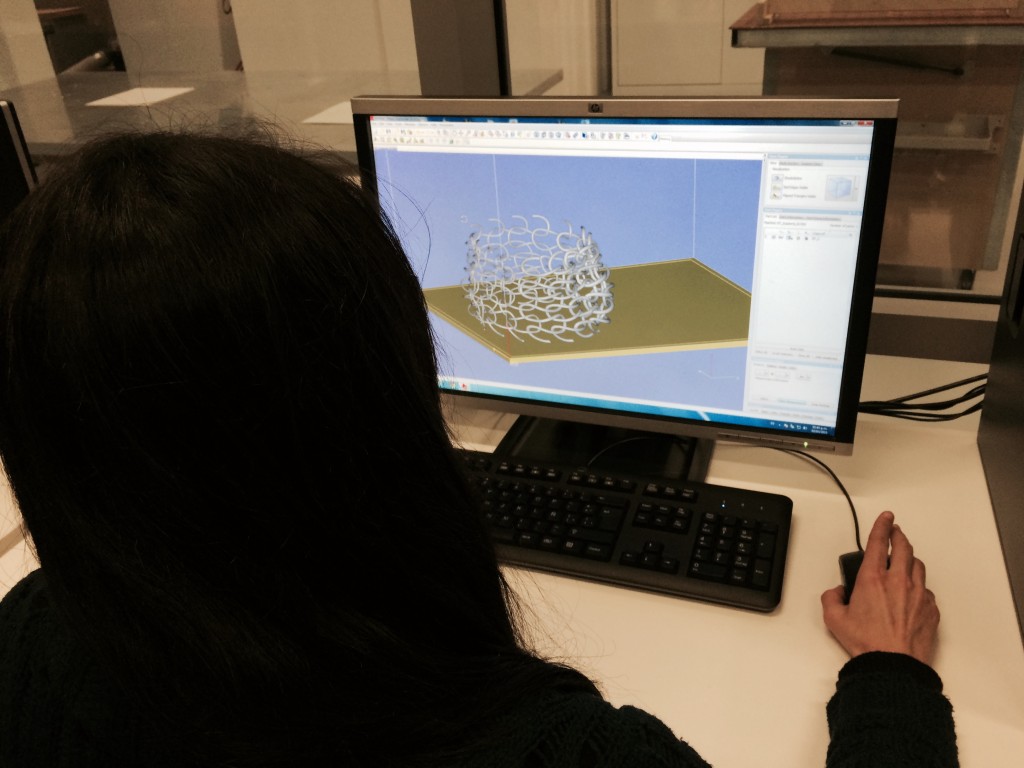
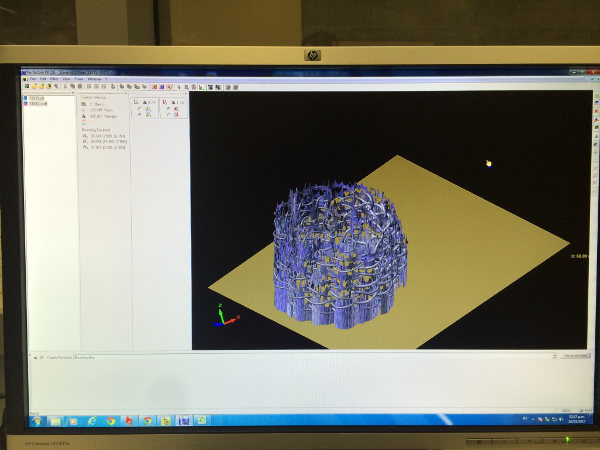
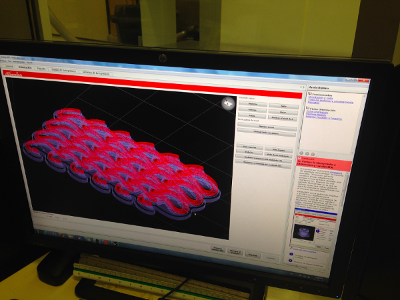
My 3d was made with Rhino, saved in stl, and using EnvisiontecMAGICS and Perfactory ; The software generated some supports because the components of my ring were “flying”: the elements were separated one from each other to allow the movement; all the models that I built in the past had the support, and on those cases, was really easy to remove it from the pieces … and for this, I thought that for this one could be the same, and I decided to send them anyway.

printing
Stereolithography utilizes a vat of liquid ultraviolet curable photopolymer “resin” and an ultraviolet laser that generates layers one by one. The laser traces a slice of the shape on the surface of the resin, and the ultraviolet laser solidifies and joints the patternd traced en the resin with the layer below. Then the elevator descends with the thikness of each layer; then a resin-filled blade sweeps across the cross section of the part, re-coating it with fresh material. On this new liquid surface, the subsequent layer pattern is traced joining the previous layer. A complete 3-D part is formed by this process.
The machine spent 4 hours to build my element … but during the proces is not possible to see the work: for the first 3 hours I could see just a small movement of the platform!!!


final steps
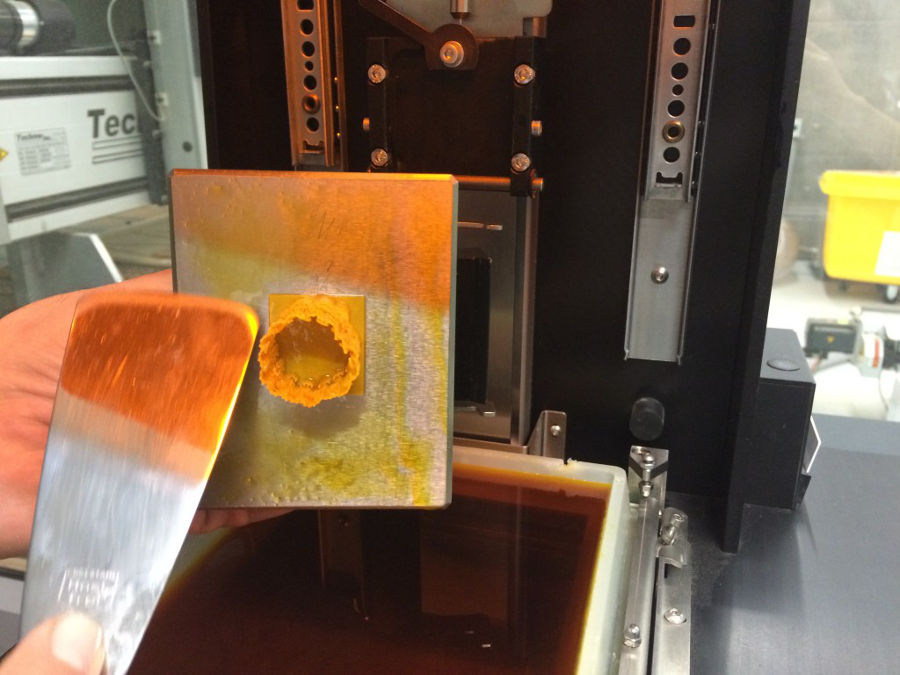
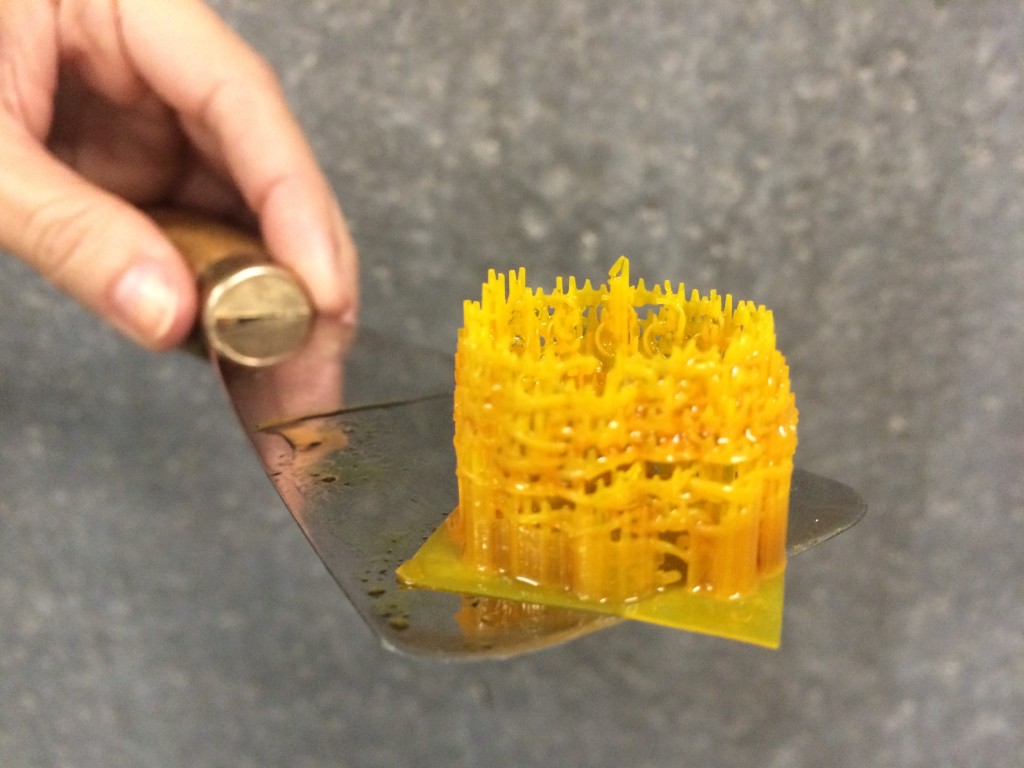
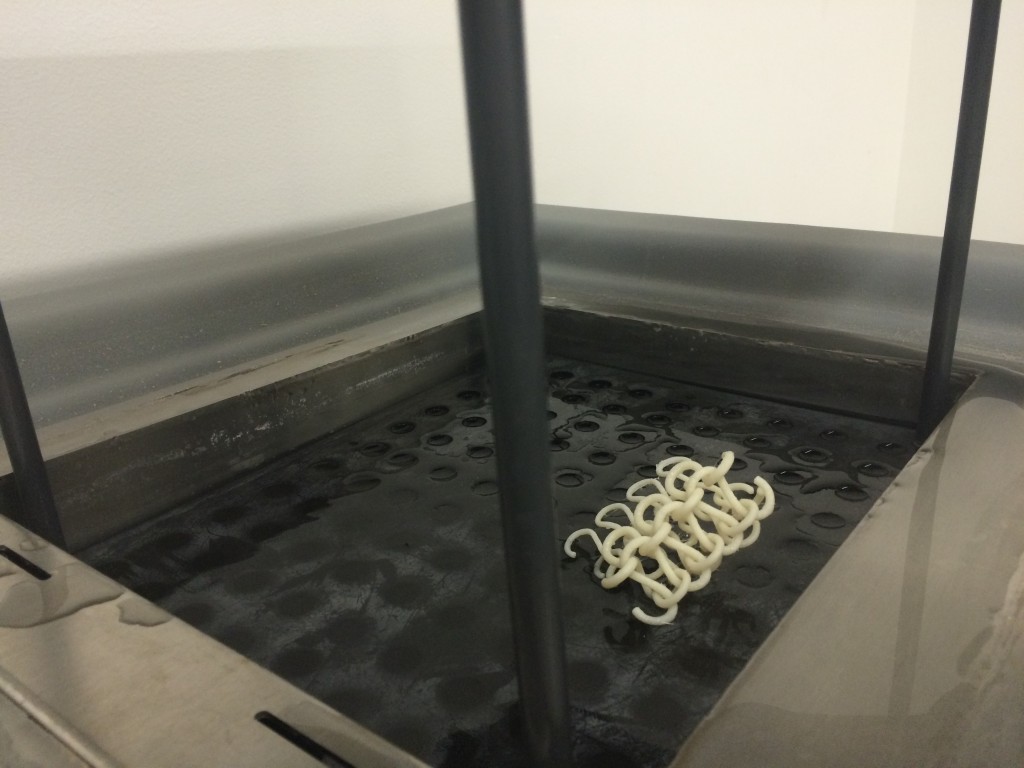
Finally my object started to appear! But … when my object began to be visible, I started to realize that maybe the support was too dense …


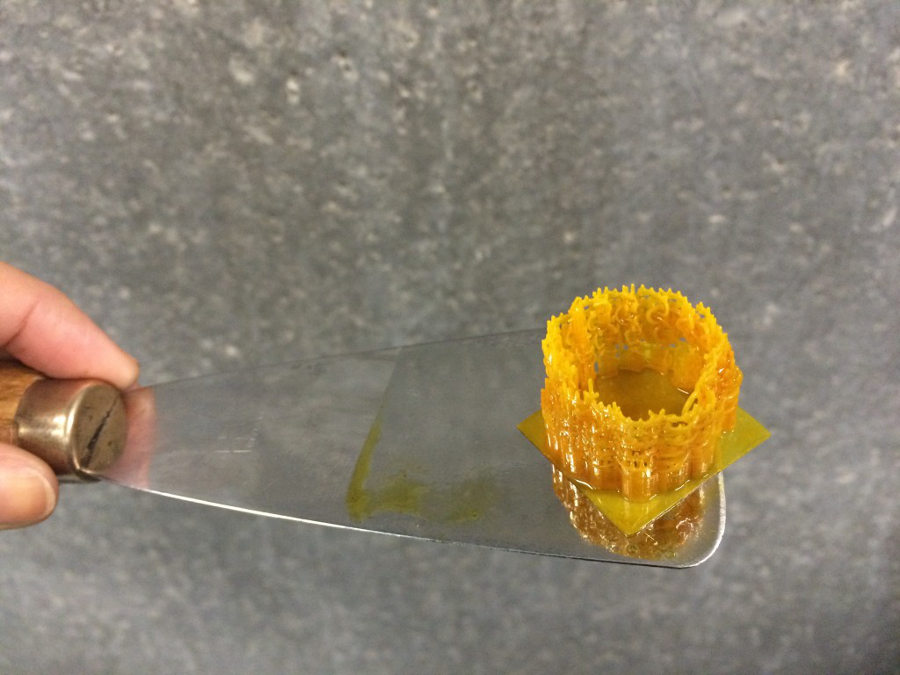
When the object exit form the machine, is not finished: needs to be dryed; at first, because that was really flexible I tried to remove the support …


drying:
… but the piece was too fragile and I decided to do the final step: removing the excess resin with alchool and then putting in the machine to consolidate,or better, to “cure” in the apposite ultraviolet oven for 20 minuts.

the result
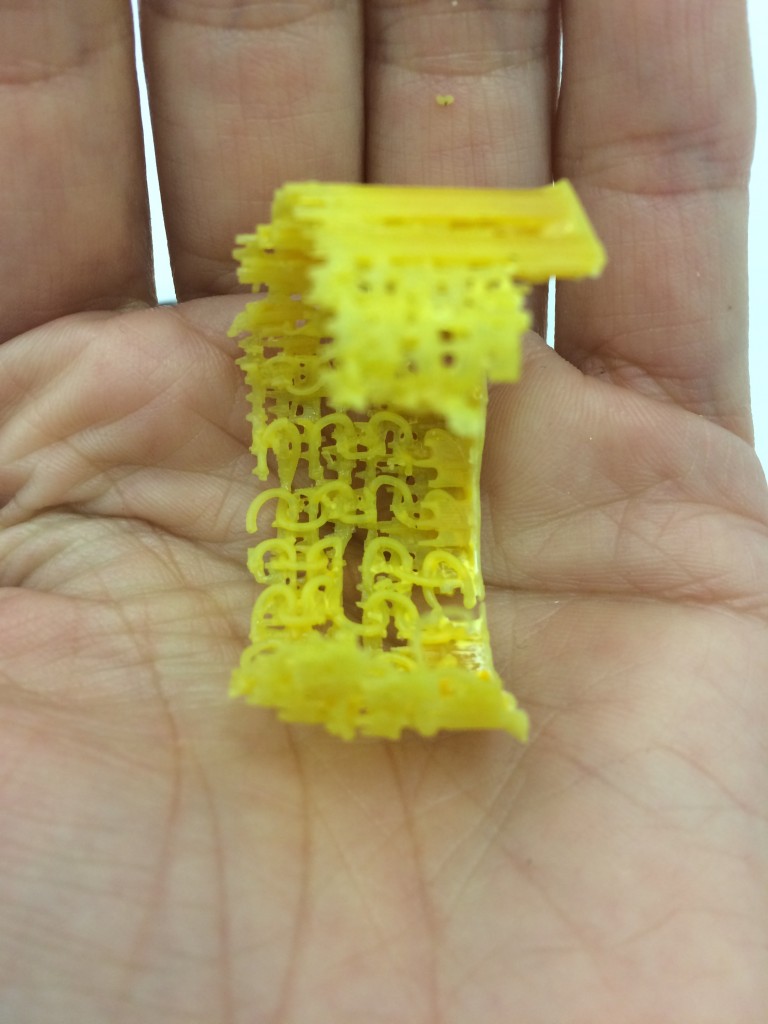
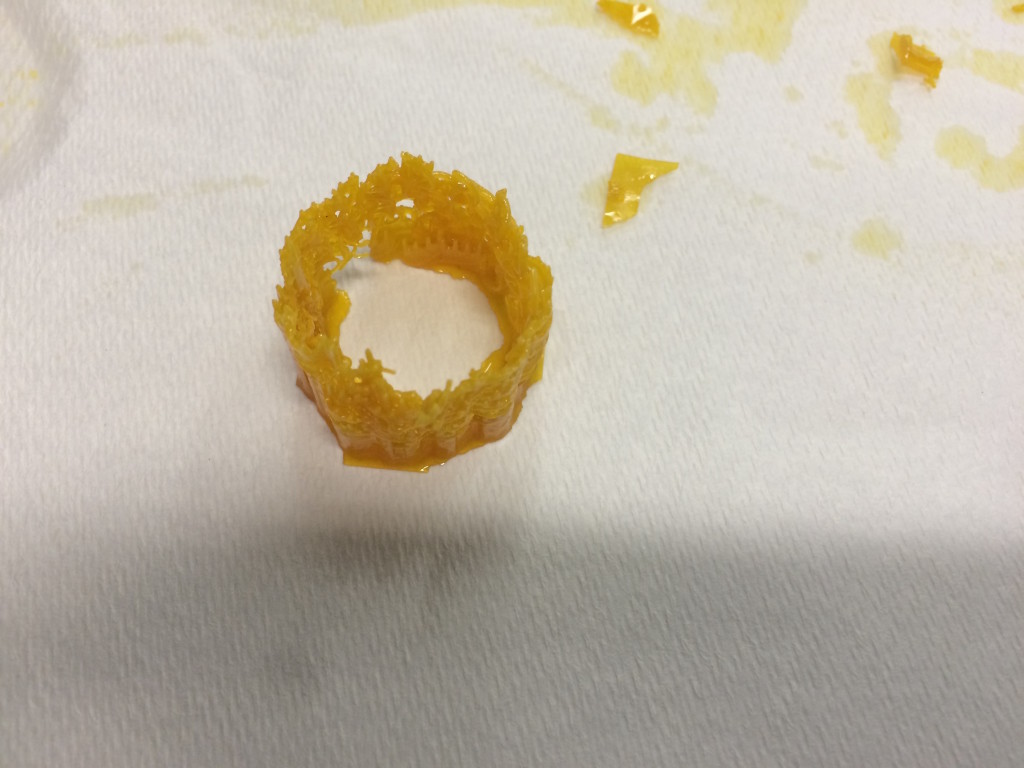
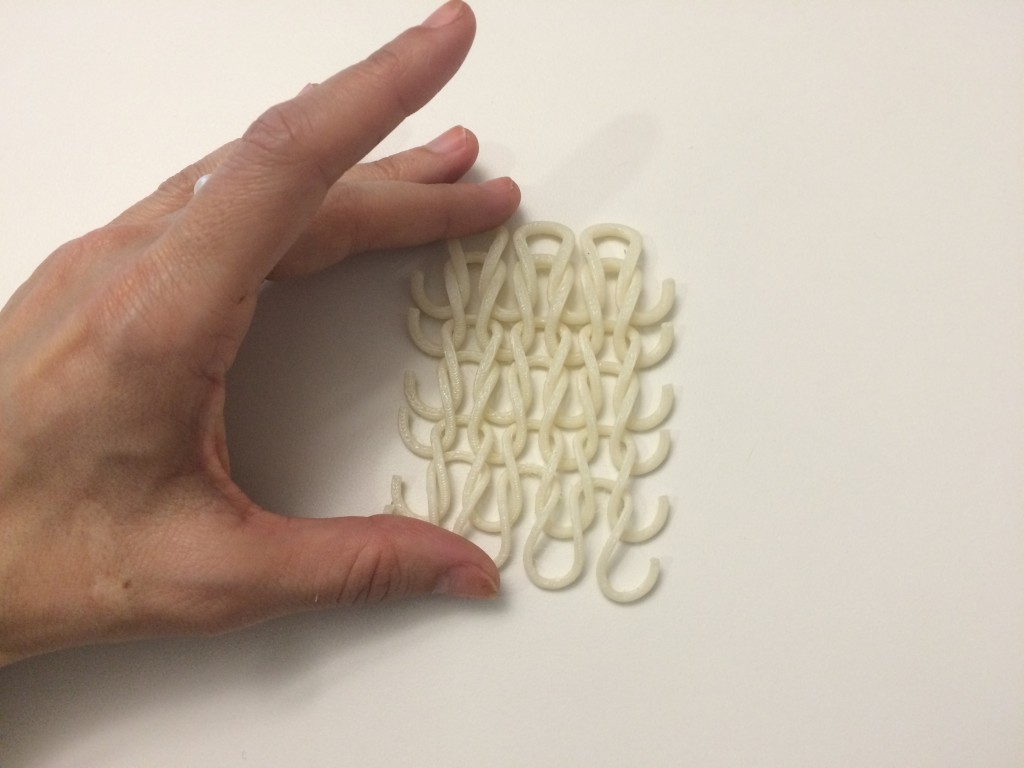
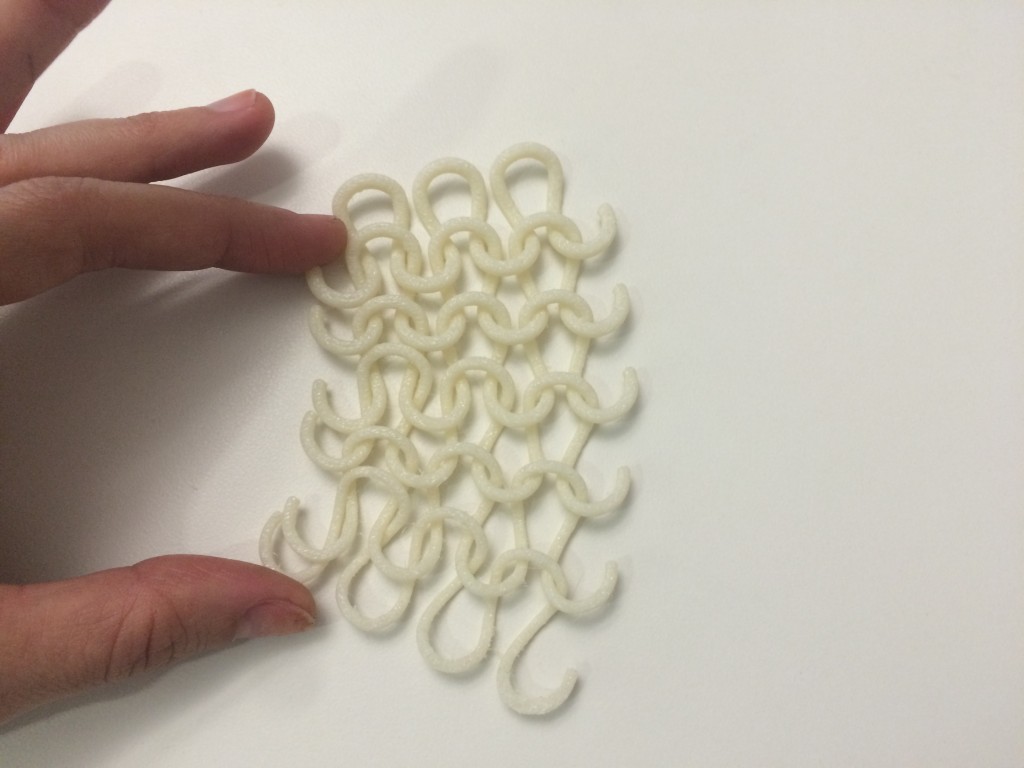
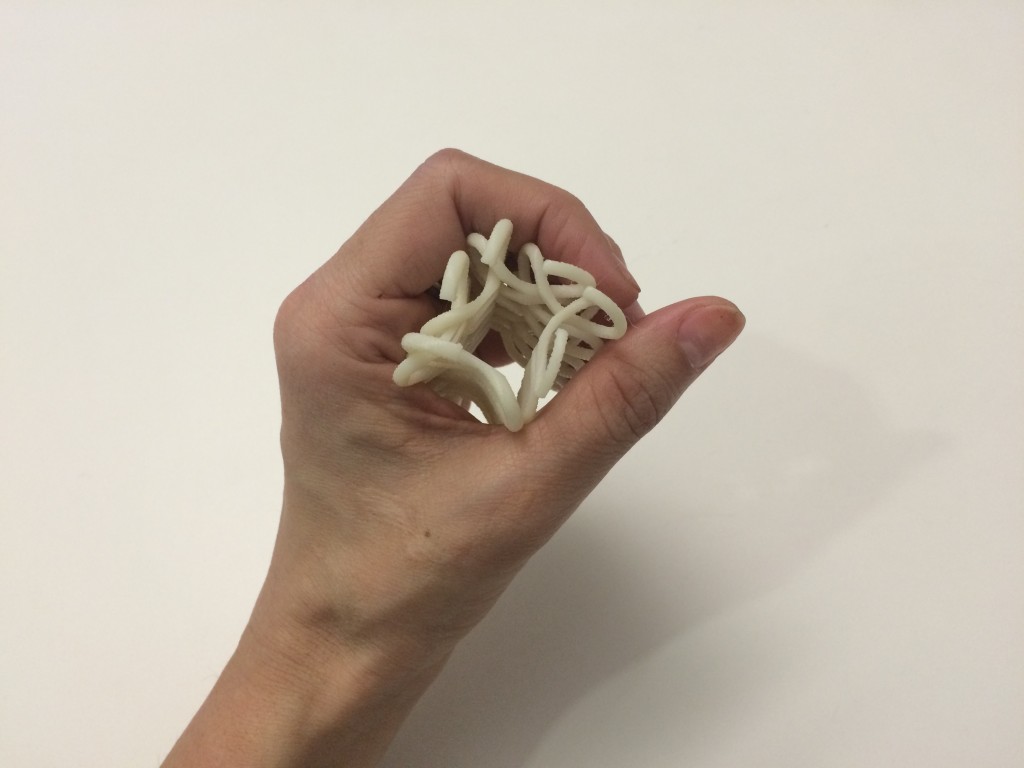
As you can see from the photos, remove the support was more complicated than I imagined and has been impossible to remove because it was too dense in respect to the conformation of the parts of the chain … finally broke my piece;
However I observed that the parts of the chain were moving: Is necessary study another strategy to generate a minimal support, maybe the support could be part of the design.
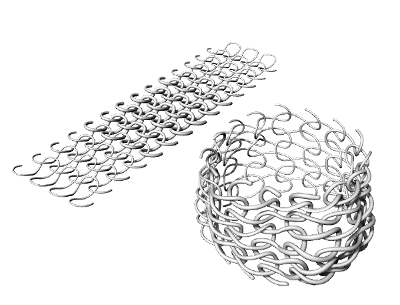
The good result is that is possible to generate very tiny elements with detail: all the parts were builded, also the smaller ones whose the thickness were 0.15 mm. This is really fascinating for me and I will keep experimenting on that.
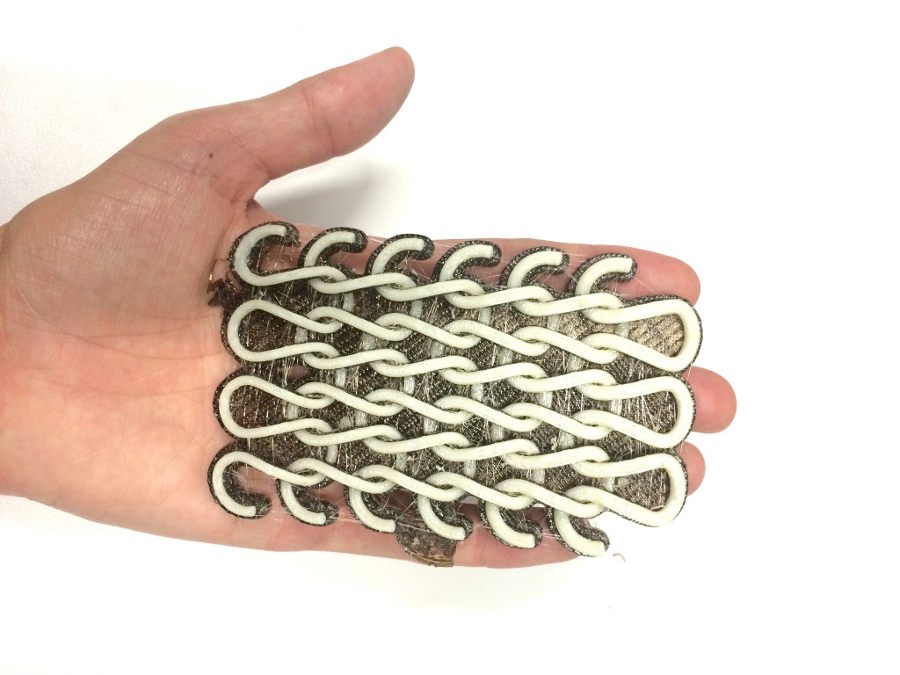
Anyway, for today … I decided to make another test, bigger and simpler with another printer, because I wants to see if the object could really work as a movible mesh, as you can see on my test 02
test 02:
For this test I used the same system, now in a big scale, and using a bigger range for the thickness of each line of chains:
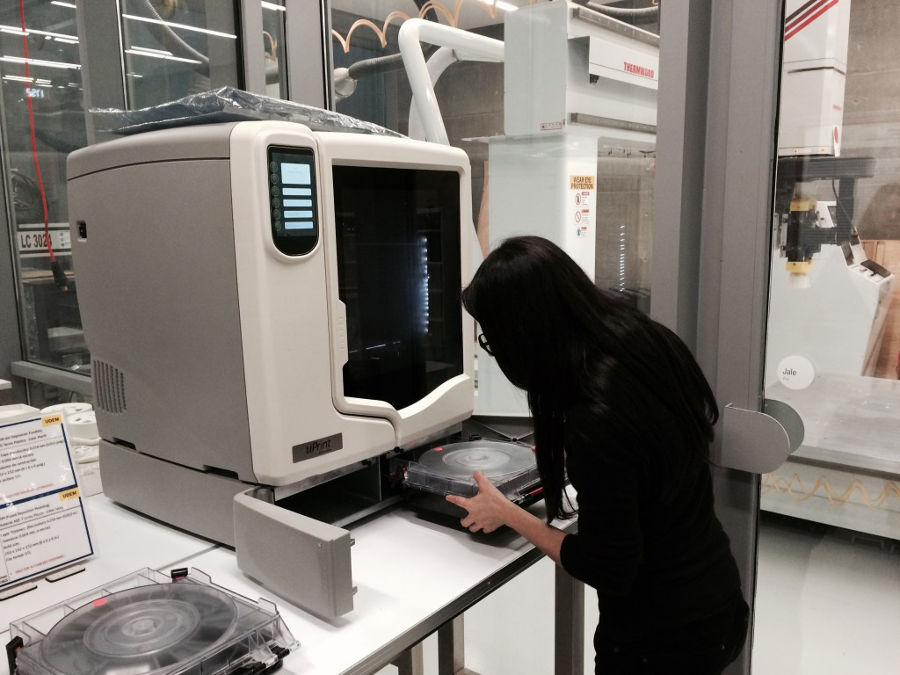
 the printer: uPRINT STRATASYS
In this case I have more experience with the printer: also here, the new thing is the shape that I’m trying to print. This printer works building the piece layer by layer, and generated too a support, but this one is made with another material and is possible to remove it with the Wave Wash system.
 3D printer FDM – ABS
material: termo plastic ABS
resolution: 0.254 mm (or 0.010 inch)
tolerance: 0.004 mm
max. print area: 203 x 152 x 152 mm
sending to the machine:
to print: The file also was made in rhinoceros, saved as stl and now using CatalystEX.
printing
In this case the machine needed also 4 hours to build my object, but here was possible to see the element step by step during all the process
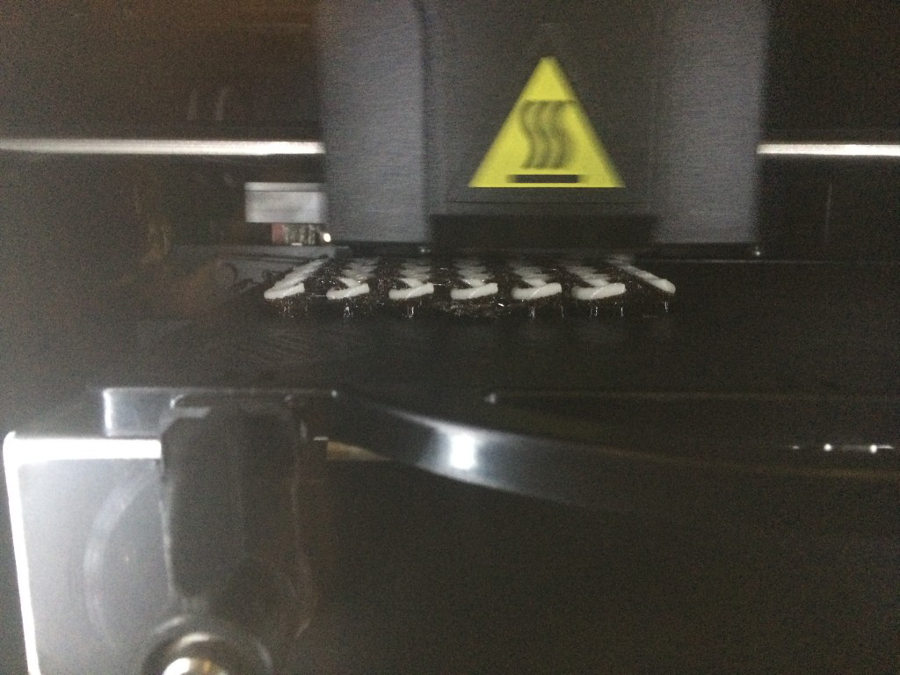
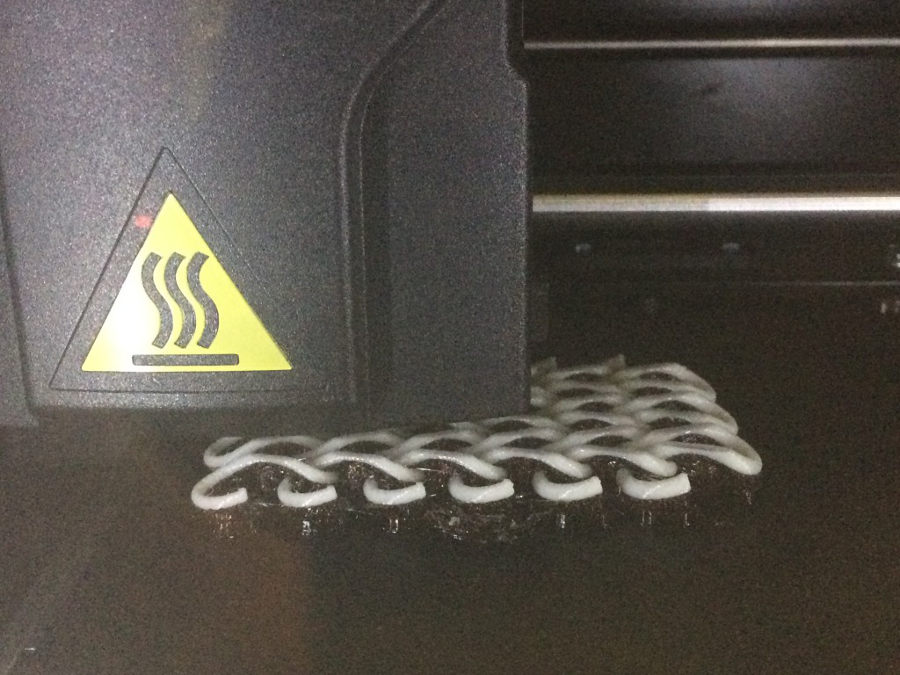

cleaning and removing the support
After others 3,45 hours my objet finally is ready! the support is removed and I can check if the system is working.
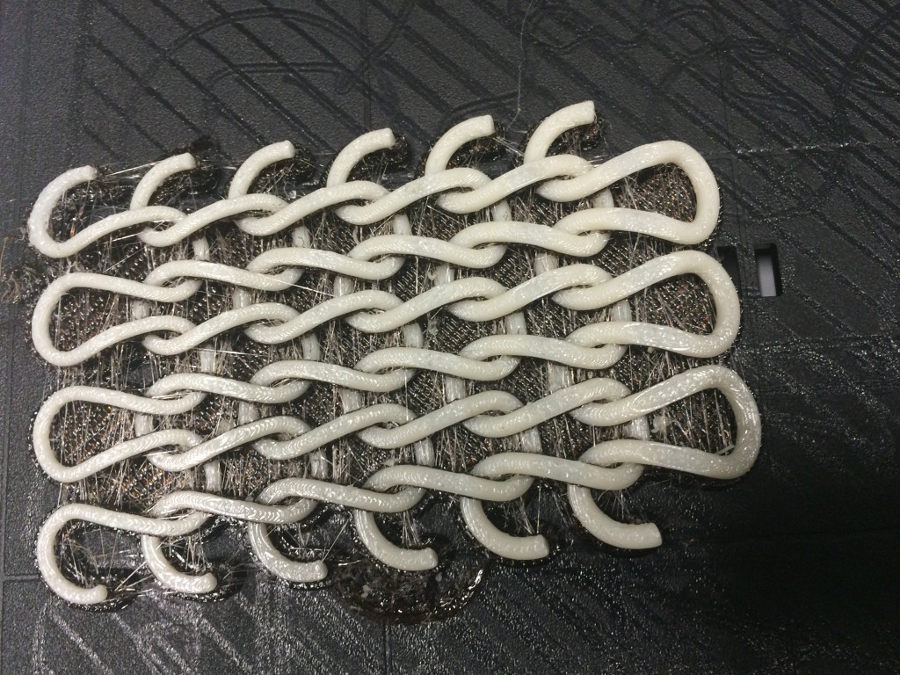
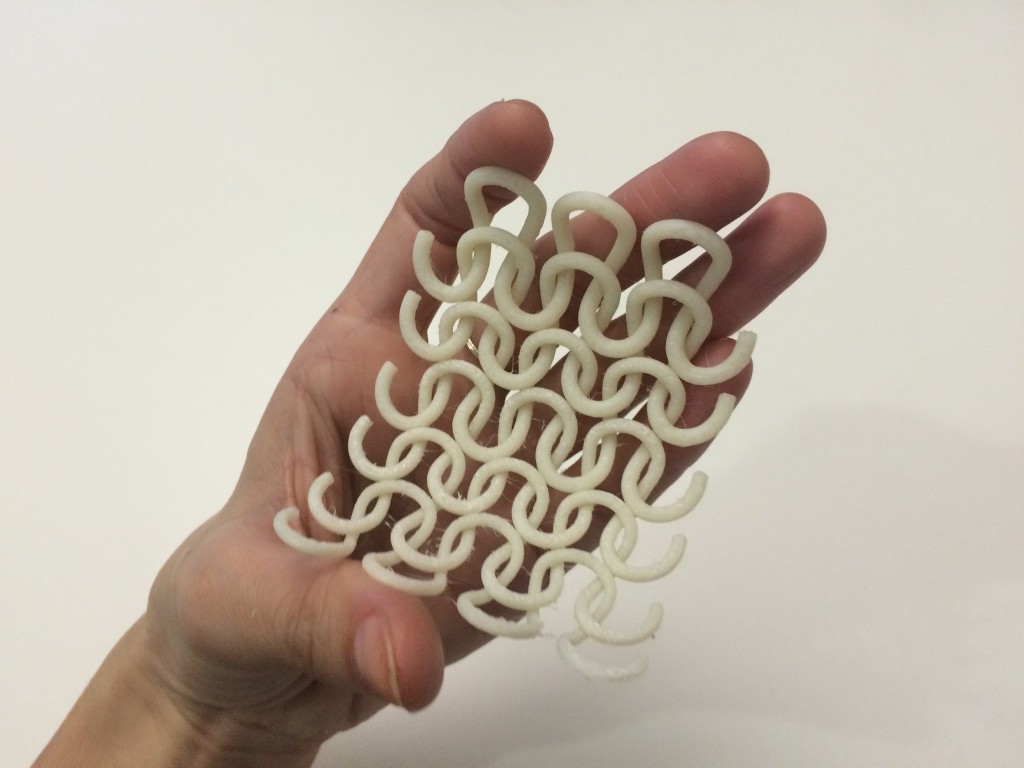
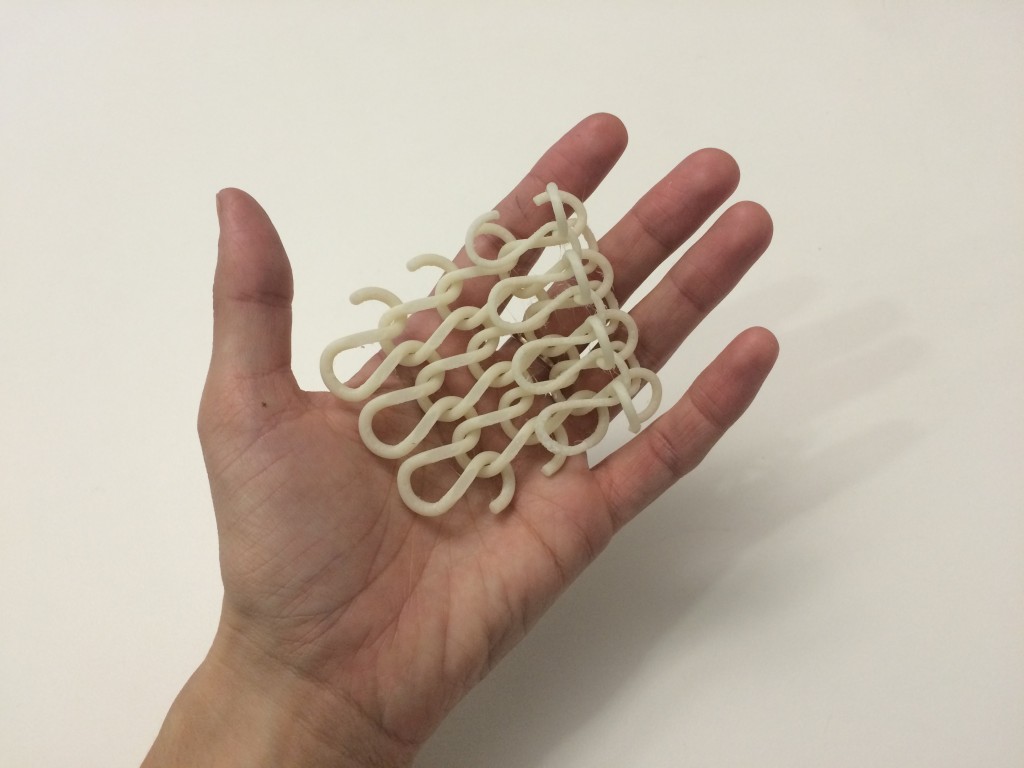
the result
The piece still having some filament that have to be removed, but my system is working! for now the object is very simple … but I am starting to imagine a lot of possibilities …
testing the system:

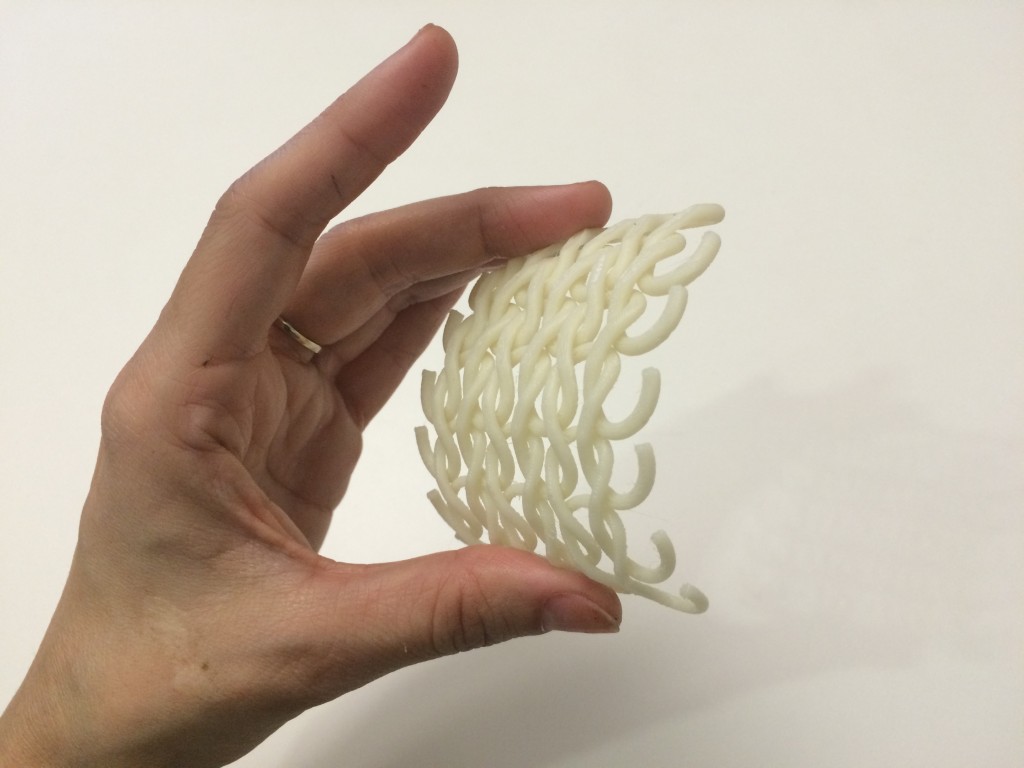
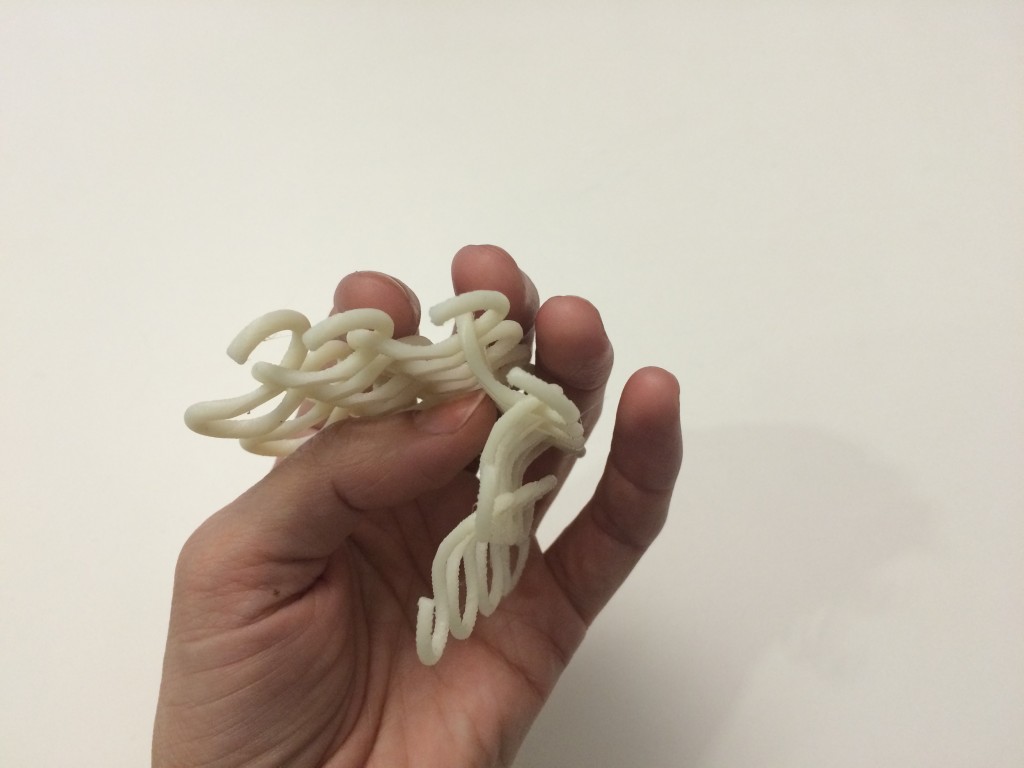
this position gives rigidity to the piece


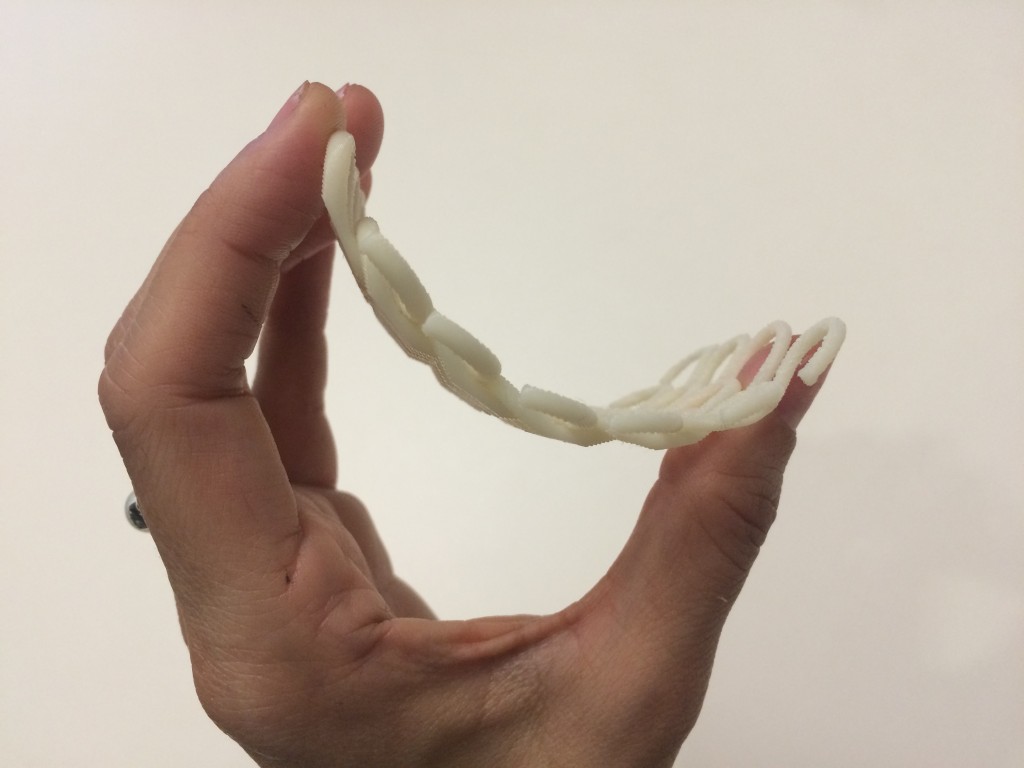


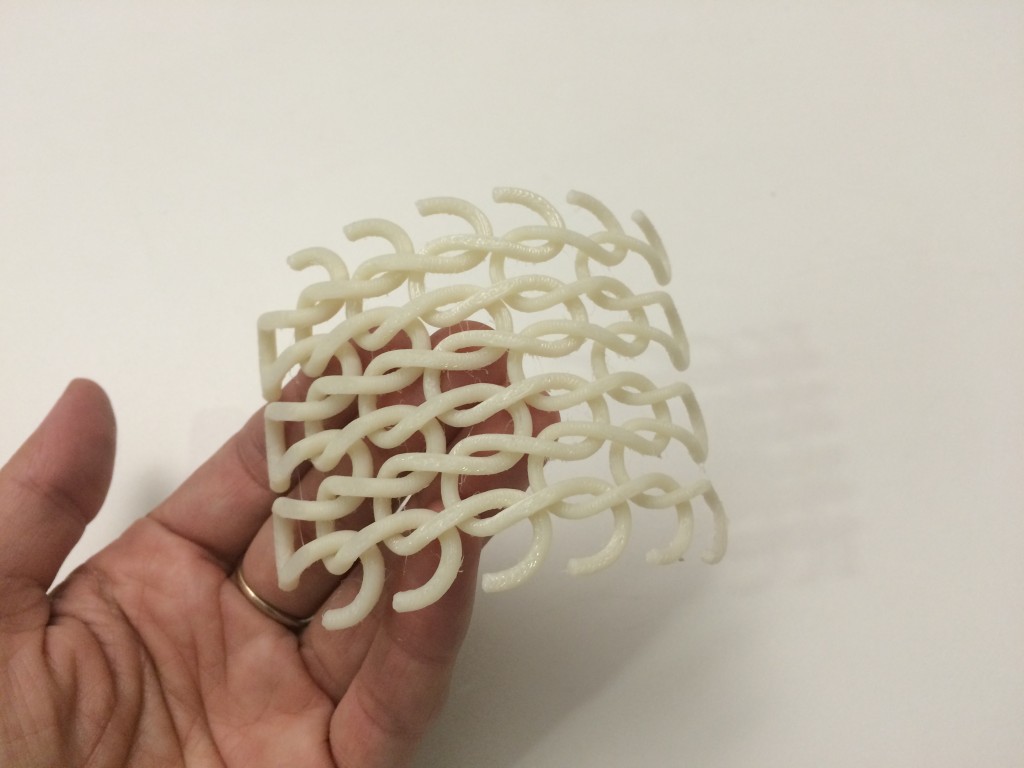

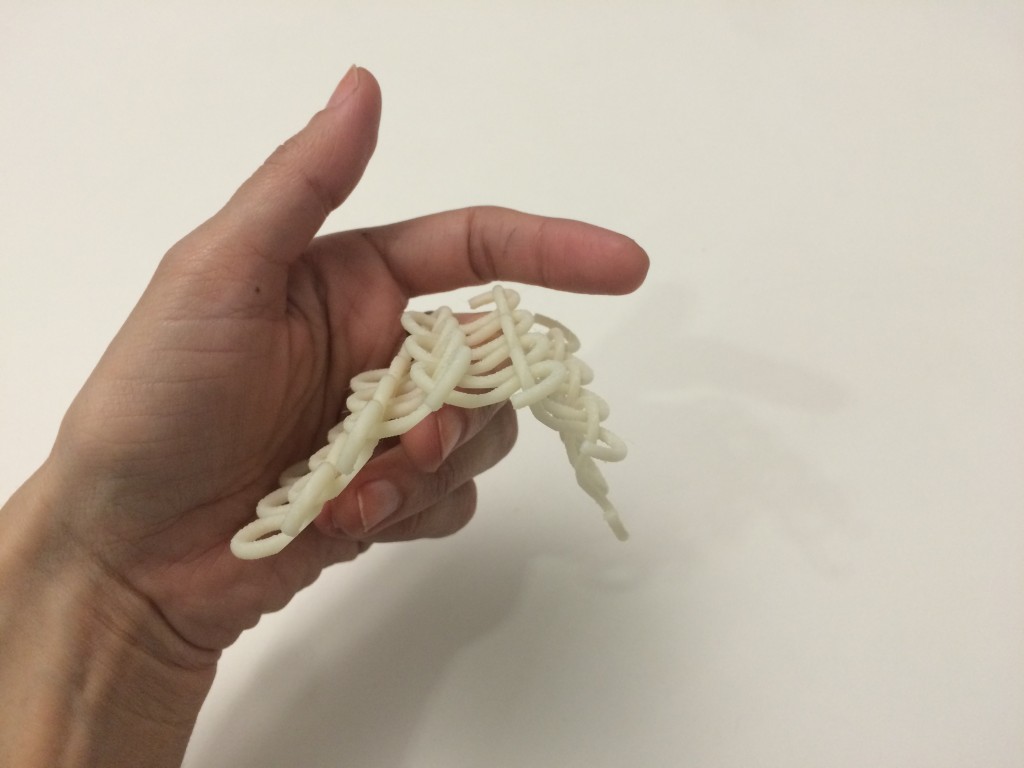
flipping the piece, the element is more articulated and untied

… I think that the result is simple but is good, now I can study others systems, more complex and that allow more movements and articulations, joints …
For the first experiment I think that I used a configuration was too elaborate considering I had no experience with the machine, and if I want to continue using it, try to start at the beginning with simpler elements; why in the second case, I have simplified the part that perhaps in the 2 test was too easy … I think that the result is simple but is good, now I can study others systems, more complex and that allow more movements and articulations, joints …
3D SCANNING
The tool that I used is 123D catch because but for now the results are not so very well;
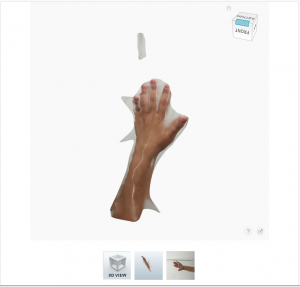
At first I decided to scan my arm (or an arm), because I wanted to apply the mesh that I was studing for my 3d printing, exactly on the shape of a wrist, or a finger: one of my ideas is to make personalized and personalizable 3d printed jewels; but with 123D catch was impossible to scan an arm!
I ask to my friends to scan my arm … and i tried to scan their arms … but the result was really unhappy!
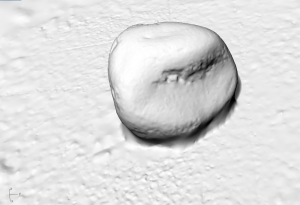
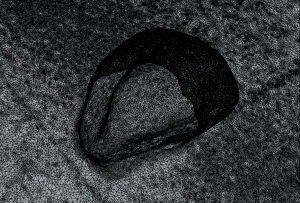
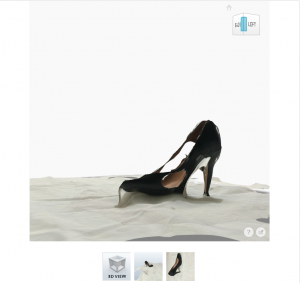
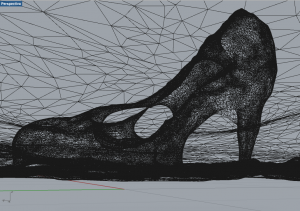
I tried to scan others objects more simples … here two of them … but the result is not good, needs al lot of elaboration to obtain an aceptable resolution; however this tool could be nice if we want play having a first aproximation with 3Dscannering.
I think that if we really want to scan something, is necessary to invert resources to have a good tool; anyway those are my experiments:
text 01: arm
test 02: shoe

test 03: stone