AUTOMATIC 3D CHICHA SCANNER
STEP 14: INTERFACE AND APPLICATION PROGRAMMING
OBJECTIVE
- Create an interphase that will show a blue bar that will only increase in one direction (up)
- Create the draft of my final project liquid increasement representation
- Create an interphase that will show a blue bar that will only increase in one direction (up)
- Create the draft of my final project liquid increasement representation
PROCEDURE
1. I entered to Ubuntu. Then, I entered to Fab Academy 2015 Schedule and clicked on the Input devices assignment
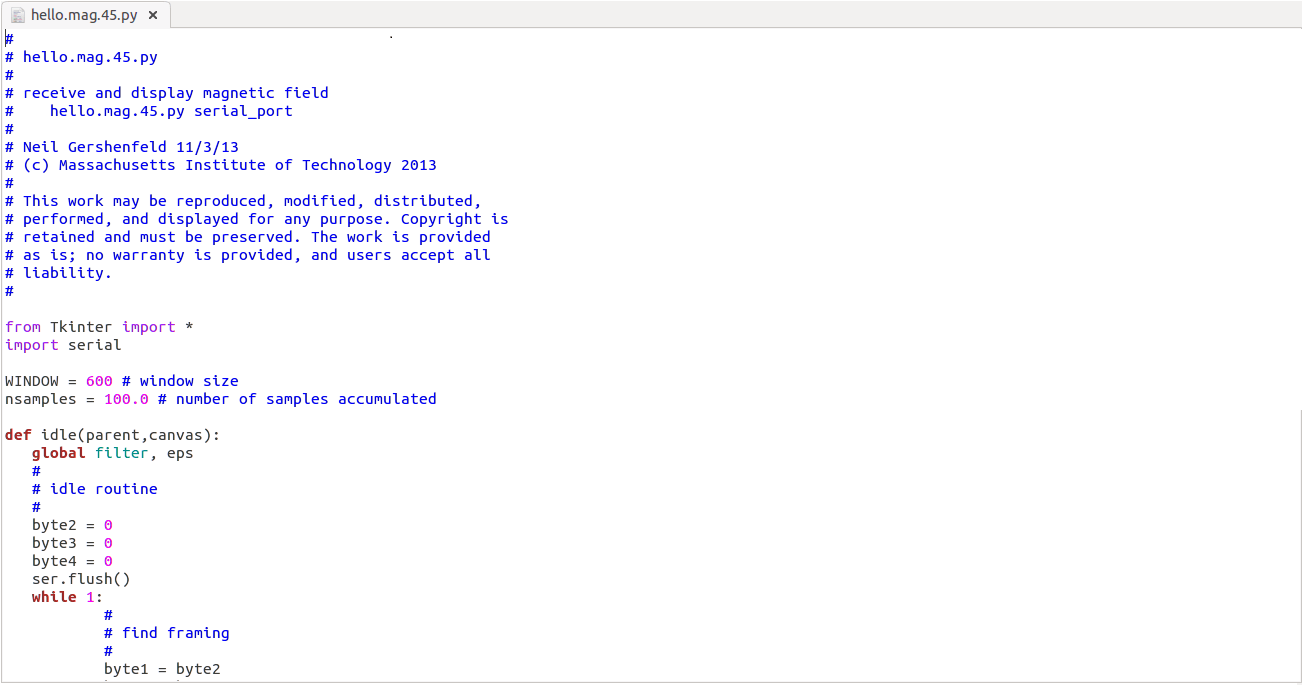
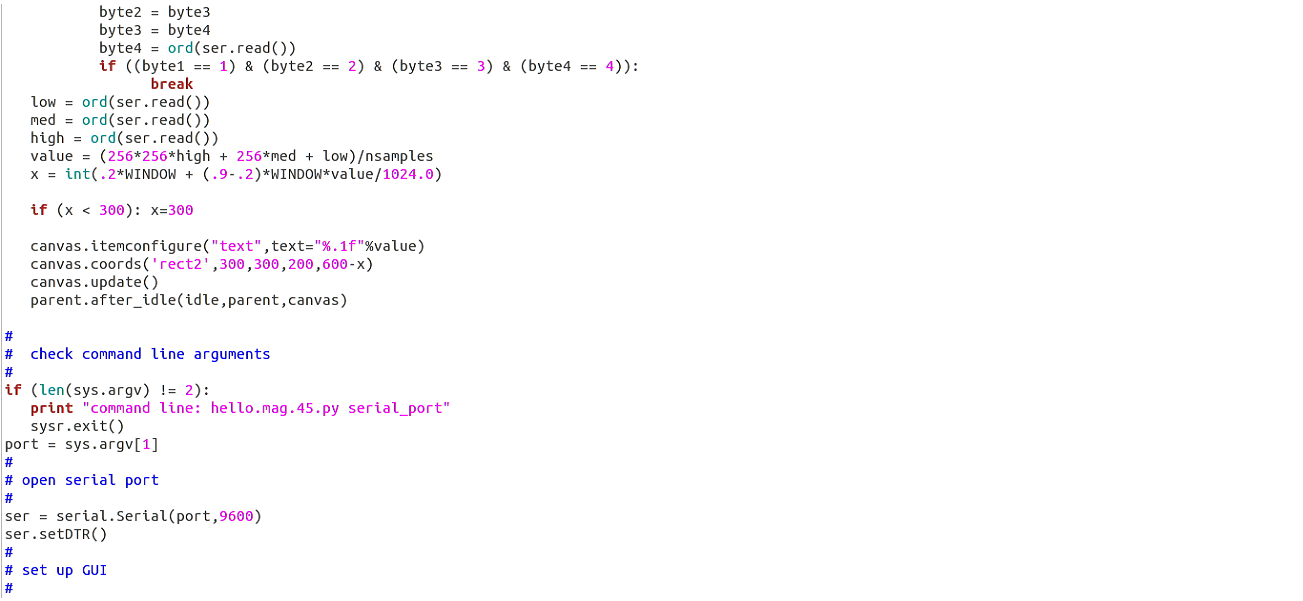
2. I clicked on hello.mag.45.py
3. I downloaded the file to my Desktop
4. I added if (x > 300): x = 300 before canvas.itemconfigure("text",text="%.1f"%value, because I observed that when x was higher than 300, the bar increased in Down direction and I wanted to the bar to reach its minimum value.
5. I changed canvas.coords('rect2',x,.05*WINDOW,.9*WINDOW,.2*WINDOW)
for canvas.coords('rect2',300, 300, 200,600-x), because I needed three fixed values for keeping a centered structure, but also one varaible value for increasing the level of the bar with the information received by the magnetic field.
6. I erased canvas.coords('rect1',.2*WINDOW,.05*WINDOW,x,.2*WINDOW), because I just wanted one bar that would represent the increasement of Chicha (the blue one).
7. I changed canvas = Canvas(root, width=WINDOW, height=.25*WINDOW, background='white')
for canvas = Canvas(root, width=WINDOW,height=.8*WINDOW,background='white'), because I wanted a bigger background
8. I changed canvas.create_rectangle(.3*WINDOW,.05*WINDOW,.9*WINDOW,.2*WINDOW, tags='rect2', fill='#0000b0') for canvas.create_rectangle(.9*WINDOW,.05*WINDOW,.9*WINDOW,.2*WINDOW, tags='rect2', fill='#0000b0', because I wanted a bigger centered background
9. Here is my result:

You can download my py Archive  here.
here.
10. I executed it following the Input Terminal steps
11. Here are the links of videos that shows that I acomplished my goals:
- Interface and Application
- Interface and Application 2
- Interface and Application 3
10. I executed it following the Input Terminal steps
11. Here are the links of videos that shows that I acomplished my goals:
- Interface and Application
- Interface and Application 2
- Interface and Application 3