MATERIALS
1. Wood
2. Pulleys
3. Motors
4. Dark liquid (ex. Chicha)
5. Pump
6. Valve
7. Container
8. Depth Sensor
9. Cork
10. Cellphone
11. Fabduino
12. Drivers
FUNCTION
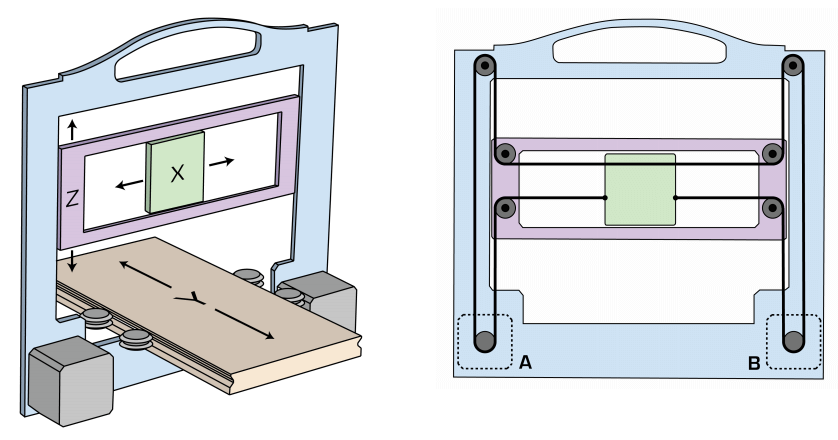
1. MAGIC MILL:
- System of pulleys: Allows the machine to move its X and Z axis while having two still motors at the same floor level.
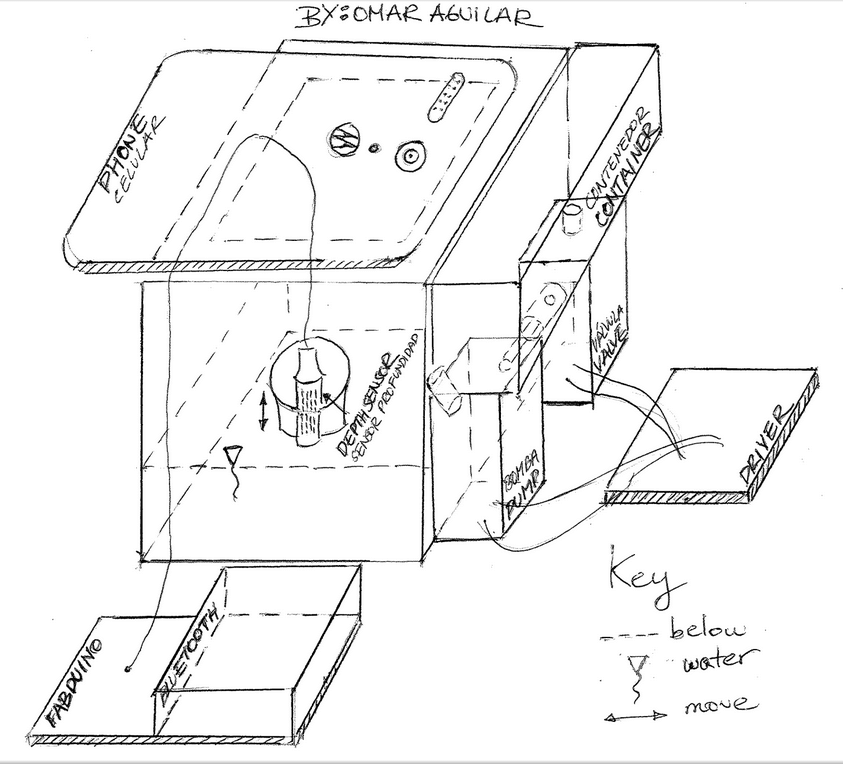
2. AUTOMATIC 3D MILK SCANNER:
- Pump-Valve-Container Sytem: Provides the cube where the object to be scanned is of 1cm¨3 of liquid per photograph.
- Sensor-Cork System-Fabduino System: Measures the depth of the liquid and sends the depth information to the Fabduino
- Fabduino-Bluetooth-Cellphone System: Sends depth information to the cellphone and indicates it to take a picture
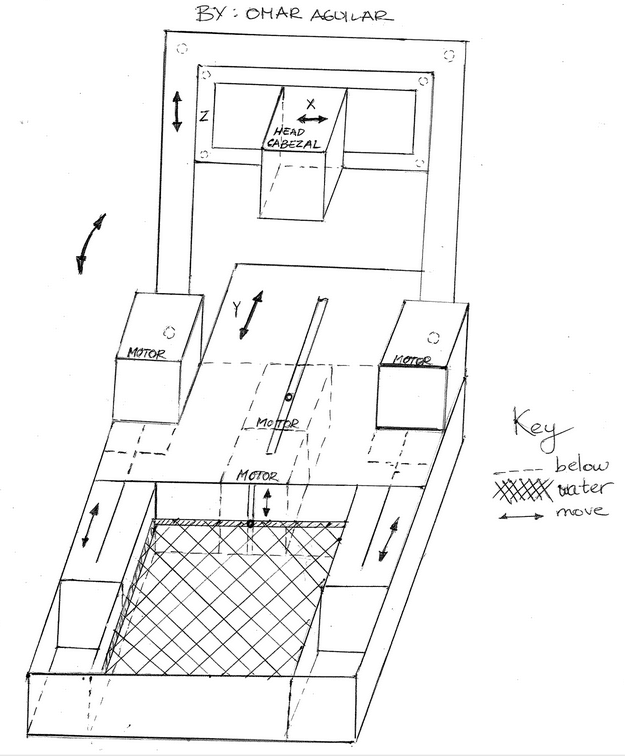
3.
PORTABLE 3D PRINTER-SCANNER
- Y Axis System: Allows the machine to have a Y axis that does not
interfere with the foldable nature of the Portable 3D Printer-Scanner
- Left and Right rectangular blocks System: Allows the machine to fold and stand strongly.
- Foldable Automatic 3D Milk Scanner System
(not yet designed): Willl allow the 3D Scanner to fold while letting the 3D Printer to fold also.
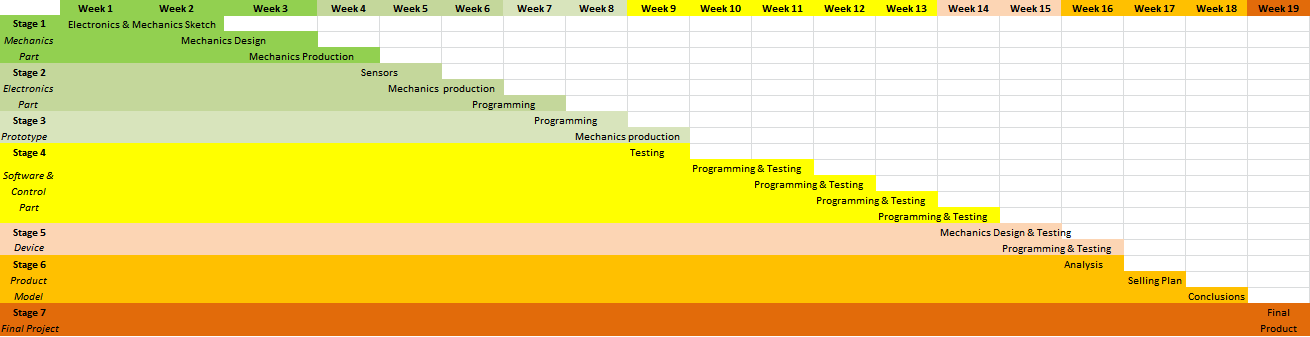
TIMELINE
 Home
HomeUPLOADING WEBS
1. Guide yourself using
Fab UNI tutorialI will translate the tutorial from Spanish to English in the following steps (with a few updates).
2. Enter to Ubuntu
3. Open the Terminal
4. Log yourself as root
5. Write 'Ctrl + Shift + t' (new tab is opened)
6. Write 'cd academy.2015'
7. Write 'hg pull'
8. Write 'hg update'
9. In the new tab, write 'nautilus'
Note: nautilus = Allows brows one's home folder.
10. Sometimes the folder is not found
11. Write 'System of Archives'
12. Write 'Home'
13. Enter to folder 'academy.2015'
14. Enter to either 'instructors' or 'students' depending on what you are.
15. In my case, it will be 'aguilar.omar'
16. Open the previous folder
17. Open index.html
18. Add (in my case)
<p><b>Fablab TECSUP (Lima - Peru)</b><br><a href="aguilar.omar/index.html">Omar Aguilar</a><br>19. We go back to the previous tab
20. Write 'hg add'
21. Write 'hg commit -m' "make a cpmment"
22. Write whatever
23. Write 'hg push'
24. Open Terminal
25. Open to tabs (Ctrl + Shift + t)
26. Write 'cd academy.2015'
27. Write 'hg pull'
28. Write 'hg update'
29. Execute 'nautilus' in the second tab
30. We visually look for 'aguilar.omar'
31. Open the previous folder
32. We copy all the archives we want in there (index, assignments, images, etc.)
33. Move to the first tab
34. Write 'hg add'
35. Write 'hg commit -m' "make a cpmment"
36. Write whatever
37. Write 'hg push'