 Composites>
This
week our assignment wasto
design, make a 3D mold, and create a fiber composite part out of it. This was a
busy week, and 3D printing a mold of the size I wanted would have taken too
long. I decided to use a 3D scan of my face. First, I gathered my materials. I
decided to use resin first, since I had used it before, and was familiar with
the mixing process. Stiff white cotton was my first choice of fiber. I was
thinking it might be neat to illuminate my composited face, so I only did a few
layers. I didn't have any plastic wrap on hand, but a plastic bag worked out
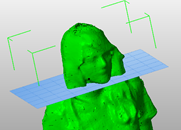
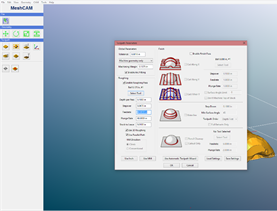
just fine as a release fabric. For my cast, I brought my 3D face into MeshCAM,
a great program to compose new 3D models from old ones. There I scaled my file
to the correct size of Styrofoam I would mill out. Here is my scaled file. Then I 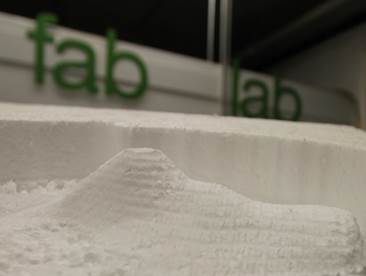
 brought that gcode file into Linux CNC, to send to our
big DIY CNC machine. Since I used a 1/4 inch ball end mill to drill the
styrofoam, I could go the machine's top speed of 60 inches per minute.The speed
of the dremel tool mounted in the CNC machine was 10000 RPM. After my face was
milled out I began the compositing process! I took care to keep my workspace
over a tray, as the resin was incredibly sticky, similar to honey. I cut up a
bunch of fabric squares, soaked them in resin, and pressed them onto my
styrofoam face. The resin/cotton was slippery, right away I got the impression
that this wasn't going to work, but continued in hopes that the pressured water
bag would do the trick. I placed my resin-soaked face in a small trash can, and
filled up a giant trash bag with water. 24 hours later I had a lumpy white
blob,
brought that gcode file into Linux CNC, to send to our
big DIY CNC machine. Since I used a 1/4 inch ball end mill to drill the
styrofoam, I could go the machine's top speed of 60 inches per minute.The speed
of the dremel tool mounted in the CNC machine was 10000 RPM. After my face was
milled out I began the compositing process! I took care to keep my workspace
over a tray, as the resin was incredibly sticky, similar to honey. I cut up a
bunch of fabric squares, soaked them in resin, and pressed them onto my
styrofoam face. The resin/cotton was slippery, right away I got the impression
that this wasn't going to work, but continued in hopes that the pressured water
bag would do the trick. I placed my resin-soaked face in a small trash can, and
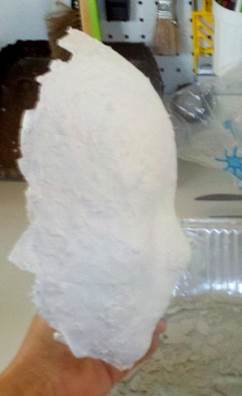
filled up a giant trash bag with water. 24 hours later I had a lumpy white
blob, 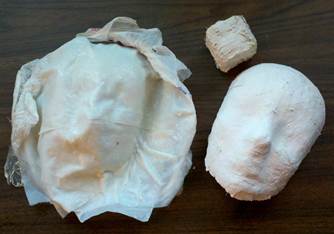
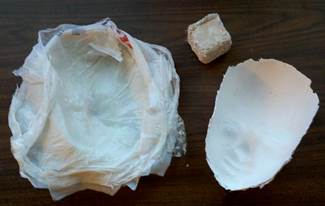 resembling a face, but nowhere near
what I had hoped for! I also had made a few coupons of burlap and plaster. This
combination was super strong, and the plaster dried much faster than the resin.
I attempted to mold my face with cotton and plaster the second time around and
I was much more successful!
resembling a face, but nowhere near
what I had hoped for! I also had made a few coupons of burlap and plaster. This
combination was super strong, and the plaster dried much faster than the resin.
I attempted to mold my face with cotton and plaster the second time around and
I was much more successful!