Week 9: Molding and Casting
3.25.2015 - 3.31.2015
Lecture Notes:
Homework:
- Design, mill, and cast a three dimensional part
Resources:
- Fab
Academy Handbook
- Roland
MDX-20 Specifications
- SRP
Player Software
- Smooth On - Smooth Cast 300 Series
- Smooth
On - Smooth Cast 300 Series Tech Bulletin
- Smooth On - PMC-121
Files:
Project:
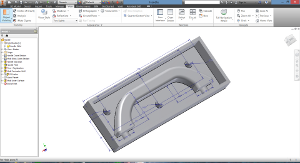
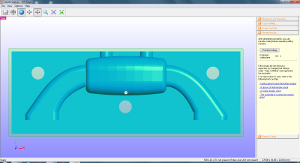
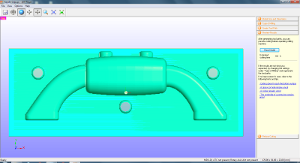
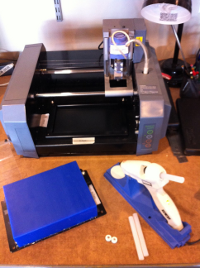
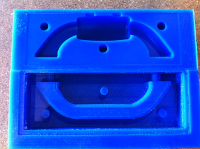
For this project I wanted to investigate casting parts with dissimilar materials. I opted to create two, two-part molds (one positive and one negative) and use them sequentially to cast a rigid handle with integral soft grip. The two-part casting process utilized flexible and rigid molds.Design:
AutoDesk Inventor Professional - Student Edition was used to parametrically design separate handle bar (positive) and handle grip (negative) molds.The handle assembly was designed to be symmetrical to reduce the number of unique mold halves. The total number of milled parts was reduced from four to three by using independent pins (acrylic rod) to register the handle bar mold halves. One mold with male pin forms replaced separate male and female versions of the mold.
 |
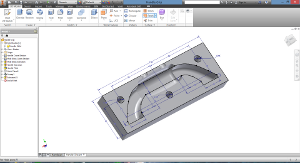 |
The scale of the handle and the handle's features were influenced by 1) the scale of the adult human hand, 2) the cutting envelope of the MDX-20 milling machine 8 inch x 6 inch x 2.375inch (203.2mm x 152.4mm x 60.5mm), 3) 0.125 inch (3.175 mm) end mills, and 4) the maximum cutting depth of those end mills. Maximum feature depth for either mold was limited to no more than 20mm.
Dual ports were incorporated into each mold to independently fill and vent the mold cavities.
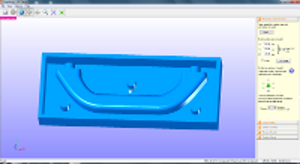
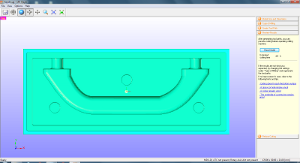
Tool Path:
Roland SRP (Subtractive Rapid Prototyping) Player software was
used to tool path the two mold designs using machinable
wax.
 |
 |
 |
 |
Cutting Parameters
| Property |
Roughing |
Finishing |
| Feed Rate |
900 mm/min | 900 mm/min |
| Spindle Speed |
6500 RPM |
6500 RPM |
| Cutting In
Amount |
1.00 mm |
0.0118 mm |
| Path Interval |
1.59 mm |
0.0118 mm |
| Finish Margin |
0.10 mm |
0.0 mm |
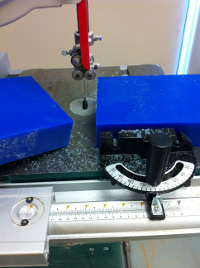
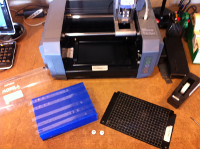
Milling & Casting:
The following image sequence documents the steps taken during
the sectioning, mounting, surfacing, milling and
molding processes.
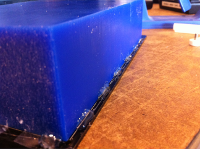
The 8 inch x 6 inch x 2 inch (203 mm x 152 mm x 51 mm) wax
blank's irregular surfaces required the use of double-sided tape
supplemented by hot glue to fixture it to the MDX-20's work
plate. Once mounted, the blank was surfaced with the
MDX-20 prior to zeroing the end mill and milling the molds.
 |
 |
 |
 |
 |
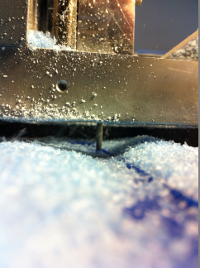 |
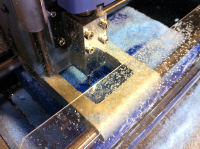
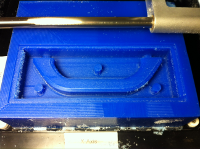
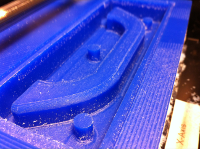
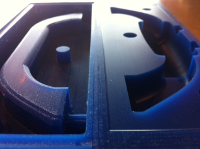
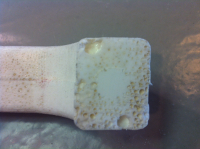
The 0.125 inch (3.175 mm) square end mill used to rough and
finish the handle mold produced a roughened surface and
discernible tool marks. One half of the handle grip mold
was nested on the same wax blank and roughed and finished with a
0.125 inch (3.175 mm) ball nose end mill with excellent surface
finish and no appreciable tool marks.
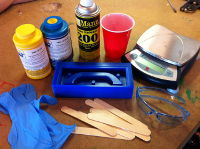
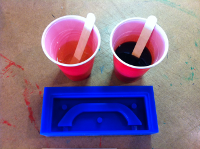
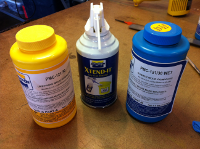
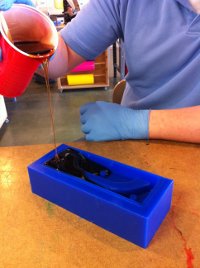
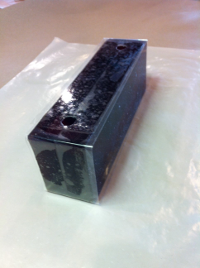
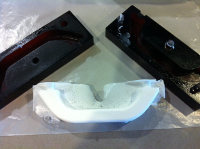
Smooth On PMC 121/30 wet urethane rubber was used to mold the
wax handle. Mold release spray was used to supplement the
release agent already present in the urethane and packing tape
was used to seal the mold edges excluding the holes.
 |
 |
 |
 |
 |
 |
 |
 |
 |
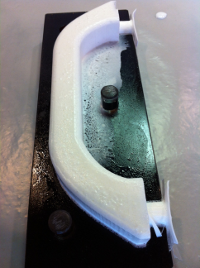
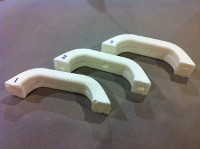
The handle was cast multiple times using Smooth-On 305.
The first cast handle showed significant porosity and was cast
without the aid of a vacuum and only agitating the mold.
The flash was limited to a portion of the mold's interior
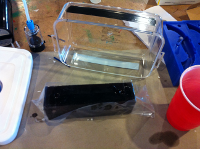
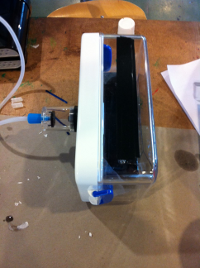
region. The second and third handles were cast under vacuum
using an off-the-shelf rigid vacuum storage container
system. The larger flash of these handles required
unsealing the vacuum container and topping off the mold
periodically as the resin level dropped in the mold
cavity.
The mold was not clamped during any the casting trials out of
concern the external force would potentially distort the mold
and handle form.
 |
 |
 |
 |
 |
 |
 |
 |
Casting quality improved with the following steps:
- Following the specified Part A to Part B mass ratio
- Allowing the mixed casting resin to rest prior to pouring
- Sealing the mold edges
- Rocking the mold
- Using a vacuum chamber
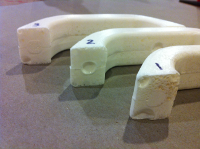
Porosity was decreased but not entirely removed over the three
casting trials. Bubbles within later castings were
generally finer than early castings but still found throughout
the handle. The mass of the cast and trimmed handles
increased by the third casting.
Other improvements to the mold and casting process might
included:
- Integral raised lip or bead around the mold's mating surfaces for sealing and alignment
- Clamping the mold halves during casting
- Larger sprue
Assembly of the urethane mold and subsequent handle castings
revealed asymmetry in handle model which prevented casting the
grip using the rigid female wax mold.
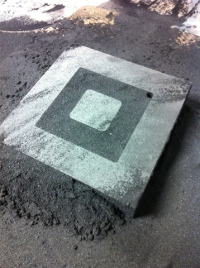
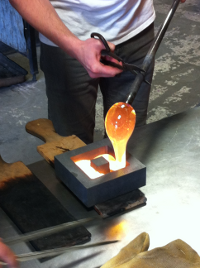
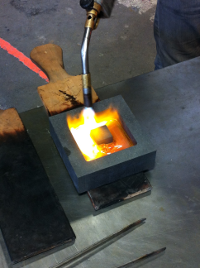
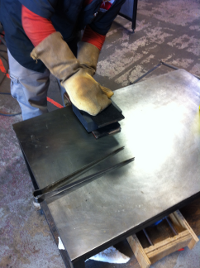
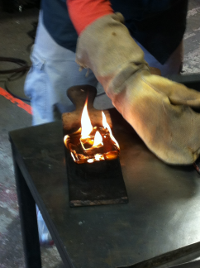
2D CAD / Glass Casting:
During Fab Academy weeks 6 and 7 I milled two high-temperature glass molds as part of a separate project.
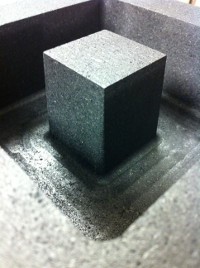
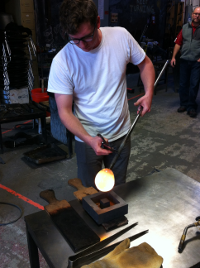
The following images document the steps taken during the
mounting, milling, and casting processes. Tulsa
Glassblowing Studio performed the glass casting.
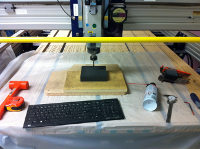
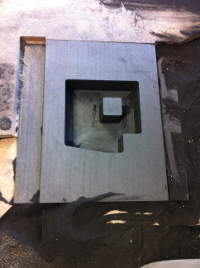
The molds were designed as 2D files using VCarve Pro 7.0,
tool-pathed for the Shopbot PRS Alpha 96, and milled from 2 inch
(50.8 mm) medium-grain graphite using a 0.25 inch (6.35 mm)
square end mill and a 0.5 inch (12.7 mm) to 0.25 inch (6.38 mm)
tapered ball end mill. The 3 degree taper and ball end of
the second end mill provided a mold draft and fillet
respectively. The bulk of the mold cavity was pocketed
with the square end mill offset inward from the mold
edges.
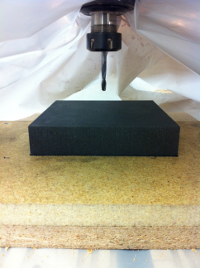
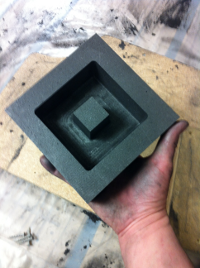
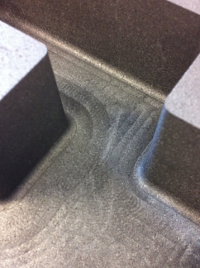
The tapered ball nose end mill was used with a pocketing
toolpath (rather than profile toolpath) to mill the mold to its
final dimensions as a precaution against chipping. A
profile toolpath with a lead in could have been used to
accomplish the same effect. The square end mill was used to
remove any remaining tool marks left by the tapered ball nose
end mill on the mold's lower surface.
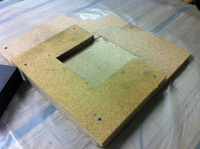
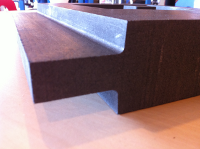
In each case a tightly fitting pocket or 90 degree corner
aligned with the Shopbot's machine axes was milled into scrap
particle wood to fixture and locate the graphite blocks.
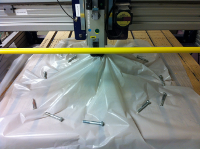
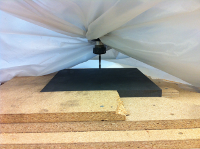
In place of vacuum dust collection, plastic tarp was placed
beneath the particle board fixtures and fastened around the
spindle's body to contain the graphite dust. The larger of
the two molds was milled from both sides to include handles
along two edges.
 |
 |
 |
 |
 |
 |
 |
 |
 |
 |
 |
 |
 |
 |
 |
 |
 |
 |