Week 5: 3D Scanning and Printing
2.25.2015 - 3.3.2015
Lecture Notes:
Homework:
- Design a three dimensional structure that suited to additive
rather than subtractive manufacturing processes
- Scan a three dimensional object (and optionally print it)
Resources:
Files:
- Cup AI STL
- Block 123D STL
Acknowledgements:
Thanks to Brandi Dixon for her inspiration and support during
this project.
3D CAD:
I considered designing three dimensional structures with complex internal cavities and limited or no external penetrations to fulfill the additive manufacturing requirement of this assignment.
Geode inspired structures and klein bottles were some of the candidate shapes I considered. Designing a klein bottle with a typical organic and not a simplified geometric form presented some challenges and I switched the design to a Pythagoras Cup at the suggestion of Brandi. The volume limiting and siphoning features of the Pythagoras Cup are supplied by an inverted U-shaped internal drain.
I took inspiration from some images of Pythagoras cups online
and drew my own version using AutoDesk Inventor.
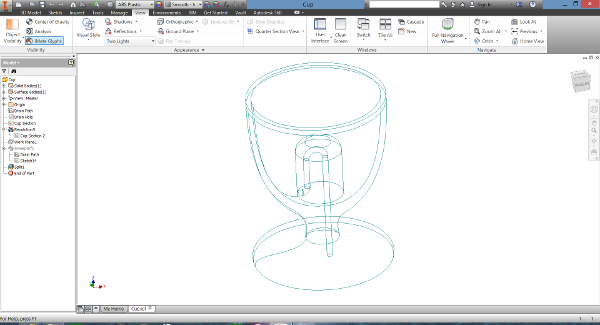
The drain was contained within a pillar centered within the
bowl of the cup. Ensuring that the drain would be
reflected as an internal void in the STL exported from Inventor
required some troubleshooting. One early version of the
design was printed without the drain properly formed within the
cup stem and pillar. Surfacing the drain and splitting the
cup solid corrected this issue.
I wanted to utilize at least two pieces of CAD software for this exercise and used 123D Design to create a second three dimensional part design.
Figure 2. Block Construction Progression within 123D
Design
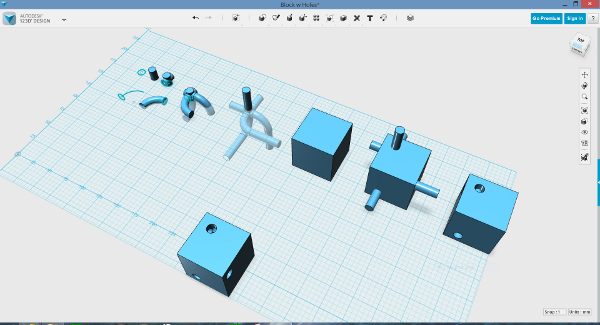
The cube-shaped block with curved internal passages was created
using sketching, extruding, sweeping, snapping, combining, and
subtracting tools within 123D.
3D Printing:
I used MakerBot brand FDM 3D printers to form the cup and block
models into physical parts. Using two different models
allowed me to print different materials and use different
features within MakerBot Desktop software. The table below
describes the printer settings used to produce the two parts:
| Property |
Cup |
Block |
| Printer |
MakerBot Replicator 2X |
MakerBot Replicator (Dual) |
| Material (Model) |
ABS |
PLA |
| Material
(Support) |
Polystyrene |
PLA |
| Raft (Y/N) | N | N |
| Extruder T (C) |
230 |
230 |
| Platform T (C) |
110 |
24 |
| Layer H (mm) |
0.3 |
0.2 |
| Infill |
10% |
10% |
| Shells |
2 |
2 |
| Printing Speed
(mm/s) |
90 |
90 |
| Traveling Speed (mm/s) |
150 |
150 |
Supports were enabled in both the case of the cup and the case
of the block however the cup used the dual extrusion feature of
the Replicator 2X where the block did not.
To ensure the best printing results I cleaned the extruders,
inspected and replaced the tape on the build platform, and
checked the platform for level prior to printing.
Figure 3. Pythagoras Cup Printing
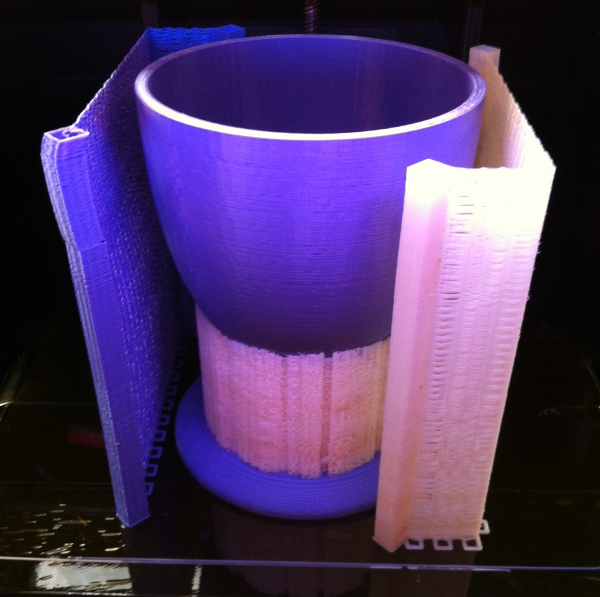
Figure 4. Pythagoras Cup with Dissovable Support Structures
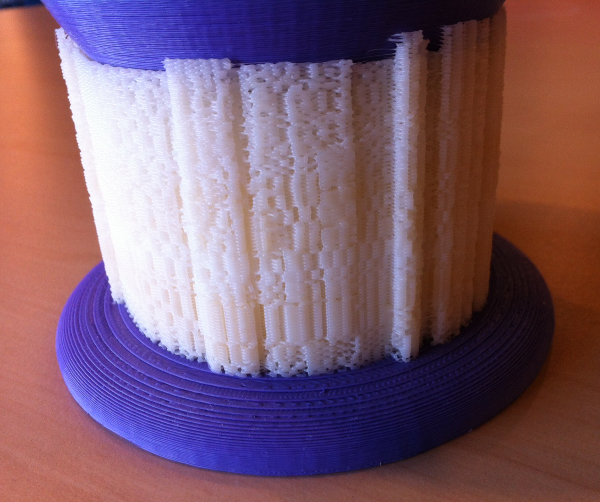
Figure 5. Block Partial Print Showing Internal Passages
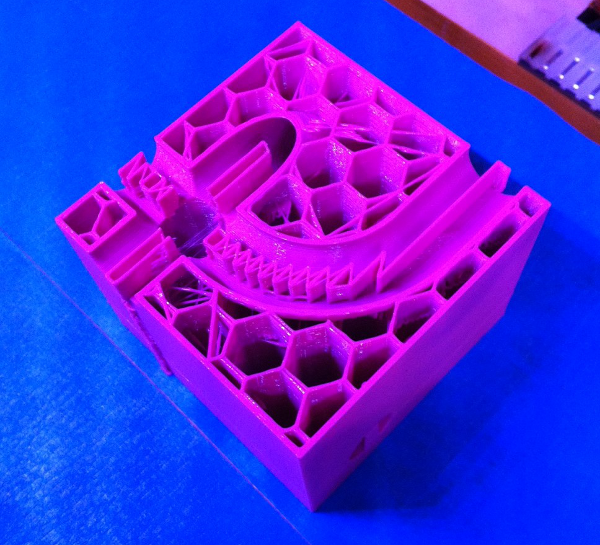
The parts were printed without any issues of warping,
dislodging, interrupted extrusion, etc. Occasional layer
separation within the block print was due to pausing the printer
and its extruder to take photographs.
Limonene soluable polystyrene was used for the cup's supports
in order for the drain to be thoroughly cleared of any support
structures.
3D Scanning:
Fab Lab Tulsa contains three types of 3D scanners that suit
different overall part scales and feature scales. Of the
XBox kinect and Scanect software, the MakerBot Digitizer and
Digitizer software, and the Roland Modela MDX-20 and Dr. Picza
software I chose the Digitizer. The Digitizer's scanning
envelope of approximately 200mm D x 200mm H and resolution of
0.5mm make it the best suited for moderately sized parts.
As a visible light optical scanner, I also wanted to test the
Digitizer's ability to scan different surface colors and
textures in addition to forms. The parts selected for
scanning included a white, glossy replica mandible, a medium
brown, matte cedar block, and a dark, moderately glossy tortoise
shell. The replica mandible and turtle shell were loaned
to the lab courtesy of the Tulsa Zoo. Thanks to Brandi for
her coordination with the Tulsa Zoo.
Figure 6. Scanned Articles
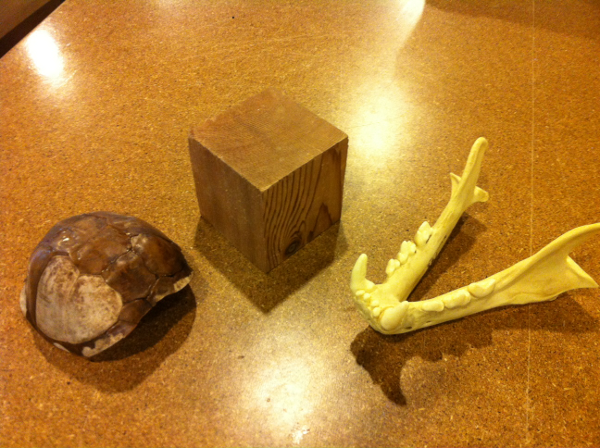
Figure 7. Replica Jaw During Scan
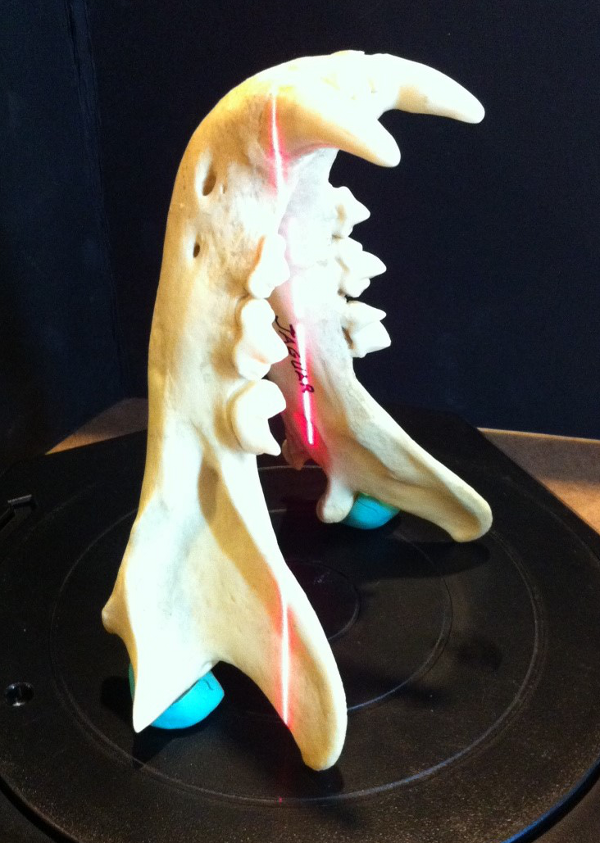
Figure 8. Replica Jaw Scanner Output

Figure 9. Cedar Block Multi-Scan Results
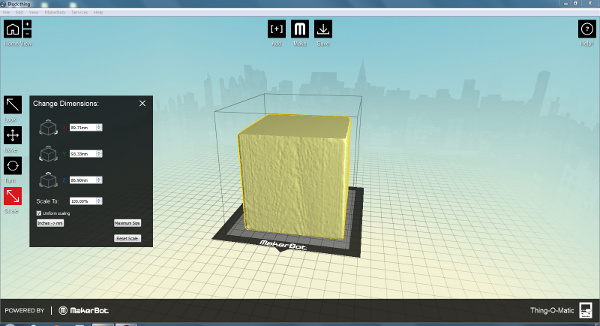
Figure 10. Tortoise Shell Multi-Scan
Results
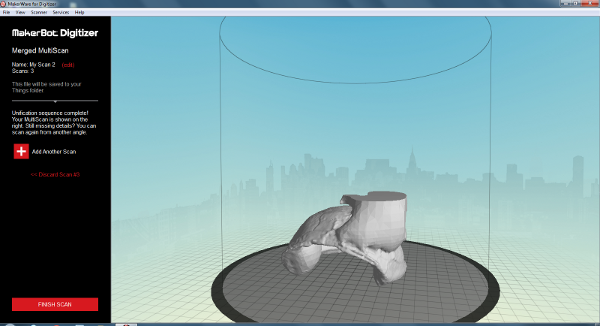
Camera, laser, and turntable calibrations were performed prior to scanning and all three parts were scanned from multiple sides using the Digitizer software's multi scan capability. The best scanning results generally came from smoother and less glossy surfaces. The shadowing effect due to some of the concave and overlapping shell and jaw features I believe contributed in part to the less well formed portions of their respective scans. The simple geometry of the cedar block allowed me to perform some dimensional measurement comparisons with the scanned results.