Interface and Application Programming
Week Fifteen
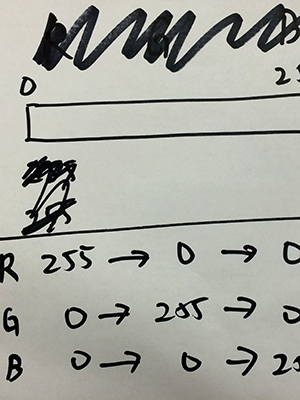
For this week's assignment, I started with the dimmer sample code in Processing. I wanted the second version of my moon clock to have the ability to be dimmed, and I thought that this excersise would be a good place to start. I got the sample code working with a white LED and it worked quite well, dimming the light. I then was trying to figure out how I would alter this code and make it my own. I thought of the color picker in Photoshop and how red, green and blue blend together to make a color. I wanted to make the color picker work so that when you clicked on an area of color, it made the LED light up that color.
I began looking around online to see if other examples of this existed so that I could learn more about the code I found a great example on the Arduino site of how to read ASCII and work with serial.parsInt(). When I found out that I was missing this week's assignment, I was at the Haystack Mountain School working in their Fab Lab. I am still relatively new to coding and was struggling at first. With the help of Brett Jensen and also my fellow Fab Lab assistant Dan Chen, I was able to troubleshoot my code and get it up in running. One of the Processing documents that I was reading really helped me out a lot as well.
I was so excited when I finally had code that would compile both in Arduino and Processing. In Processing, I could see that when I selected color on the color picker, that is was displaying those values but for some reason the LED was not lighting up. After working with the code for a bit, Dan helped me to see that the format that Processing was exporting the information was not in the same format that the Arduino program was looking for it in. Processing was exporting something that looked like R:104 G:25 B:203 but the format the the Arduino program needed was simply 104,25,203.
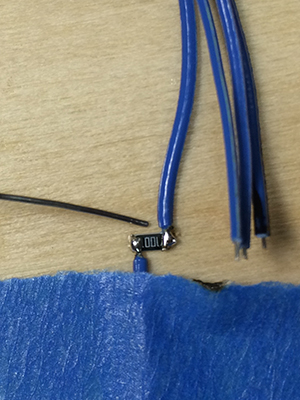
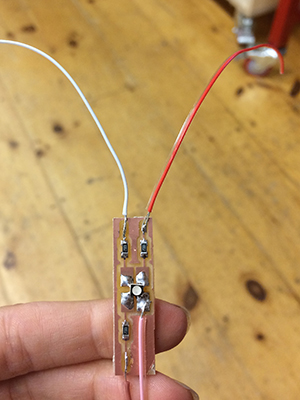
I used the Modela at the Haystack Fab Lab to make a small board to work with. I accidently didn't put mosfets on the board, meaning that I couldn't use the surface mount LEDs. Luckily I had brought some of the hole-through RGB LEDs that I had wired for my final project. I didn't really have time to make a new board, with the schedule at Haystack being very hectic, but I needed to put resistors onto LED. Dan taught me how to do what he called "air soldering" which is to cut the wire and to use the resistor to reconnect the LEDs. It was a bit tricky to hold it in place, so I used blue tape to hold the wires down. Once I had the connection of those three wires, I was able to still use the "lobster" board that I made, which is fitting due to my current location.
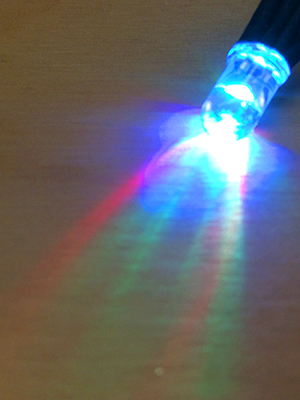
After finally getting both the hardware and software to work, I was incredibly excited and exhausted. I am excited that I now that this code and could use something like it for future projects.
Files
Processing Code
Arduino Code
