This week assignement was to design a 3D mold, machine it, and cast parts from it.
*All files provided on the navigation menu.
This assignement was one off the most techinic, long and difficult for me, not because of itself but because i got to a point where it had to be absolutely perfect. The idea was do making keys for the final project keypad. I thought this was a good idea since it is just one mold for at least 16 casts (my final keypad is a 4x4 matrix with 16 keys).
I began my journey researching every button, key, switch i could get my hands on. First i dissasemble, mesured and made a 3d model of the switch we have in the inventory. I discovered that the movement is made possible by a thin convex metal sheet. After i mesuared i found out that the actual movement of the switch was of about 0.3mm (about thickness of 3 sheets stack toguether). And also that the swicht is made of 6 different parts (there is one that is plastic with metal embedded, so i count as one). And after reading the datasheets (?link?) i found out notting more, i guesss for my application those variations don't matter, but anyway was intersting).
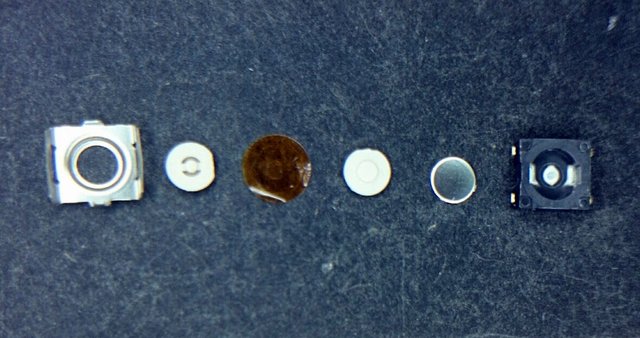
Fab inventory switch dissasembled, 6 parts (top case, external button, protective film, internal button, metal sheet spring, botton case
Because the Fab inverntory button is so small and the movement it's so litle i figured it out i should do a cap for that, and after i found out it would be perfect for the molding and casting assignement, so i reasearched a bunch of buttons or caps.

The inside panel of an Epson big format printer that Shawn and I fixed, the complementary spring is the plastic itself , the switches on the eletronic panel whore the same as the ones on the Fab Inventory
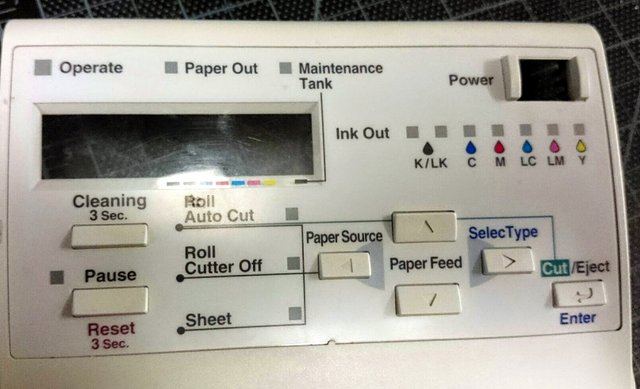
The engonomic side of the Epson buttons
Some metal buttons, outside the AS220 building, yes round buttons are very pleasing
A lot more buttons, this ones had rubber or metal springs to complement the movement, and whore a little different since they had a coductive plastic on the botton to close the circuit once a key was pressed
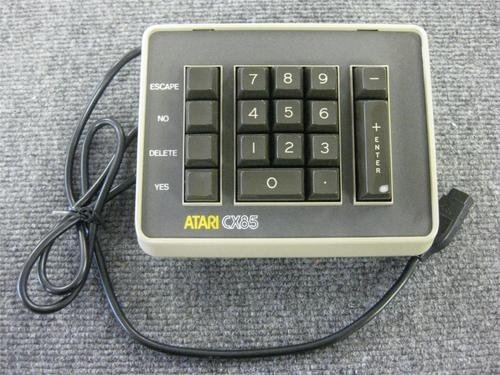
An old Atari keypad, i thought about making a special key for enter, but i don't think maybe in the future
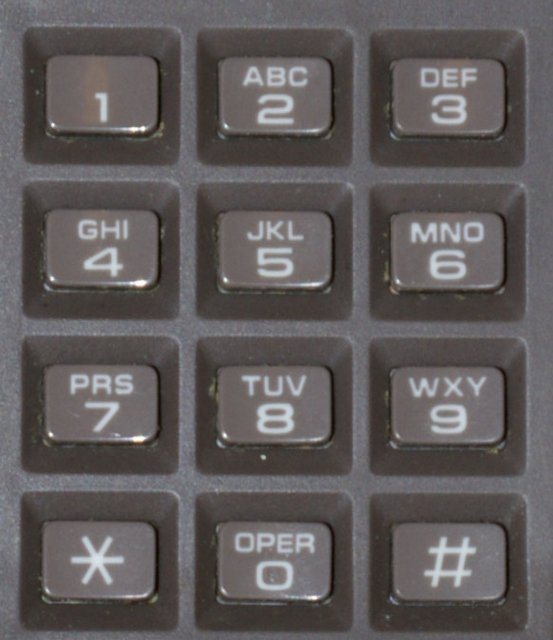
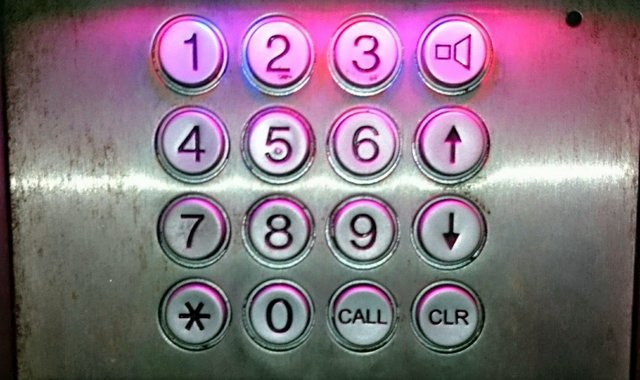
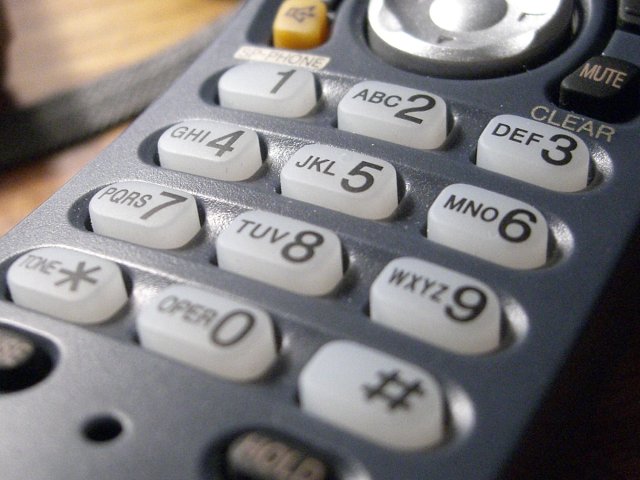
An old telephone keypad, remember the alphanumeric keypad?
A more modern keypad, all ruber
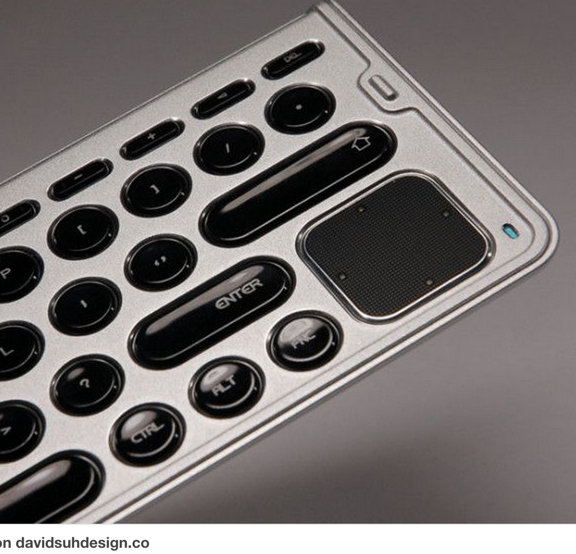
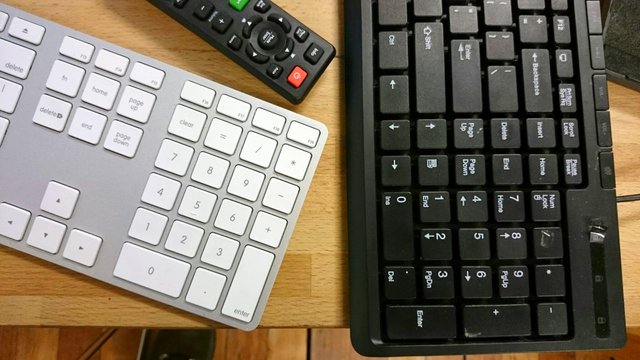
An modern keyboard, the ergonomics/design is key here, all roud and concave keys
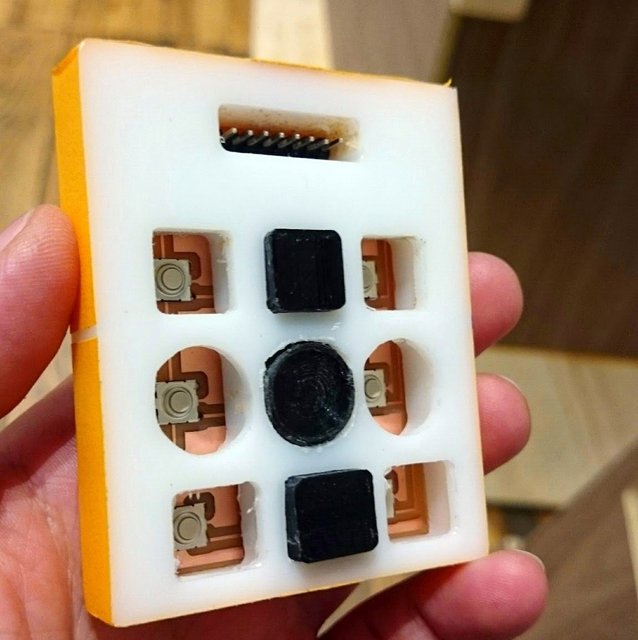
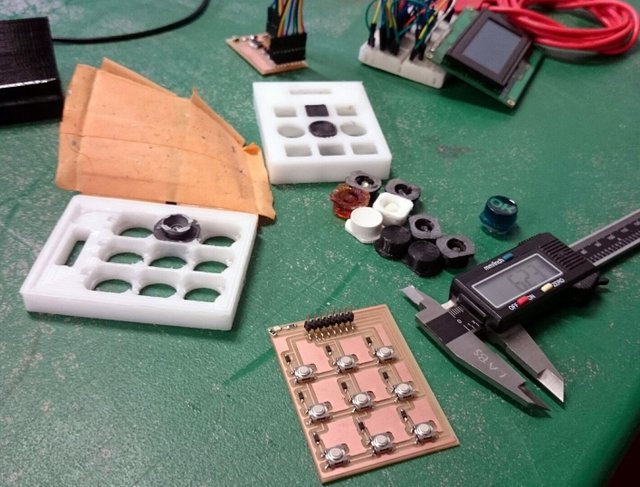
Now for the practical part, after i reseached the keys, i milled a case for the buttons in blue expanded pvc plastic, to fit the 3x3 keypad board i had already done, just to test if the keys. Without a casing it is just keys pressing buttons on air and you can't find the trajectory of those.
To mill the plastic i used the Modela MDX-20 with an 1/8 (inch) endmill, the problem was the endmill i used was not an endmill but an Dremel bit, once i used the correct one it cutted, but because the material is to soft it melted and the finishing was not great.
Trying to mill the case for the buttons, but using the wrong endmil...

Now with the wright endmill, the problem was the material, it was to soft and not good for finishing
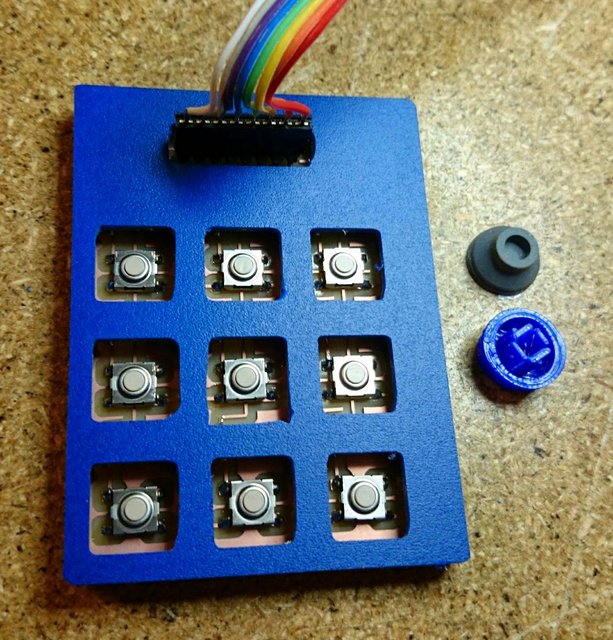
Fitting the case in the 3x3 Keypad board
Testing the Keypad board with a 3d printed key and a rubber spring
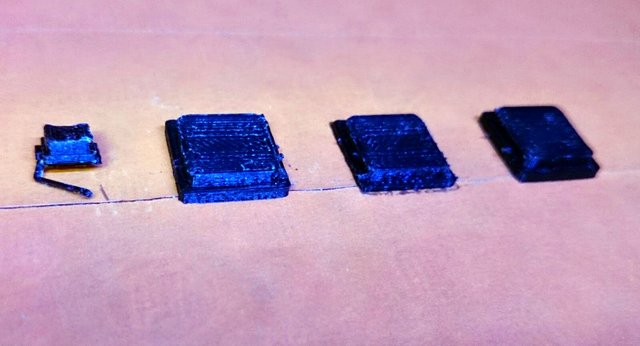
Then i started to 3d print lot of different keys on the Makerbot to test on the buttons board. I found out that i wanted to test square buttons, retangular ones and even round ones so i milled another case out of white HDPE, and when i found the right shape (the round one) i milled another case out of white HPDE. And then printed keys with different thickness.
3d printing a couple of keys
3d printing some more keys, different thickness
testing the 3d printed keys with buttons in the plastic case
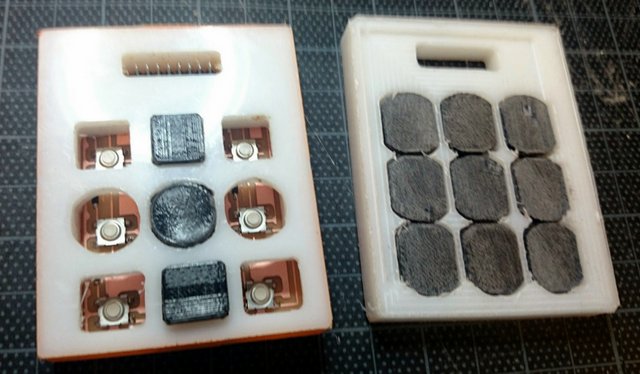
Two different cases, one with different shapes and another with the prototipe 3d printed keys
Testing the felling of the keys when pressed
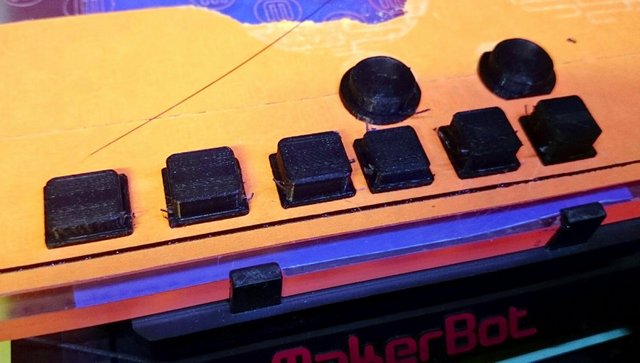
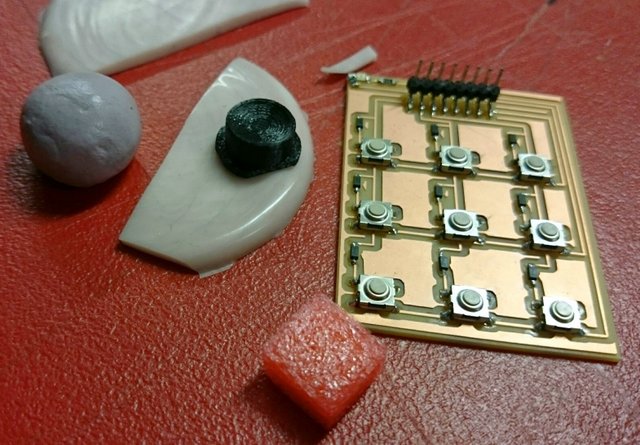
Then i found out i didn't have enough thickness on the HDPE to make the keys flat on top of the buttons and that the rubber springs nedded something to stick. And a hole would be perfect for both. So i drilled holes, but now the keys could not press the buttons, so i putted some hot glue on the inside of the hole, and that made a litle lump on the middle of the hole that now could press the buttons satisfactory.

Making holes in the keys, so they fit better with the buttons
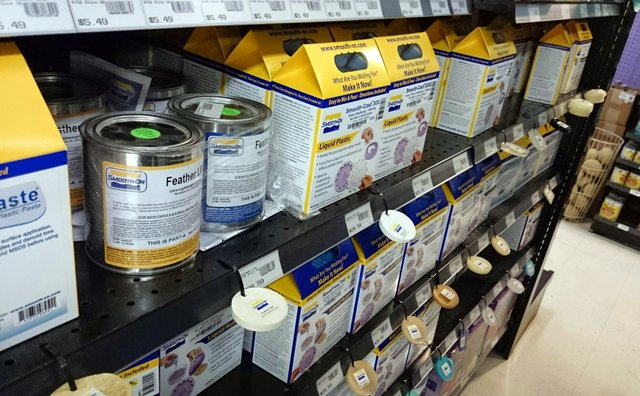
Researching for mold and casting materials
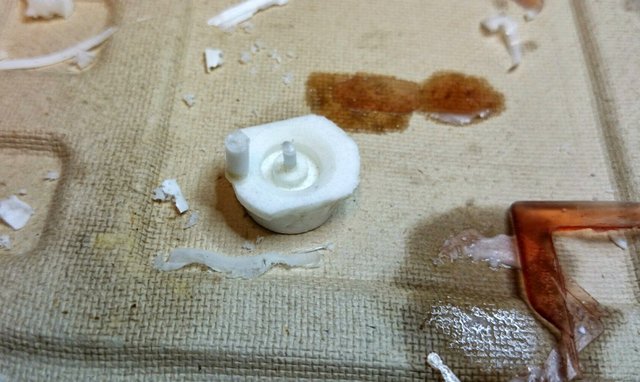
One important thing i found out is because the button on the inventory has only 0.3mm of travel when you press it, is a good idea to increase the felling off pressing the button with some king of spring or foam, and i had the good fortune of finding on the lab a lot of rubber springs for keyboard (i assume it was removed from an old keyboard) an that worked perfectly, i tryed to use other rubber and plastic foams (so it could be reproduced in other labs) but never with the same felling as those, so in the end i stuck with those.
Testing several rubber to try to make the pressing of the keys more pleasent
The research continues...on the left it is a button with the rubber spring on it
After that, and after testing the design of the keys i decided on a circular one with a concave top. I then prepared to mill the machineable wax using the standard settings on the old FabModules, one problem i got is because i didn't measure the endmills and did the model acoording to that the mold of the mold was imprecise and not exactly what was on the 3d model. But for a test i poured the urethane rubber on the mold and made a mold of the mold, then i tryied to make a button using Urethane plastic (Smooth-Cast 305) and applied a thyn layer of Spray release (Smooth-On Universal Mold Release). But in the end the urethane plastic stuck with the urethane rubber, so strongly that not even cutting the mold helped save the key.
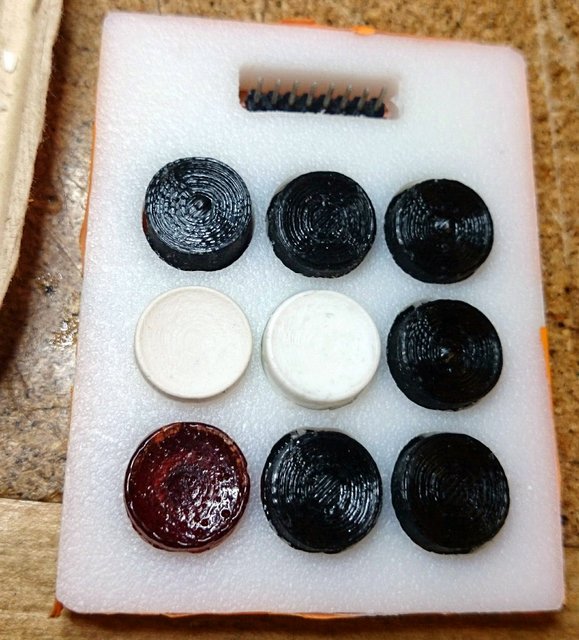
Final aproved test of the buttons, some are 3d printed and some casted (white ones and ambar one)

Trying differente resins and different quantyties of resin to hardener
First mill try, on the machinable wax
First urethane rubber mold
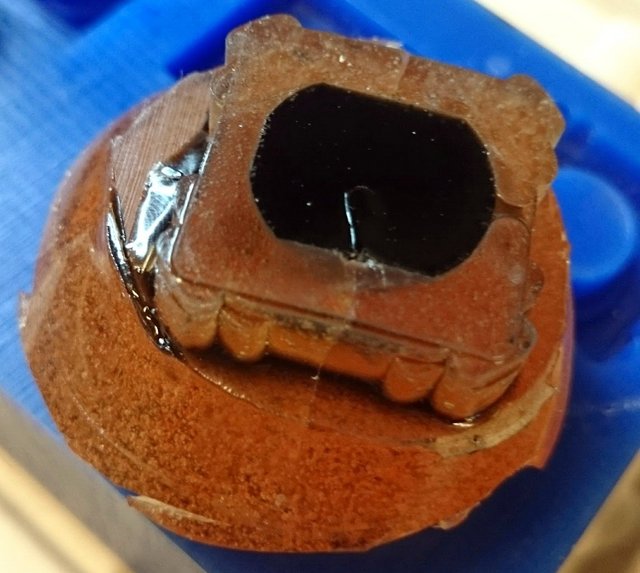
Try to put urethane rubber in the urethane mold, with a tin layer of mold release and it stuck toghether, really stuck, not even cutting the mold helped
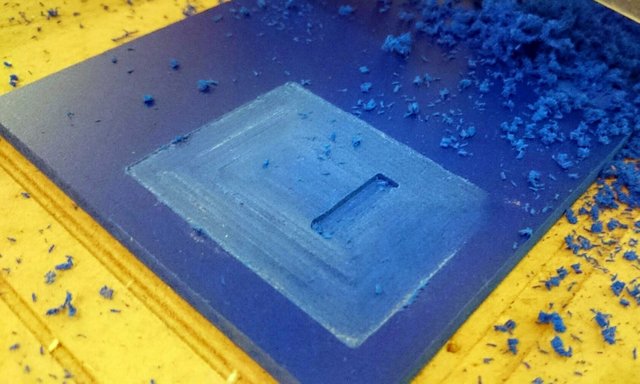
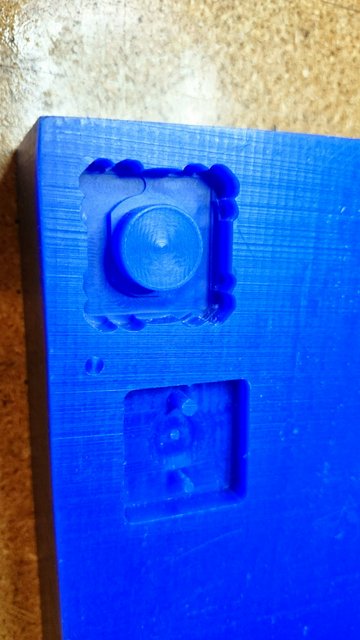
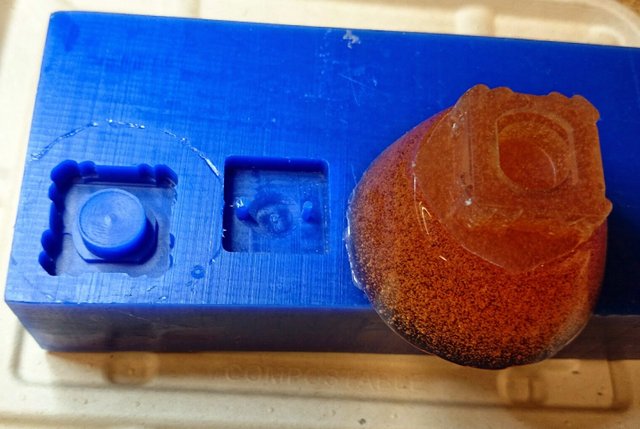
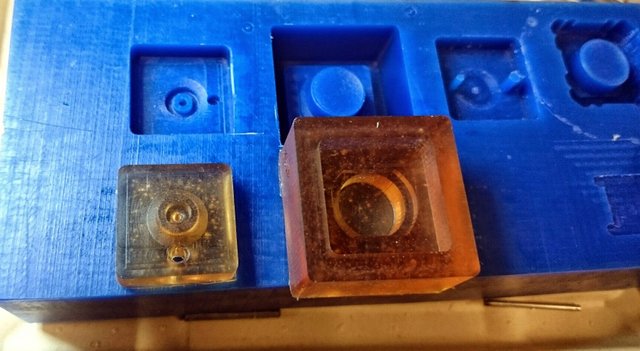
And because my previous tests teached me so much i did a very complex final mold. I modeled in Rhino a two part mold with a vent and a pour hole (actually i designed so they are made from nails without heads, beacuse they are too thin for the maxchineable wax), and for each mold it had a rough cut with the 1/8 (inch) endmill and a finish cut with the 1/32 (inch) endmill. I had to mesure and use a diferent 3d .Stl for each endmill, so that the bigger shank (on the 1/32) didn't ruined the mold, the final idea with the endmills is how deep can the cut be. Also i did so the ghost line (separation between top and bottom mold) was in a place it didn't appeared on the cast part and that one mold fitted inside the other so the part was more precise and didn't need registration marks or to be clamped after.

For maximum precision, i took mesurement of all the endmills, and the cutting part i had to work
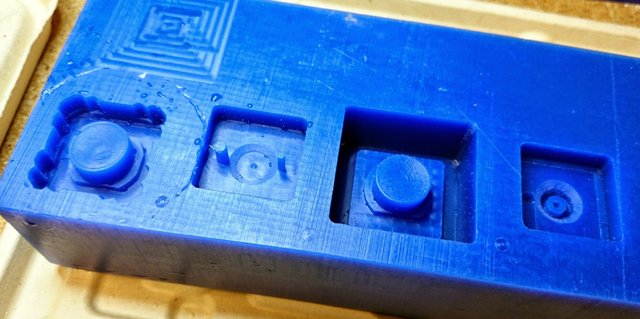
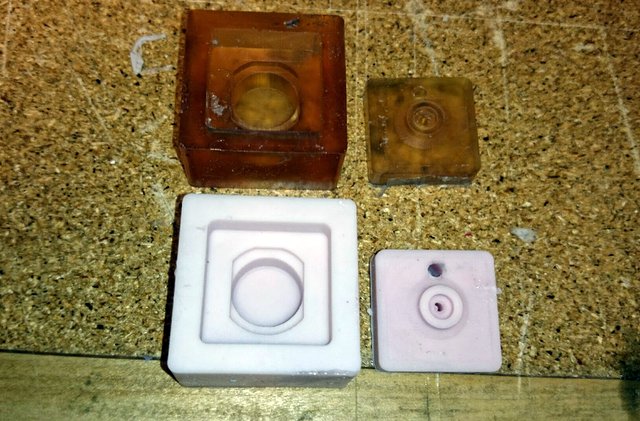
The old an the more precise new mold for the mold
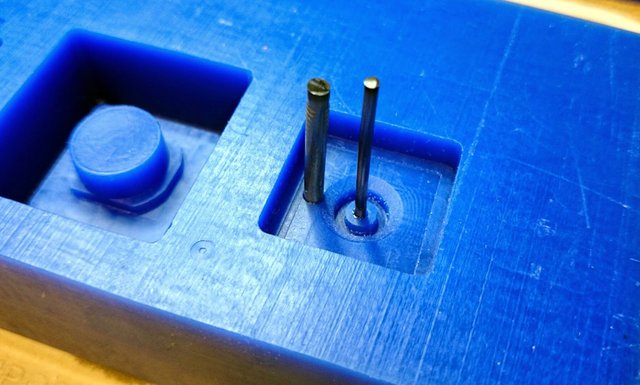
The old mold had the puring and the respirator rods made of wax but they wore too fragile, so i made two inserts for the metal rods (they are nails without the head)
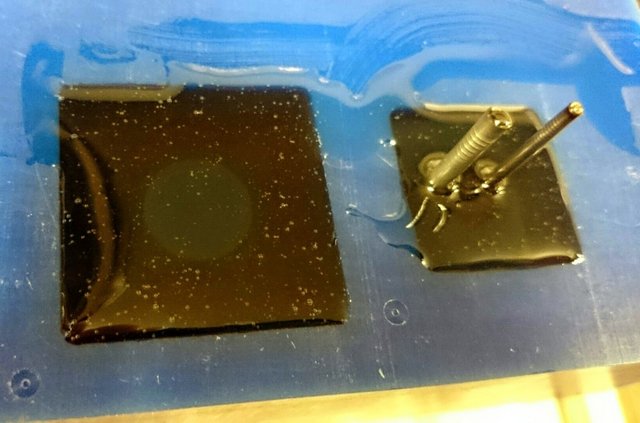
Pouring the urethane rubber in the new mold
The new mold ready, perfect! (the bubles are only internal ones)
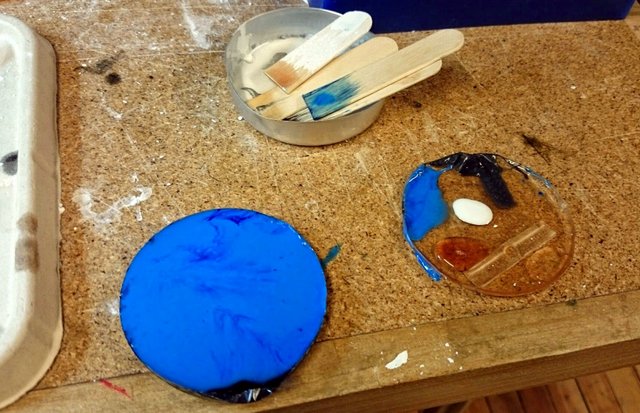
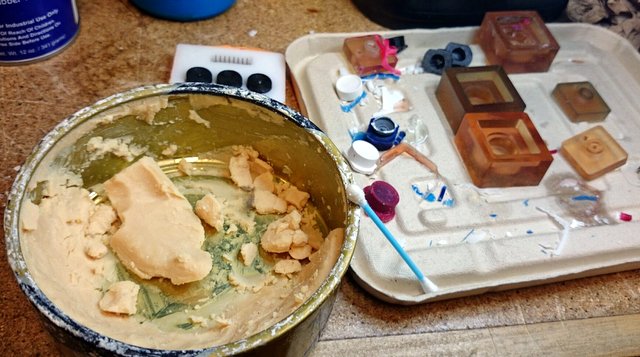
Testing urethane plastic with the different pigments
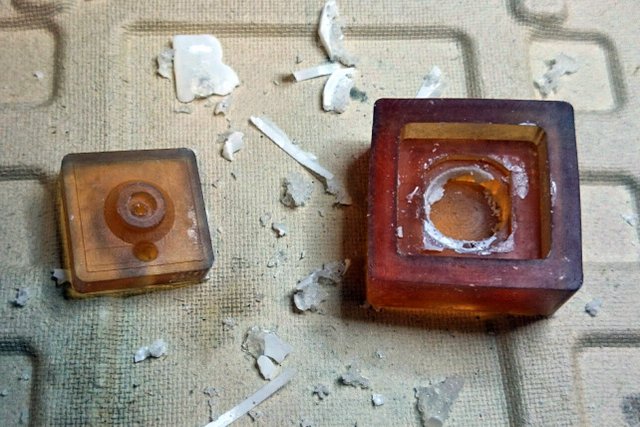
So for casting the key the first time on the new mold i used a lot of spray release, but even with a lot of spray the plastic keept bonding with the mold in some parts, so i did another mold and this time i used Mirror Glaze Maximum Mold Release Wax. And it worked very nice, but the problem is the work you have to do, put the wax in small quantities, wait, remove the excess, put a another coat, wait and then remove the excess (the lable says to put 3 to 5 coats!!!). In the end i found we had Silicon rubber, and that was a bless, much better, no wax or mold release necessary and it is very maleable.
First try with molding and casting on the new mold, some plastic got stuck again
The casted key
Using realease wax insted of the spray mold realease, much better
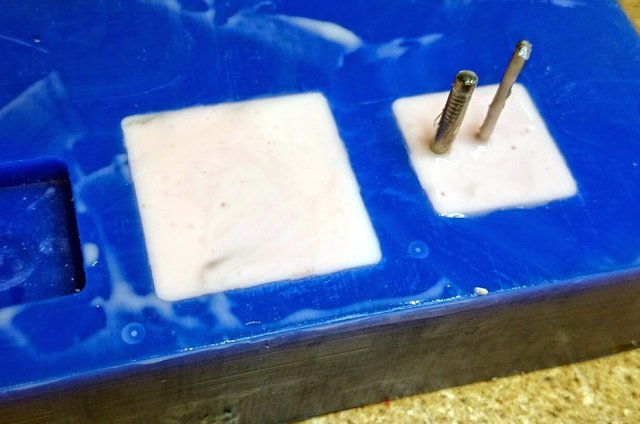
Casting the mold silicon rubber
The two mold in contrast, the silicon is softer and dosen't require mold realease
After i was abble to make some very nice keys i found out the perceft ratio of resin to hardener is key, what happens when the quantities are wrong is that the plastic becomes soft, one time so soft that ressembled the consistency of the urethane rubber and not the plastic. So for the final keys i made a clean workspace with all the materials i needed and everything labeled and most important a scale to be very precise on the mesuarements. One important thing if you are using Smooth-On 305 or 326 is that one is heavier than the other, an you are supose to mix the same quantity in volume. And just the smallest fraction of pigment (Smooth-Cast SO-Strong pigments) you can put because if you put a lot it will interfere on the reaction and make the plastic soft.
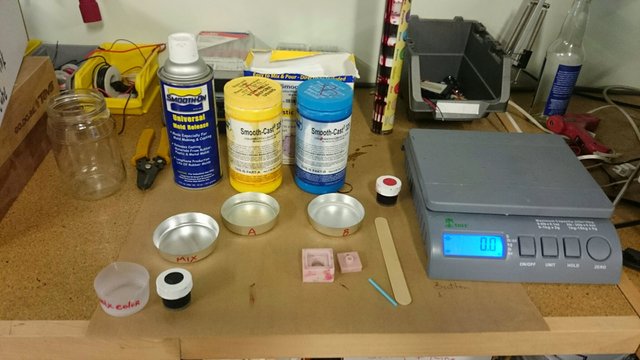
For the final key, all organized to have the exact proportion of resin, hardenear and pigment
For some bizarre reason when i tryied to use the vaccum pump to eliminate the bubbles on the urethane plastic what actualy hepened was that the plastic got a lot of bubles and than became really hot really quick, in almost 5 minutes it was already hard with a lot of bubbles on it... I tryed with the pigment and without with the same bizarre efect. I guess i should use a pressuse chamber, but that will be a experiment for the future...
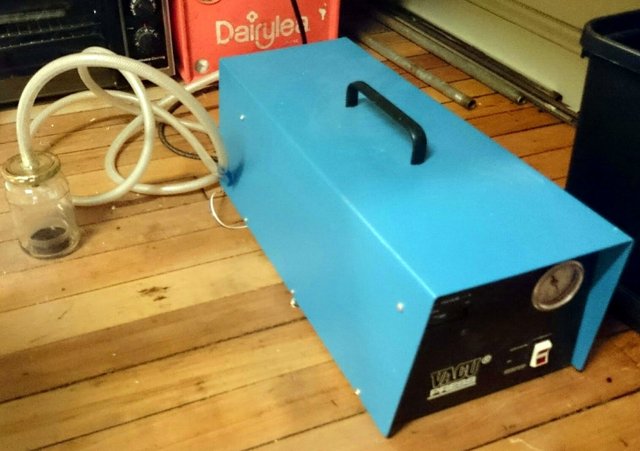
Trying to remove the bubbles with the vaccum pump
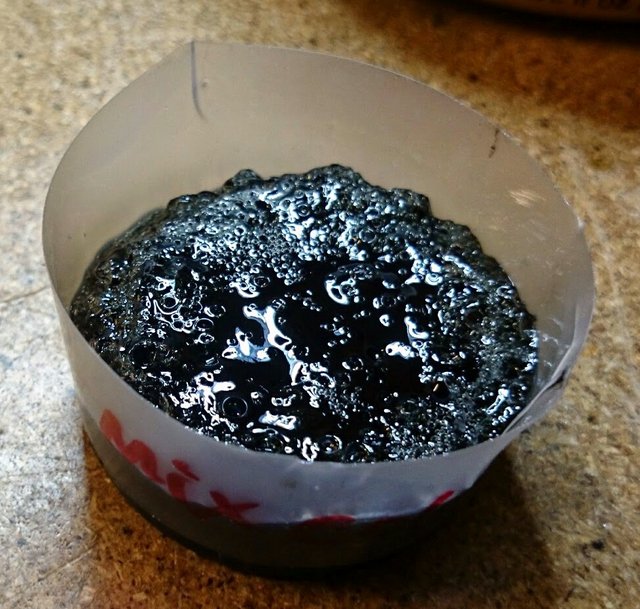
Something gone wrong, when trying to remove the bubbles with the vaccum pump
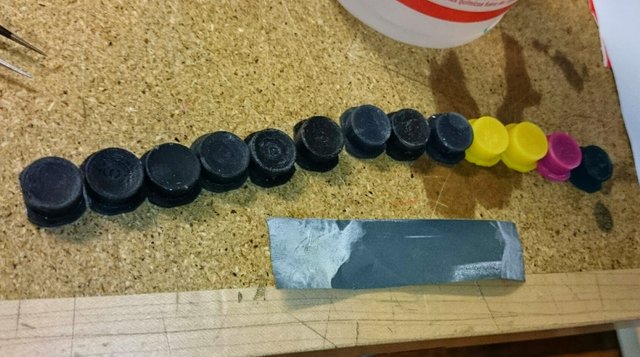
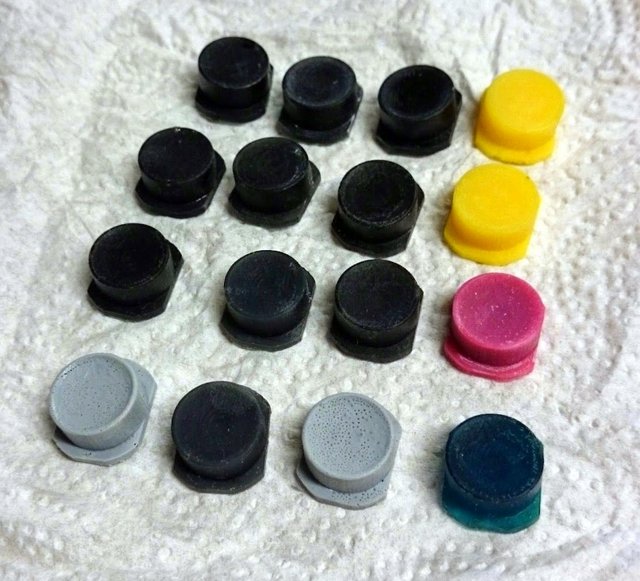
The final aproved buttons, on the final position (i changed the two on the botton pink ones because they whore to similar to the red one)
The discarted ones, some are too soft and some have bubbles or descoloration
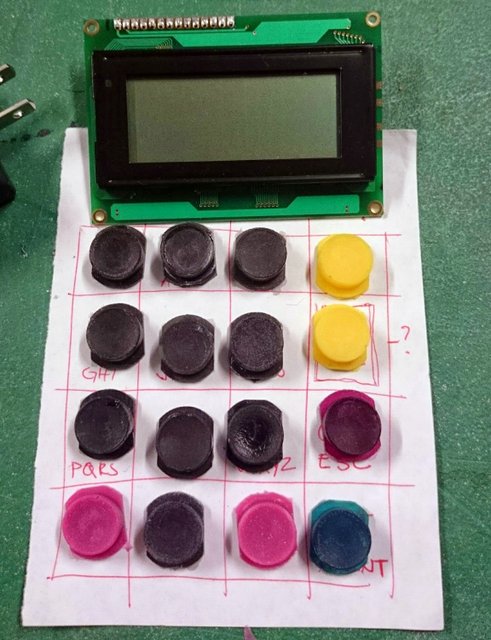
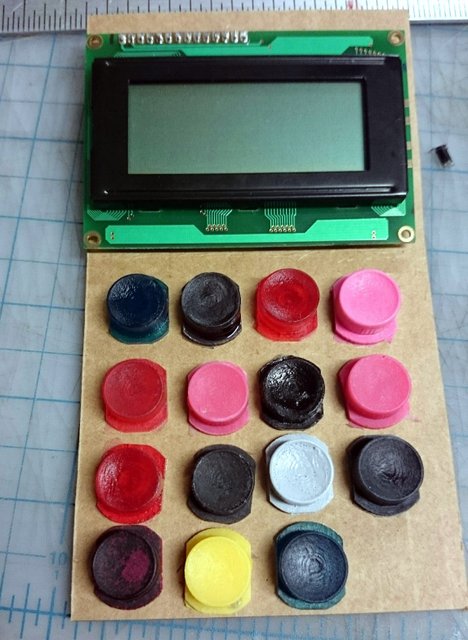
And for my final touch i decided to put symbols on the keys to identify them, so because i got this far with the keys i decided to make the most complete ones. I thought about many ways to do this but in the end i whent with the idea of using vynil cut with a layer of urethane clear plastic, and it worked great, the only thing is because i used wax in the casting i had to sand the keys to remove it, and some of the stickers wore very difficult to put, but in the end everything worked with two coats of the clear plastic, an also i tested the scrach resistence and it is very, very good.
Final sanding the buttons to remove the wax excess and aplly the final clear resin layer
Sanded, cleaned with detergent and ready to go
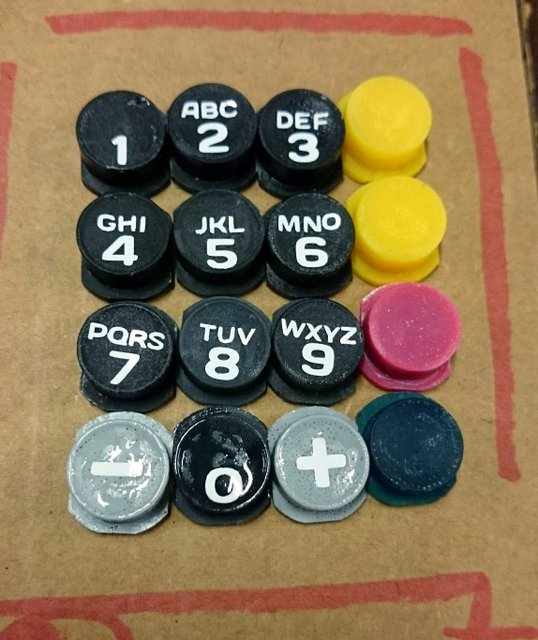
Vynil number and letters on the buttons
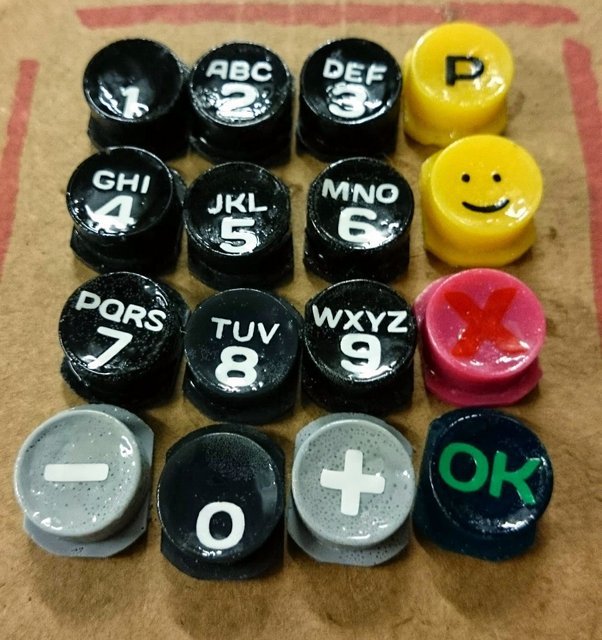
Keys with final coat of clear resin (they are very scracht resistent too)
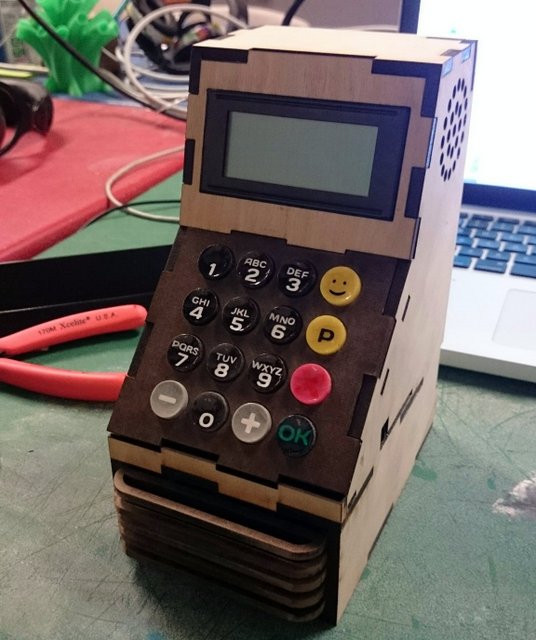
The finalized 4x4 Keypad, with keys, buttons and board
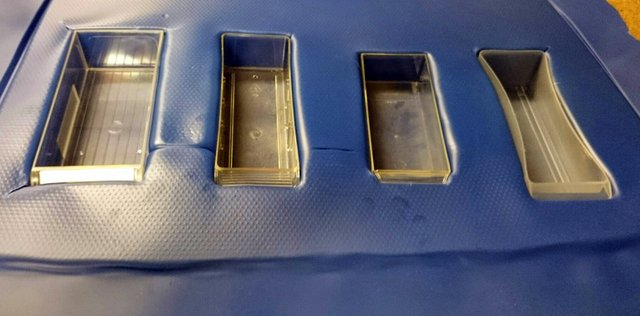
This was a experiment, but i didn't had the time to complete it, the idea is we can cast the drawers with plastic on the vaccum forming machine, i guess this had two problems: 1-The plastic i used was to thin a 2- The drawers i used as a mold whore hollow (this made they deform) and the actual mold has to have a slope side so the cast can be removed (the way it happened i had to cut the cast because it embraced the mold and was stuck).
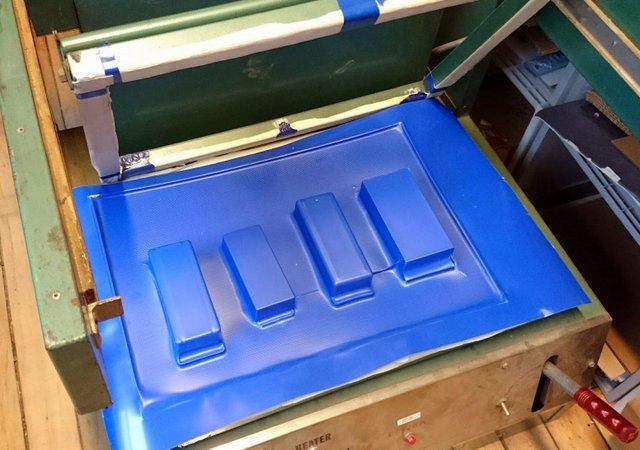
Casting the drawers with the vaccum forming machine
Casting the drawers using existing small part storage drawers
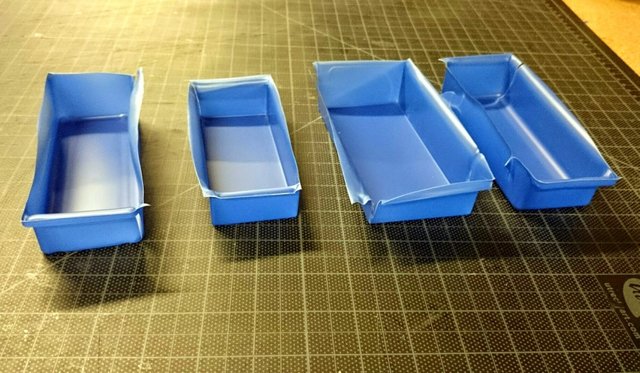
In the end the plastic was to thin and the cast envolved the mold and i could not release the parts without destroing the cast