


measure something: add a sensor to a microcontroller board that you've designed and read it
For exercise this week I insert a stepper motor to the touchpad created in the previous week, in order to manage with one finger motor movements.
But since time is running out , I had to devote to the operation of my Final Project , thanks to the borad I created can manage the motor with the simple commands , to control the speed and to stop the engines.
I connected all of a 12-volt DC motor , during the first test everything was going well , the program has responded very well , and the engine ran at speed control with 2 : MEDIUM and HIGT , then there is the option MOTOR STOP .
For transmits the speed to the frames of the rotomolding I prepared a 3d file that one side had the seat for the motor shaft , on the other instead I drowned a hexagonal nut 8 mm in thickness and 30 mm in length , this solution has proved weakness her when she was put to work by car , the engine was too weak , then the transmission of power was not the case .
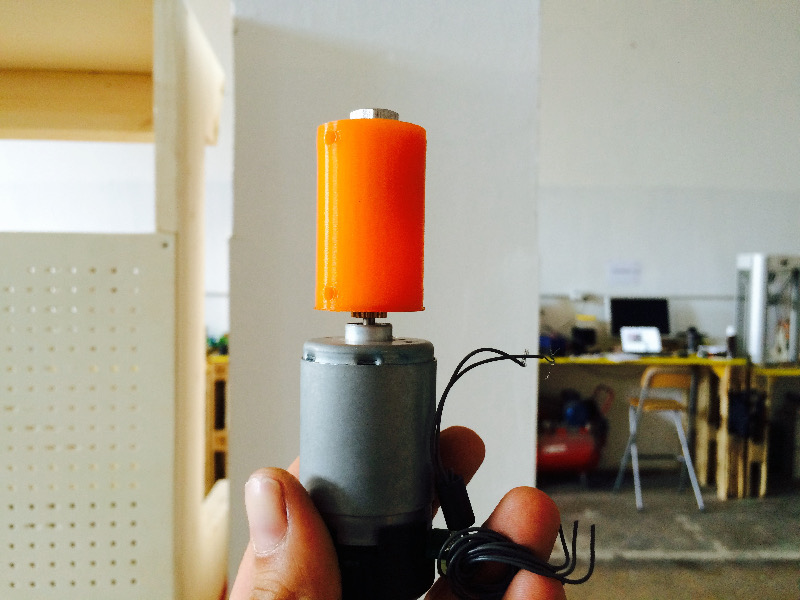
I needed a more powerful engine !!!
In Fablab SPQwoRk I collect all waste technological and electronic arriving, because often there are parts still usable.
Initially I thought of using the engine of a fan, but it was too cumbersome for the structure, he threatened to unbalance the whole one side. Among various things in the time I put aside various drills and screwdrivers with some flaws, I removed one, and I used its engine to give life to my Open Rotomolder. The drill brings a 14.4-volt DC motor, it requiresfor this power supply with 15/18 volt and an output of 4.3 amps, this solution proved to be a turning point for the entire project, because it allowed me to abdare forward and also finding a good solution for the transmission. I chuck using the shell of the same drill to keep blocked the threaded rod of the transmission, then I created a structure similar to the side to hold the rotomolding frezione engine and to hide what is not good to see by eye.
void setup() {
// says the number of characters and lines of our screen
lcd.begin(16, 2);
//active new character
lcd.createChar(0, blocco);
//definition of the status pin
pinMode(pinMotoreA, OUTPUT);
pinMode(pinMotoreB, OUTPUT);
pinMode(pinMotoreE, OUTPUT);
pinMode(pinIndietro, INPUT);
pinMode(pinAvanti, INPUT);
pinMode(pinConferma, INPUT);
//schermata di reset
for(int n = 0; n < 16; n++)
{