Design a 3D mold, machine it, and cast parts from it
Exercise n1: Design
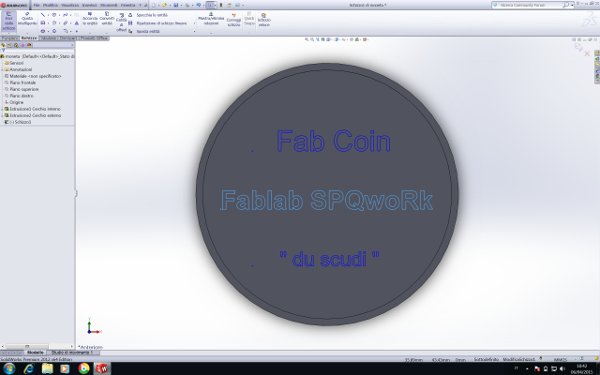
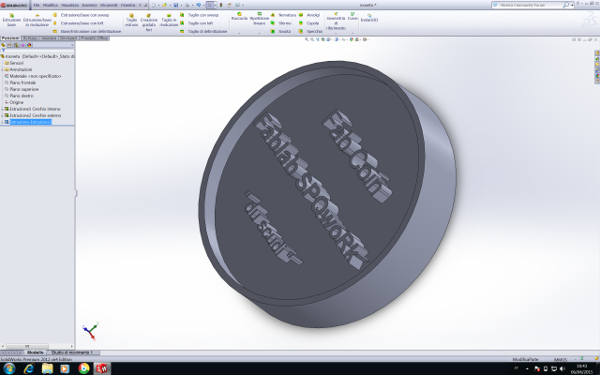
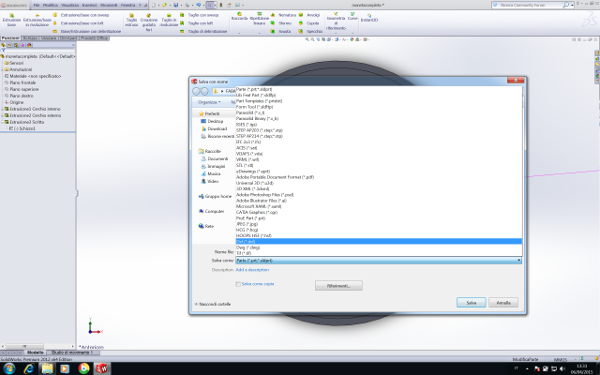
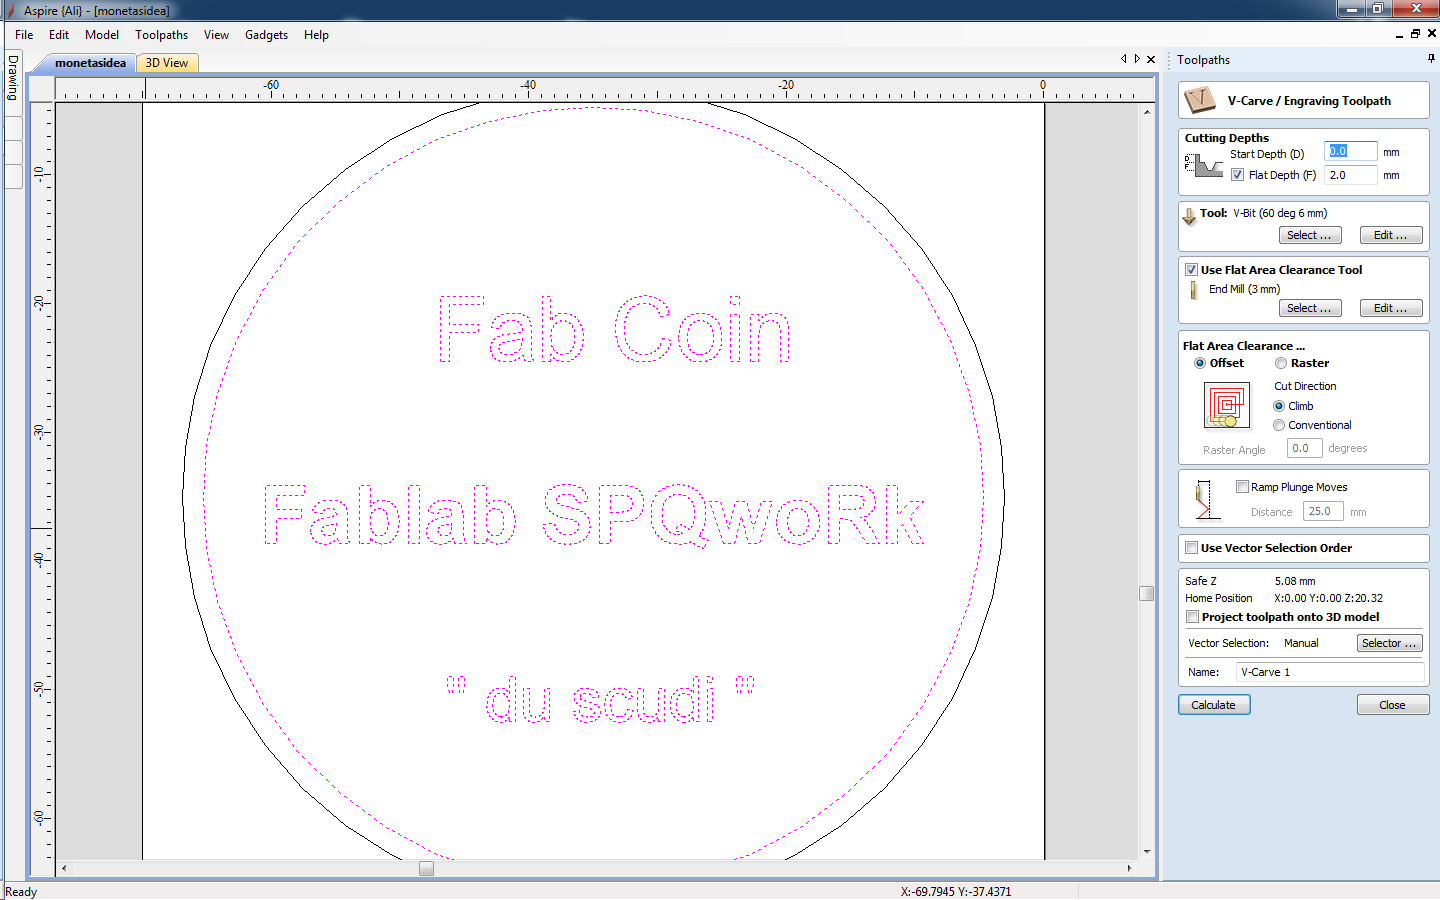
For the design of the molding I used Solidworks. As they are not experienced in the graphical modeling, I chose a subject very simple to implement, in order to make the effectiveness of the test. Initially I spent a lot of time to choose what to build, but now I have a better idea why I was able to confront the topic molding & casting. The choice of Fabcoin is derived from the fact that often in Fablab SPQwoRk organize initiatives, and often give candy and chocolates. After drawing with solidworks, I exported the file in DXF format and passed the file to Vcarve(aspire). Vcarve really is an excellent program, easy to use, very intuitive, gives you many opportunities, tips, materials, virtualization process, thicknesses.
Exercise n2: Molding
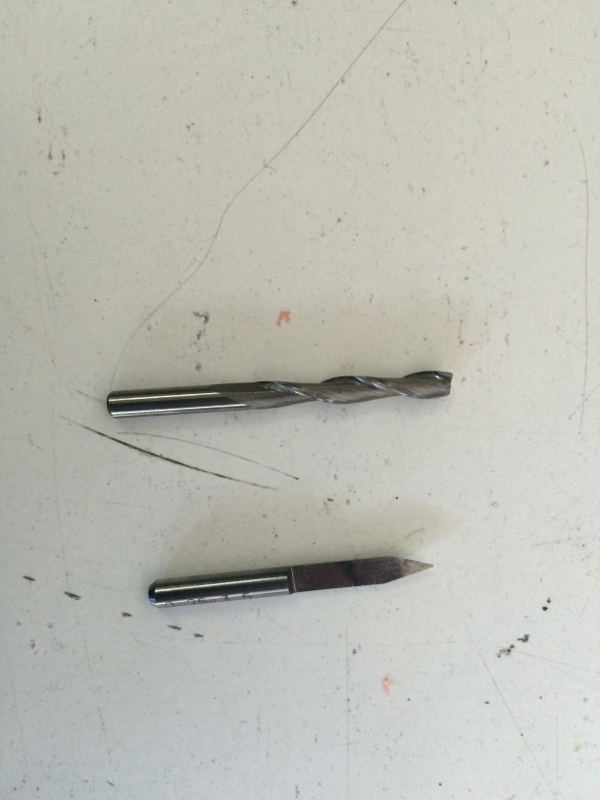
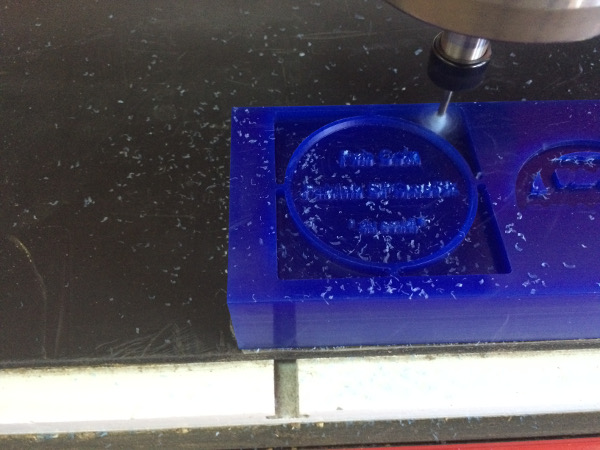
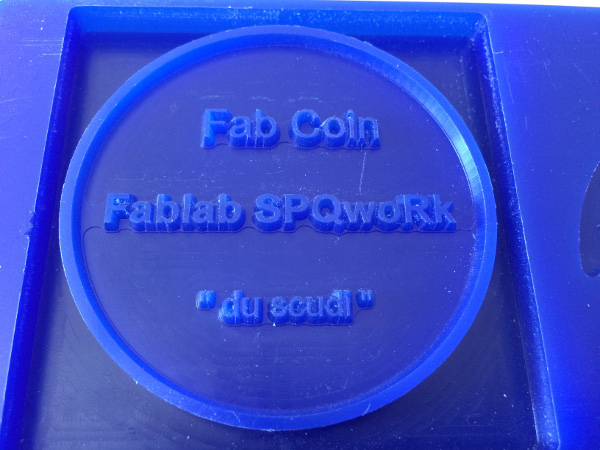
For the realization of the mold I decided to lay a stick of wax to create a negative from which then I'm going to get the silicone mold. This time for exercise I used a cutter cnc LY6090 as machine program I used Mach3. For processing, I used two different tips, but three different processes, namely: first roughing inside the circle, then changing the point I could roughing around the letters, and at the end have been emptied letters. When working with the cutter must always make sure that the material is firmly on the surface of the cutter, I used tape bioadhesive, but do not overdo it. Then there are 3/4 steps to do between machine and software that are key: control the cutter with the joystick, turn the spindle, find the source, make the Z and than push start, but an eye must always be on break, Because any problems for the work can be locked at the origin. I am very pleased with the work that I got, the cutter cut the wax with ease, this made me think of the many possibilities that we are!!
Exercise n3: Make stamp
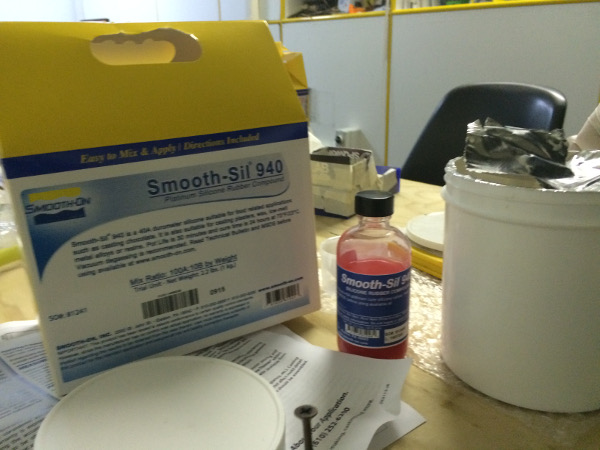
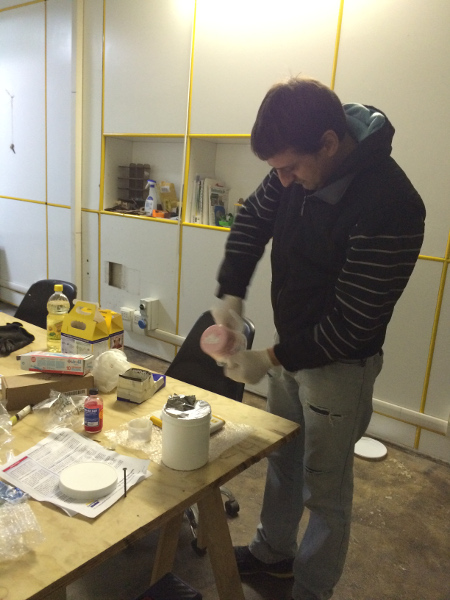
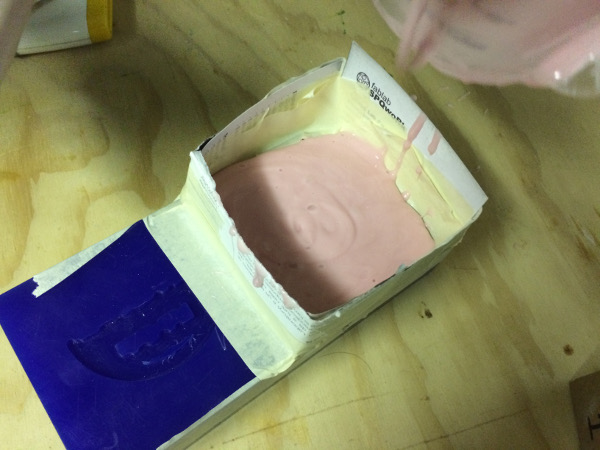
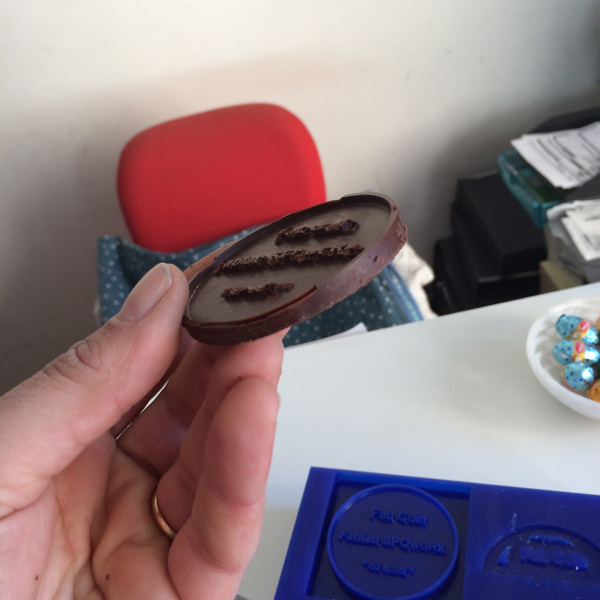
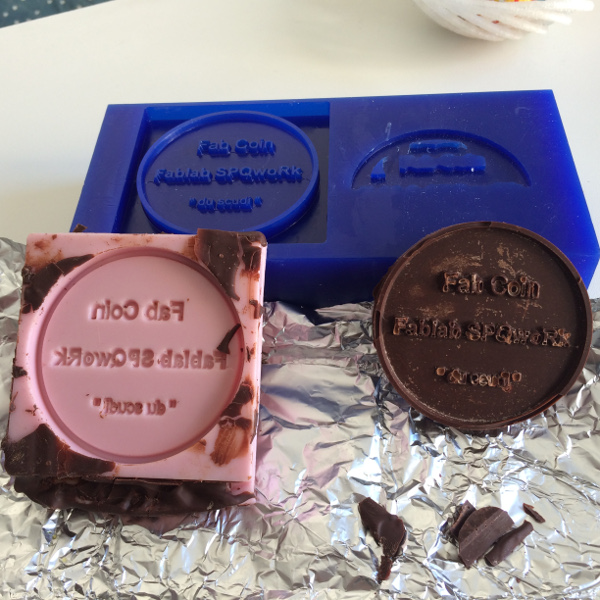
After milled wax, I cleaned for well written all chippings wax. It'us the first time that i used silicone to create molds, care must be taken in the dosage of the materials. The seat of my mold risulatva a bit low, so I created of walls to make confort the silicone and create a thickness around the mold. For my exercise I used Smooth-Sil Series, is a silicone that seats inside the food. The package of Smooth-Sil Series is composed of two materials: Part A and Part B which must be mixed in the ratio 100 Part A with Part B 10, this mixture is stirred for about 3 minutes before being poured into the form of wax. The color is pink silicone, and is poured slowly to avoid air bubbles. After this step, the mold is left to stand for 24 hours, then is extracted and we can try to pour the Our chocolate. I also did another experiment. I took a piece of wood with laser engraving of about 2mm, I created walls and I prepared the material for casting silicone Mold Max 60, resistant to high temperatures. This material is toxic, so bisonga be really very careful, it is recommended that a ventilated area. Also this silicone consists of Part A and Part B, the proportions are 100 Part A Part B 3. You get a dark red liquid which is slowly poured into the mold and left to stand for 24 hours.
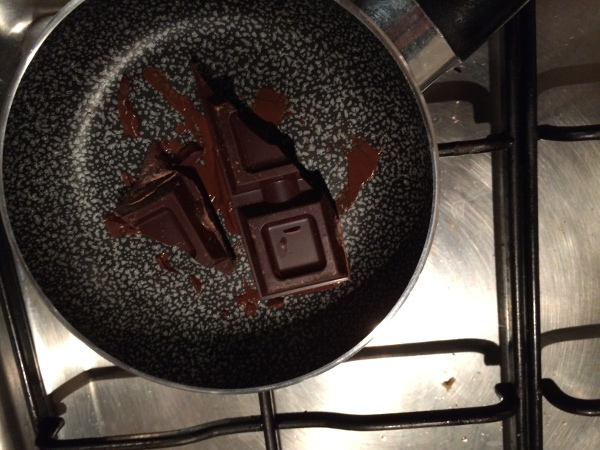
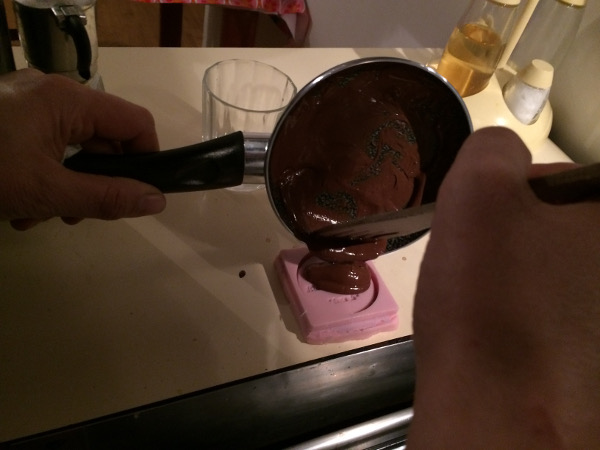
To melt chocolate I used a saucepan new, sterile, I paid about 4 €. The dark chocolate bar has a cost of about 3 €, I removed two squares and put them on the saucepan over low heat. After a few minutes the chocolate is melted enough to be poured into the shaper of silicone food we prepared earlier, then you have to wait about 8 hours to enjoy the results of your work! Exciting !!
Exercise n4: Traditional way
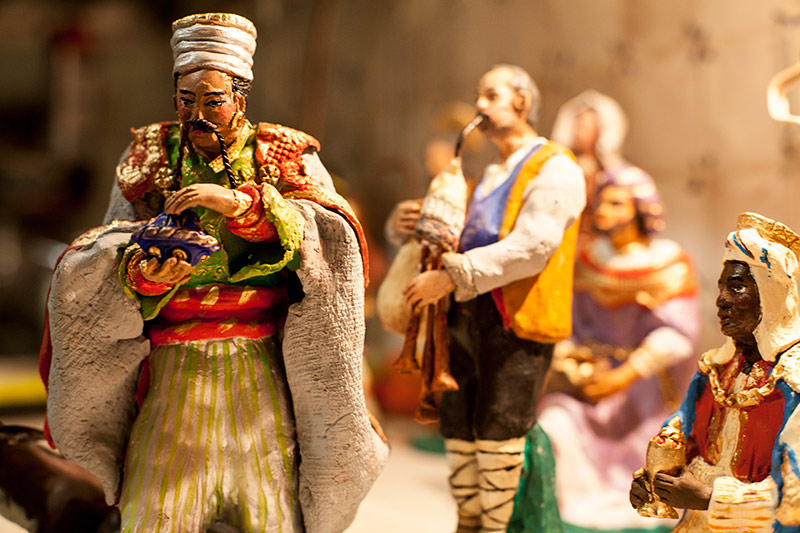
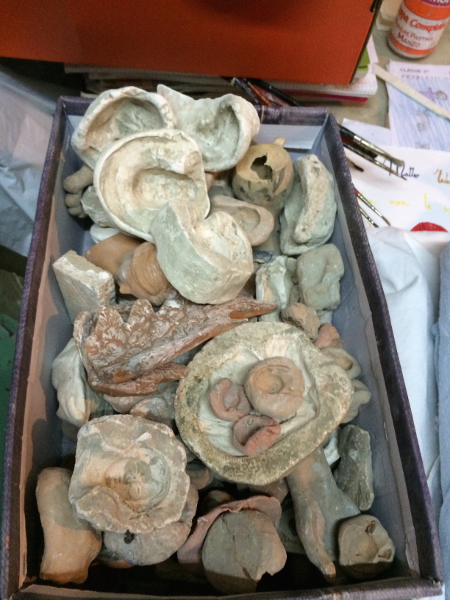
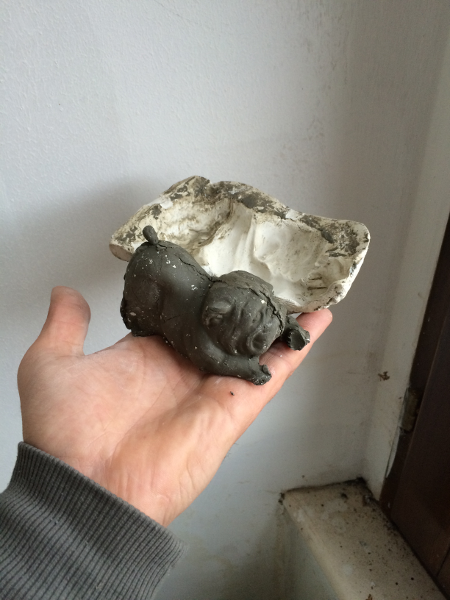
In the end I speak of a tradition that has been handed down for generations, in my small scales of origin in the mountains of Italy in the multiplex. My country of origin Pacentro is famous for the tradition of "Cribs" portraits of shepherds and merchants from around 200 years populate the scene of my craft streets. My mother is one of the last artists to preserve tradition, and since childhood I witness reproductions series of statues, landscapes, molds, kilns, clay and ceramics.
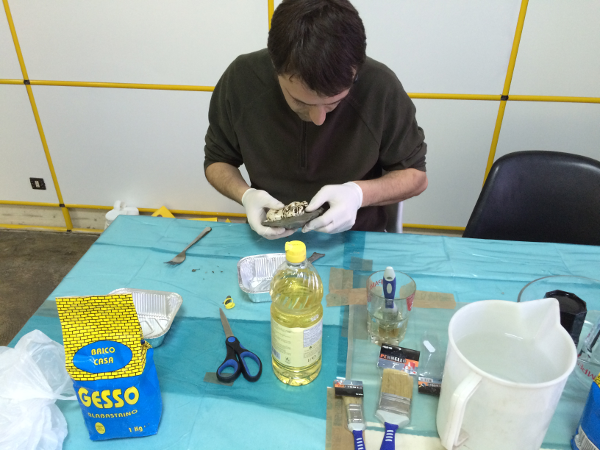
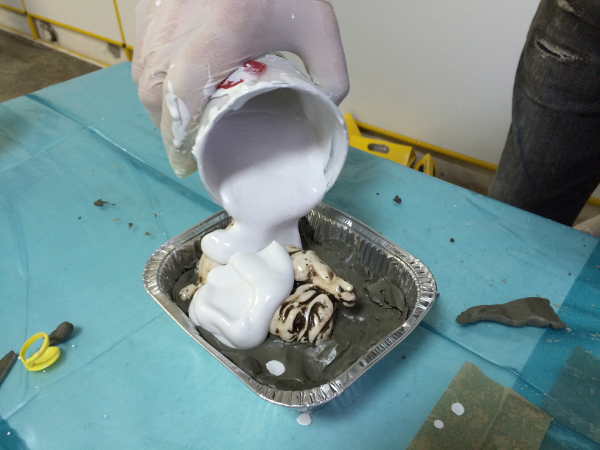
For this form I also run an exercise with chalk. I made a cast for a 3d printing of myself, and a small object that represents my dog. The water and the plaster should be mixed slowly, putting water first and then adding the chalk, when you get a creamy mixture then is ready to be poured. The figure for casting is performed in two times, side A and side B. Isolate the Part A and be sure to close any sort of undercuts, switch oil on the statue from limestone to avoid problems during the detachment from the plaster. Pour the plaster and leave to rest, after about 40 minutes to repeat the same process for the B side and wait until drying.