During the lesson of Wednesday March 24, after the review of the previous module, Neil introduced us to the 3d print, through the use of various technologies, and materials. From the print low cost of FDM to printer up to the SLA technology and STL.
After we saw some web sites to find files available for printing, for example Thingiverse, and others of service design, like Shapeways
We have seen a lot of software for 3d modeling, we have already view some of this during the week of Computer-Aided Design.
.
For me, the most interesting part of the lesson was the 3d scanning systems, I knew any of this systems, but I never tried, while I used, with good results, others scanning system like the scanning with Kinect. I highly recommend you watch the video of the lesson.
Design and 3D print an object (small, few cm) that could not be made subtractively
3D scan an object (and optionally print it)
This week the assignment is 3 D modeling an object and than print it. Following the advice of our tutor, we designed the case for My FabISP. For the second part of the assignment we have to try using scanning systems, that Neil explained us during the lecture.
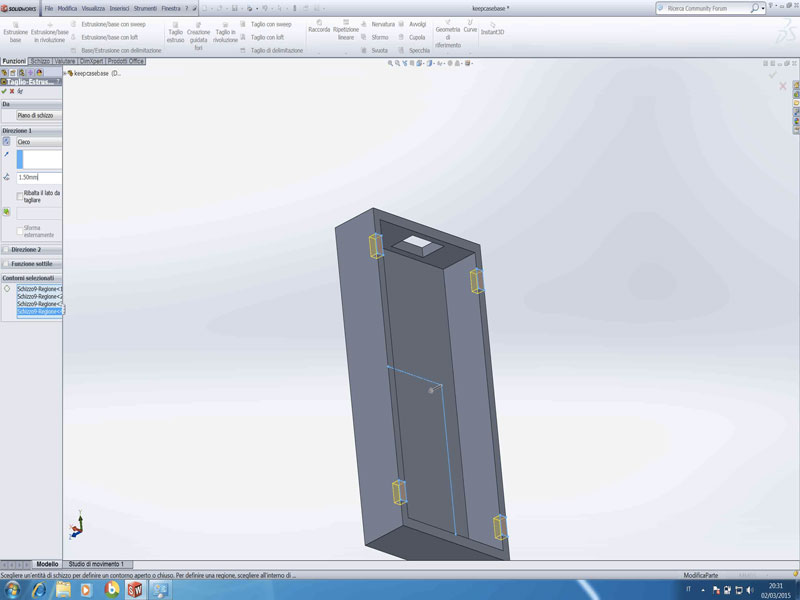
Exercise n1: Design a case
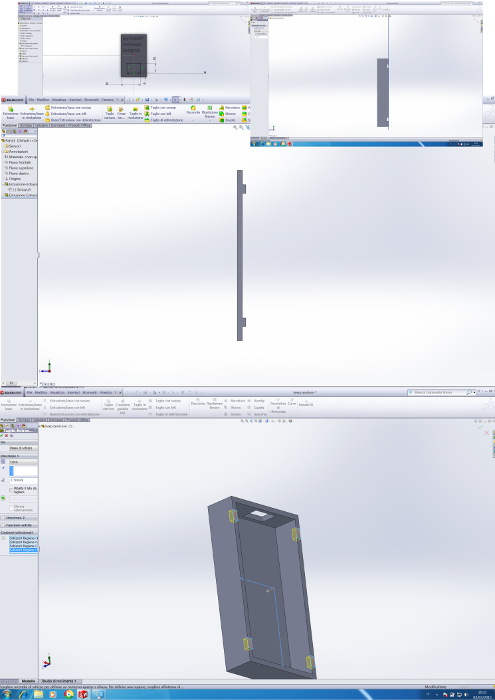
The first time I've designed a 3D I used 123d Design , than I had skills and immediately I needed to use a more sophisticated software, with more tools to make more professional exercises. Between the various software proposed, I decided to use the CAD Solid Works , mainly for two reasons: the first, last month we got the license for free, thanks to an agreement between the Fabfoundation and Solid Works, the second because our instructor Lorenzo Negri is particularly skilled with this software, it’s a great advantage for us!
Following a slide with the steps of the project, in the first time I had some problems, then, when I understood well, I had any difficulties to produce what I want and customize it.
I draw the case on the paper, then I took the measurements of FabISP with a calibre and I put it carefully on the software, during this step is very important consider the 3D print machine tolerance. My first design was wrong for the measures, so I had to scale the design to have the real size. Before having the box as I wanted, I drew two times the project.
Exercise n2: Print a 3D Model
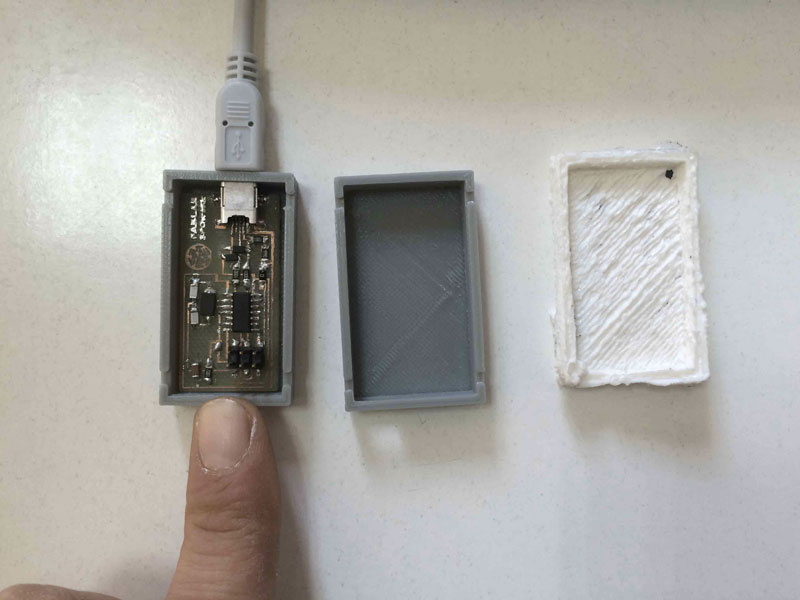
For printing case, I used a Delta Wasp. printer. Accurate and reliable on all materials with pieces up to 40 cm in weight with closed chamber and heated bed. The machine technology FDM (fused filament fabrication) have a cilindric Print Area: Ø 200 mm - 400 mm h Print Max weight: 445 mm, the nozzle diameter is 0.4 mm, and the printing resolution is 0.05mm < 0.25mm. I used PLA filament, color gray with diameter 1.75.
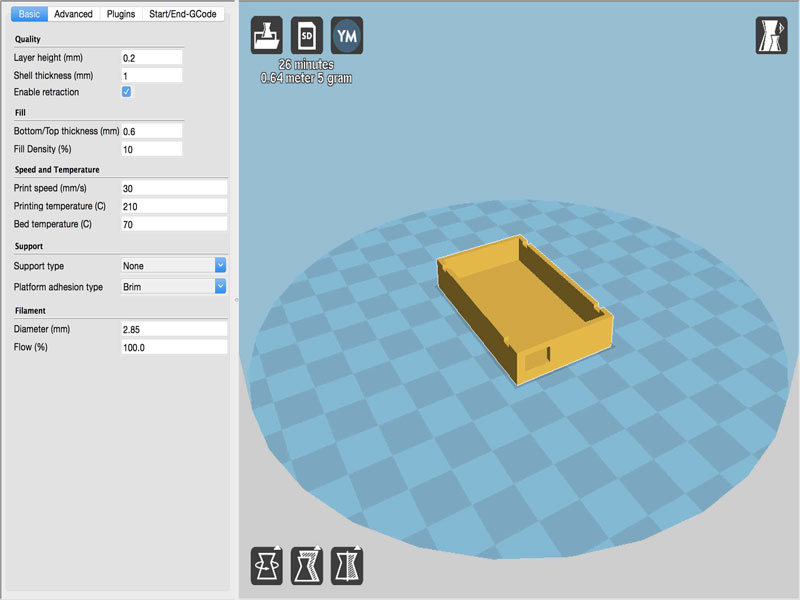
After the modelling, I exported it in STL, than I open Cura Software and I imported it. I print the TOP and the BASE of my case on the same plat of print.
I set Cura with the right informations about the part of print and the kind of print machine. Some setting to have a good print are:
Exercise n3: 3D Scanning Structure-from-Motion
During the week end, at Fablab SPQwoRk we made a workshop on Digital Fabrication for Cultural Heritage. The digital fabrication have opened new prospectives for the Cultural Heritage, offering new and original solutions for the study, storage and promotion of cultural heritage. During the workshop we tested hardware and open source and low cost software, to clone historical and artistic objects. We saw the possible applications for the restoration, for the museum, and for educational.
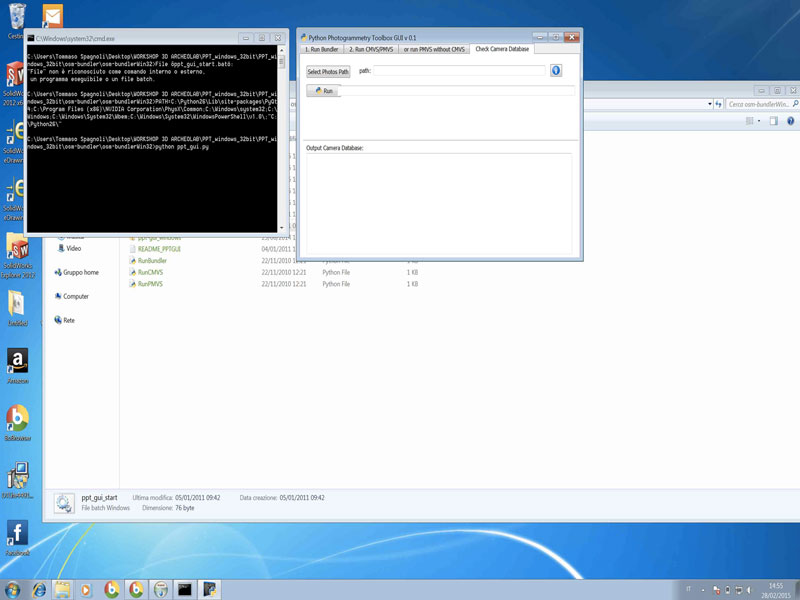
Structure-from-Motion is a technique that, starting from a set of pictures, allows to obtain a 3D project, as a 3D points cloud. To get the final 3D model, polygonal and color, the cloud had to processed with software to create the polygon mesh and its texture. There are many software solutions SFM free / open source, freeware and low-cost. During the workshop we saw the 5 main solutions for reliability, quality of results and usability: Python Photogrammetry Toolbox,it is a free software,VisualSFM, freeware,123D Catch, freeware, cloud computing
PhotoScan (Standard Edition), proprietary software.
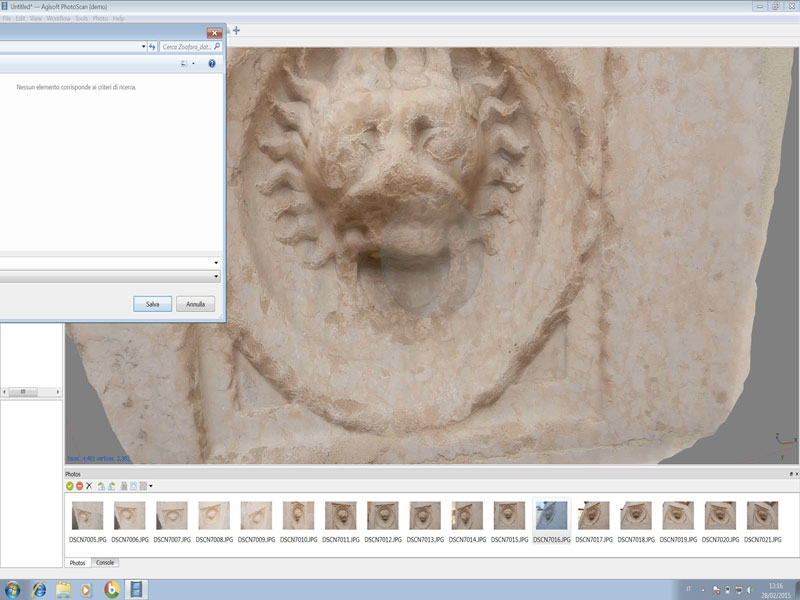
After, we’ve imported the images taken before. We’ve installed the software PhotoScan and we’ve worked the images, removing what was too much. I didn’t save the file, because the software requires a license fee, instead of We then worked witha MeshLab and Netfabb.
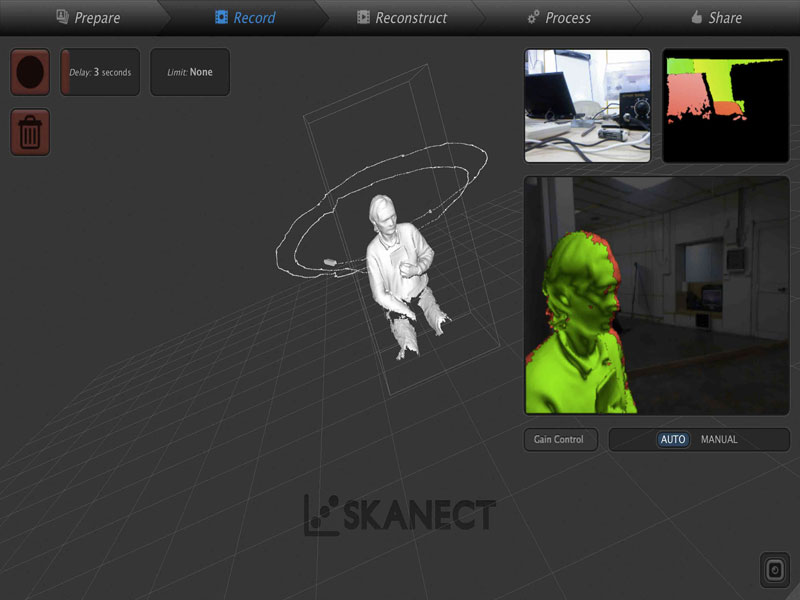
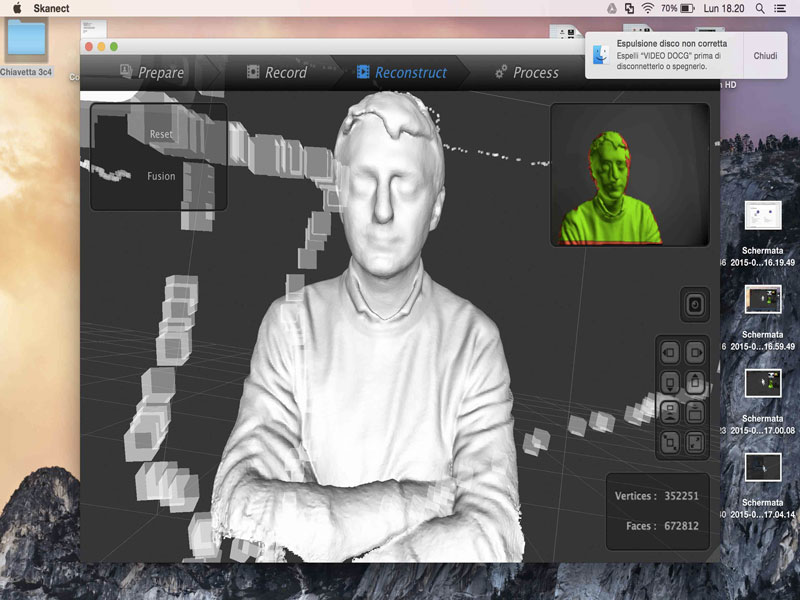
Exercise n4: 3D Scanning Kinect + Skanect
At Fablab SPQwoRk we use often the Kinect to scan, with Skanect software. It’s very simple use this, and it’s very popular because many people have the Kinect, and Skanect has a free trial version, very simple to use. For more or less 100,00 euro it’s possible buy a license for 1 year, I did it, and I recommend it, because it’s a very intuitive and immediate, perfect for workshops and educational.
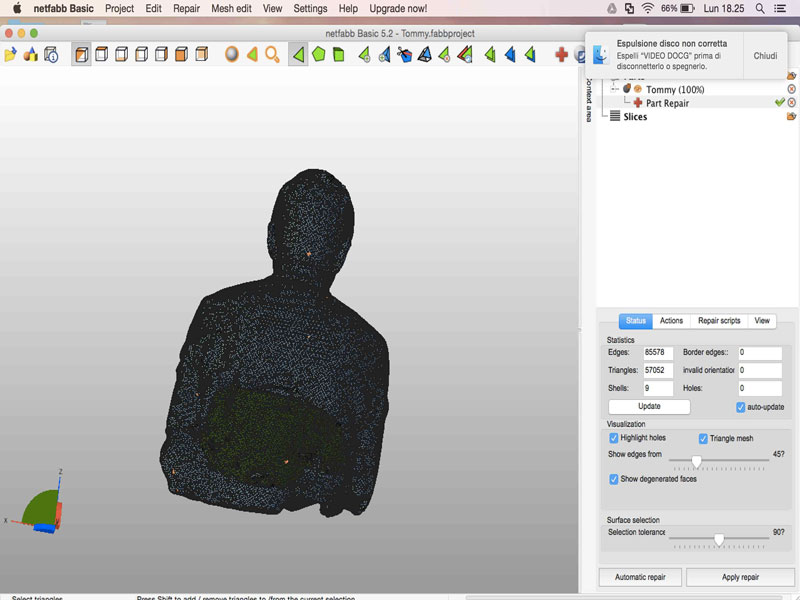
I scanned my friend and colleague, Sergio, then I optimized the file, closing the holes with the function Recostruct, then with the function Process I cut the body, saving the best part. At the end I exported the file in STL, then I uploaded the file on Cura, I set the parameters for the print, and I printed it.

Exercise n5: 3D Scanning Sense + Skanect
After the scan with Kinect, we tested the scanner 3d low cost of 3D Systems , Sense , also this scanner uses Skanect to process the data.For this experiment, we set up a photographic room, with lights and withe limbo. My colleagues scanned me turning around with the scanner Sense. The file had many imperfections, even after processing with Skanect, so I have processed the file with Netfabb, closing holes and cut the wrong parts. Result more than enough.
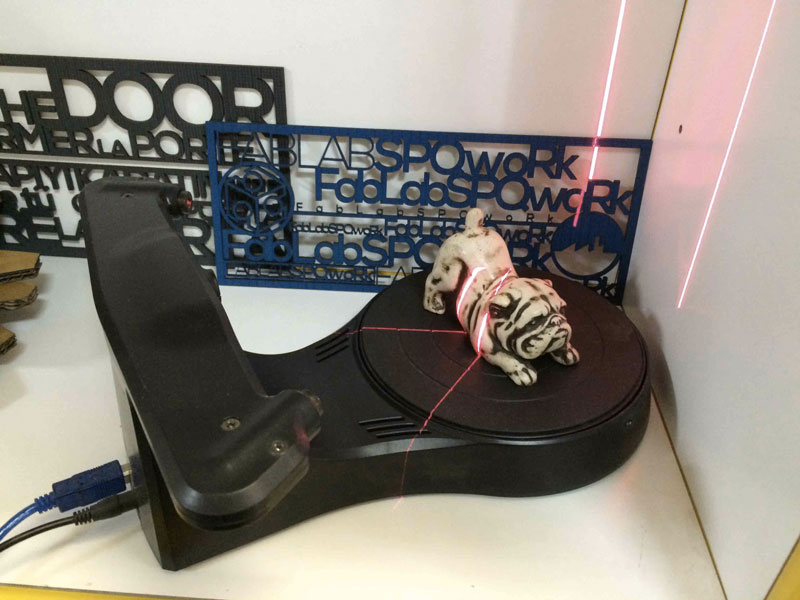
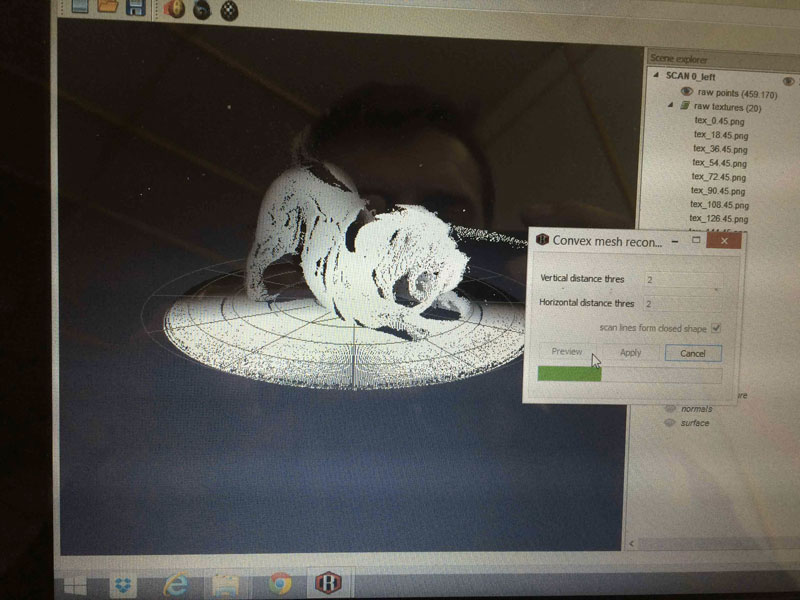
Exercise n6: 3D Scanning Rubicon
The last exercise of this module is use of a desktop scanner with the turntable, his name is Rubicon. With this scanner I tried several times to scan the same object, because even the slightest movement can compromise the point cloud. The software is the one that is given with the purchase of the scanner. Although there is a sufficient collection of data by the laser, the software doesn’t allows to export files in STL, but just in RUB, in addition to from 6 months there were any updates. It’s possible pass the file .RUB on Netfabb or MeshLab, to close the point cloud and have a STL to convert in Gcode. In the following photos there are two experiments, the complex object is not been printed, the simple was printed, but once printed does not respect the scale.
Dowload file basebox
Dowload file topbox
Dowload file from scanning whit kinect
Dowload file from scanning whit fotogrammetry