WEEK 11
11. Output Devices
This week I kept learning arduino IDE and experimenting with it. I wanted to work with a DC motor as an output because that will be useful for my rotocasting machine final project, and having the ability to control its speed and direction.
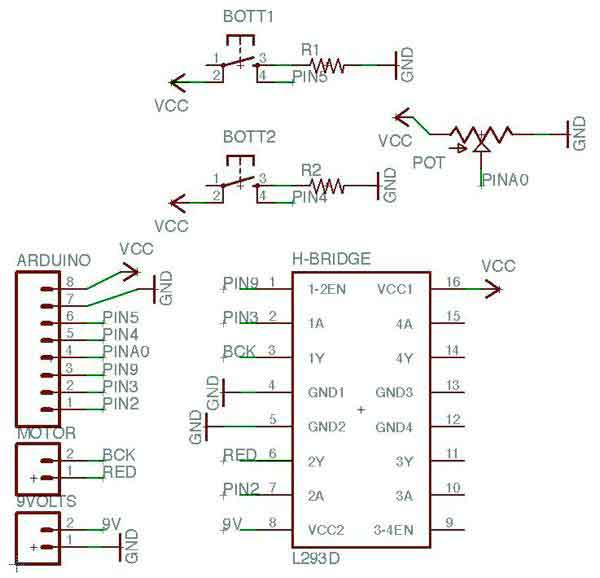
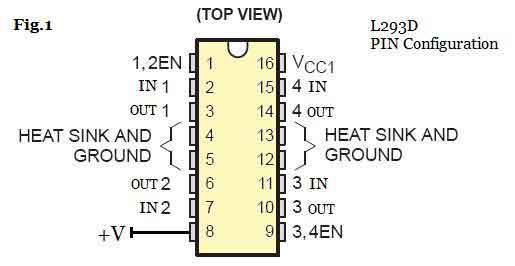
Pin 2 and 3 are outputs used to regulate motor's direction using the H-Bridge, Pin 9 is an output to set the motor on/off, Pin A0 is an input from the potentiometer to regulate speed, Pin 4 and Pin 5 are inputs from the buttons for on/off and direction.
/*
MOTORBOARD

modified 13 May 2015
by Saverio Silli

Read data from the potentiometer
turn a DC motor on and off with a button
switch DC motor direction with a button
using an H-Bridge L293D
*/

const int controlPin1 = 2;
const int controlPin2 = 3;
const int enablePin = 9;
const int directionSwitchPin = 4;
const int onOffSwitchStateSwitchPin = 5;
const int potPin = A0;

int onOffSwitchState = 0;
int previousOnOffSwitchState = 0;
int directionSwitchState = 0;
int previousDirectionSwitchState = 0;

int motorEnabled = 0;
int motorSpeed = 0;
int motorDirection = 1;

void setup()
{
  pinMode(directionSwitchPin, INPUT);
  pinMode(onOffSwitchStateSwitchPin, INPUT);
  pinMode(controlPin1, OUTPUT);
  pinMode(controlPin2, OUTPUT);
  pinMode(enablePin, OUTPUT);

  digitalWrite(enablePin, LOW);
}

void loop()
{
  onOffSwitchState = digitalRead(onOffSwitchStateSwitchPin);
  delay(1);
  directionSwitchState = digitalRead(directionSwitchPin);
  motorSpeed = analogRead(potPin)/4;
  if (onOffSwitchState != previousOnOffSwitchState)
  {
    if (onOffSwitchState == HIGH)
    {
      motorEnabled = !motorEnabled;
    }
  }

  if (directionSwitchState != previousDirectionSwitchState)
  {
    if (directionSwitchState == HIGH)
    {
      motorDirection = !motorDirection;
    }
  }

  if (motorDirection == 1)
  {
    digitalWrite(controlPin1, HIGH);
    digitalWrite(controlPin2, LOW);
  }
  else
  {
    digitalWrite(controlPin1, LOW);
    digitalWrite(controlPin2, HIGH);
  }

  if (motorEnabled == 1)
  {
    analogWrite(enablePin, motorSpeed);
  }
  else
  {
    analogWrite(enablePin, 0);
  }

  previousDirectionSwitchState = directionSwitchState;
  previousOnOffSwitchState = onOffSwitchState;
}
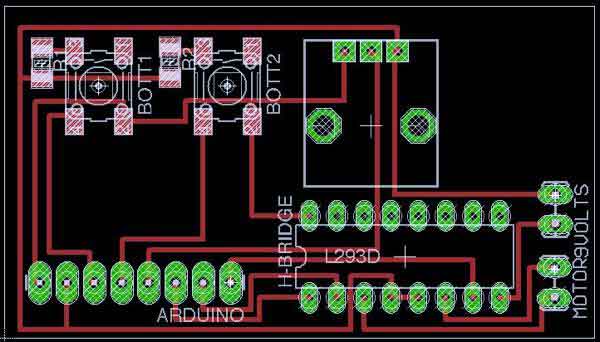
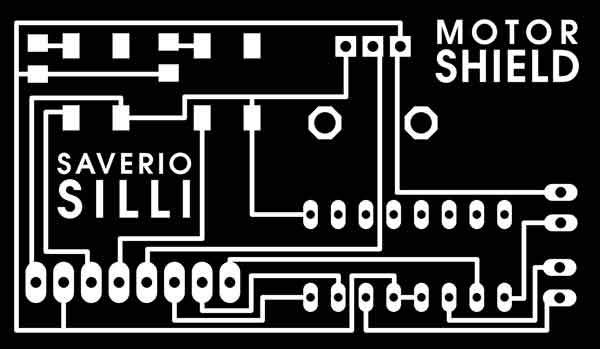
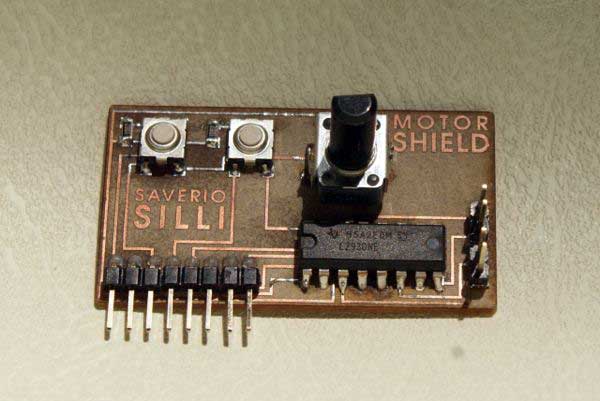
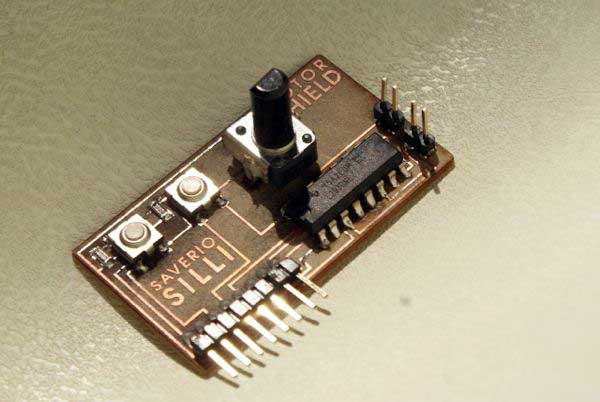
Custom Motor shield
I uploaded the sketch on my Satshakit (a Fabduino board made by Daniele Ingrassia), and then I designed a Motor Shield that features both inputs and outputs. It has two buttons to control ON/OFF and direction. Both have a 10K ohm resistance to keep the circuit safe from the 9Volts battery that powers the motor. There is also a potentiometer to regulate the speed. The output is a simple DC motor. To control it you need an integrated circuit called H-Bridge (an L293D from texas Instruments). It is basically a transistor that lets you control higher voltage and amperage than the arduino might do, keeping it safe from backvoltages. I made one mistake connecting the central pins of the L293D only to the ground and not also to a heat sink. It can get very hot as my finger learned the hard way.
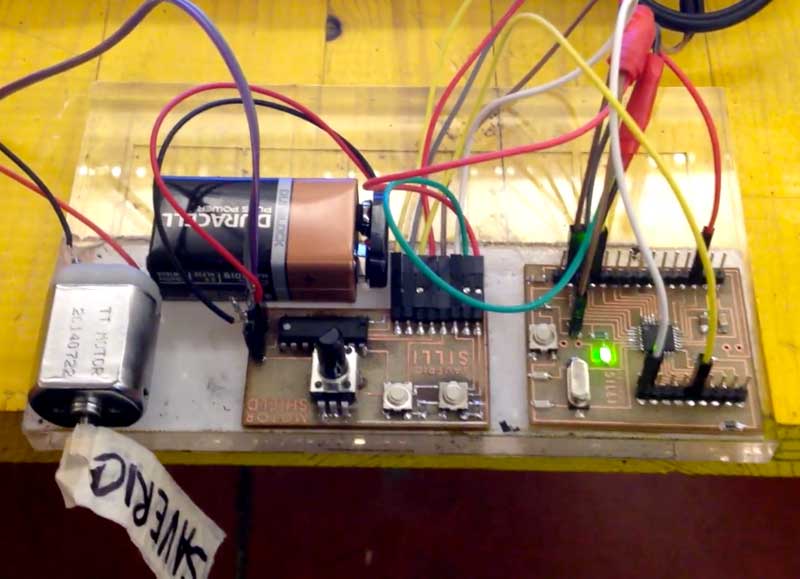
Set-up and Video
You can see in the video the motor starting on as the left button is pushed, changing direction at the right button, and going faster/slower as I turn the potentiometer. Pushing the left button again stops it.
Files available here