WEEK 9
09. Molding and Casting
I have a good experience with molding and casting, that's why I contributed to my class with a little lecture about the most used materials and their qualities. The video is in italian, but there are also many useful images!
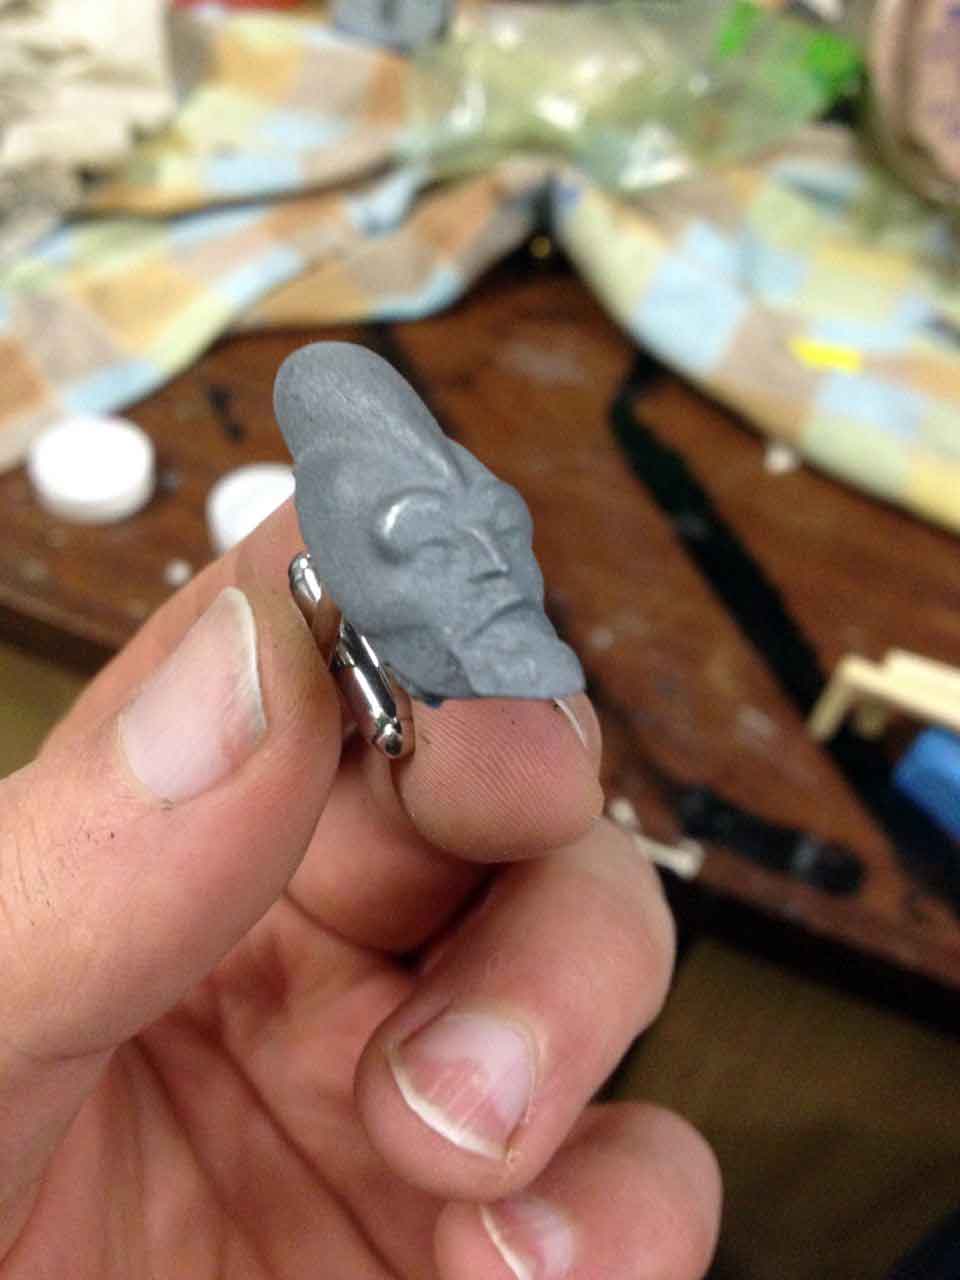
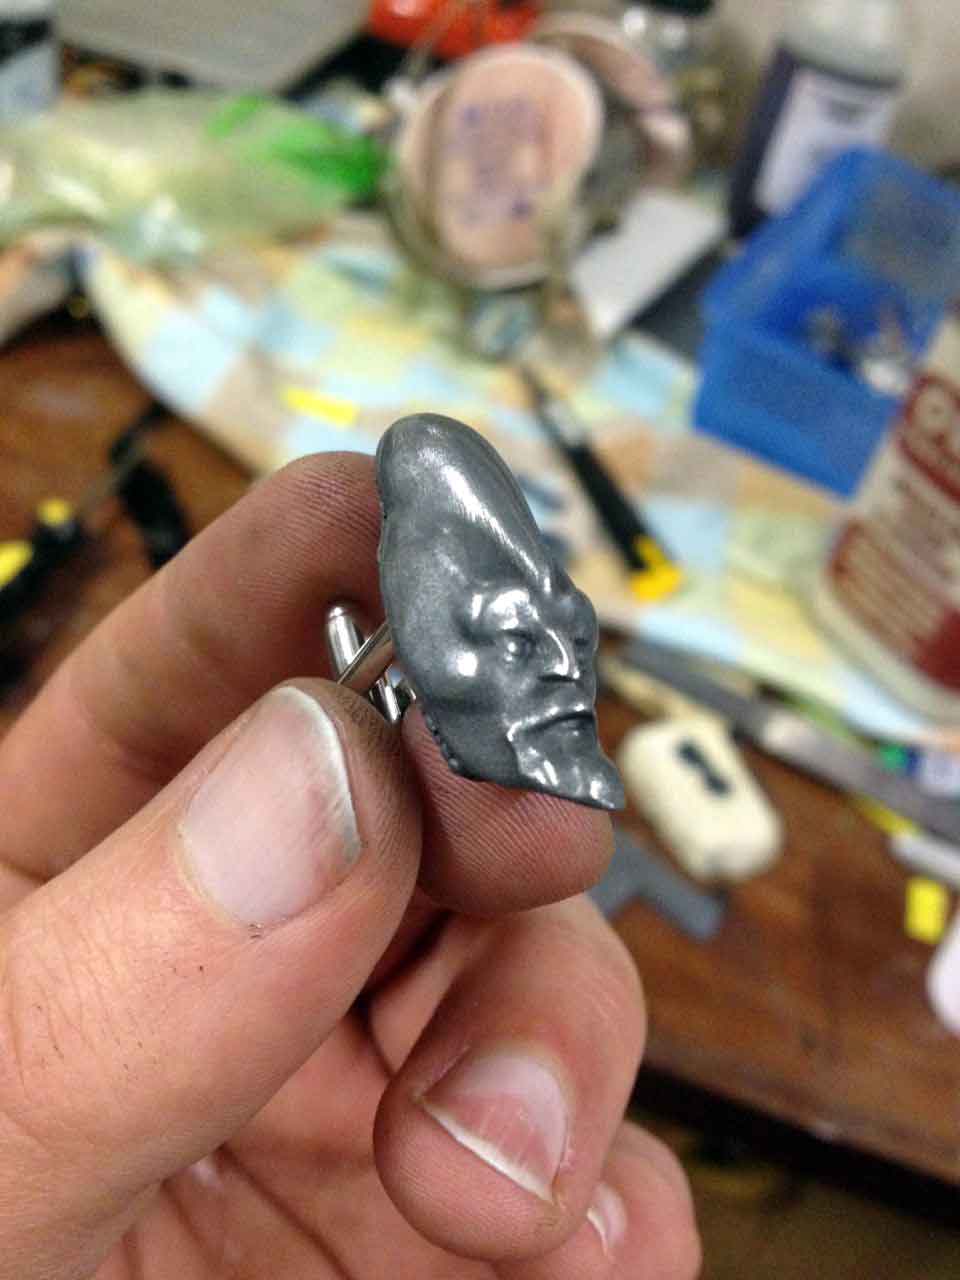
I wanted to create something useful and that could take advantage of casting's distinctive feature, such as the many different mix of resin and additives you can make to achieve special effects. Since i'll be attending a best friend's wedding next week, I decided to make cufflinks using the metal cold cast technique.
Cold Cast
"Cold-Casting" is a term used to describe the process of mixing metal powder with a translucent casting resin and applying the mixture into a mold. The finished casting give the appearance and weight of solid metal. The metal cold-casting process is faster and much less expensive compared with foundry casting of molten metal. Different metal powders such as Bronze, Brass, Nickel Silver, Aluminum and Copper can be used depending on the desired effect. At this link you'll find a great tutorial on how to make cold cast pieces using Smooth-On products.
Modeling
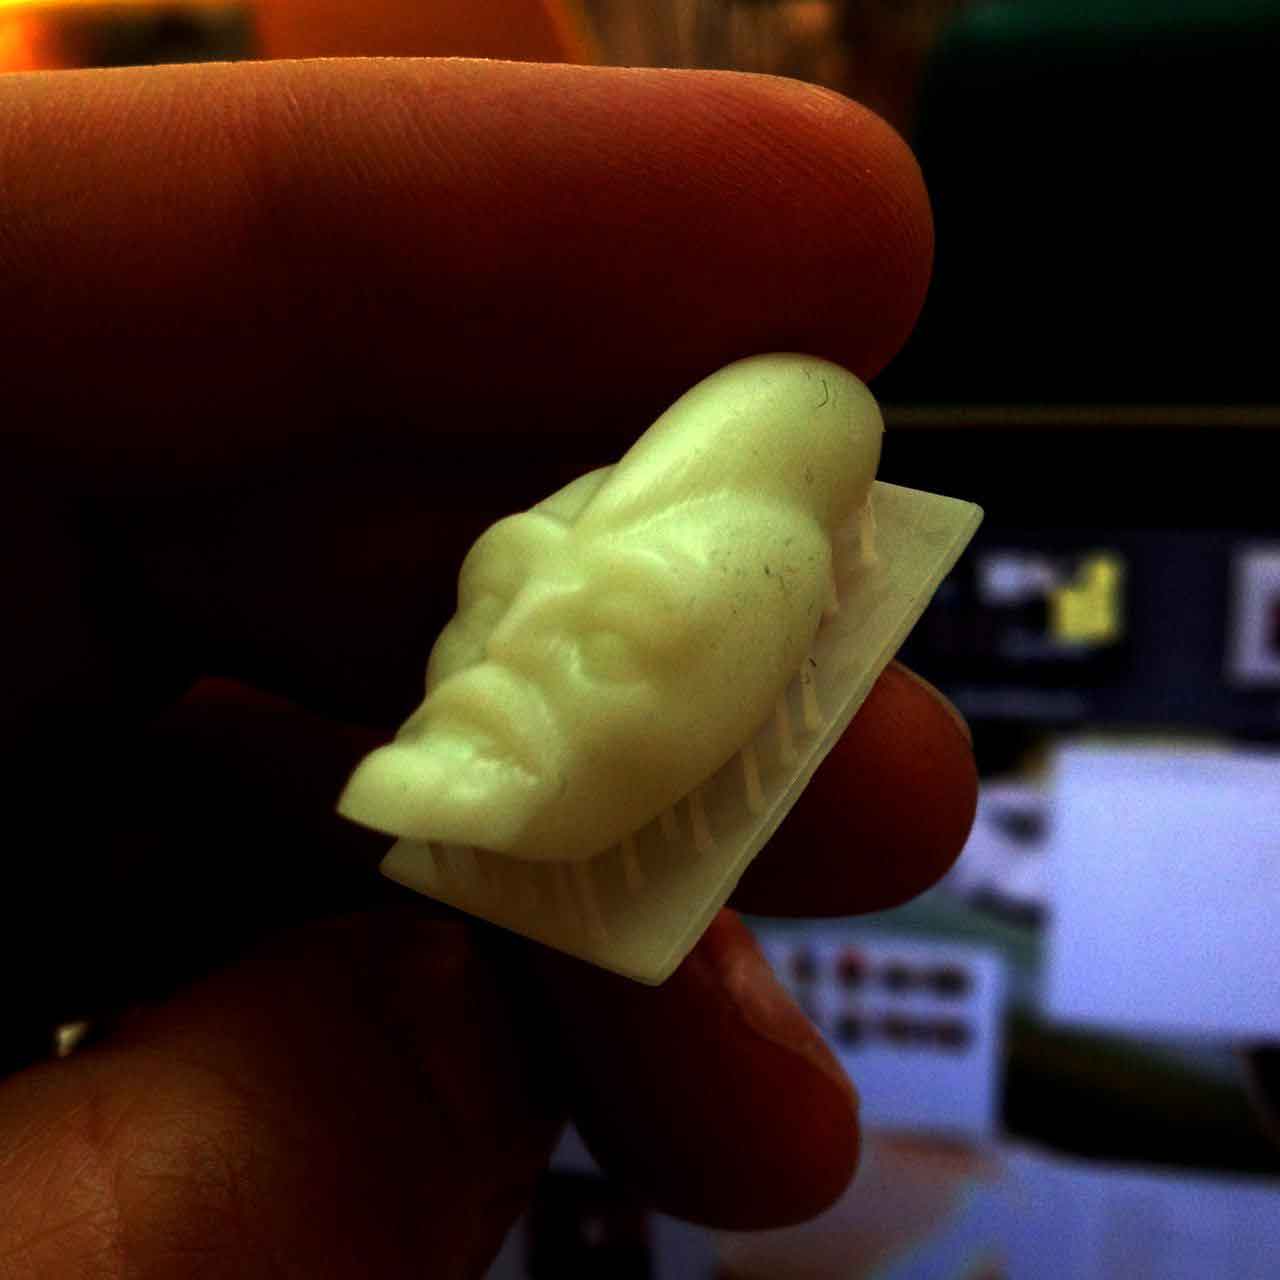
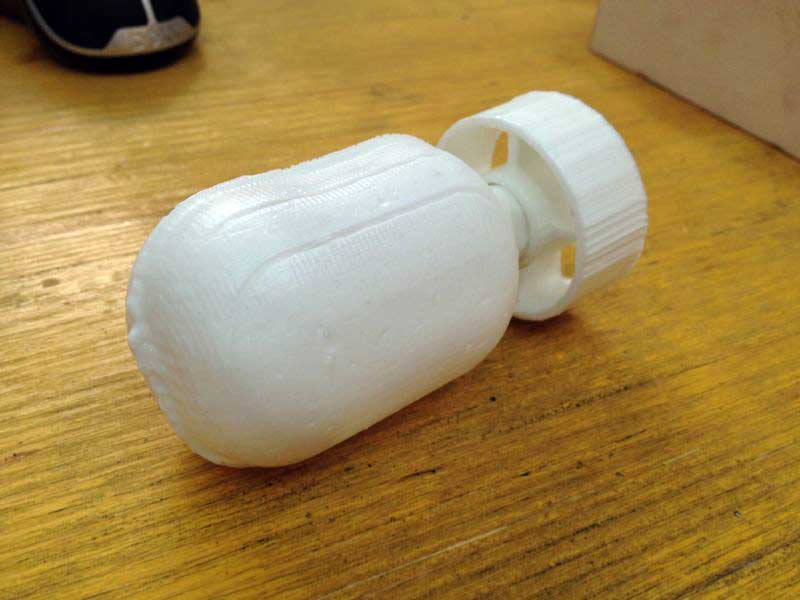
I started downloading a Star Wars' Jedi model (with the groom, we share a passion for Star Wars) and i used various softwares to modify and adapt the head of the puppet to be used as a cufflink or pin. With Blender I smoothed the low poly appearance and stretched some proportions, then with Meshmixer I made it a solid object with no holes.
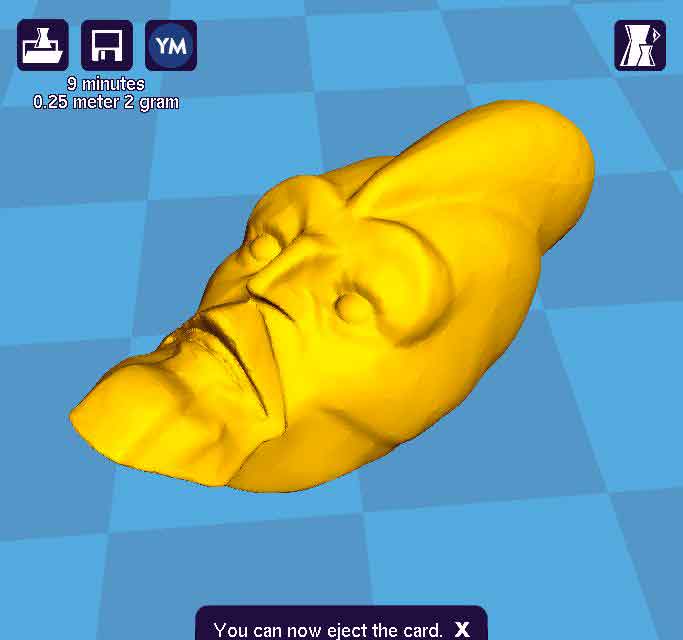
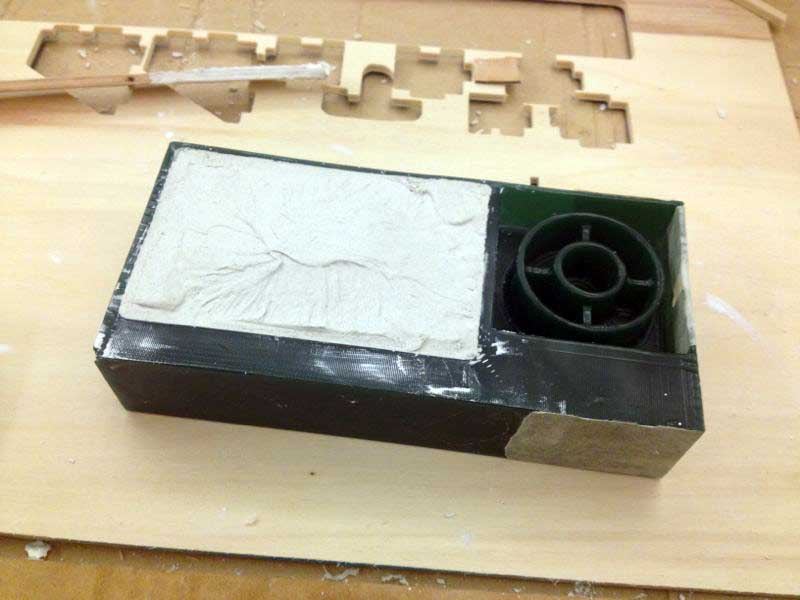
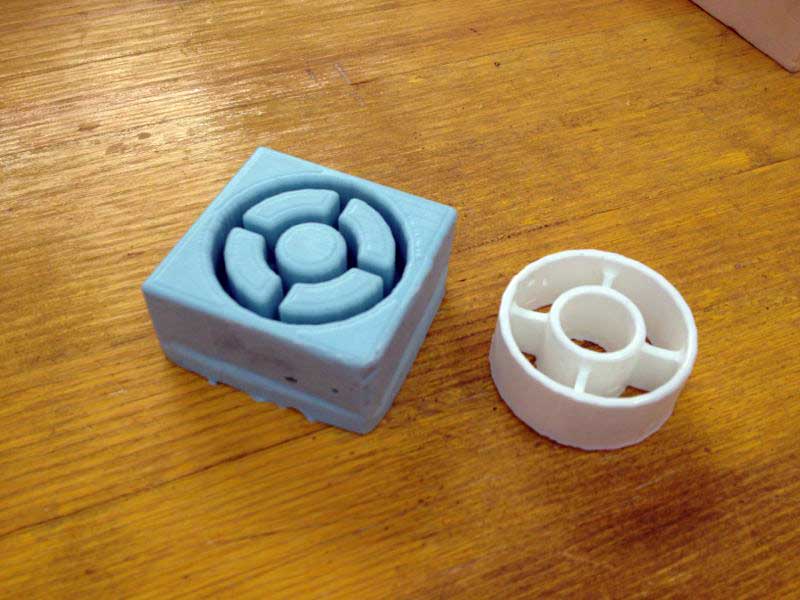
Unfortunately Opendot's milling machine was still not working, so I had to create my model with a 3D printer. This time I used the DWS stereolitography to achieve a great level of detail, but instead of printing the entire mold, I only printed the little head. The print came out smooth and detailed to a level not easily achieveble with a milling machine, if only for the undercuts I had on the cheeks of the face of the puppet.

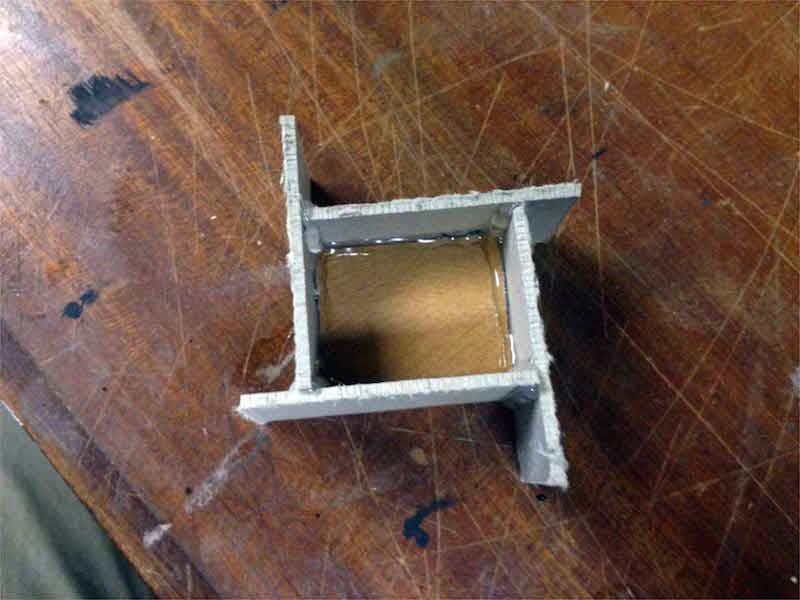
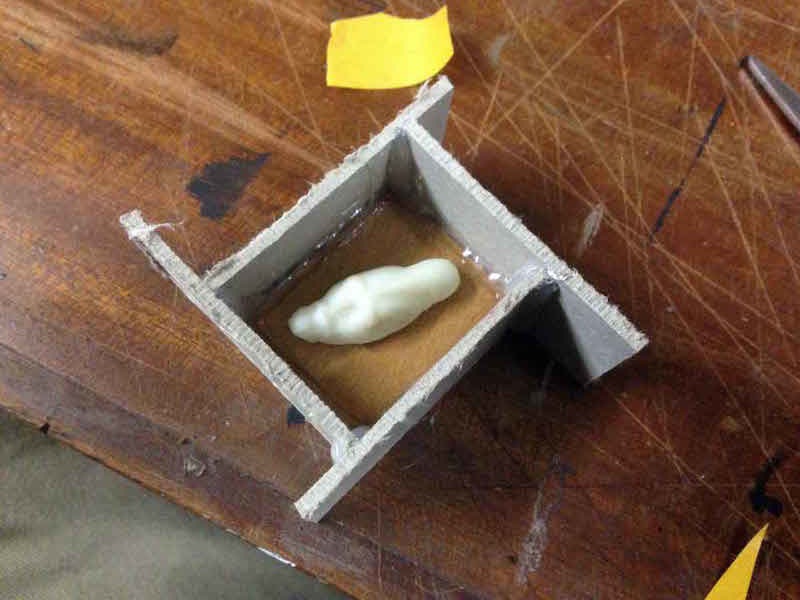
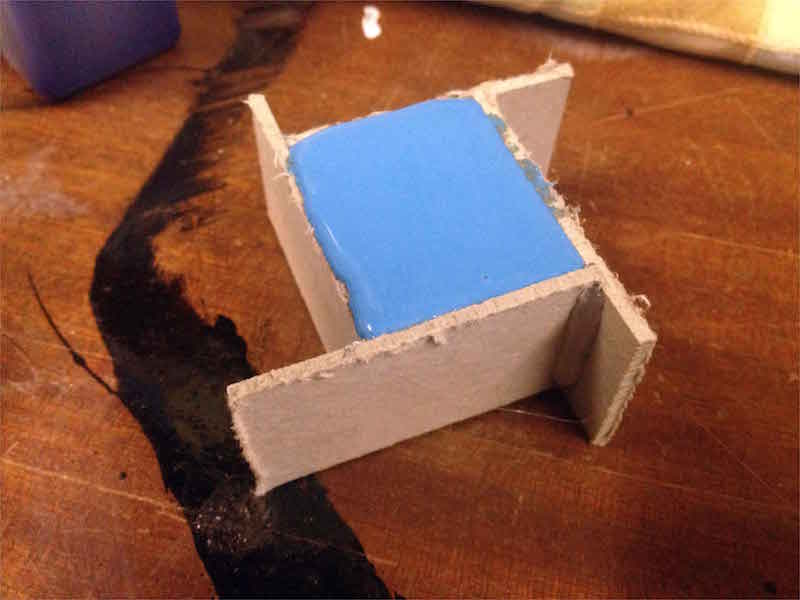
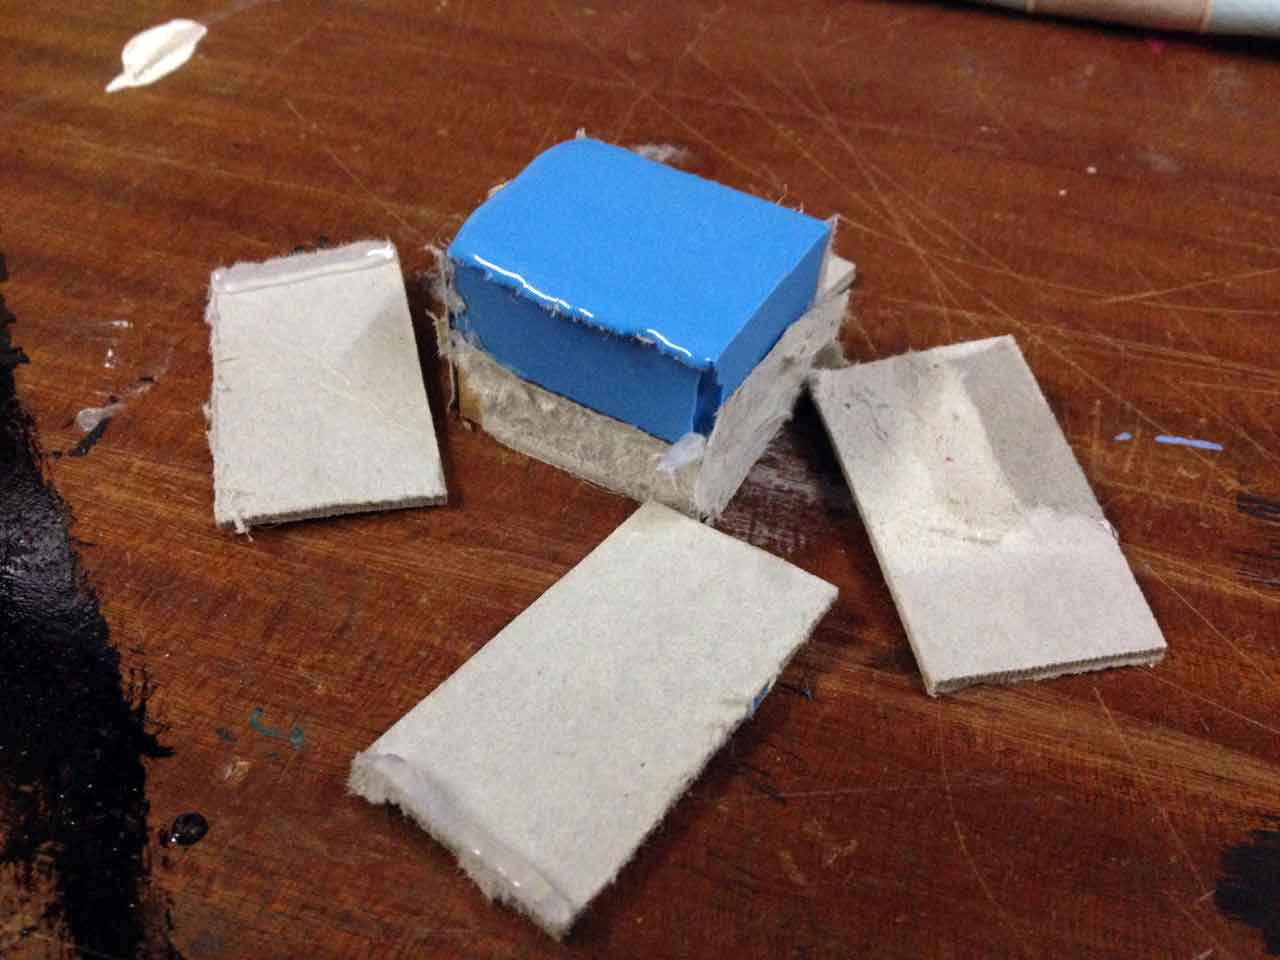
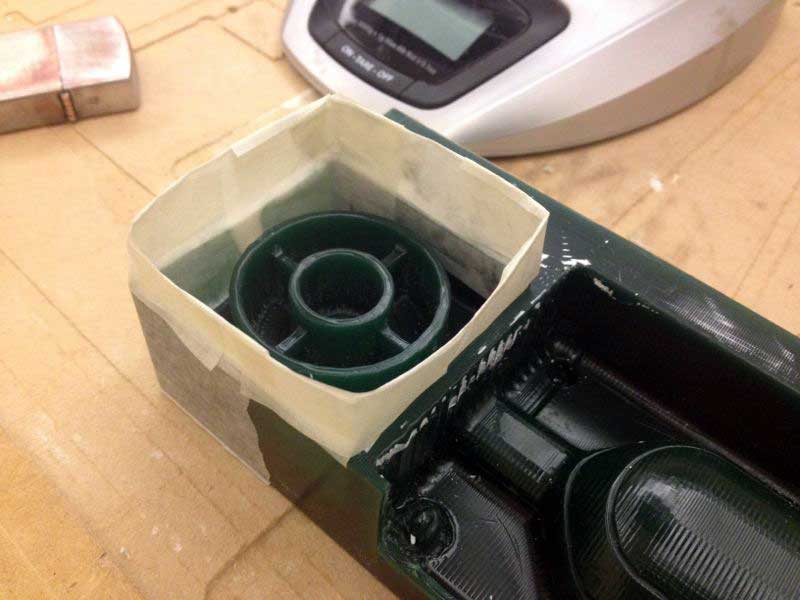
Making a mold box
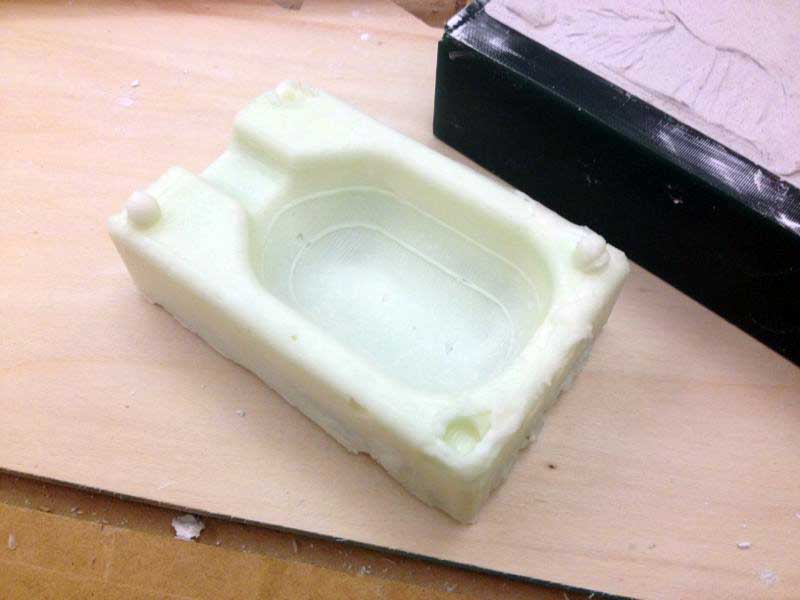
Then I built a little box out of a MDF base and four cardboard walls, hot glued together. Hot glue is never a glue you can rely on for permanent purposes, but in this case it is great as it set very fast and it is necessary to make the box water-thight, so the rubber wont leak out. The mold box is just a one-timer so there is no need for a better glue. Since we are working with silicon rubber we will not need any demolding compound, the positive mold is ready.


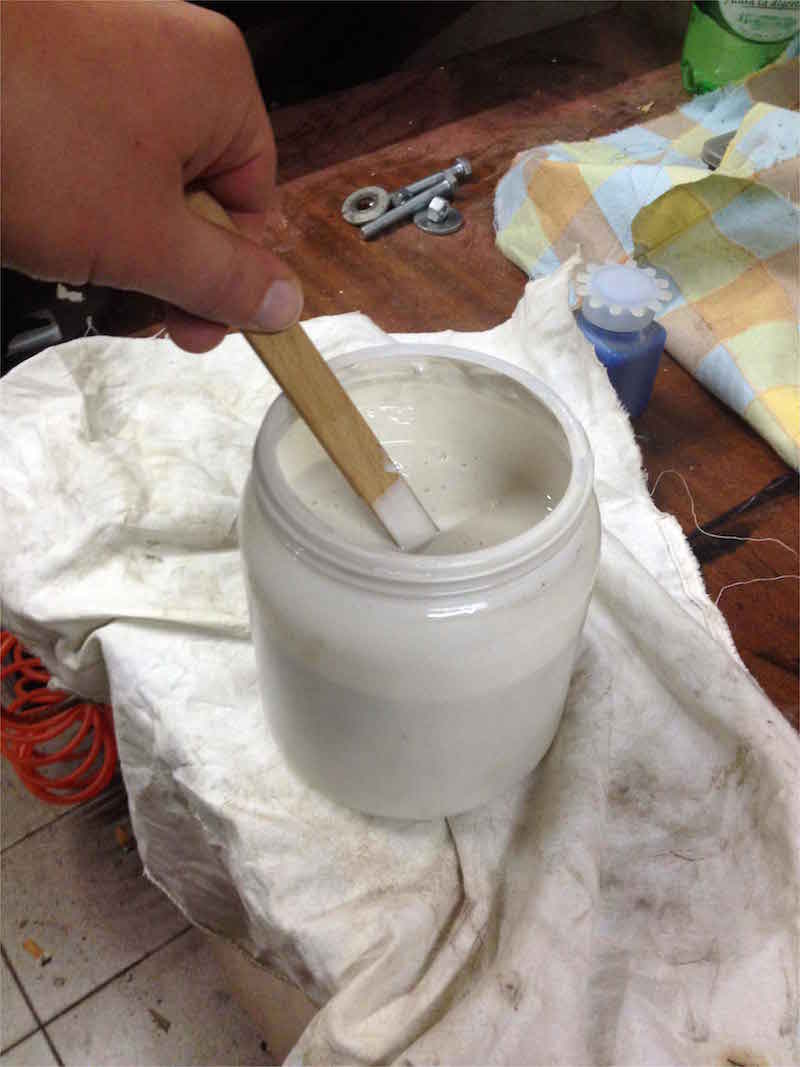
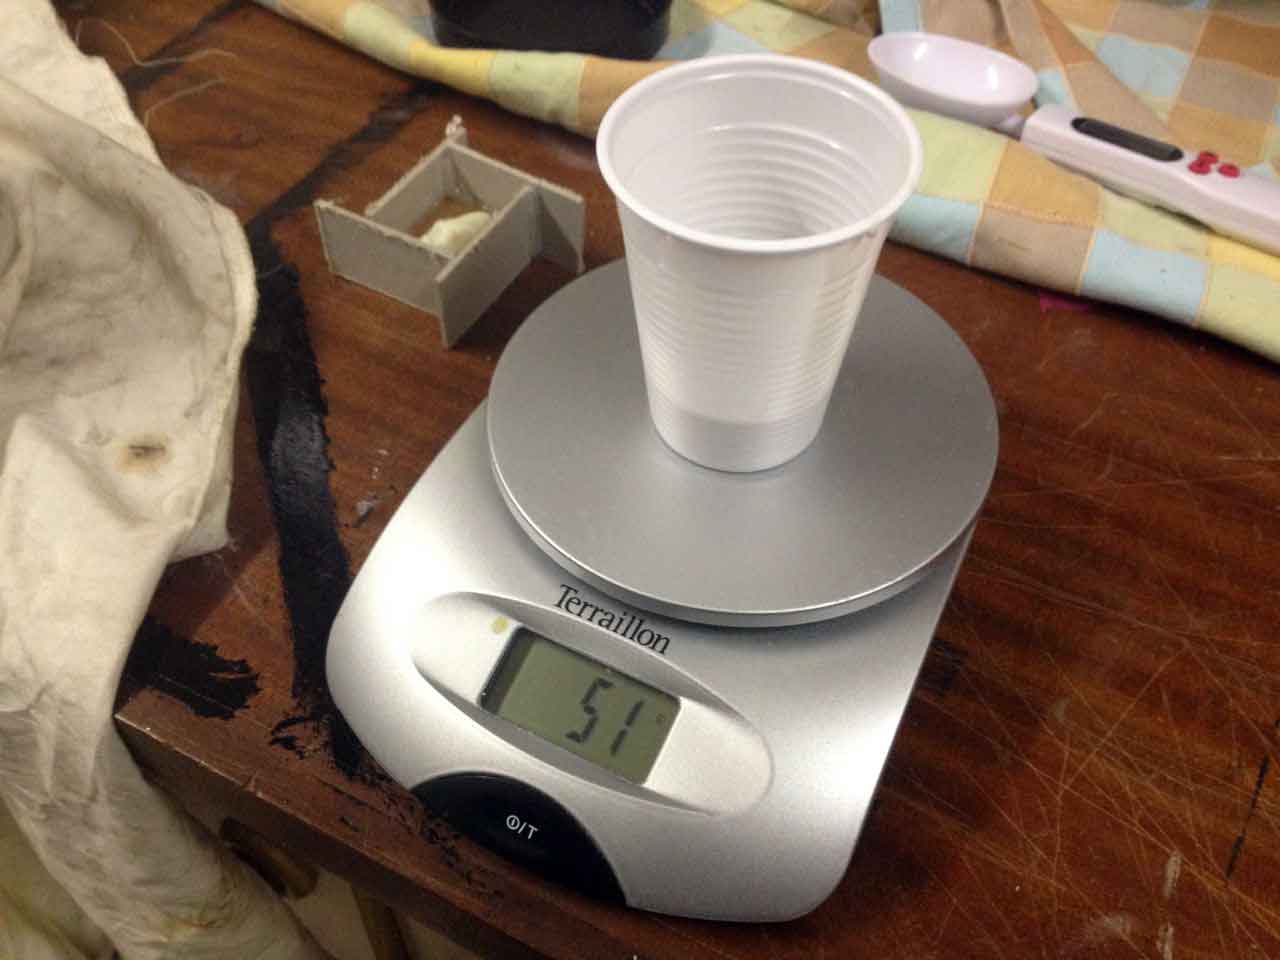
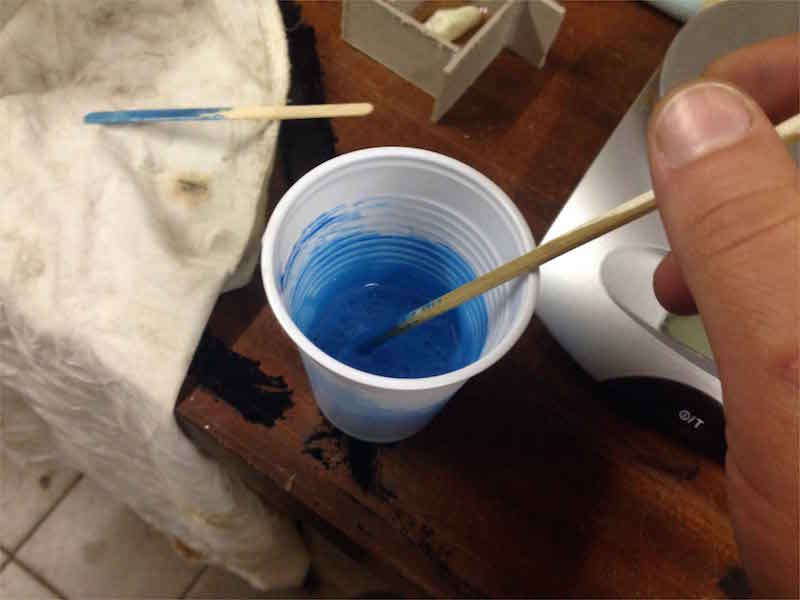
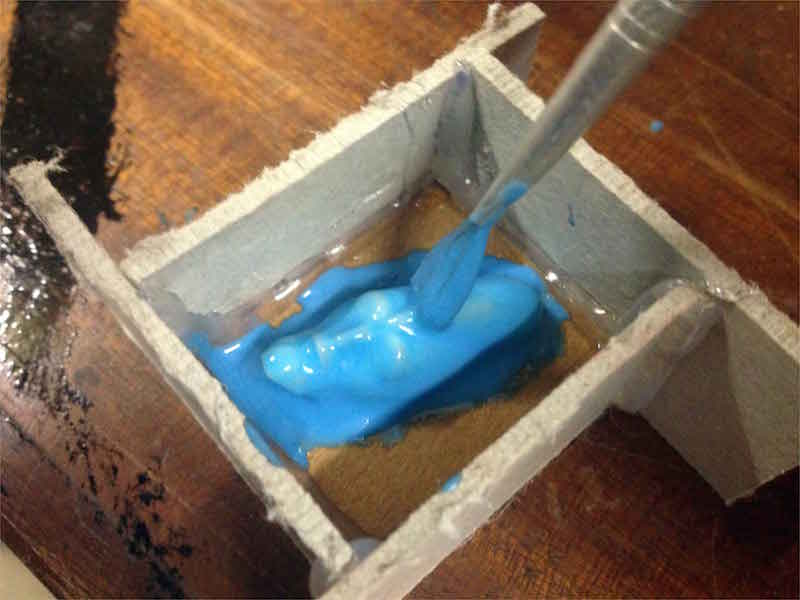
Mixing and stirring
While mixing silicon rubber you want to use a sturdy wooden stick, the rubber is hard to mix and you need something that wont brake or flex. You have to mix the rubber before you add the catalyst as it has components that separate over a batch's shelf life. The mix ratio of my rubber was 5% in weight and I used 50 grams of rubber with 2,5 grams of catalyst. The catalyst is blue colored so you can see when it is well mixed with the rubber. Pay much attention while stirring to scrab the walls of the pot and clean the stick many times scraping it on the rim of the pot, as you want all of the rubber in the pot to be mixed with the catalyst.
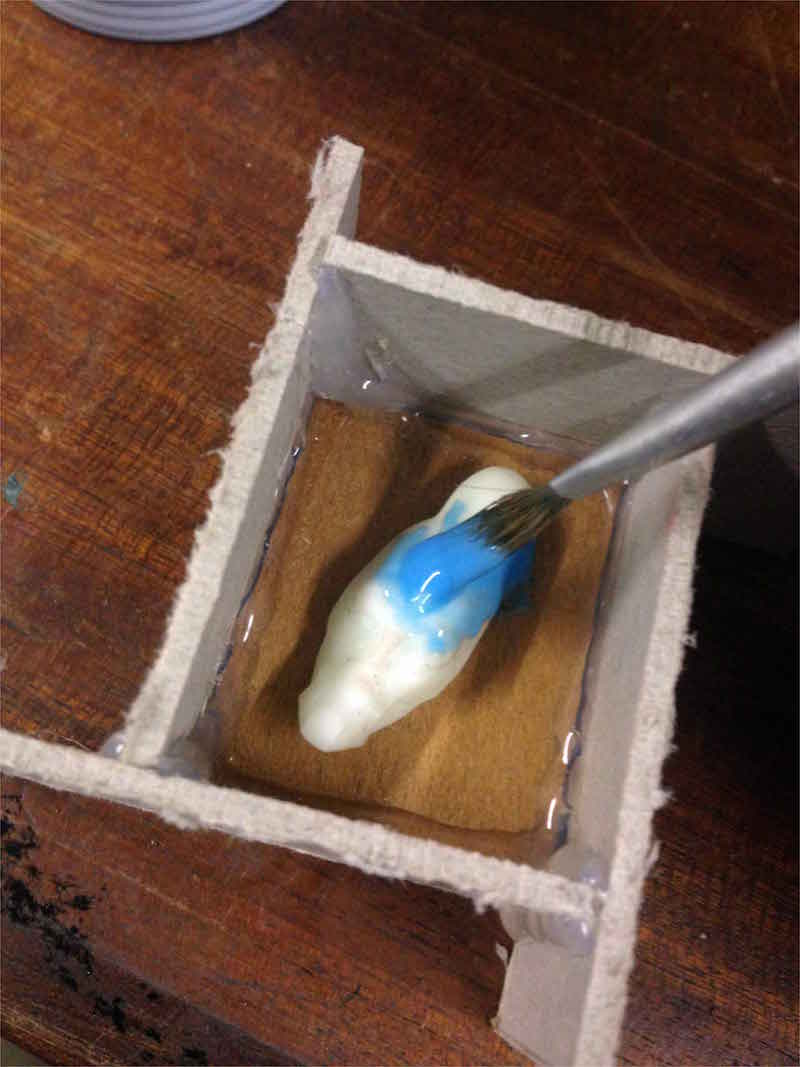
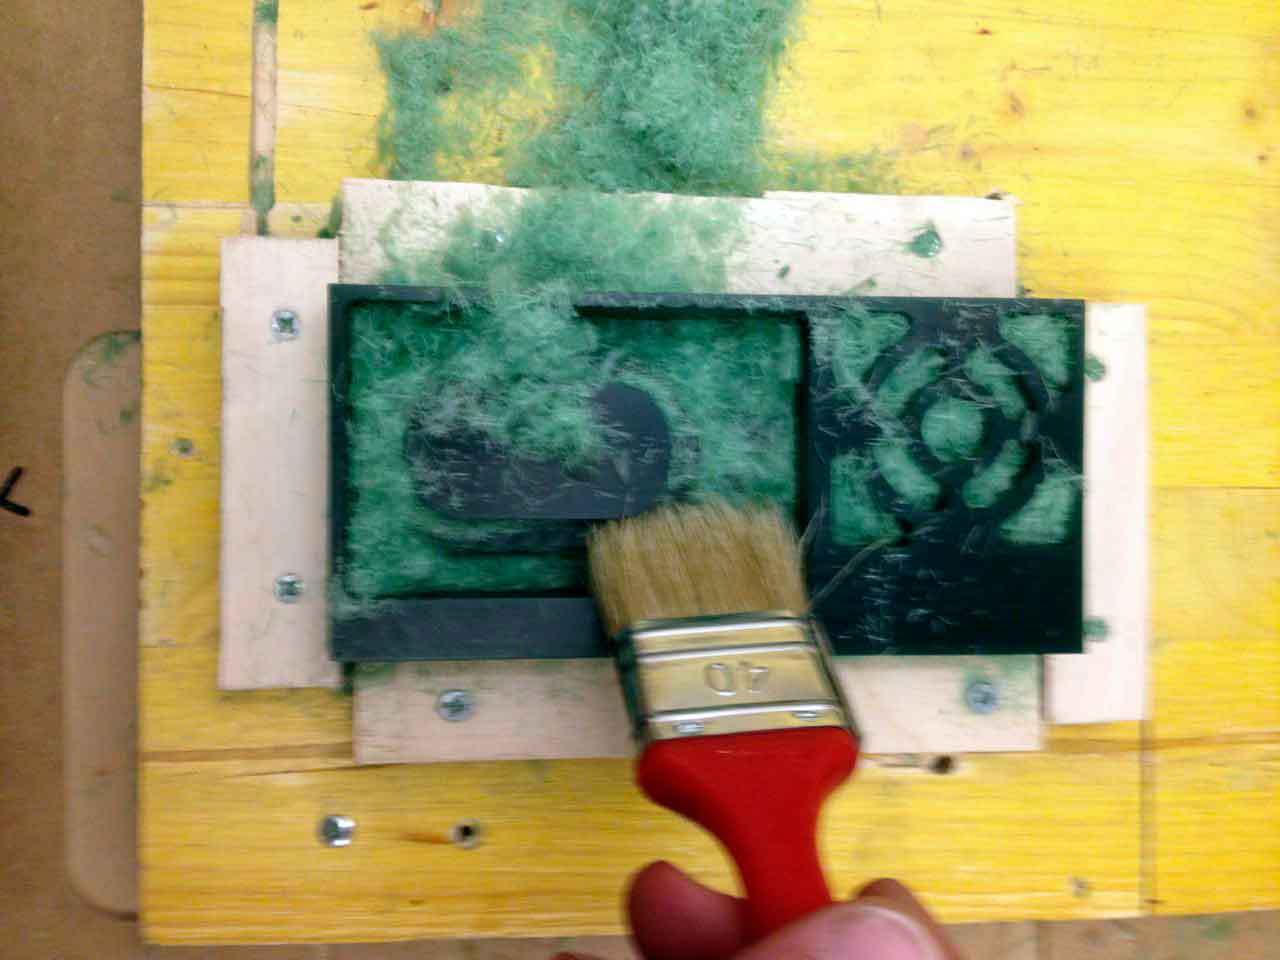
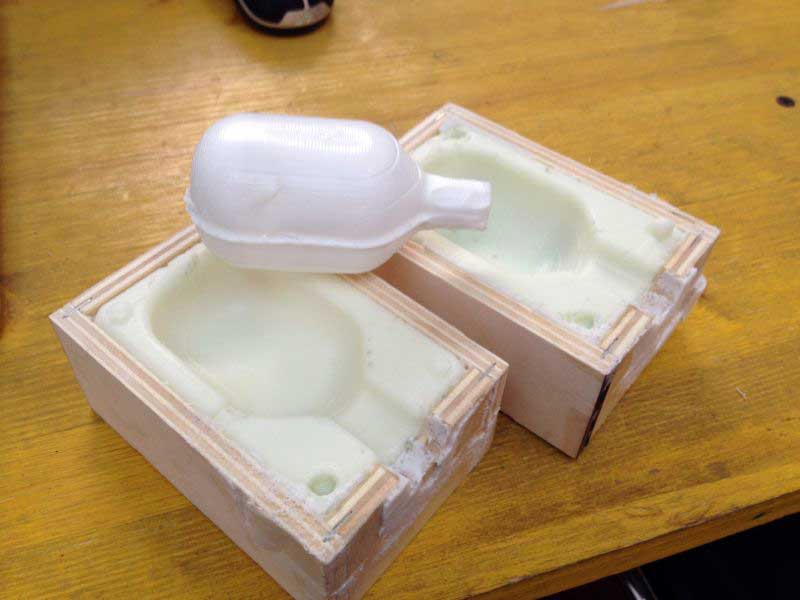
Brushing, pouring and debubbling
Before you pour the rubber in the mold, I always use a brush to put a thin layer of rubber on the master. This way I'll be sure there are no air bubbles directly touching the master and even if they will get trapped into the mold, my first layer will still be smooth and compact. Nevertheless after pouring the rubber I put the fresh mold over a vibrating device to help the air bubble rise to the top.
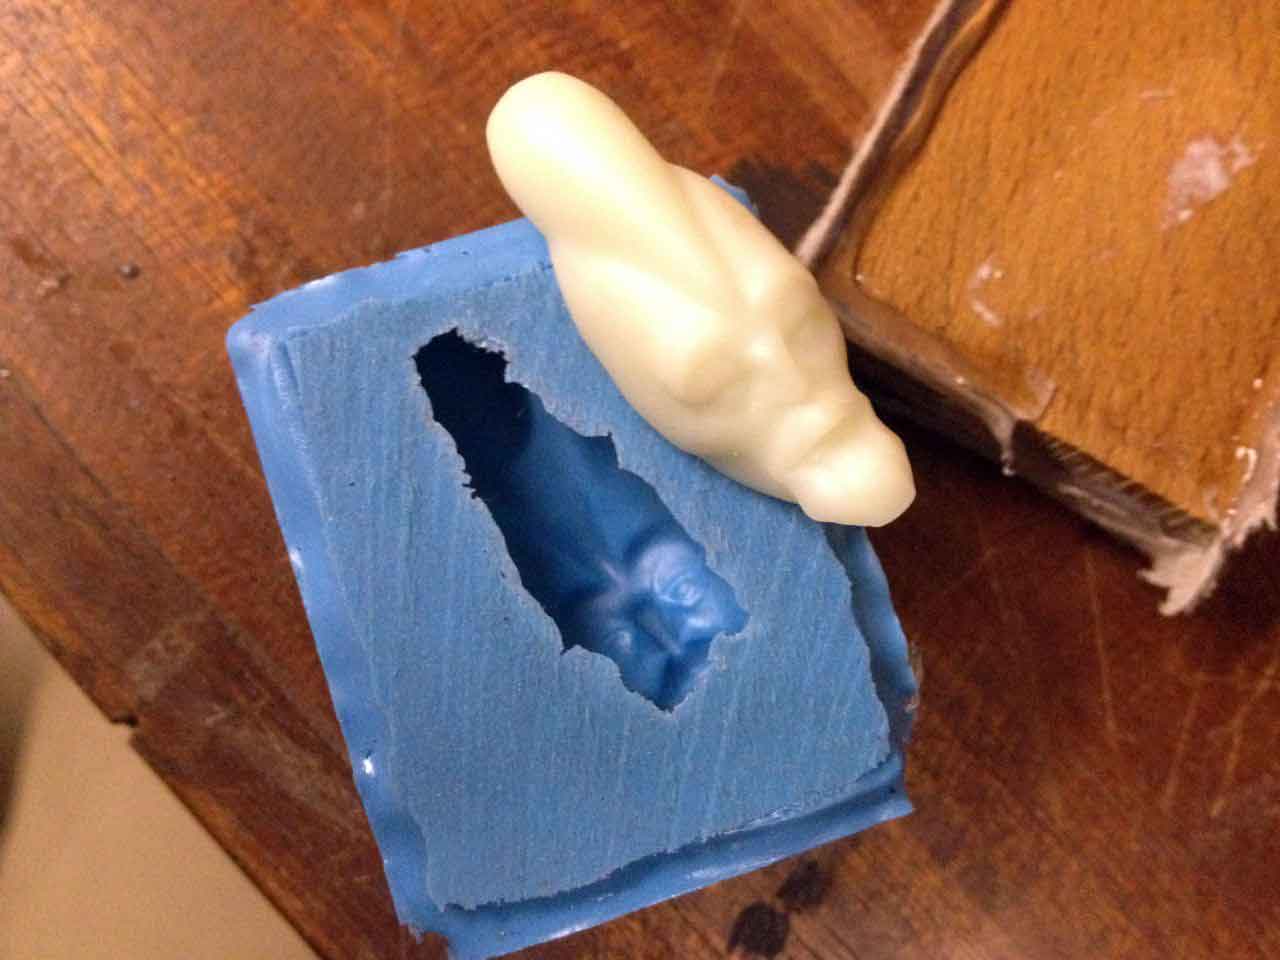
Cold Cast the cufflinks
After 24 hours, I disassembled the cardboard box and the negative came out very well, ready for casting. For the process I needed polyurethane resin, aluminum powder (using aluminum you can achieve a silver effect) and a black tint that works with urethane (similar to Smooth-on So Strong tint).These are the steps for the cold casting process:


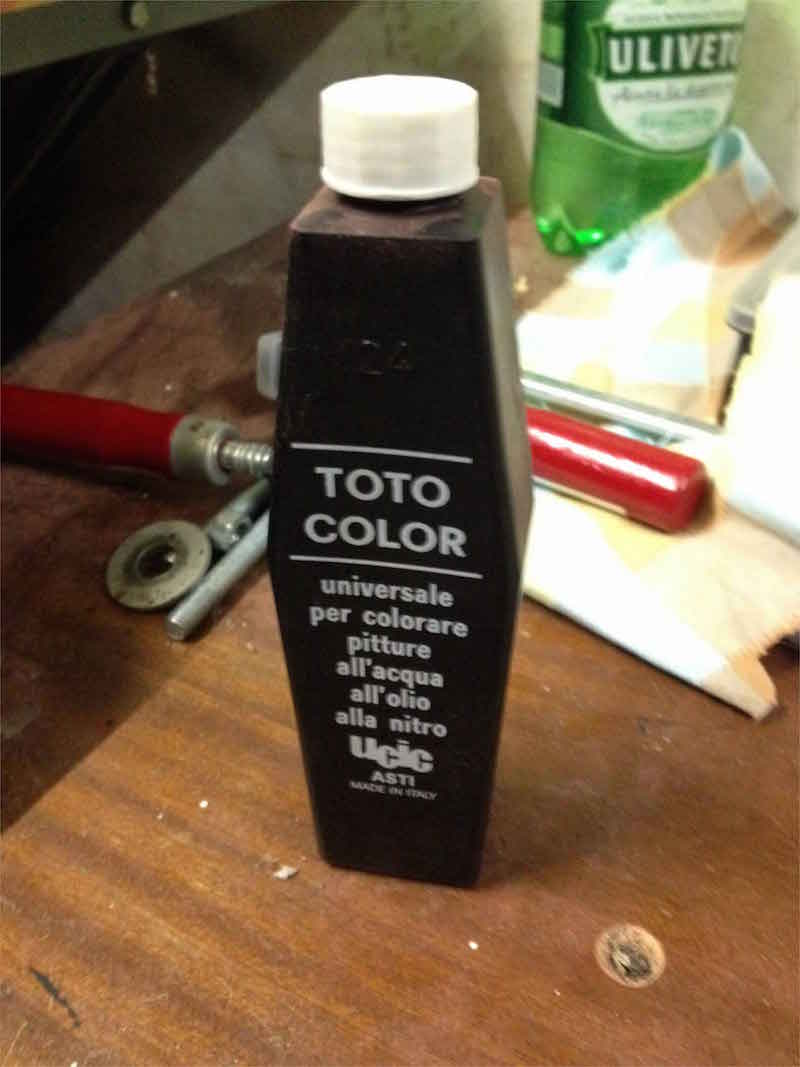
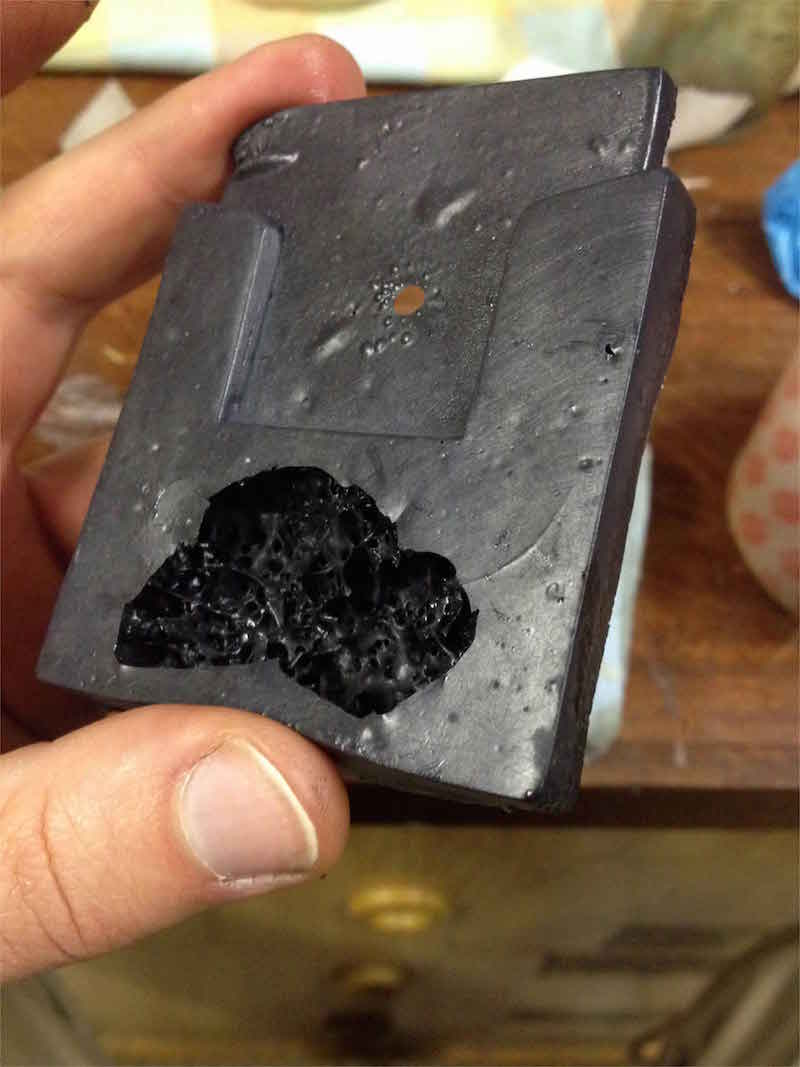
Color tint issues
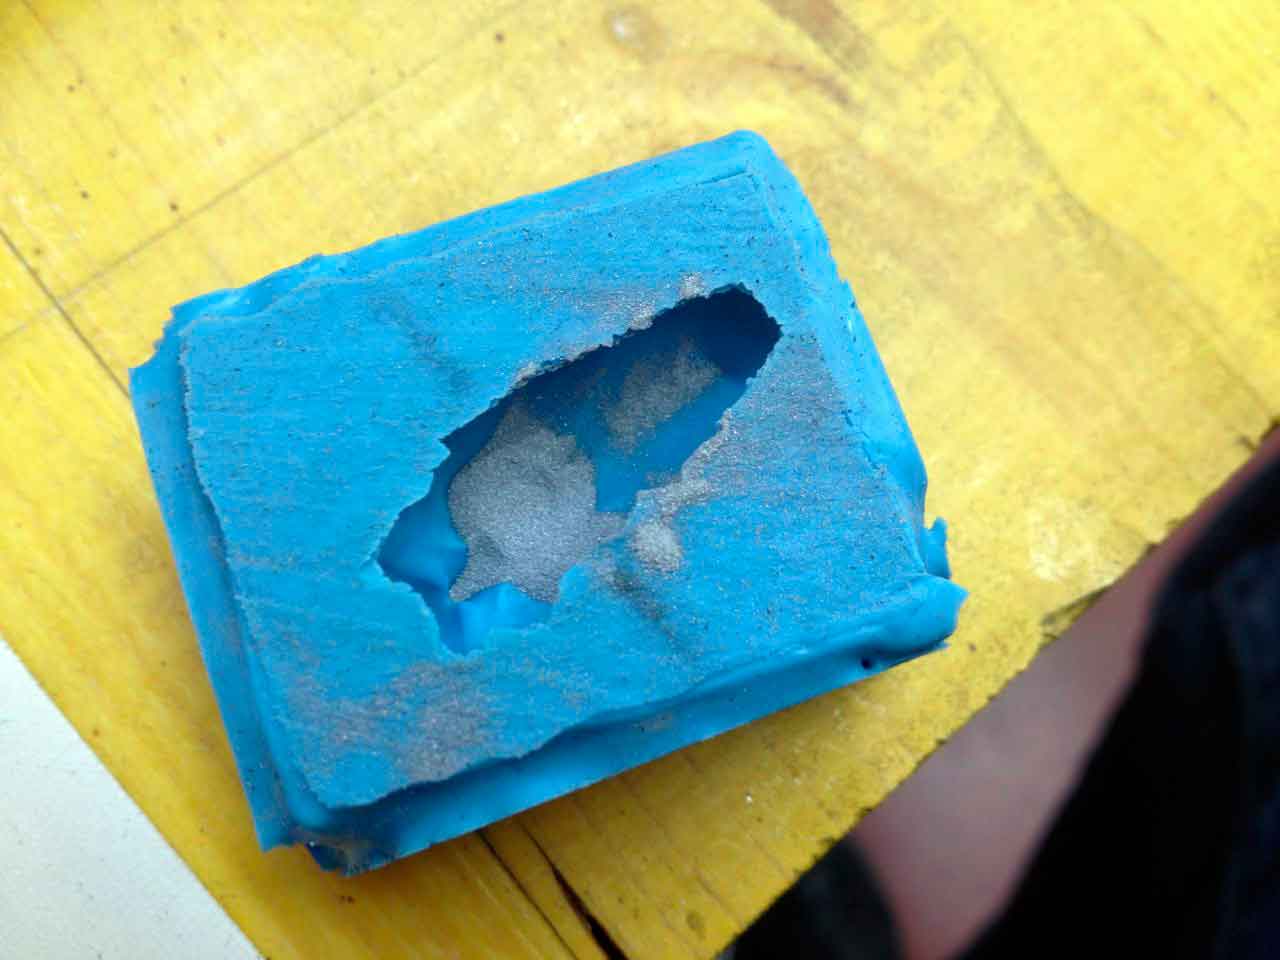
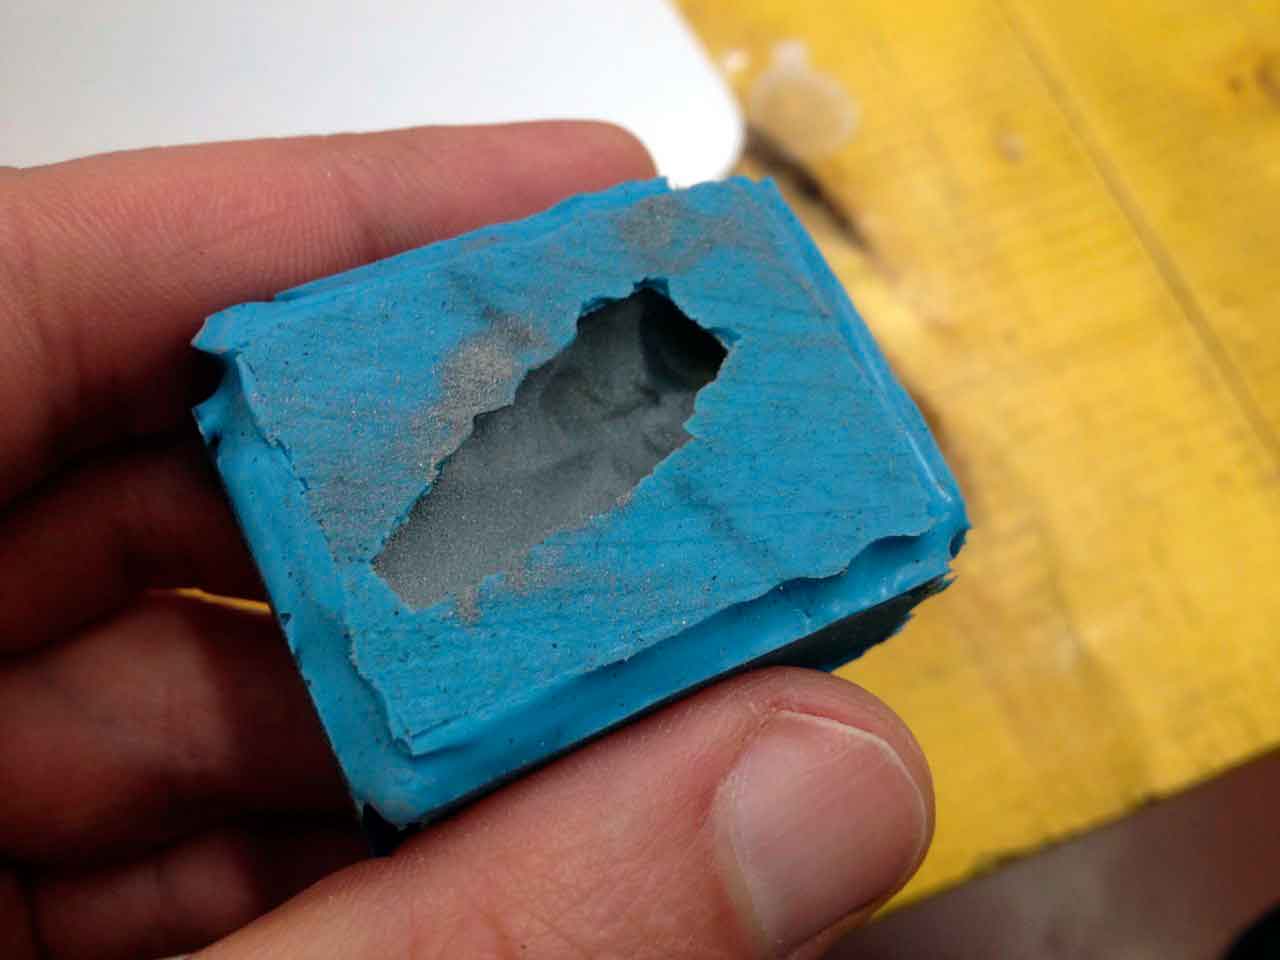
I already knew you can only use specific products to color urethane, but I also tried an all purpose color tint, one you could use with water, sintetic or oil based paint. The result is an "explosion" into a foam of bubbles as the temperature of the termic reaction takes place.

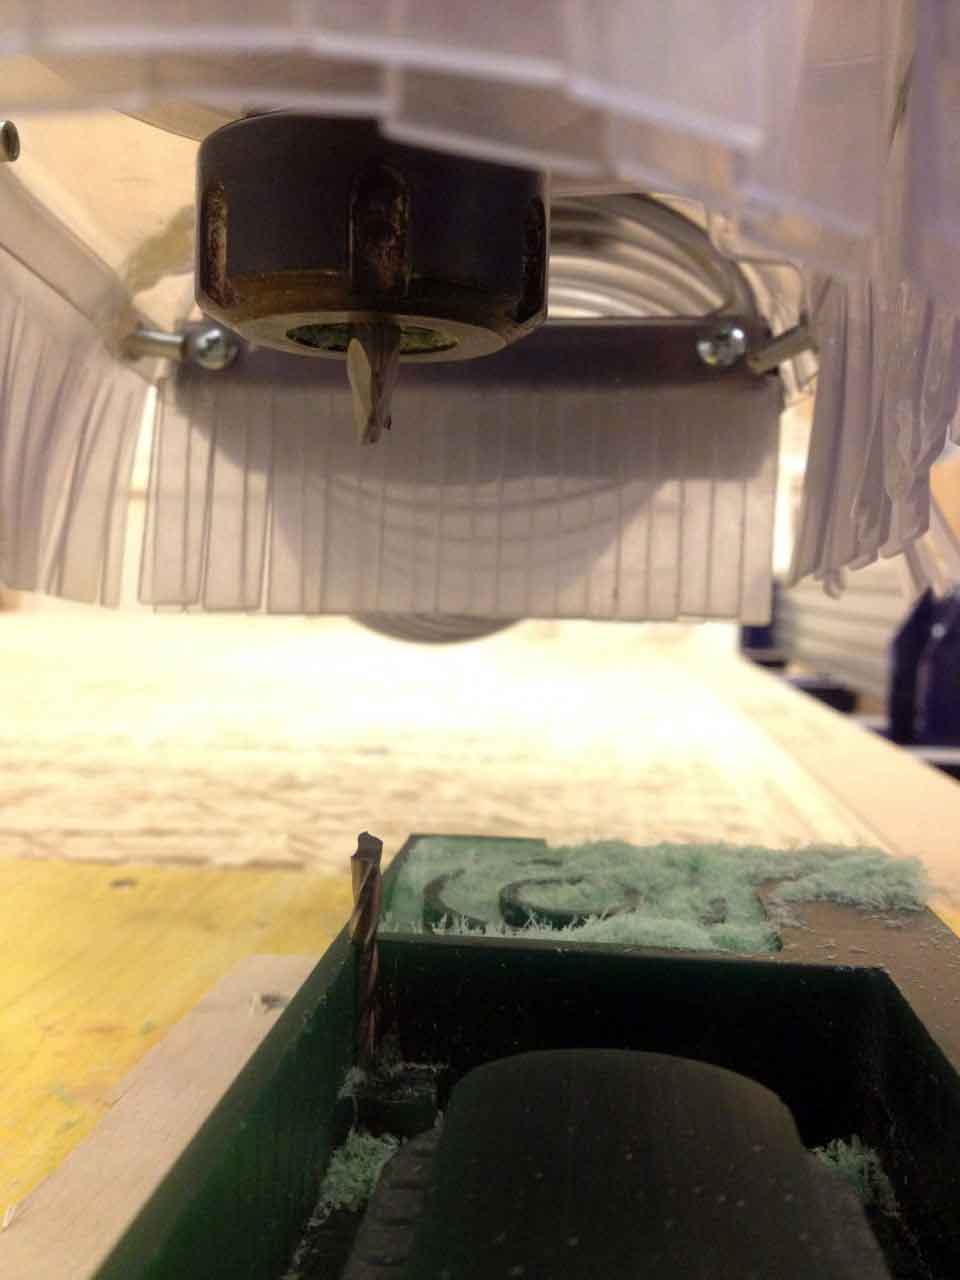
Rhino mold modeling
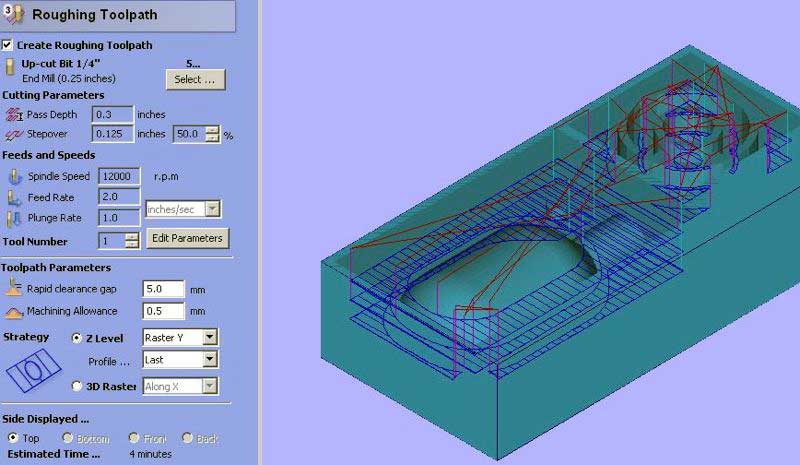
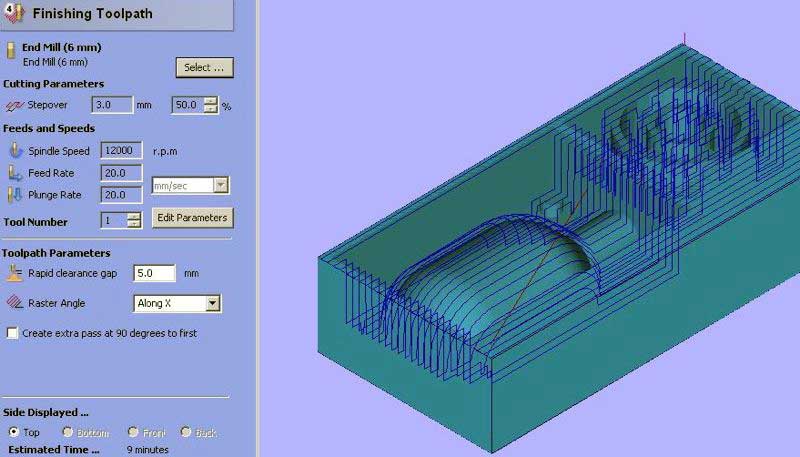
I experimented with wax milling. I designed a three part mold of a Nuke bomb with Rhino. The main body of the bomb is symmetrical so it must be molded twice to have two valves that are going to snap together. The stabilyzer of the bomb will be a single, one valve mold.

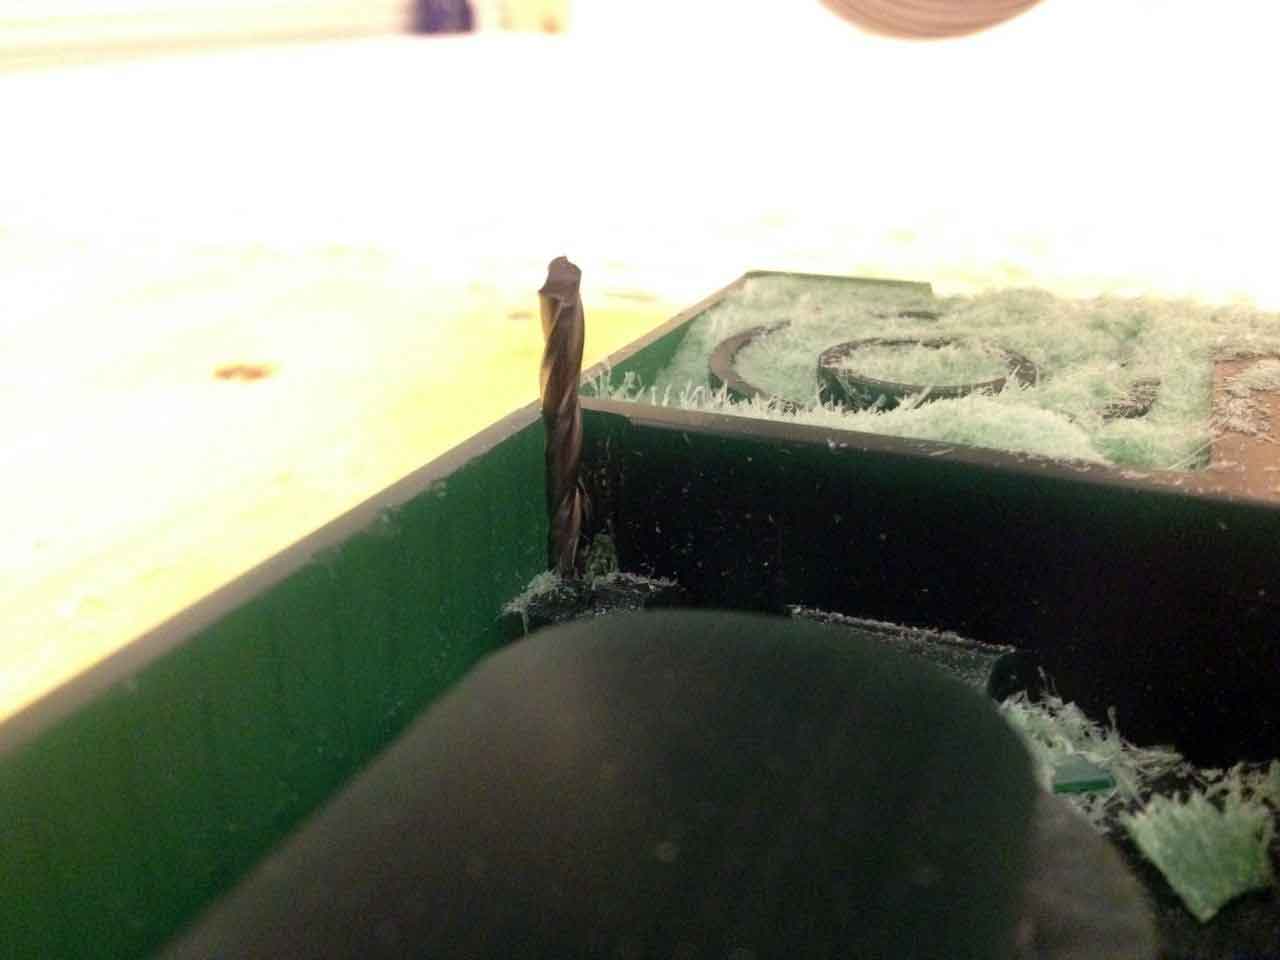
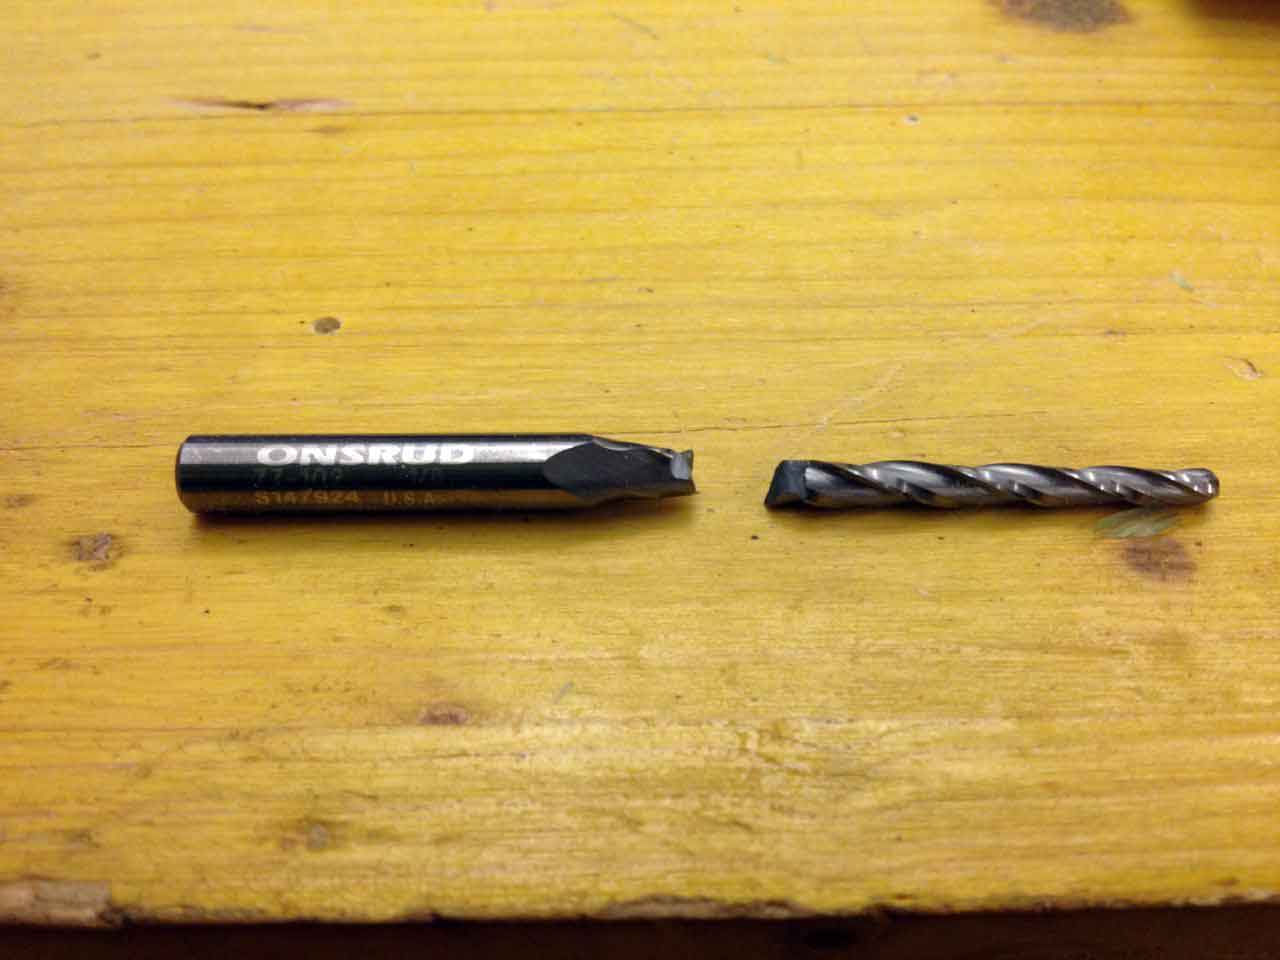
Wax milling
We had to use the Shopbot to mill, but after the roughing cut, as the 3mm ball end tip began working on the main body, it got stuck into the wax. What happend is that the roughing cut couldn't fit very well around the registration key and it left a big amount of wax. So the finishing tip found a lot of wax and the router was moving too fast and it broke the tip. I made another finishing pass with a big ball end tip and the result was not very good. Anyway I collected the wax and I plan on melting again a new wax block.


Molding the wax model
I used cheap acetic contractor's silicone mixed with corn starch as a molding rubber. When you mix the two they become a thick and sticky paste you can apply with a spatula. It hardens in less than an hour and I also poured a layer of plaster to give rigidity to the silicone. I used the mix to make two molds of the bomb and then used regular liquid silicone rubber to mold the tail of the bomb. Both molds came out good and I could use the two valves one to test my Rotocasting machine.


3D files are available here: