3D Printing and Scanning
The assignment for this week was to desing an object to 3D print and scan and object in some of the diverse techniques, and eventually, print it. To make some useful work, I decided to scan my hand to use it for my final project. But with unexpected and unwanted results, finally I test three different techniques.
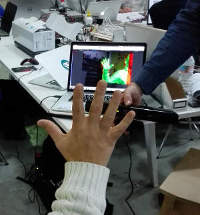
Kinect
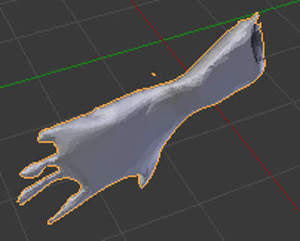
First of all, I decide to use the conventional scanning technique, using the XBox 360 Kinect. We try to use the Microsfot Kinect Studio software, but we finally decide to use the Scanekt program, much more intuitive. Our expert classmate Alex, scan my hand, he make many passes around my hand to take a lot of images. But the problem with the Kinect is the lower resolution, and the imposibility to scan nearest object. It requires a minimum distance to the object. So it can't obtain important features of the object, details, and in the case of the hand, it can't interpretate the space between the fingers. It is a good device to scan larger objects without need of high resolution, so in my case it doesn't work. When I opened the file on Blender an see the results, I just close the program and start thinking in other better options.
Photogrametry
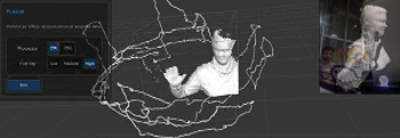
The second option was to use the photogrametry technique. So I decide to use two differents apps to do it: 123D Catch and ReCap, both from Autodesk. I install the app on the smartphone since the twho circle guides for the snapshots are really very usefull, by this way, you can ensure you will not lose any point of the object. Even so, is not easy to maintain the object a the same distance and at the center of the camera, but it helps. Once you send the work to the cloud, it take a lot of time to process.
In my specific case, the difficulty is to maintain the hand at the same position for at least 5 minutes. If you move even some milimeters, the program drives crazy and take other fix objects of the background as a central object, so the results are very creepy!
I try also with a camera, and a tablet; I try inside, outside, always with the same result. With the ReCap software is the same. This software are useful and you can get better results if you tray to scan an a static object. And do not forget to keep away dogs andany other living being of the surrounding, there can not be any movement around when you are taking the images, if not the software get confused because there are 'new points of reference'. It's strongly recomendable to have many reference objects, not plane backgrounds, but big objects on the background can be a problem if you are scaning something like a hand, that can't move a milimeter. Otherwise, the program change the 'protagonist' of the scan. So instead of my hand, I get my head or a TV, for example.
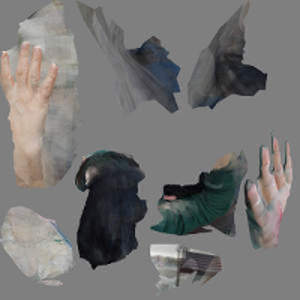
The different reference points of 123D app.
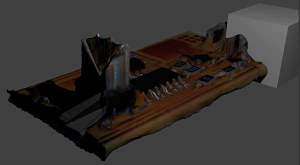
The results of scanning a static object, confirm me that it's not a good idea to use it if I want to get some useful results with my hand. In this case, I scan my ISP, to design the top part of the ISP case. This exercise help me to understand how it works and to not fail taking the captures. In the ISP case, I didn't take pictures from the bottom side, so the lower side of the conector has a hole, since the software do not have any information to complete the 3D model.
Roland Modela MDX-20 milling machine
The next technique was use the Roland MDX- 20 milling machine. This is not really a scanner. You can change the milling piece by a sensor head with a needle, that set the position of the object in a 3D axis plane, dot by dot, depending on the resolution settings.
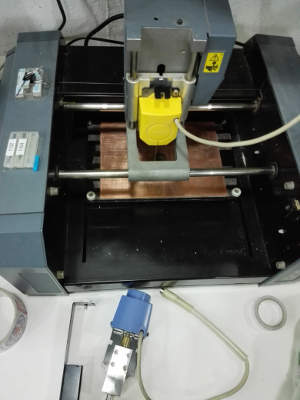
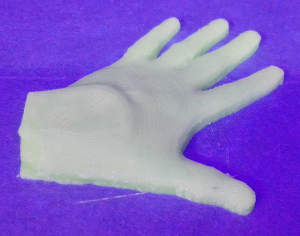
Since it gets a lot of time to scan even a small object, was not possible to scan my hand. It can takes, in a medium resolution, more than 25 hours, without moving my hand, with a needle brushing me. So I decide to make a clay model of both sides of my hand. Even if Roland takes a lot of time to scan, will not be my hand, but a replica!
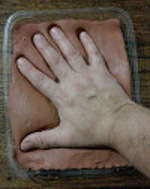
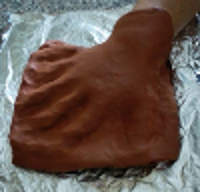
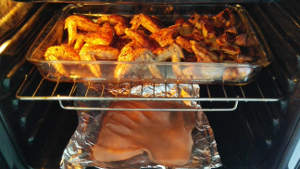
I use the common modeling clay, but the type is not required baking, but air dried. Since it takes more than 24 hours to drie, I decided to take advantage I had to use the oven to cook my meal -some delicious chicken wings- and I 'cook' the clay mold of my hand. I made two cast, for the both sides of my hand.
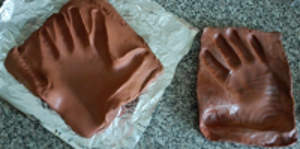
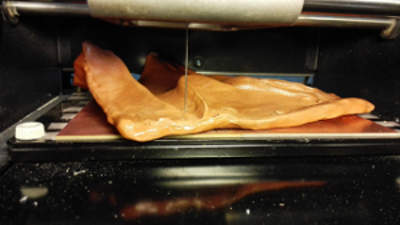
I apply a clearcoat thinking to use it with the milk scanner technique, but this I will explain later. My hand model was a little bigger than the Roland platform, so be careful with this, but to get clear the space beteween fingers, I needed to open my hand all that I can.
After of set all of the parameters and settings of the Roland, we get an estimated scanning time of more than 27 hours, so we decide to change the resolution, instead of 0,5mm, we set 1mm, so we get an estimated time of 12 hours.
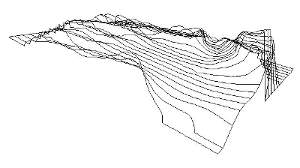
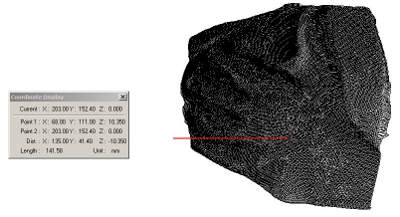
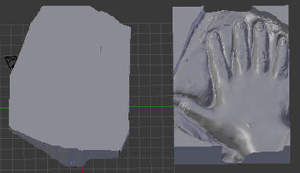
At the left, each point marked with the Roland, draws a line. At the right, all the points that take the machine, marked with its coordenates.
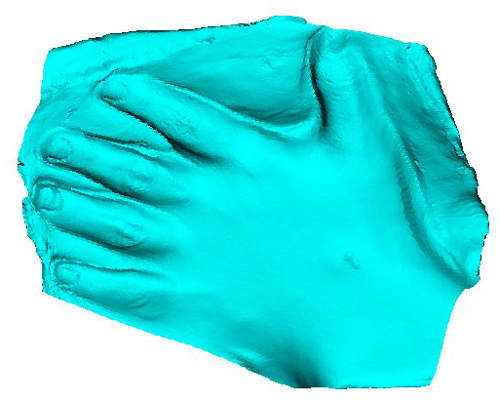
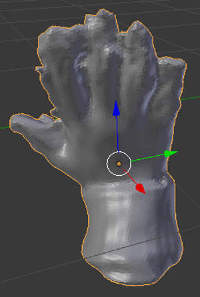
The final result of 12 hours, scanning dot by dot with a resolution of 1mm, the model of my hand. The software to process and scan with Roland MDX-20 is Dr. Picza.
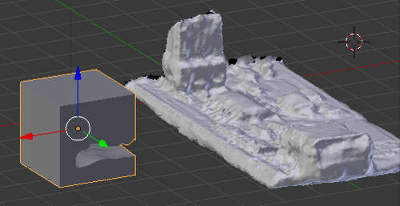
Now, is time to model the scan to print it! We export the file in stl format with Dr. Picza. I used Blender to fix and prepare the model. Since I need the model in positive, with the help of Ferdi, we create an "immprint" of the object, so now we have the negative and positive of the object.
It was a plane scanner, that means that we don't have any information of the bottom of the object, the Roland machine just scan the top of the object. If you want a complete scan, you have to turn the object, scan it and then join the two images, and is not a easy job to get the exactly position of the rotated object, at the same point, to match both sides. So with our file, once clean and with the mash corrected, we made an extrussion and then fill the empty space. Now we can print.
But we abort the mission! I want to use muy scan to make some test for my final project, but this scan and the final file are not very useful, so we considere not to print this file. Anastasia, our Fab Lab 3D printing specialist make me think about other possibilities, and encouraged me to do other tests based on an original sketches. It was a great help to carry out an analysis of the various possibilities.
After a long process with this excercise, what you want most is to see the result of your work, in this case, your printed piece. It take me one day making the clay model of my hand (my first clay model!); 12 hours scanning with Roland Modela Machine the cast model; half day trying to fix the result in Blender to 3D print it. But we've done the right thing, I have learned with each step, which is really important now.
Fluid Scanning - The Milk Technique
Trying to get a good scan of my hand, I decided also to test the milk scanning technique. I really doesn't trust in it, but when I see the results, I was really surprised.
Since we are still talking about my hand, I needed to find some technique to take the photos trying to avoid moving the hand. So there was the possibility to use the clay models with the uncolor paint to take the photos. But it was not entirely convincing. Thinking about how to take the captures of the real hand in a faster way, Laura, a classmate of this module, offers me to test taking the images with a videorecorder, faster than that...
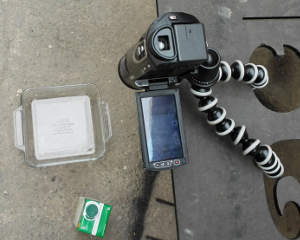
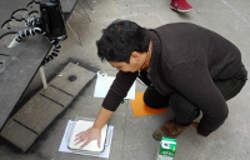
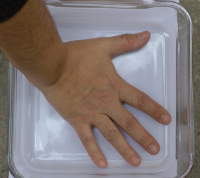
With a flexible tripod, we fix the videorecorder to make the video to downwards, trying to avoid shadows (even that, we get it!). We made it with natural light, in a cloudy day. We poured the milk into the bowl with the hand inside, while recording the video. We do it very fast, thinking in the posibilities of video editing.
We edit the video with Photoshop, we left only 36 seconds, and 12 frames instead 25. We also made some settings with the layers contrast, black and white levels and then save as GIF. But then, using the Fab Modules to convert the GIFs into STL file we get some error messages, exactly were indications to correct the images settings. Some other classmates get the similar messages. So Ferdi, our instructor decide to use fmmpeg on Linux to convert the mp4 file into a pictures. Then we use Bimp to change some settings. Is especially necessary to remove the transparencies on the layers, convert the images into greyscale, increase the contrast and decrease the brightness, and invert the colors of the images.
The procedure was as follows:
- Install ffmepg in Linux to convert the frames to images
- Execute the following comand: ffmpeg -i M2070001.mp4 -r 1 images/frames_%04d.png //extract frames as images
- Install Bimp
- Use batch mode in Gimp to convert images to grayscale, increase contrast and to invert color of images (white is geometry)
Now is time to convert our GIF to STL:
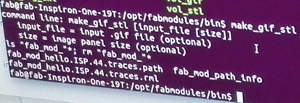
- Go to Fab Modules with the command: /opt/fabmodules/bin
- Execute the command: gif_stl ~/Documents/yourdirectory/file_name.gif ~/Documents/yourdirectory/file_name.stl 0.5 10
- 0,5 is the threshold, and 10 the Z size. You can try other size and threshold with your files, it depends on the features of your images
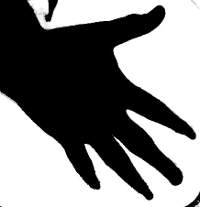
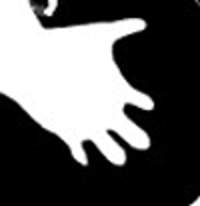
With our stl file, we can use Blender to fix the errors and the mesh of the scan. With this milk scan technique we get silhouettes of the object, which are clearly visible, especially if you left a few frames in order to get a not very large file. These silhouettes can be appreciated in the 3D model as slices. So with the help of the Blender tools, we can smooth the borders, thus achieving a much more delicate contour.
We get a Gif file with a total of 39 layers. Then, originally, the mp4 was recorder with 25 frames per second, with 36 seconds, we get 900 frames. With Photoshop we changed to just 12 frames per second. The final Gif has a 1 frame per second.
In my case, the scanned object was my hand, so we get a real size images. We scale the images with Gimp to get a smaller file. Then we scaled again to get a smaller object to send to 3d printer, since was just a technique test, was not worth it printing in real scale.
Now finally the file is ready to be printed.
In this close up, the "slices" can be clearly observed. They would be even stronger if we had not used the smoothing tools of Blender.
This is the animated Gif of our test. This is just a small sample, we change some settings, like the number of the frames, just to upload the file to this website
3D Printing
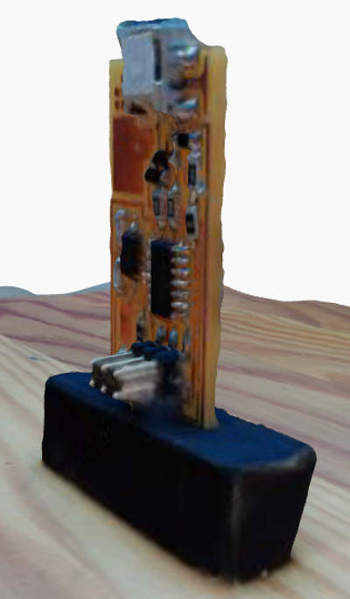
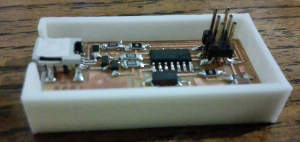
In addition to the printings of my hand, I try to made a case for my ISP. So I desing and 3D print with PLA a classic bottom part, where the circuit is embedded. For the top of the case, I decided to use the scanned image of the ISP to desing a flexible case cover, drawing the outline of the circuit. The idea was to 3D print this cover with flexible material, but there was not flexible material in the lab at that moment.
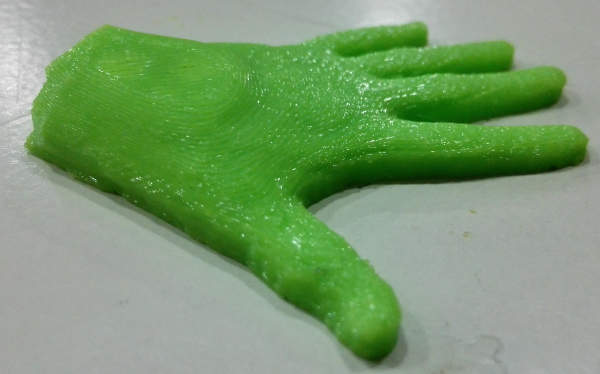
To do a fast printing process, I decide to design the top of the case in Tinkercad website, that export the file directly to a 3DP format, specially for the Maker Bot printers. Then, it is an advantage to print with the Maker Bot printers, since the own software have all the functions integrated. By this way, you don't need to use Slicer, Netfab or any other process software. You just have to open the file in the MB SW, select the right model of the 3D printer, and export it, the software does all the work. If you are going to print in a standard resolution, you don't need to set any parameter, just select, if you need it depending on the kind of the object, the raft and the support structures. Then just click Print and wait. And do not forget to check the color of the filament, otherwise you will get a green hand!
An exciting week, with a lot of work, learning a lot of interesting things.

Fab Academy 2015 website by Milena Orlandini is licensed under a Creative Commons Attribution-NonCommercial-ShareAlike 4.0 International License.
