Fab Academy 2015
Fab Academy
How to Make Almost Anything...
How to Make Almost Anything...
This week assignment consist in design something that can't be made subtractively and print it using a 3D printer. Also we have to scan one object using one of the techniques learned in class, we can optionally print the scanned object.
3D printing is a technique of creating additive, this technique has two main advantages, the first is that no waste, all the material is used in the object creation, the second advantage is that it allows creating structures that would be impossible with other techniques.
Before I start designing and printing, I'll make a piece of calibration, which can give me an idea of tolerance of the machine, this will be very useful when designing. I downloaded this design on Thingiverse, here is the link.
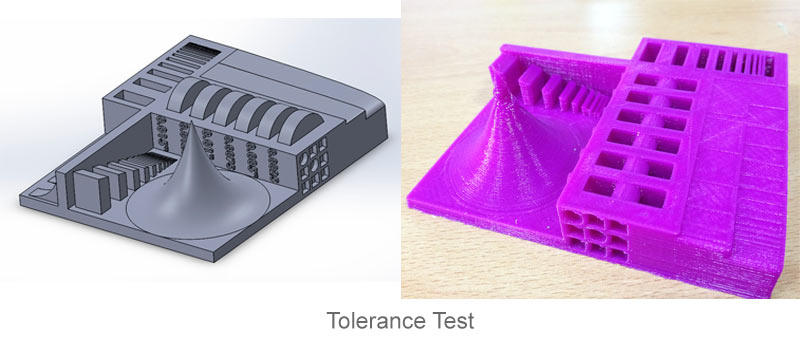
I have long working with this machine and already knew the tolerance that has at the time of print, but I have always worked with these values in my head, now I have a physical object that I can consult when in doubt about tolerance, allowing me to adapt parts more accurately. I think that everyone who has a 3D printer should print a sample like this before you start designing, it will save a lot of work.
On the piece can appreciate a deformation, this is because it is a very small area and is overheated, to avoid this, the fan layer should be activated.
The weekly assignment was to create an object that could be created with another technique, any boltless flat object can be created with the laser cutter or CNC, so I've tried to design a composite object that also has movement. I have designed a fully functional bearing in one piece.
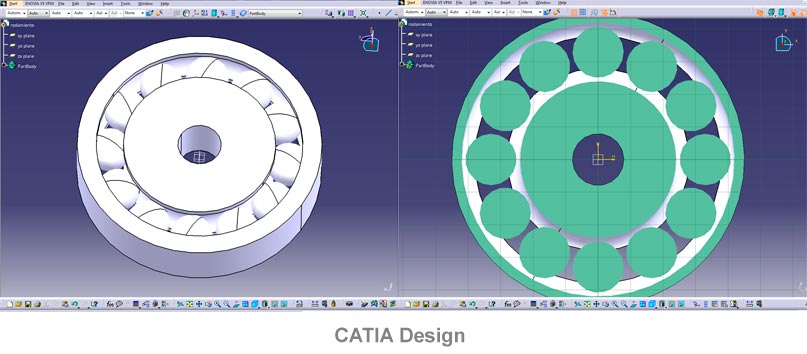
For the bearing design I used CATIA V5 creating a single solid the body bearing and balls are created together. For the bearing design I have taken into consideration the tolerance of the 3D printer, I have a margin of separation between the balls and body bearing large enough not to join both.
For printing the bearing I've used CURA, I think it's a good program for simple Prints, doesn't have many options, but enough to make good printings.
To create the bearing two fundamental things are fan layer and support for the balls, this is essential for a good finish and to support the balls, because at first these are in the air. These are other basic parameters I used:
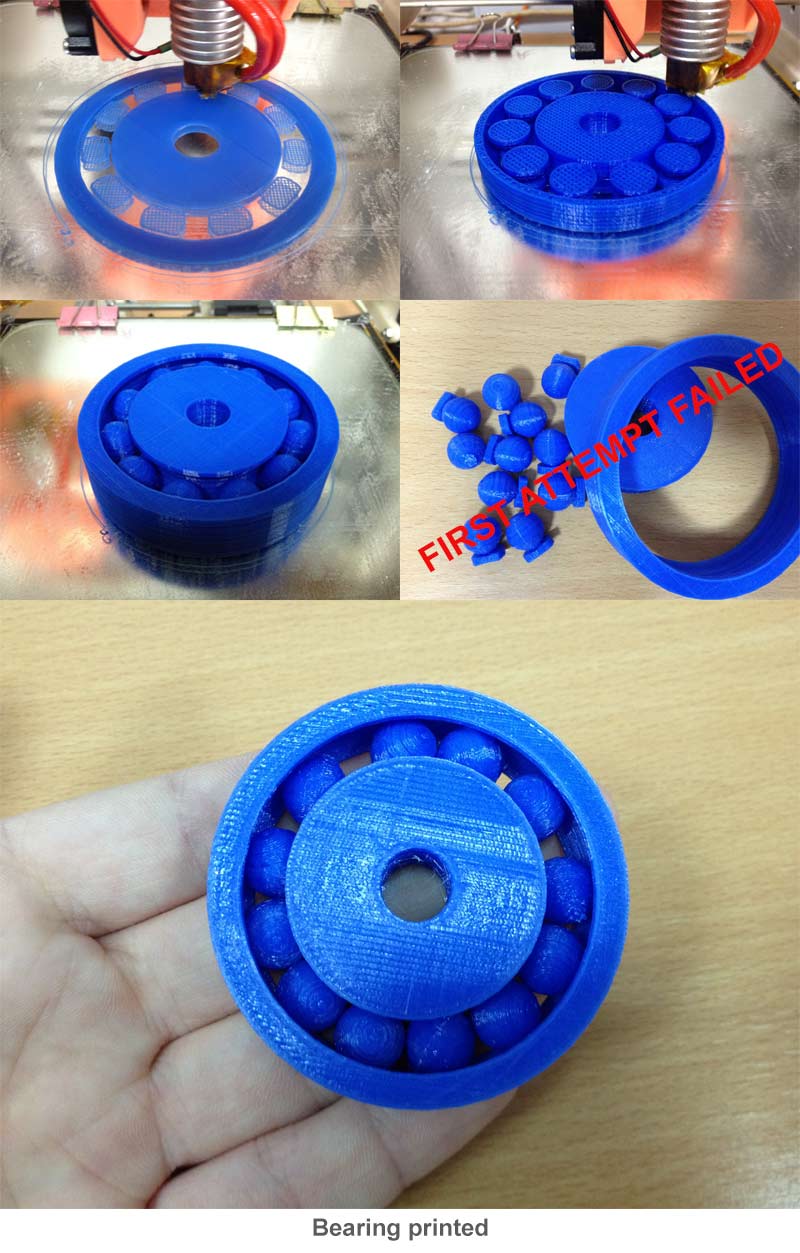
I had to repeat the piece, because I have not taken into account the displacement of the shaft, it can move compressing a portion and releasing the opposite, because of this, the margin is 4 times higher than I had given, this causes the balls fall off. In the second part I fixed the error and the bearing works perfectly.
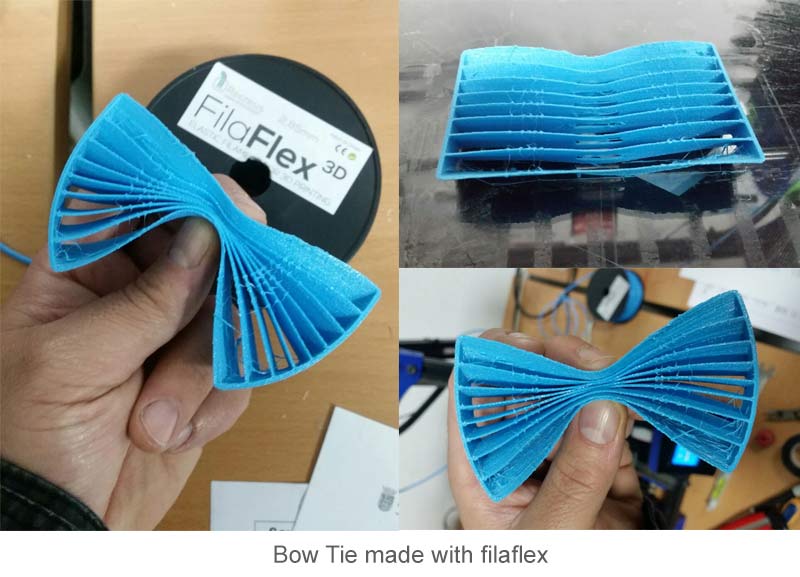
One of the most interesting fields to experience in the world of 3D printers are the materials because besides creating objects, we give physical characteristics that make them suitable for specific applications.
In my case I use a flexible material (filaflex), to make a Bow Tie, if I did this object with rigid materials, the effect would be very uncomfortable, so use a flexible material is a good solution.
3D scanning was a completely new experience for me, and I really enjoyed work with this tool. For the scans, I've used "Sense". The use of the scanner and the software is easy, only need to select the type of object you want to scan and turn around the object at the same distance.
In my case I was scanning people and of course also scanned to me. I think it would be very interesting to have a "selfie stick" to self-scanning.
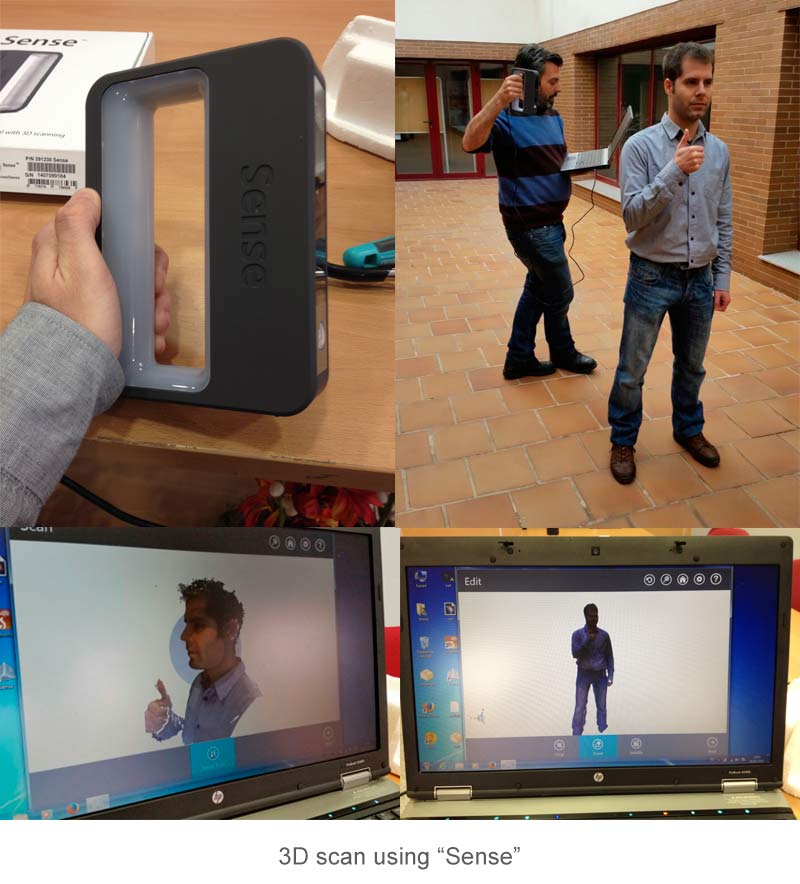
We had some problems with the scanner when we try to scan some surfaces, things like hair, glasses and reflective surfaces are not recognized good for the scanner, we also had problems scanning thin objects, sometimes duplicates the object, deforming completely.
After scan me, I had to print myself xD. For that, I load the 3D model on CURA and set the parameter for print with PLA.
