Fab Academy 2015
Fab Academy
How to Make Almost Anything...
How to Make Almost Anything...
This week we have learned to use cutting machines (lasercutter and vinylcutter). Weekly assignments consists of design, make, and document a press-fit construction kit using cutting machines. Besides that, we will have to try different materials and configurations to get ease when handling these machines.
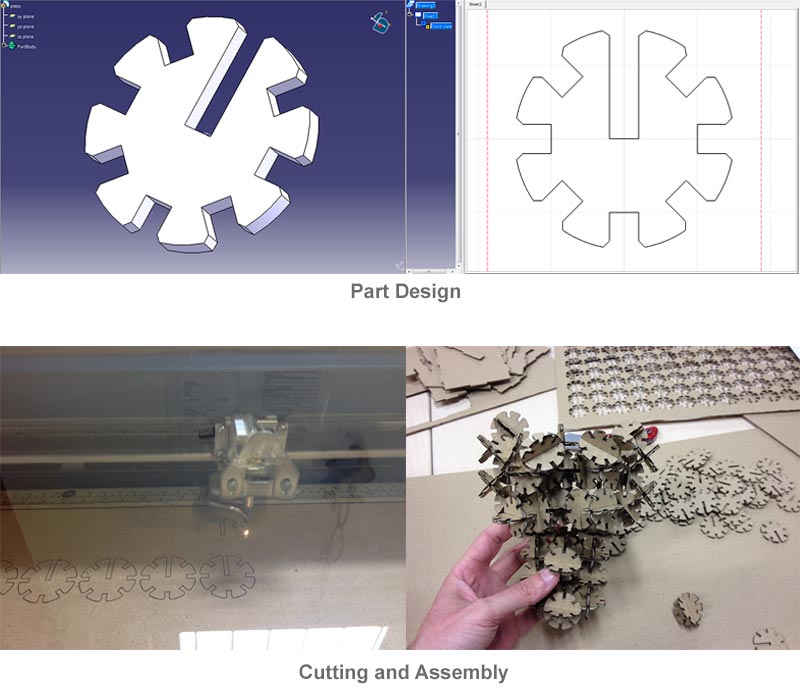
The laser cutting machine is an essential tool in which we can cut materials like cardboard, fabric, acrylic, wood... besides being able to engrave all types of materials burning the surface. For testing I will use a "Epilog Mini 24" with 40w laser.
One of the first tests I've done, is the speed and power, I did this to determine the speed and power needed for cutting 3mm cardboard. Doing these tests, I determined that to make a clean cut in 3mm cardboard, I need a at least 40% power at 100% of speed and 500Hz frequency.
After determining the speed and power needed to cut the cardboard, I had to determine another important parameter, material loss when burned with laser. This parameter is very important if you want to make accurate assemblies. we must make the designs considering the loss of material. In the case of cardboard, I have determined that 0.0925 millimeters is lost, so I have to raise the profile that amount.
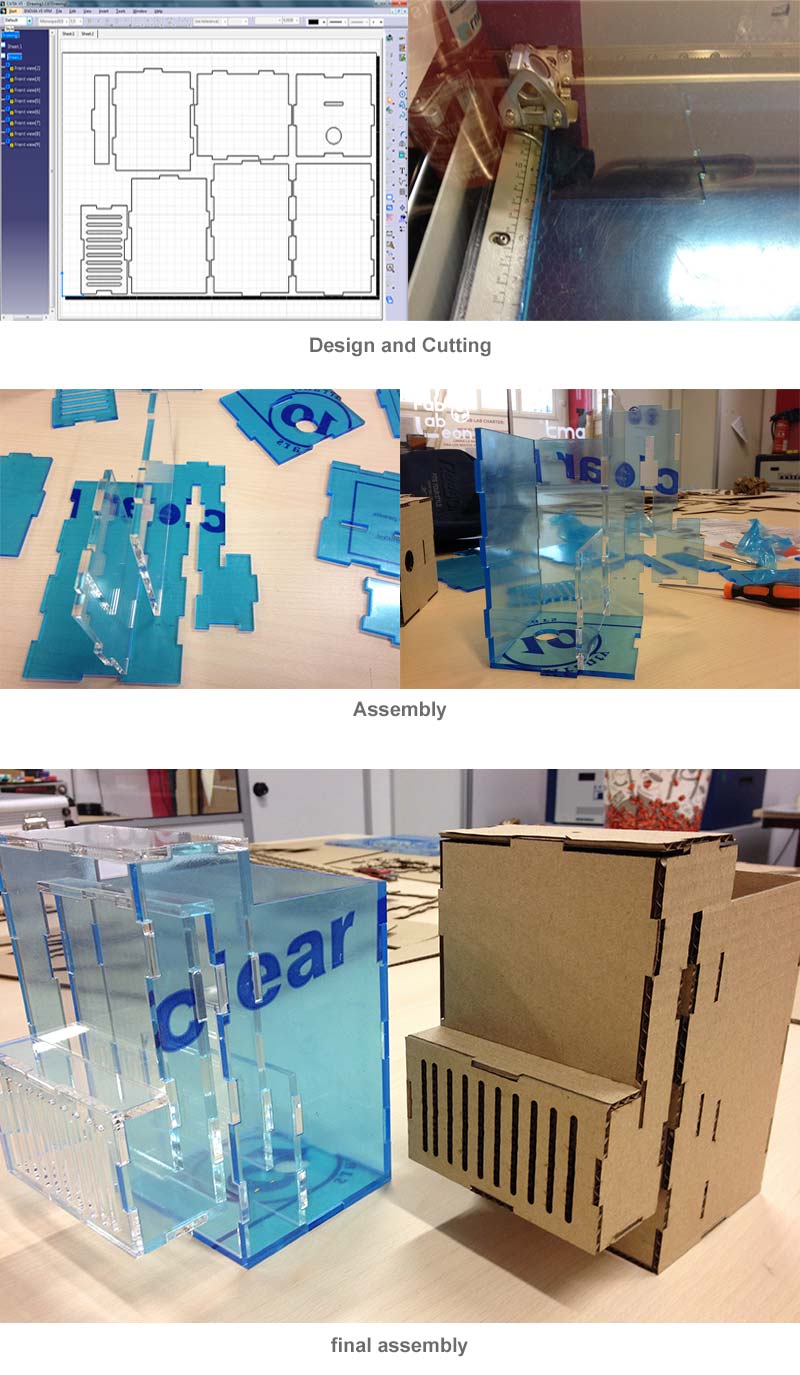
After cutting board, I decided to cut the acrylic that I will use in the fish tank, for that I export the model in .dwg and I changed the configuration of the laser cutter, for cutting acrylic, I set the power at 90%, 10% speed and 5.000Hz frequency.
In acrylic, the loss is 0.1 millimeters, so I designed the couplings considering this loss.
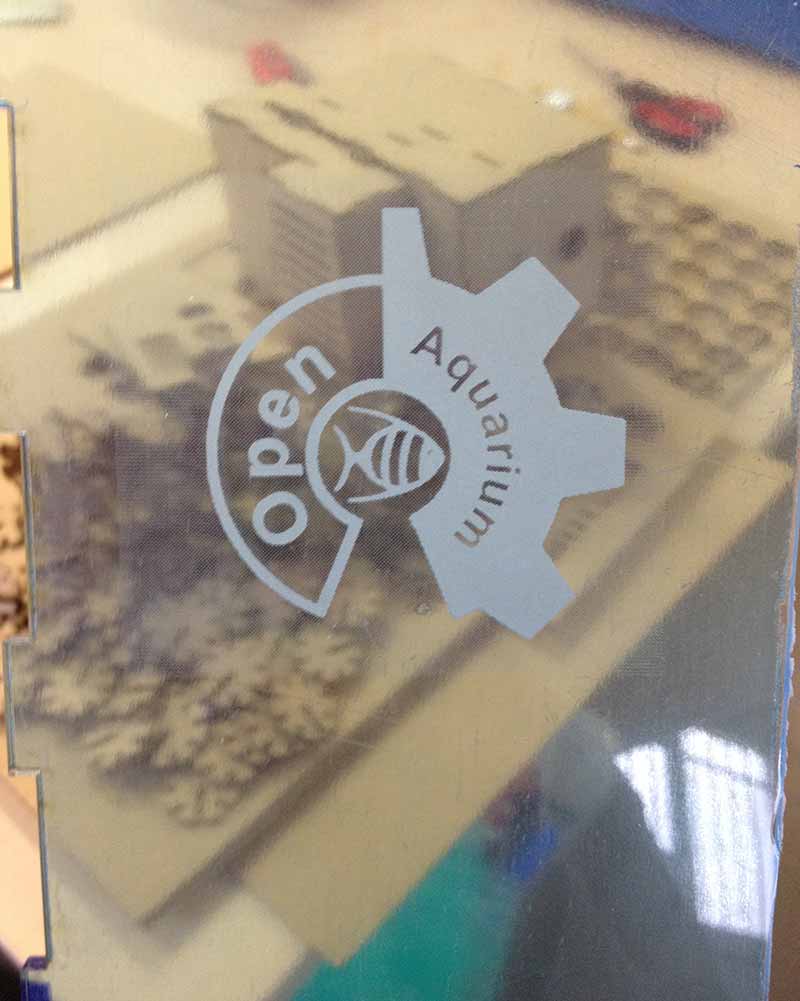
Nuria Robles has taught me to use the laser cutter in two ways, such as raster and vector and depending on the speed and power set, we can cut the material or degrade. Working as raster, the laser will affect the different areas at different intensities, so that we can draw burning more or less the material surface, this mode is slower than working as a vector, but you can get very good effects.
To make engravings just have to put the laser cutter in raster mode and set an appropriate speed and power, to engraving acrylic, I've set the power to 70%, speed to 100% and 5.000Hz frequency.
Another machine that I wanted to work is the vinyl cutter, I think it is a machine with many possibilities that can give a professional look to any project. In FabLab León I have worked with a "Roland GX-24 SERVOCAMM" this is a machine that can cut sheets up to 584 mm wide (enough to make me a cool shirt xD).
I decided to use the vinyl-cutter with textile vinyl that way I also learn to use the iron to set the vinyl. I have to say that I was lucky when I had to work with this machine, because when I used the machine, there were some people in the FabLab with extensive experience in vinyl cutting which helped me a lot. They explained that there are different blades and which parameters are to be put to the machine to make appropriate cuts.
To make the T-Shirt I used a force of 90gr/f, and a speed of 20 cm/s.
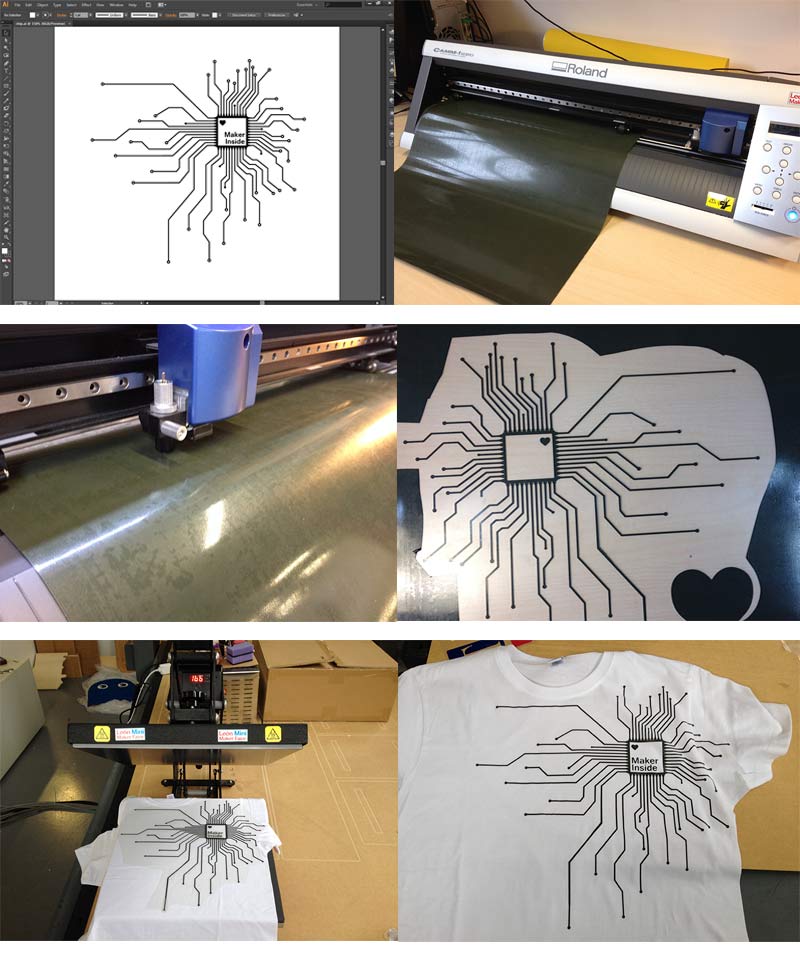
The hardest part was removing the vinyl, It's really hard to see the cut lines but when you focus on vinyl for a while, the lines appear as the Matrix code...xD
This week I really enjoyed, I have learned to handle the laser cutter and vinyl cutter. The most important thing I learned was to send the files in the correct format, in order to be interpreted by machines files should be preferably used as vectors or vectorized images (although it is possible to use images may lose quality or deform the end result). For this programs like Inkscape or illustrator are very good.