
9- Molding and Casting
Intro
The assignment of this week was to create a mold and cast some material to realize an object.
Creating the hard mold
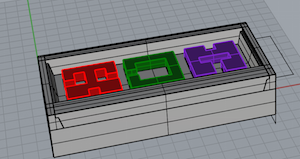
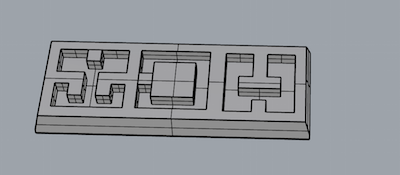
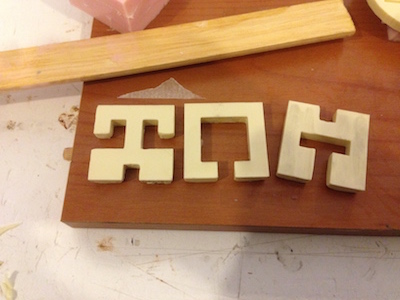
For this assignment I wanted to useflat shapes to create a 3D object so I decided to create a 3D puzzle. I started from this puzzle . It is fun because you have to follow the right sequence of actions to solve it.
Make the hard mold
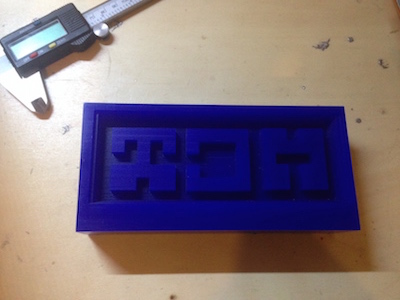
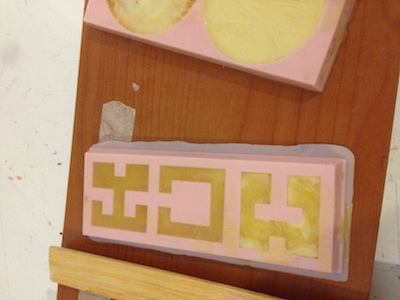
To make a soft mold you need an hard mold in wich you can cast the silicone rubber. To do this I used a modelling wax block (blue wax from Dumatt) to be milled with thr Roland SRM-20 that is in the Fablab
The first step was to create a 3D model of the puzzle for the milling machine. I started modelling the wax block in Rhino, this to help me to keep the correct proportion and correctly place the model of the puzzle inside the wax block. I left a margin of 5 mm to be sure that the wax doesn' become too weak. Moreover I created an engravement with angled borders to facilitate extraction of the soft mold. This is to allow to easily pull out the silicone rubber. Then I placed the models of the 3 pieces of the puzzle.
Then I send the model to a Roland SRM-20. I set two working steps. Roughing wit a 3 mm end mill and finishing with a 1,5 end mill. The roughing is made with a bigger end mill to remove excess material and, ideally, leave a constant thickness of stock all over the part for the finishing operations. To make the CAM files I used the Modela Player 4 software. The settings used for the roughing were: X,Y speed 24 mm/s, Z speed 10 mm/s, spindle 7000 rpm, cutting-in amount 0.6 mm, path interval 1.8 mm and finish margin 0.2 mm. The finishing is more precise (and took more time) and remove the remaining excess of material. The setting of the machine were X,Y and Z speed 16.8 mm/s, spindle 7000 rpm, cutting-in amount 0.2 mm, path interval 0.2 mm and finish margin 0 mm.
Creating the soft mold
Then I used Smooth-sil 940 silicone rubber to make the soft mold. There are two components that have to be mixed with the ratio of 100:10 (weight). You can find (and you must read carefully) the instructions and details here.
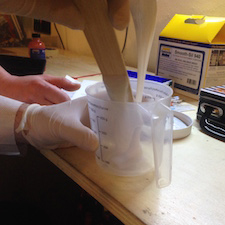
I mixed the two elements until I get a uniform material. To know how much silicone I have to put insideI made a model on Rhino and used the "volume"command. To avoid air bubbles, before casting, I spreaded the silicone rubber on the mold with a brush. Then I casted it.

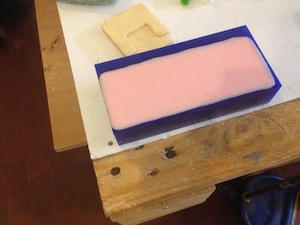
I put the mod on a vibrating surface to make the bubbles reach the surface and pop out. I waited for 1 day then I had my soft mold almost ready. I baked it for 2 hours at 80 degrees and for 1 hour at 100 degrees.
Casting
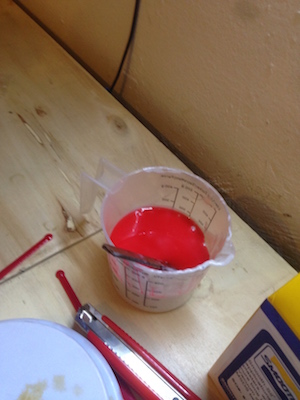
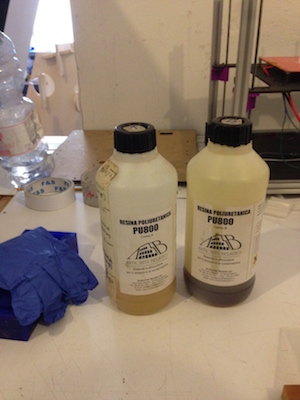
Then I decided to use polyurethane resin (bought from here instructions in italian) to make my object. It is made by two components that have to be mixed in a ratio of 1:1.
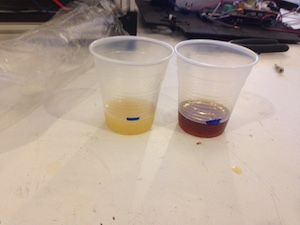
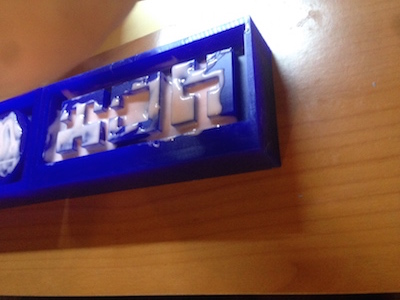
The resin start to react and becomes white and produces a little heat. However, at the first castingm I didn't mix properly the two components, so the result was not good. The second shoot was better. You can see the differences below.
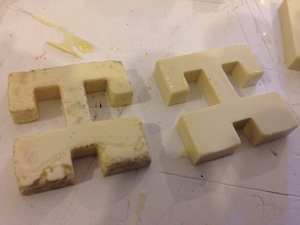
You can see missing parts on the left. It was also very sticky so it become dirty very soon. Remember to use gloves when doing that stuff :D
The final result:
 Attribution, non-commercial, share alike.