Networking and communications
.
The weekly assignment focuses on fabrication/programming of networking example board(s).Serial bus will be used to connect computer and boards. The connection between parts is wired.
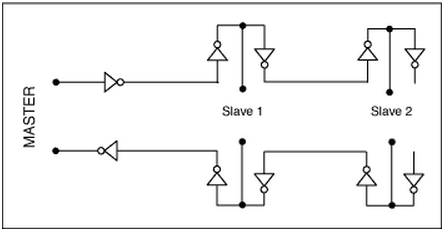
INTRODUCTION . Asynchronous serial communication is a form serial communication in which the communicating endpoints' interfaces are not continuously synchronized by a common clock signal. Instead of a common synchronization signal, the data stream contains synchronization information in form of start and stop signals, before and after each unit of transmission, respectively. The start signal prepares the receiver for arrival of data and the stop signal resets its state to enable triggering of a new sequence. For further detail please refer to this page about the serial communication or this one about data transmission.
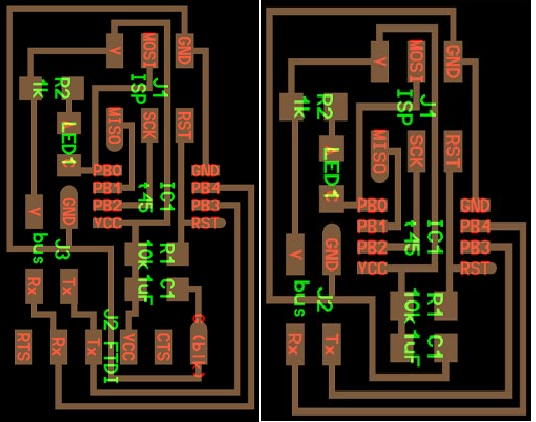
BOARDS FABRICATION. With reference to the assignment page I've decided to use one hello.bus.45.bridge (left side) and two hello.bus.45.node (right side). The components for the bridge are: 1 Attiny 45
1 Header 6 pins
1 Header 4 pins
1 Header Ftdy 6 pins
1 Red Led
1 Resistor 1 K
1 Resistor 10 K
1 Capacitor 1 uf.
The components for the one node are:
1 Attiny 45
1 Header 6 pins
1 Header 4 pins
1 Red Led
1 Yellow Led
1 Resistor 1 K
1 Resistor 10 K
1 Capacitor 1 uf.

PROGRAMMING. The hello.bus.45.c code has been downloaded and modified three times. The first one to flash the bridge board, the second and third time to flash the node boards. This is due to the fact that each node needs to have a different node ID number (0, 1, 2, 3, etc). In this case the bridge is 0, the nodes 1,2,3 and so on.
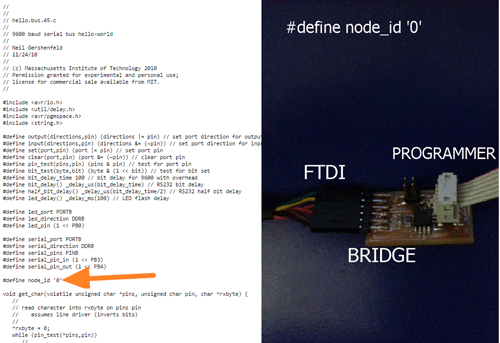
FLASHING THE BRIDGE. I've connected the bridge board to computer using the FTDI header and the USB programmer, then I flashed the bridge board as node 0: sudo make -f hello.bus.45.make program-usb.

FLASHING THE NODE(S). I've connected the node board to computer using the FTDI header,the USB programmer and the bridge itself, then I flashed the bridge board as node 1/2: sudo make -f hello.bus.45.make program-usb.
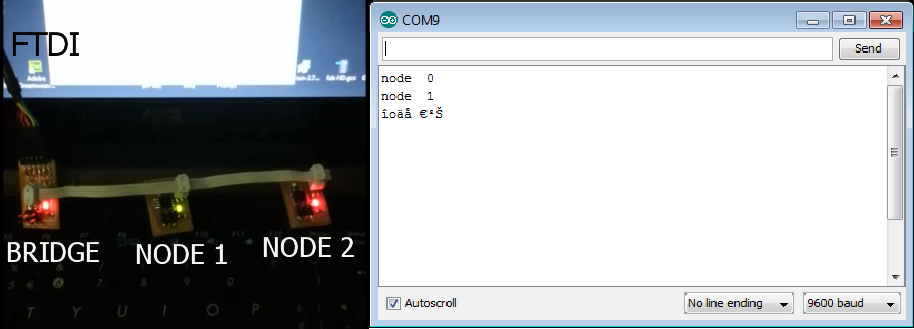
CONNECTING THE BOARDS. I've connected the three boards to computer using the FTDI header. They are connected by themselves using a 4 pin connector. I've opened the Arduino IDE and set the baud rate to 9600. I've opened the serial monitor.
Networking assignment from antonio burrai on Vimeo.
TALKING TO THE BOARDS. To talk to the board you just have to enter 0/1/2 into serial monitor and press the "send" button. In the video, I've send the entered the values: 0,1 and 2. As you can see, after the "sending", the three leds (one for each board) blink, and then blink the led of the board identified by the sent number. There's a problem with node 2, common to all the student: a lot of noise, so the returned value is not clear. This problem has not completely resolved.
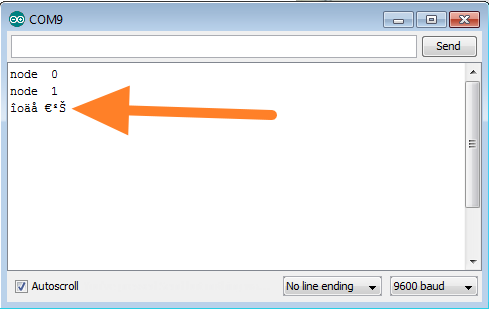
The mentioned "noise".
Download area
Plese note that all the files are downloadable at the assignment page by selecting the files listed at "serial asynchronous" (make file,c file, board, traces and interior). This because they were not redesigned.