Final Project OBIKE
Video
3D Model
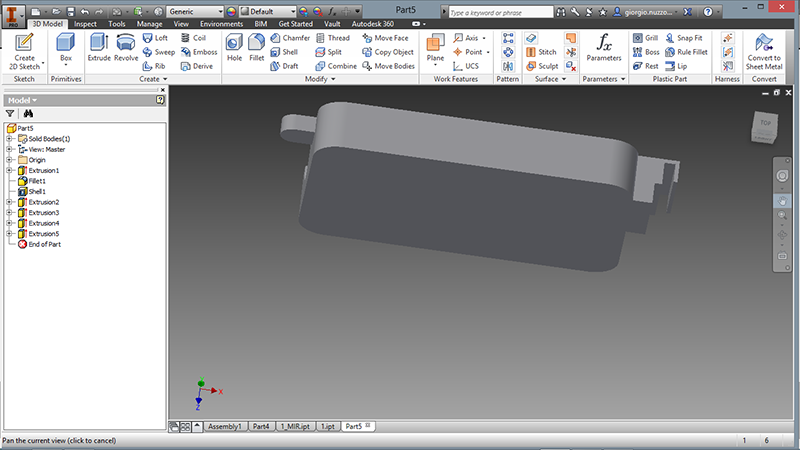
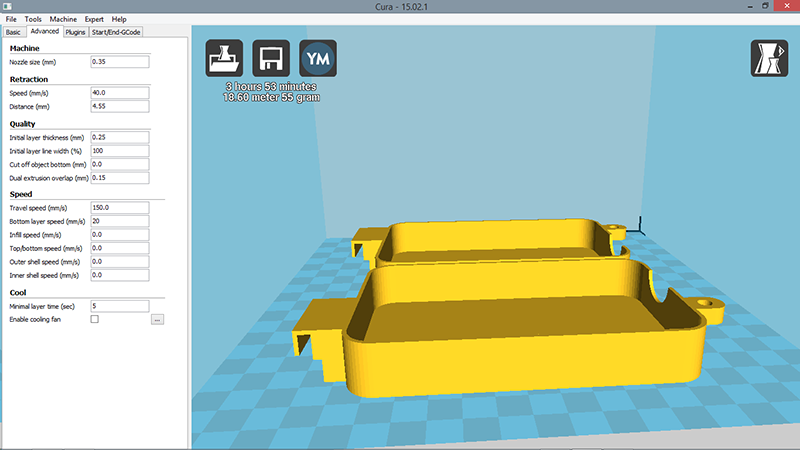
Using Inventor I create the case for Obike. I design the case in three parts to host all boards and components The bike mou and the join for the case have been downloaded by Thingiverse. The join has been remodeled and adapted to the case. Final material is PLA, the images below show the parameters used in Cura.
3D Models
Case SXCase SX
Hook for bike
Electronics design
I start to develop my project designing three small boards:
I mill the three boards using a Shapeoko with these parameters creating gcode file through FabModules:
OBIKE BOM (electronics and sensors)
Costantino Bongiorno and me had some problems to set-up the right parameters and we use both Eagle and Illustrator to adapt and refine/optimize the traces of FabKit in order to be easy milled.
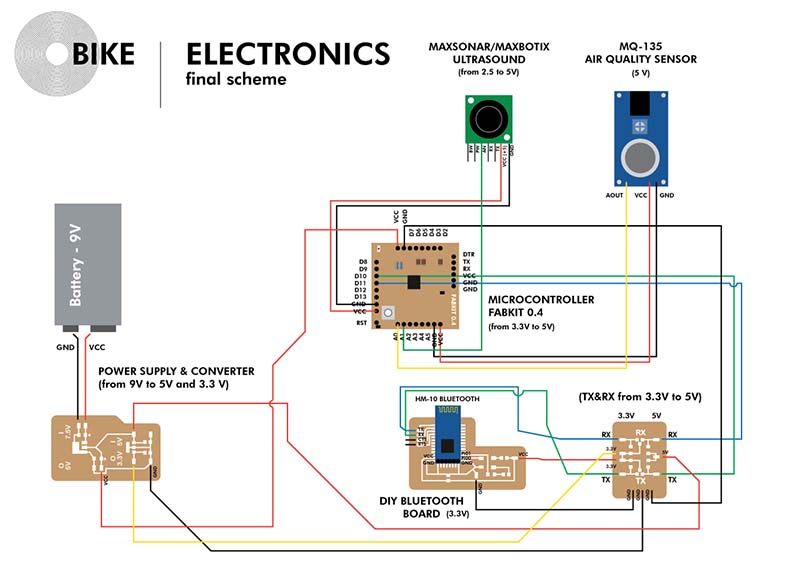
OBike electronic final scheme pdf
Energy converter traces and cut file .eps
RX/TX 3.3V/5V converter traces and cut file .eps
DIY Bluetooth board traces and cut file .eps
OBIKE CODE
I wrote a code to control both the Air Quality and Ultrasound sensors and connecting its to the Bluetooth:
#include// import the serial library SoftwareSerial Genotronex(10, 11); // RX, TX void setup() { Genotronex.begin(9600); Genotronex.println("Welcome to PoliFactory"); pinMode(13, OUTPUT); } void loop() { float SonarValue=0; float GasValue=0; SonarValue = analogRead(A0); GasValue = analogRead(A1); //float value=pow(116.6020682*(sensorValue2/41763),(-2.769034857)); //float value=pow(10,((220-sensorValue2*1000)+158.631)/62.877 ); delay(100); Genotronex.print("Gas Value = "); Genotronex.print(2.2*GasValue); Genotronex.print(" Sonar Value ="); Genotronex.println(SonarValue); if(SonarValue>30) pinMode(13, HIGH); else pinMode(13,LOW); delay(100); }
Obike App
I start to develop the GUI during the assignment Interface and Applications. Trying to use learning to use Kivy, Processing and Python. For now I used Bluetooth Terminal Application for smartphone.Basically the final OBIKE app will be composed by two screenshot:
I will work in the future to implement the final version of the OBIKE App as i mentioned during the concept phase.
Acknowledgments
I Thank you very much all the people that help me to complete my final project (and other exercises) providing me tips and precious suggestions. I want to thank you in particula Gianni Terragni and Costantino Bongiorno(We Make FabLab), Diego Quetti, Patrizia Bolzan and Naveed Anwar Bhatti (Politecnico di Milano, Polifactory), Thanks to Massimo Menichinelli for the precious support.