09. Molding and Casting
Project
The idea is to cast chocolate diretly in a plexiglass mold. Professional chocolatier use both vacuum formed molds and rigid polycarbonate milled molds. obviously the seconds are more expensive, but more reliable. They also help the tempering process, very important to get a high quality, glossy chocolate.
3D design
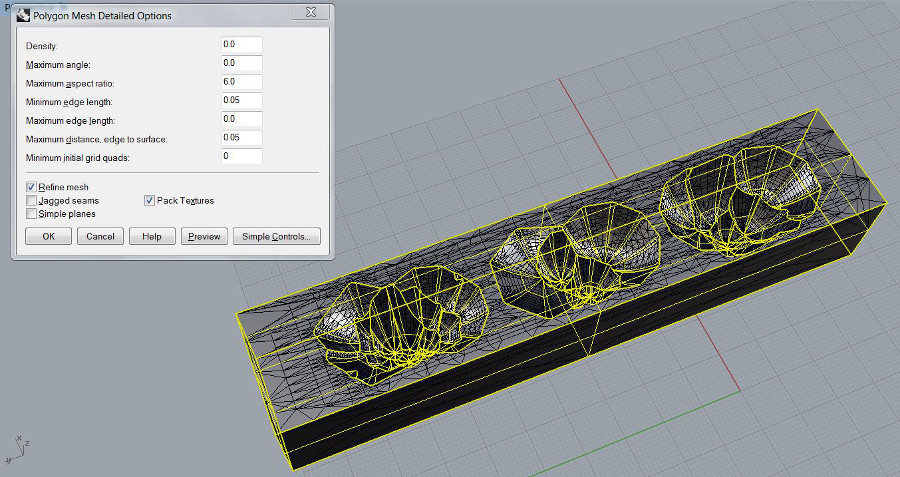
I decide to design (small) chocolate mountains. Like real mountains, they are all different from each others, so i make a small sketch in grasshopper. Here a screenshot of the file:
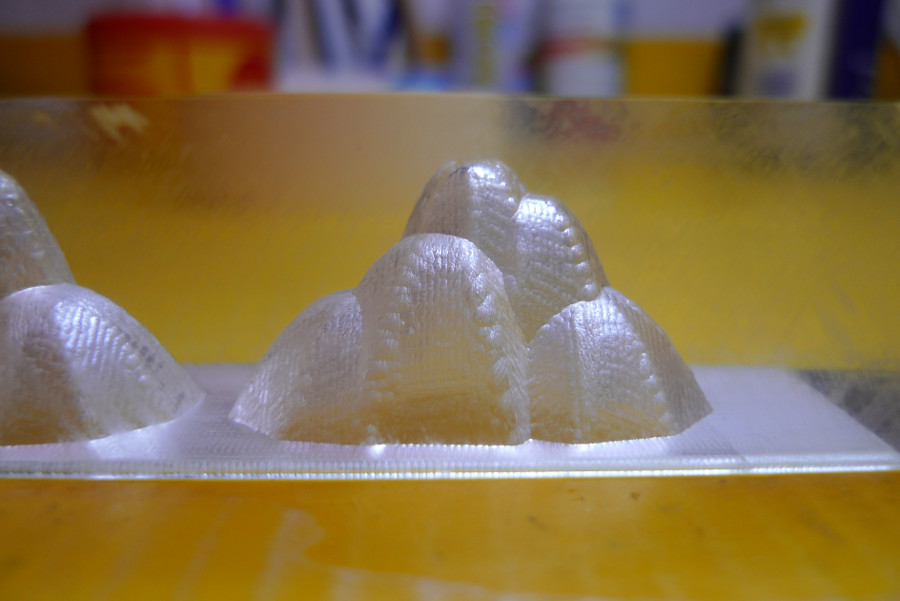
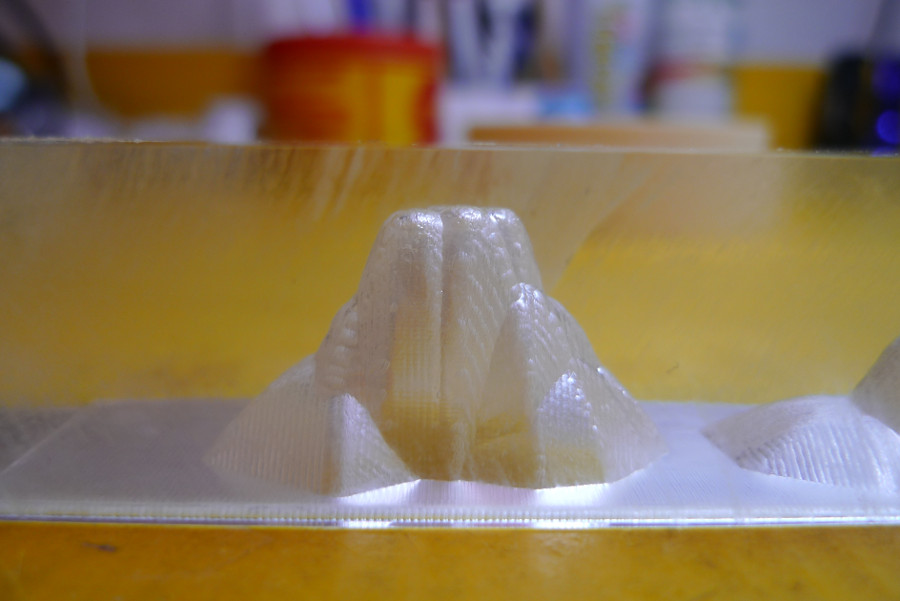
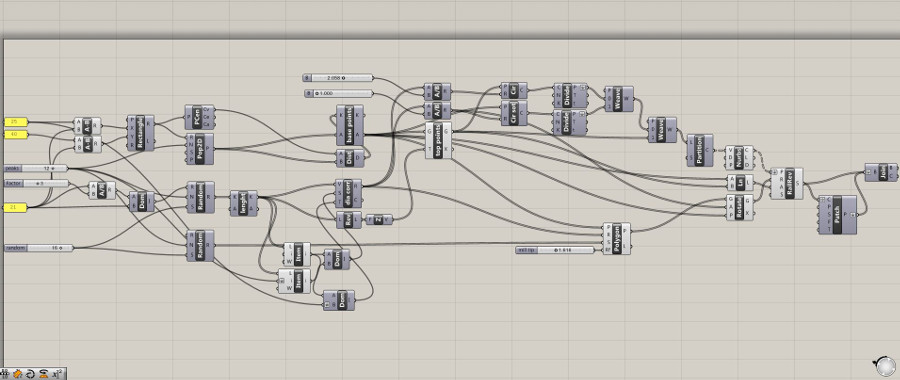 The definition is basically deciding the number of peaks, the shape and the complexity. Each shape can have different parameters or a different random seed to get virtually infinite possible shapes. I choose three mountains with different features to see the result after casting, not cause they're easy to demold. I actually had a lot of trouble with one of these.
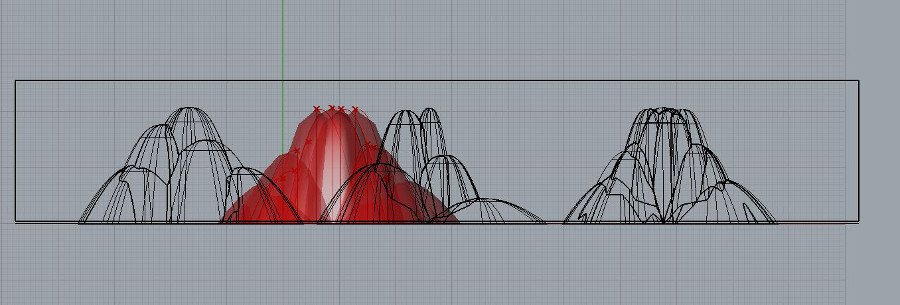
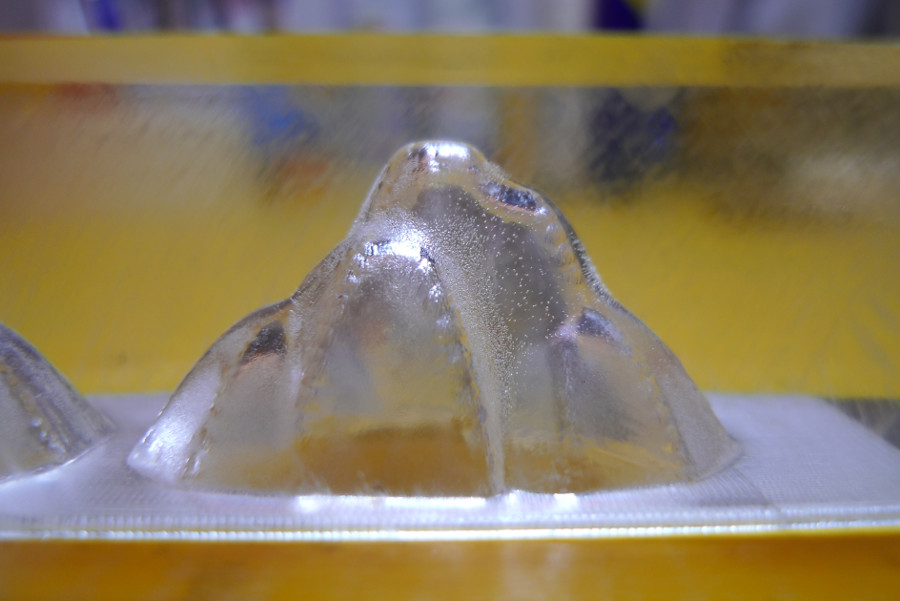
Here the three random shapes i used:
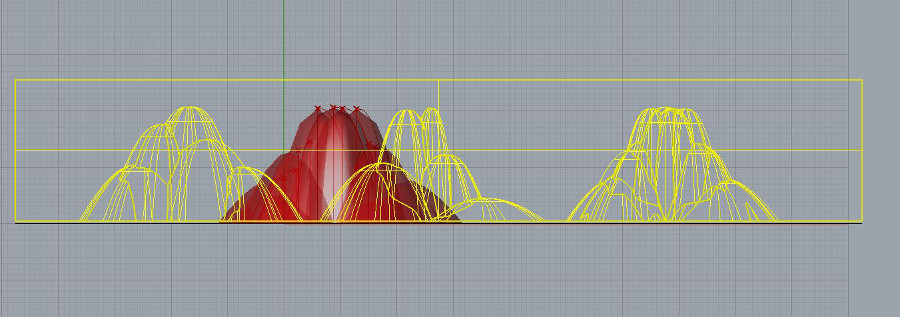
 To design the mold I did a Boolean subtraction between a box with the same dimension on the plexiglass block and the three mountains.
 Here the final Stl for the CNC machine
CNC Milling
I did the mold with our Shopbot and Part Works 3D. Based on my previous experience with CNC machines it's a very simple tools with just basic milling strategies, but almost impossible to misunderstand.
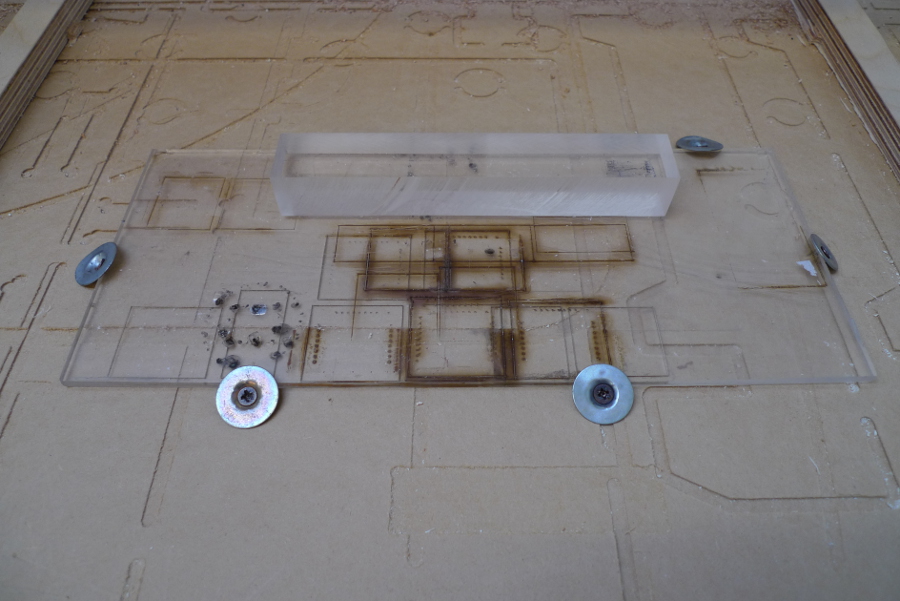
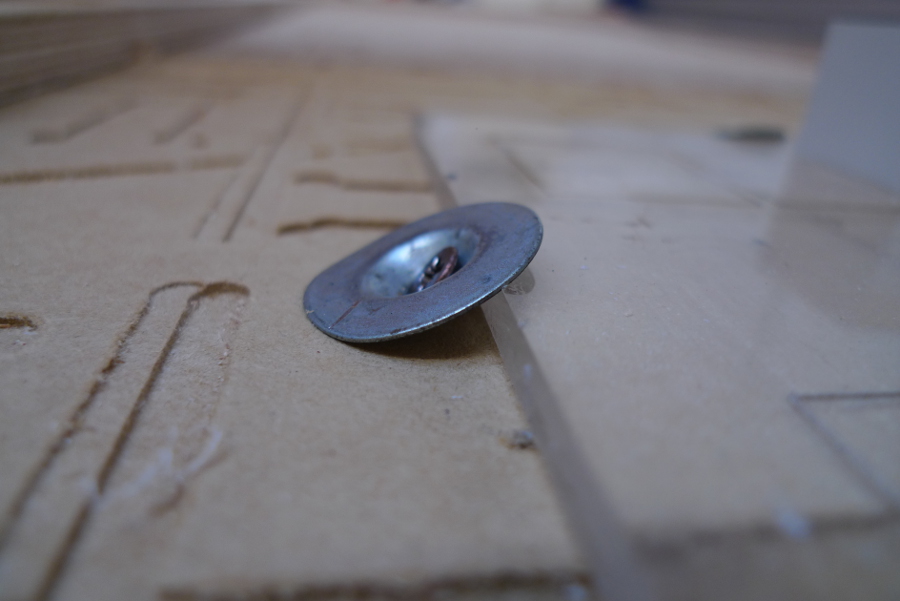
To fix the piece I used an extra layer of plexiglass clamped to the sacrificial layer with screws and washers. this allows me to attach the piece with double side tape and see through the extra layer and align the piece using some old milling trace in the bed.
 I did the roughting with a 6mm cilindrical downcut end mill and the finishing with a 3 mm round tapered end mill. I don't suggest to do so, it's deinitely better to use a 3mm for the roughting as well, if the mold is not too deep.
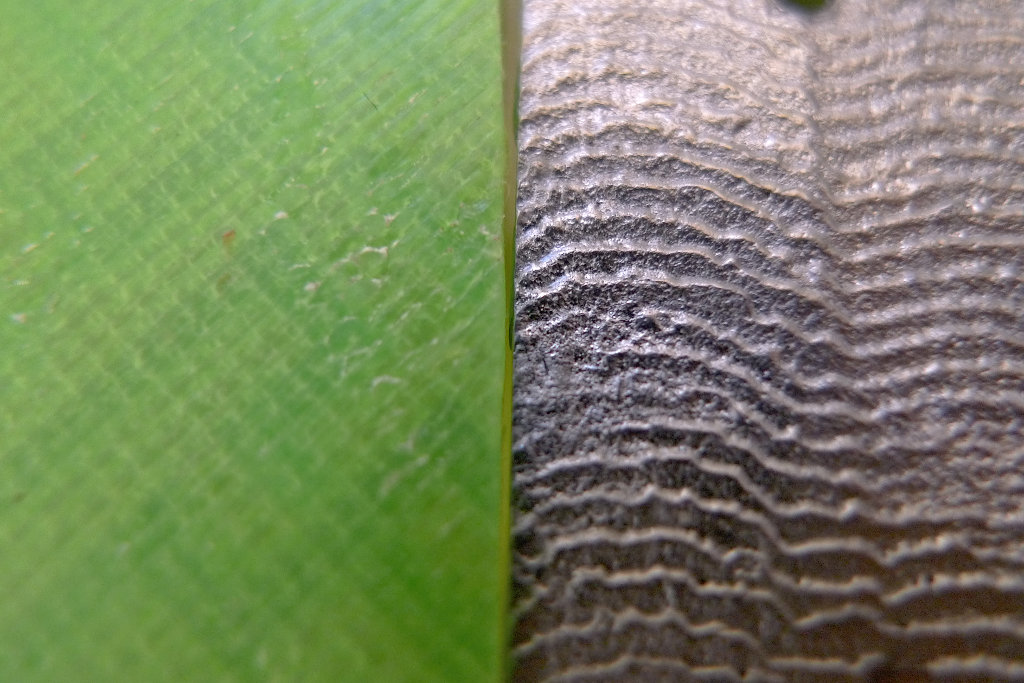
I did a double finishing (along X and along Y) to get a more homogeneus result. Even if I did so, the result was not smooth enought.
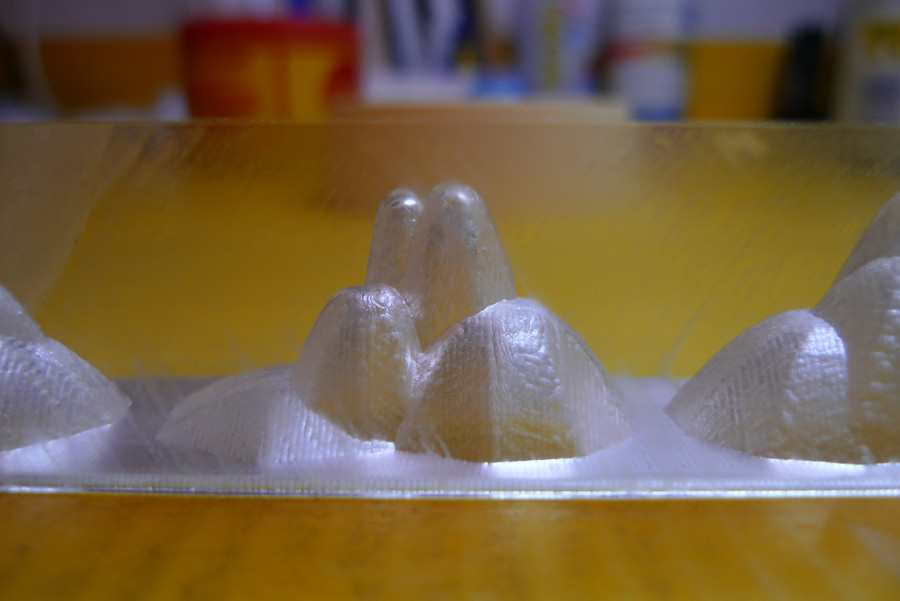
 The geometry was to complex to smooth it with abrasives, I used a small butane pencil torch. It's not so easy to get a precise result, but with a little bit of experience it's very effective and quick. That's actually not my case... I smoothed the mold but in some points I have overheated the material and that's leaving small bubbles inside the plasic and on the surface.
Casting
Chocolate is a complex material to cast. To get a nice glossy finishing and to demold it easyly it must be temperded properly. To have an idea of what that means you can have a look at this instructable (How to temper chocolate)
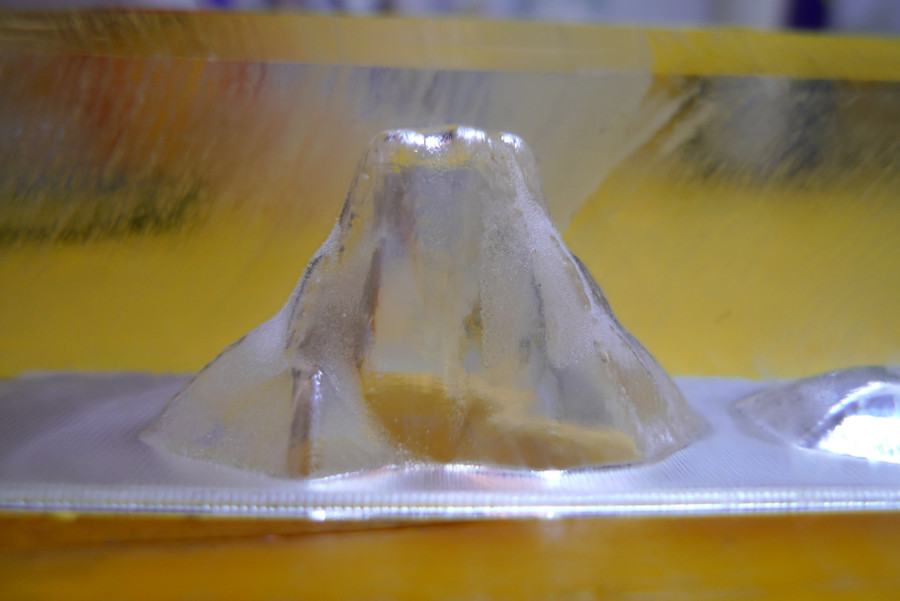
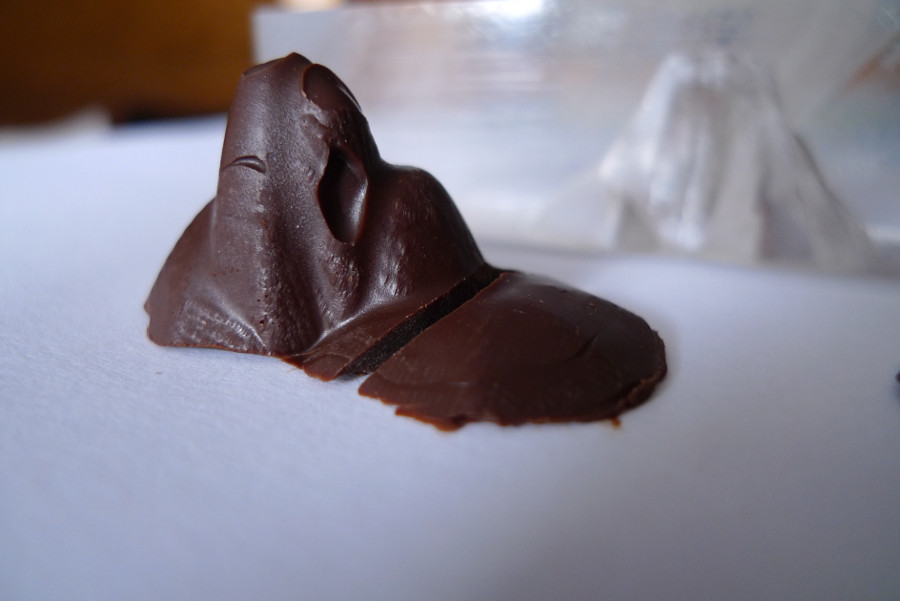
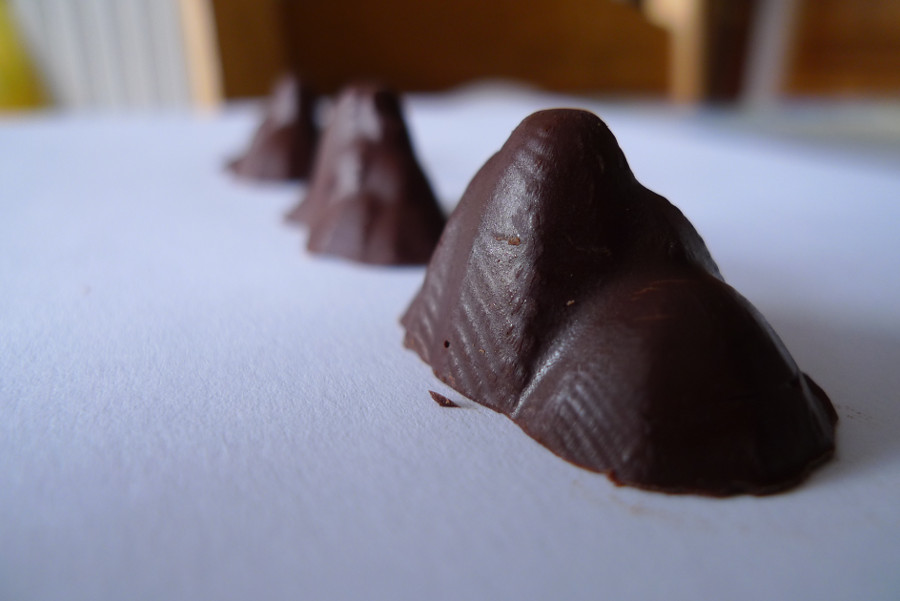
I haven't a thermometer for food, and the firts experiment wasnt's a success: i had bubbles, sticky surfeces and cracks
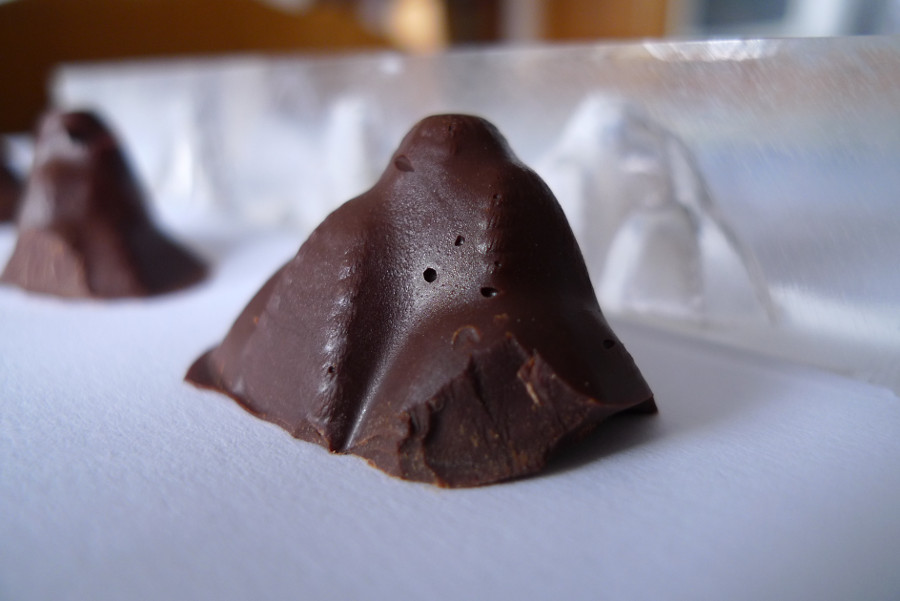
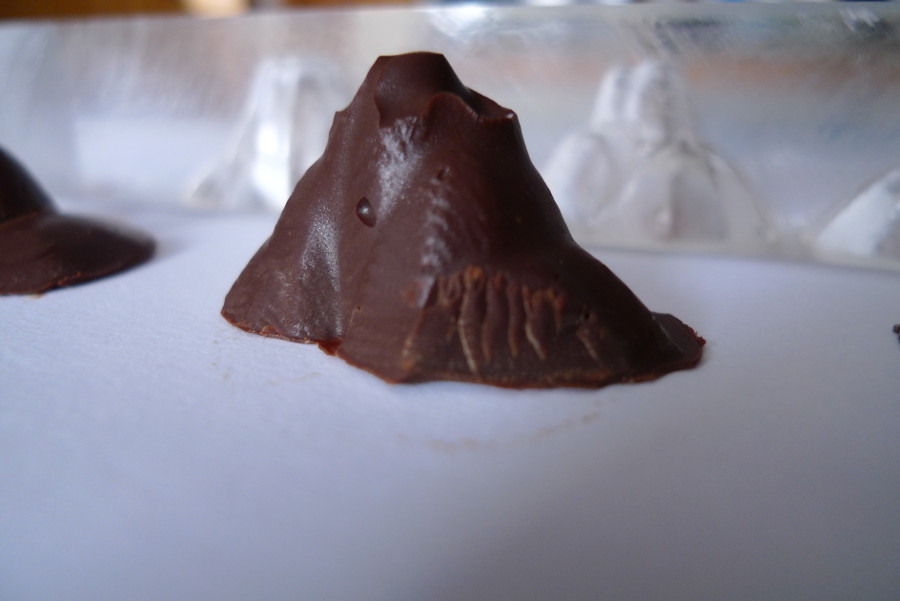
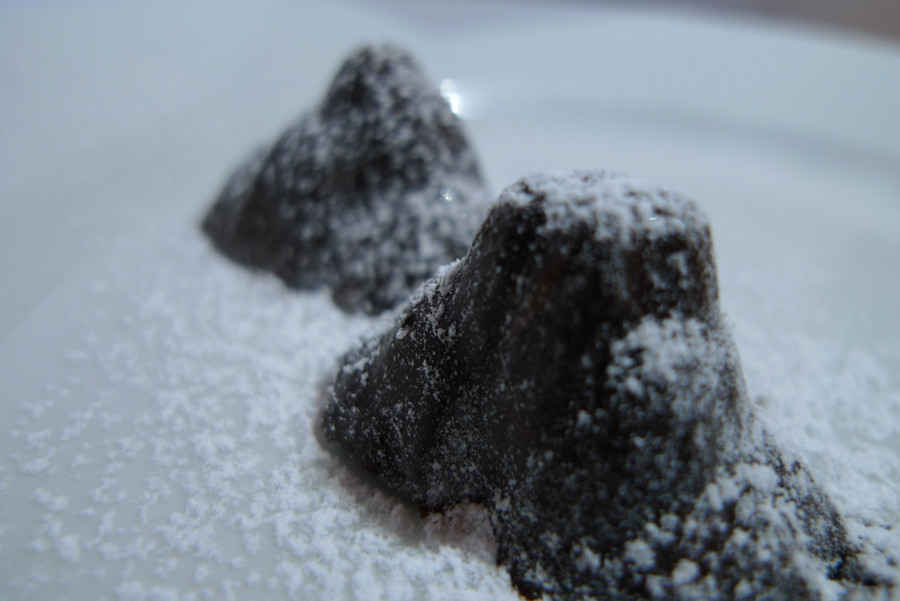
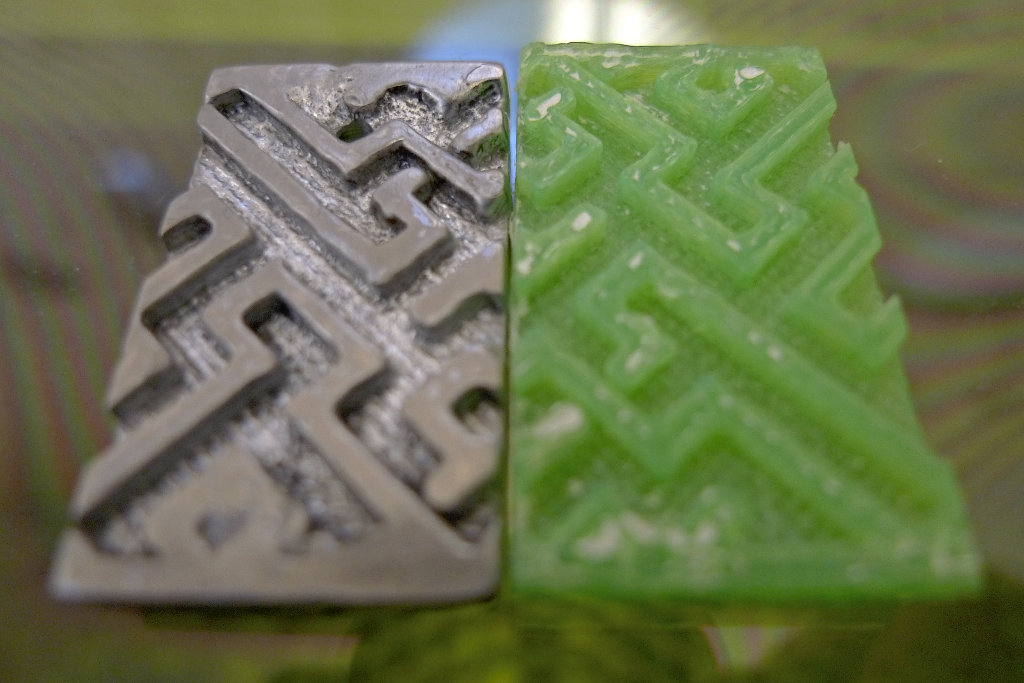
 It's interesting how the chocolate is copying the mold perfectly, even the traces the smoothing didn't erase
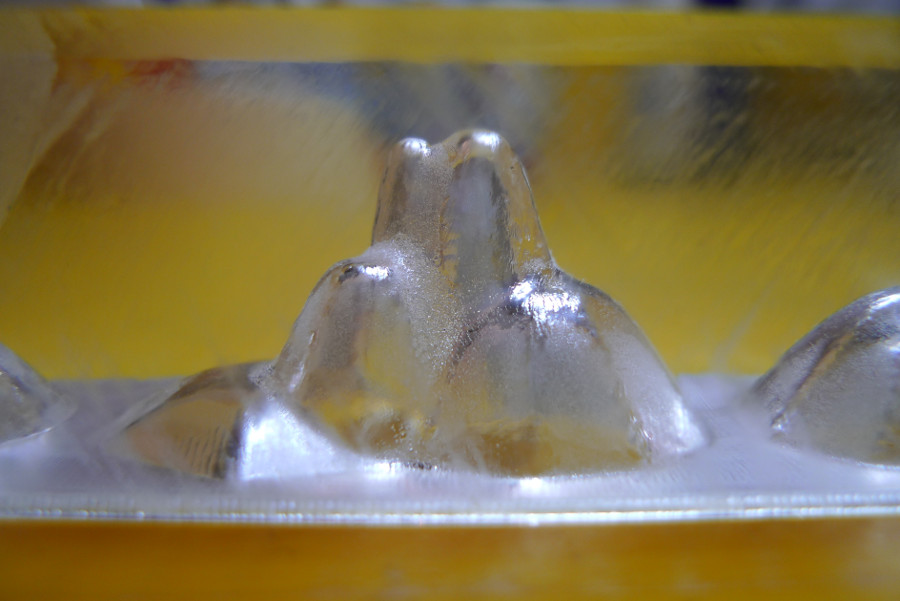
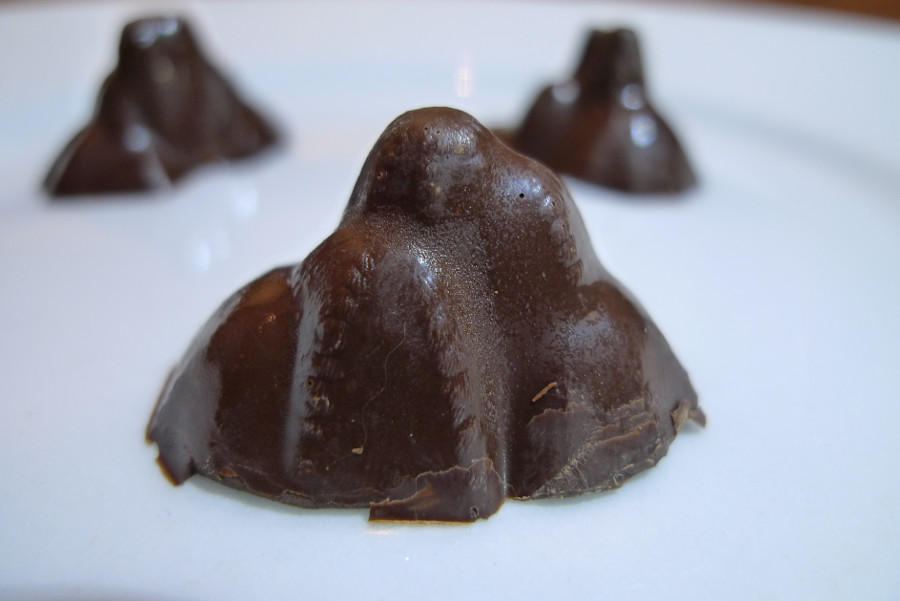
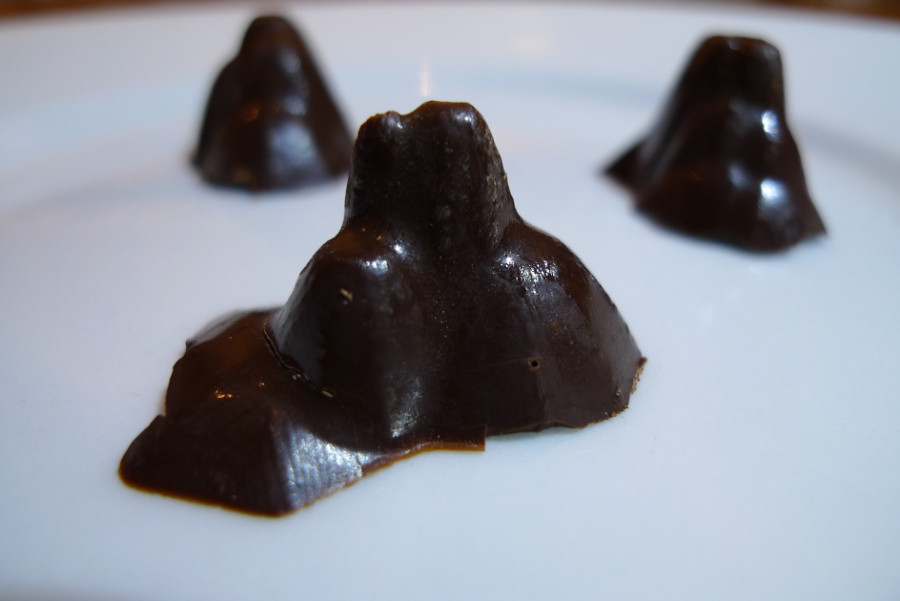
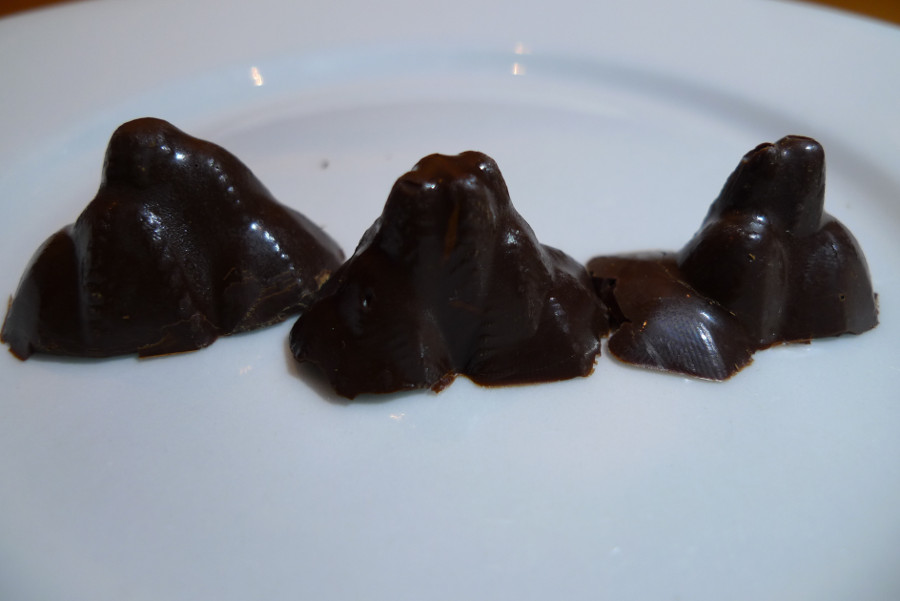
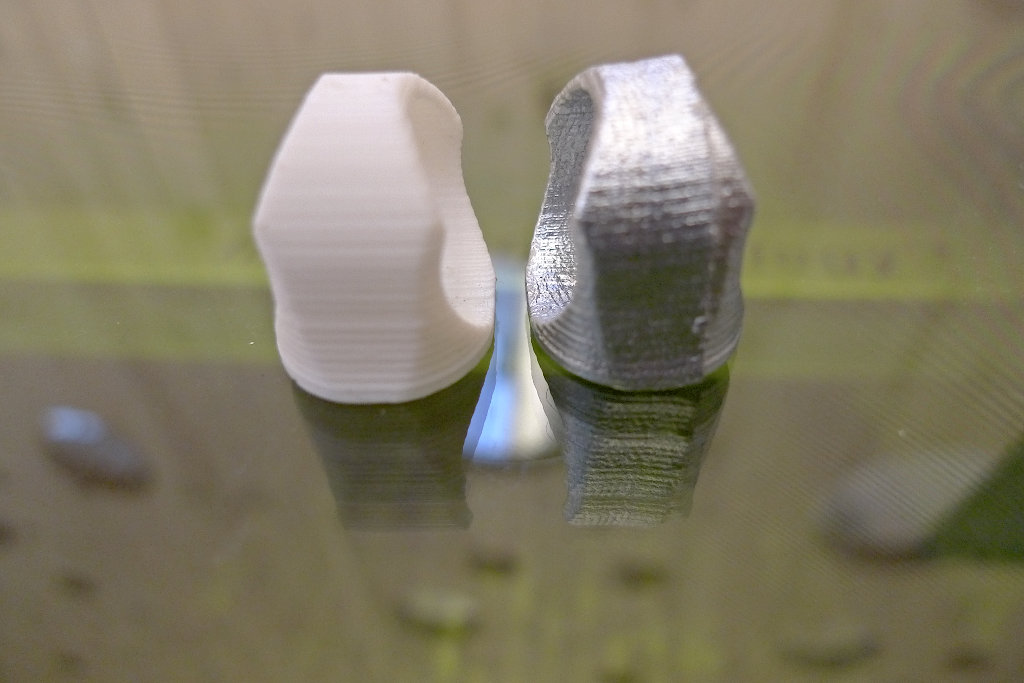
 The second experiment was definitely better, even if the most "extreme mountain" (the one with a pretty flat hill next to it) was basically impossible to demond without breaking it.


Extra content 1: Lost PLA process
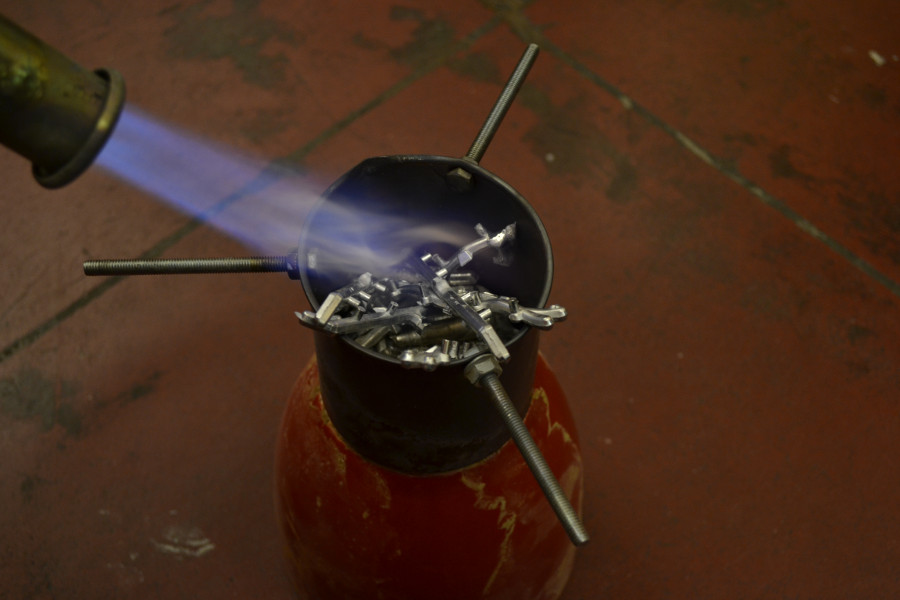
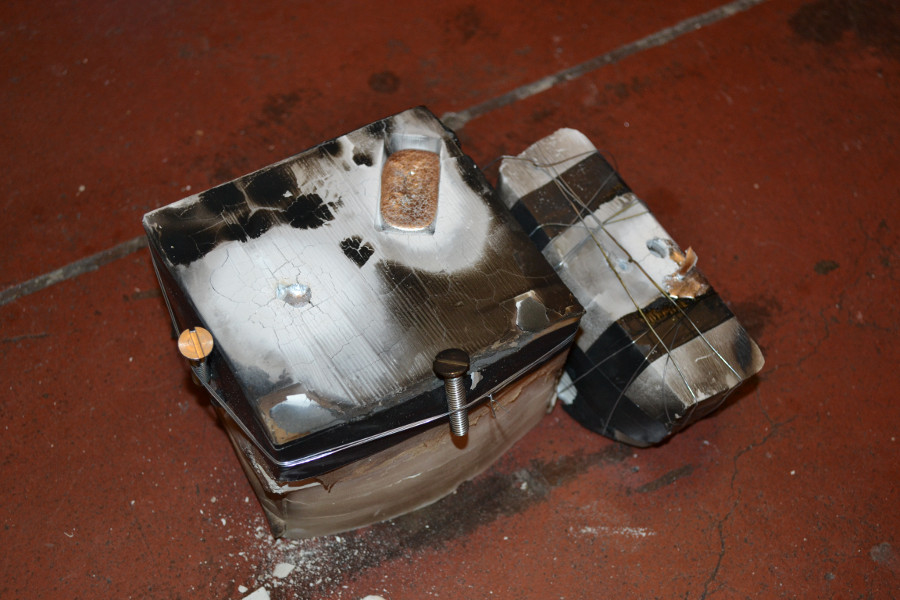
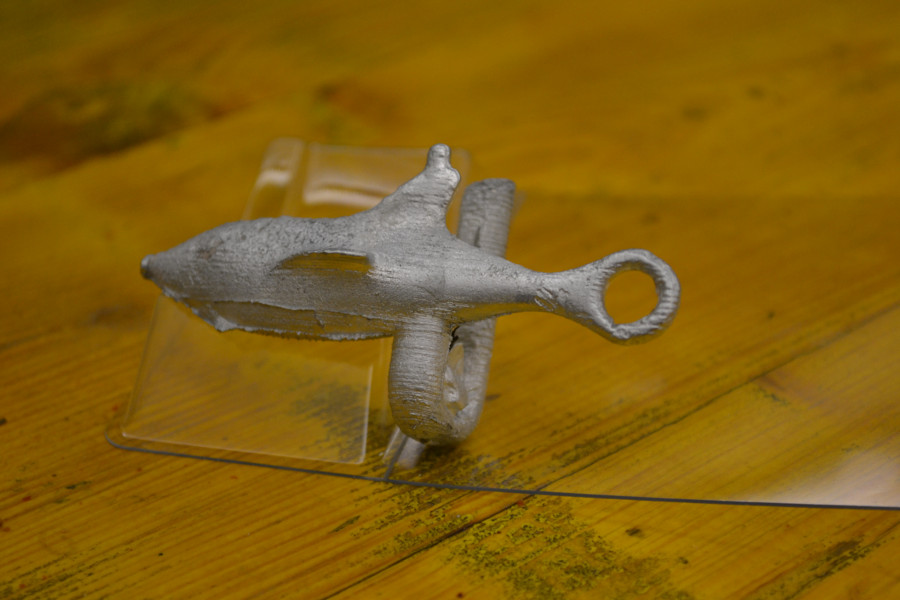
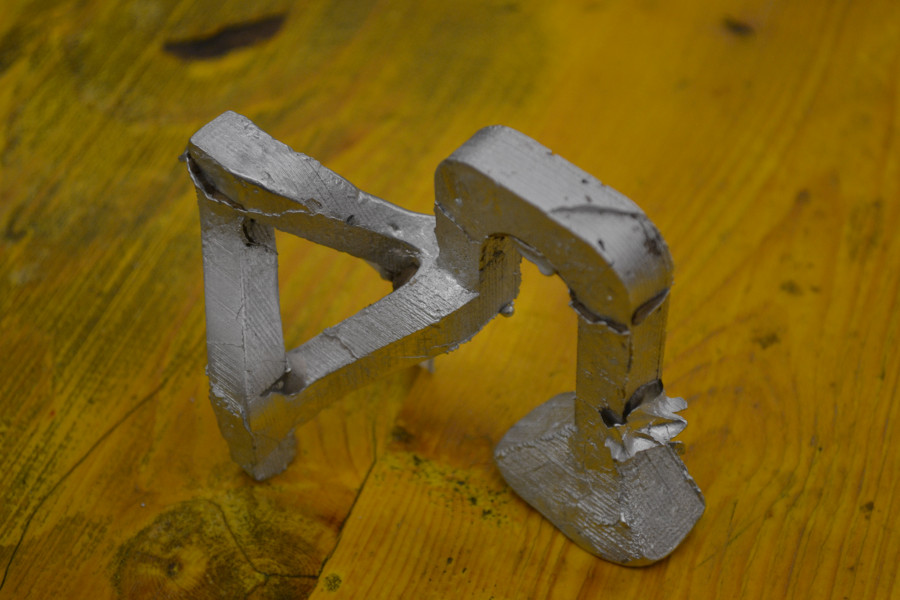
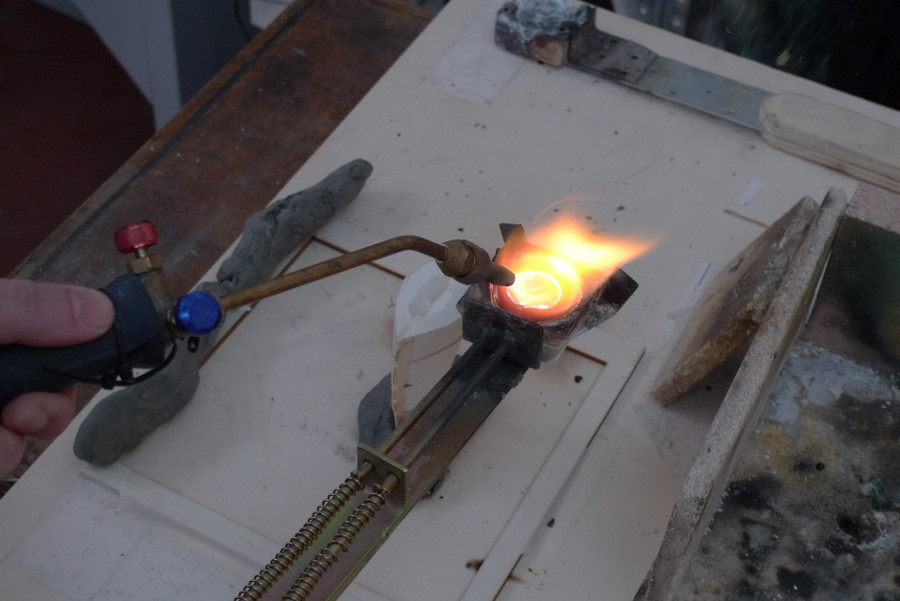
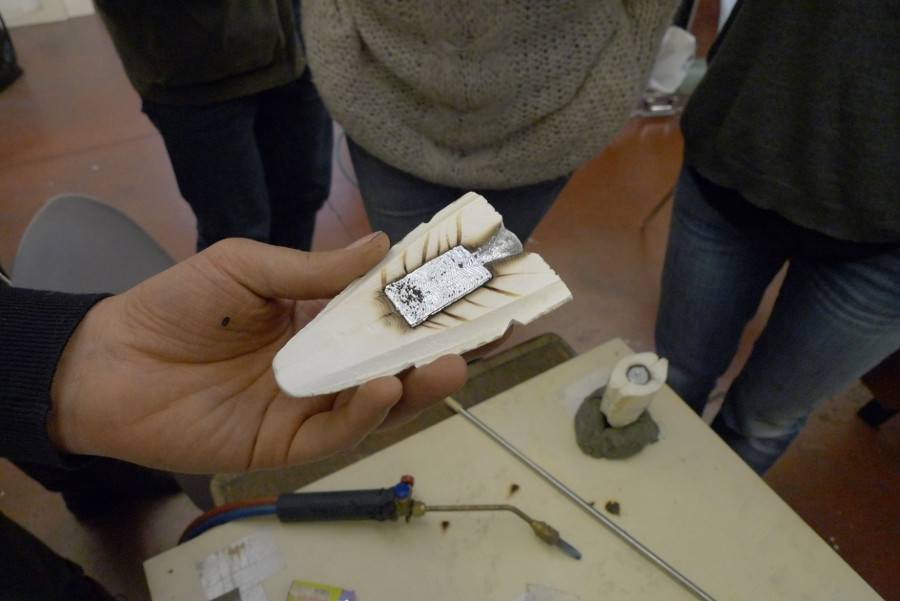
Few months ago in Opendot we tested the "pla lost process", using a reprep Prusa I3 and plaster to make the mold, and Zama (or Zamak) as the metal alloy to cast. the results were very interesting: zama melts at 400°C and it's a pretty resistant material. Being the mold destroyed every time you don't have to worry about undercuts.
Here some pictures of the process

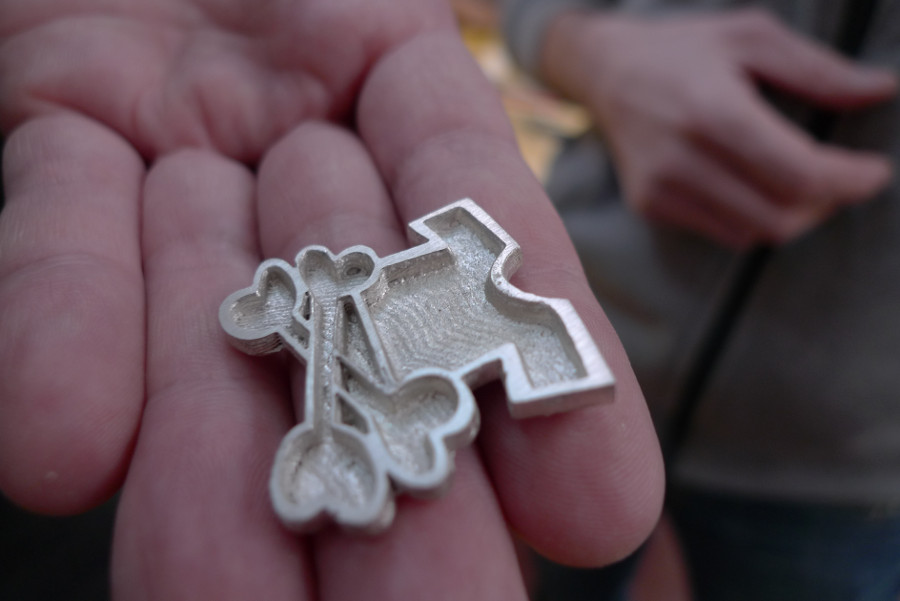
Extra content 2: cuttlebone casting
After the first wokshop done with zama, we made a second, more artistic appointment with melted metal. We used a very ancient technique in which the molds are made with a cuttlebone. Here some extra info on the process. There are two interesting aspects about this method: to make the mold it's enough to press the object agains the cuttlebone and the melat part copies the natural texture of the mold. We used both zama and silver, with different results. Here some piclures
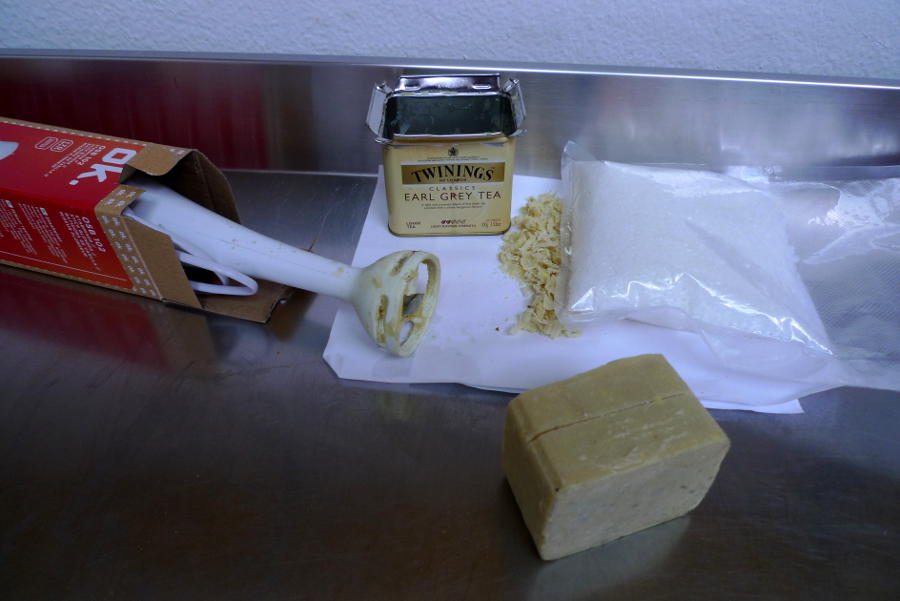
Extra content 3: DIY machinable wax (WIP)
We tried to make the machinable wax starting from paraffine wax and polyethylene. the first experiment was a failure: the plastic did't melt properly. The second time it improved a little bit: we didn't use a direct flame to melt the wax, but hot a metal plate. this reduce the risk to burn the plastic and the smokes made by the wax. to have a more homogeneous result we used a blender. it get better but it's still far away from the wanted result. Next step is to use a wax for jewels (the one used to be injected in molds to do replicas. It's less than half the price of the machinable wax) and polyethylane in pellet.
So far this is the result, far from being good. I tryed to cut it and the wax get stuck to the blades, so I guess it's not ok for being machined.