Week 8
Computer-Controlled Machining
Machine: Shopbot PRSAlpha 48"x96" Model 10216-01 (Software: Vcarve Pro(7.012) for converting vector data to toolpaths, ShopBot Control Software (3.8.30) for controlling the machine)
Material: Two boards of plywood (900mm x 1340mm x 15mm), Two wooden poles (20mm in diameter, 400mm long), Wood glue
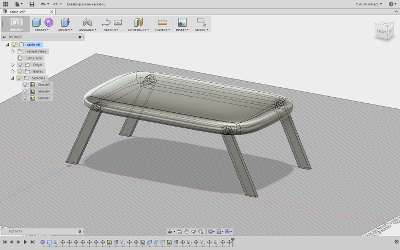
Software: Fusion 360 for 3D modelling, 123D Make for converting the 3D model into slices, Inkscape for editing the vector data
Making the data
(all photos can also be viewed here. View/download the 3D data here )
After I finished modelling the table I exported the still file and converted the tabletop to slices by using 123D Make. This vector data was exported as pdf files.
Milling
(all photos can also be viewed here)- The first time I opened the pdf file in Vcarve Pro I forgot to uncheck Use Offset in the Job Setup and the shopbot started cutting from a different point than I expected. I remembered to always uncheck this the second time onward.
- I used a 1/8” Up-cut bit. (Pass Depth: 0.25 inches, Stepover: 0.05 inches 40%, Spindle Speed: 14000r.m.p, Feed Rate: 3.0 inches/sec, Plunge Rate 1.0 inches/sec)
- In Vcarvepro I drew 3mm circles around the tollbooth data to drill holes for fixturing the plywood to the sacrificial layer. (Cut Depth: 2 mm. Machine Vector: Inside) Then I screwed the board down with a screws and drill.
- I cut all of the parts with the Cut Depth at 15.6mm and added tabs. The Machine Vectors for the holes were set to Inside and the rest was Outside (photos 3 to 6).
- Remember to always turn on the spindle before cutting. I broke a bit (as well as my heart) by forgetting to do that :(
- I milled the holes after the table parts when I should have done it vice versa. The ShopBot could mill the holes in the long table parts, but while it was milling the hole in the short table part, that part came off of the plywood and started to spin so I had to stop the machine. In the picture you can see the spinning collet burnt the wood. I secured the pieces by screwing them down and resumed the milling job.
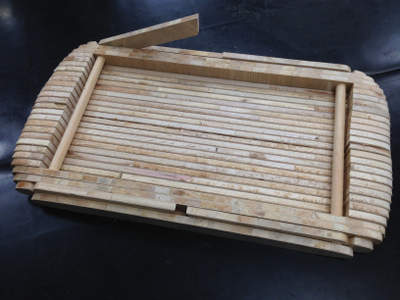
- After all of the parts were cut, I arranged them together. I decided not to use part No.2, so I had to cut 8mm off of the wooden pole.
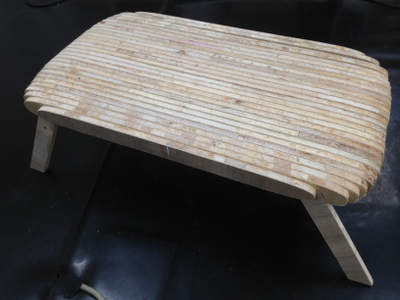
- I glued the tabletop parts first. I was afraid the glue would dry if I glued all of them at once so I divided them in two sections. Since I didn’t have clamps I used vinyl rope to press the pieces together. I let the tabletop dry for a day, and then glued the rest of the pieces together (including the wooden poles) and fastened it with rope again. (photos 17 to 19)
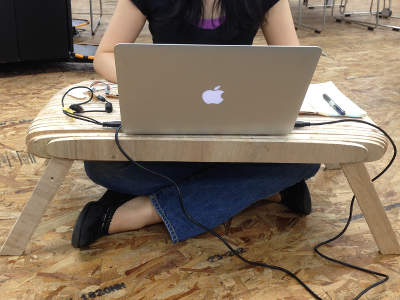
- The surface is rough so I still need to plane it, but for the most part my table is done!