8. Computer Controlled Machining
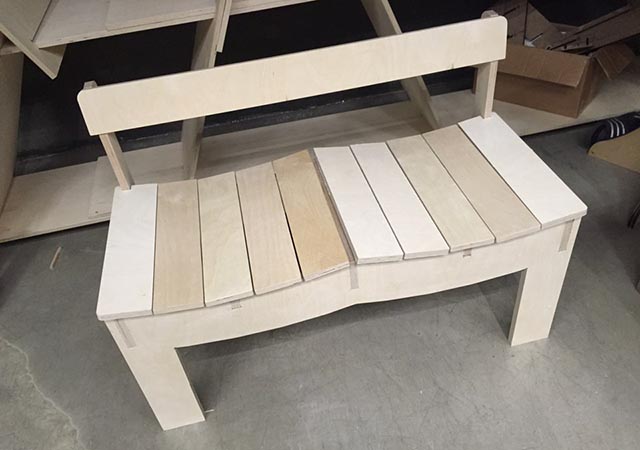
Make something big
This week, I built a bench. I designed with Autodesk Inventor, make a layers with Illustrator, and make fillets with Vcarve Pro. I used three types of joints in my bench. I tried to test thetolerances with the values. I used shopbot with two different endmills on my fab. the procedure of this week was
Design -> Tolerance test & Machine setting -> fabricate.
download
Design
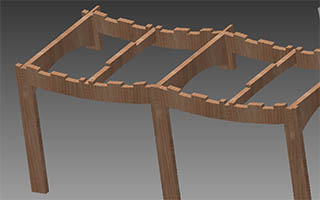
I wanted to make a bench which has the beautiful curves. I used the Autodesk Inventor for parametric design. I thought that it would be not too complex, but It was very challenging to me.
 |
 |
 |
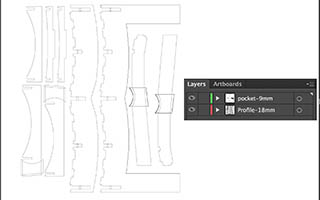
Setup files for Cutting
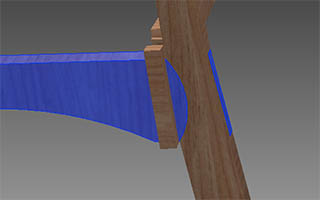
I exported dxf files each parts, set the layers in Adobe Illustrator, Make the fillets in VCarve Pro Shopbot Edition.
It was very hard to change the files to the right format. because when I tried export dxf file in normal way with Inventor, then too many lines appear. I found the solution on the link below. http://www.instructables.com/id/Exporting-Inventor-Files-to-Illustrator/
-
Inventor : right click the face of the part, choose “Export Face As”
-
AutoCad : convert to dxf 2004 format
-
Ilustrator : Separate layers of the design
-
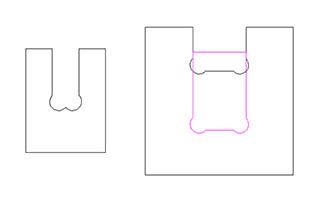
VCarve Pro : Make fillet, I used “Dog-Bone Fillet”
 |
 |
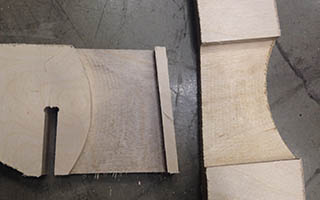
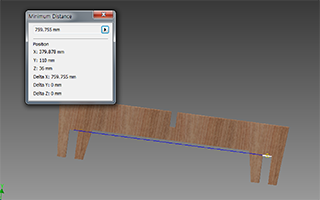
Tolerance test & Machine setting
I made a design for testing to prevent wasting times and materials. I succeed with the properties below.
pocket depth = 9.3mm
Diameter = 6.0mm
Pass Depth = 2.5mm
Stepover = 3.0mm (50%)
Spindle Speed = 14000rpm
Feed Rate = 200”/mm
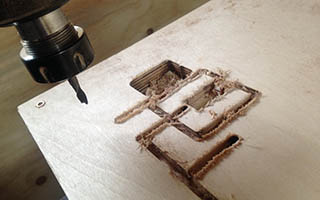
Failure
I guess there are some reasons that I made fire.
-
Low feed rate
I used a 6mm Up-cut Endmill which has two flutes. First one made fire! first time I thought that I have to down the feed rate.
I made chip rate about 0.001”. spindle speed = 14,000rpm, flutes = 2, 0.0127mm/s
but when chip rate over 0.005” (feed rate > 0.06) it didn’t make fire and better finish. -
Machine vibration
When it starts cutting, It goes well in 1~2min, and then whole machine vibrates intensively. The machine or software has to be fixed. -
Too short endmill
cutting area (where the flute is) is little bit shorter than the material thickness. I think when it goes deeper than it, It cause the friction and being heated.
 |
 |
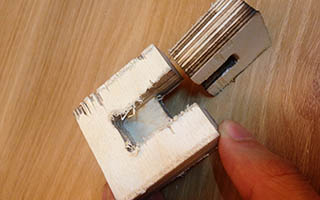 |
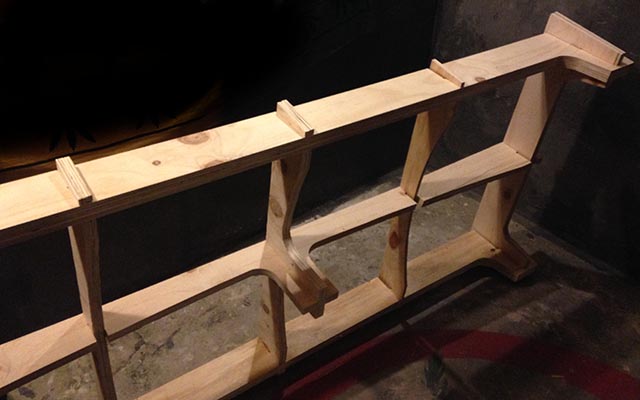
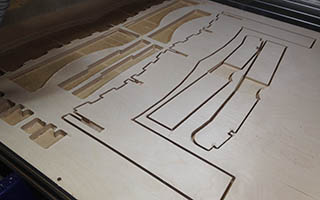
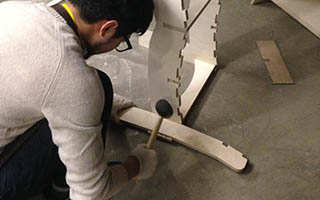
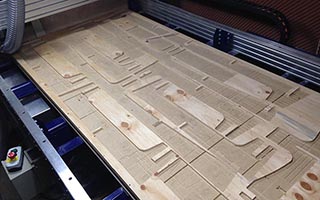
Fabricating
I used 18mm, 15mm birch plywood. I changed endmill 2 flutes upcut to 1 flute upcut.
Diameter = 6.0mm
Pass Depth = 4mm
Stepover = 3.0mm (50%)
Spindle Speed = 14000rpm
Feed Rate = 100”/mm
Plunge Rate = 60”/mm
Add tabs = length 6.0mm, Thickness 0.9mm
Ramps = distance 100.0mm
 |
 |
|
 |
 |
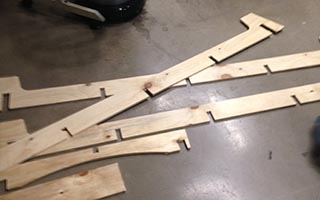
Failures
-
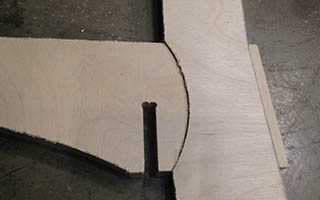
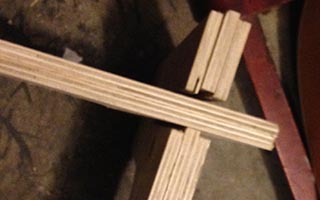
Tolerance
I tested several times and made a perfect tolerance. but plywood is not completely flat, so I failed to make every pocket machining has same depth. I sanded every joints for making good tolerance.
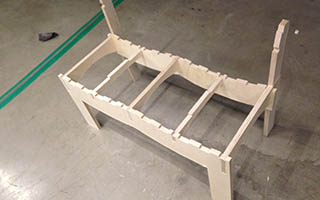
Joints
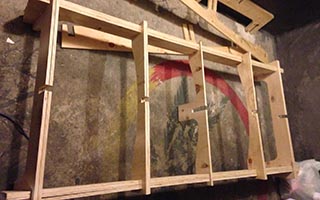
I used three kind of joints. bridges between front and back, legs and bridges, bridges and covers, each of them have different joints.
 |
 |
Completed!
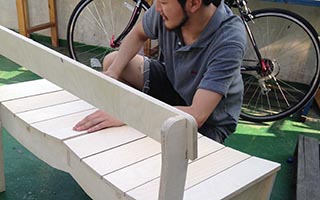
Finishing
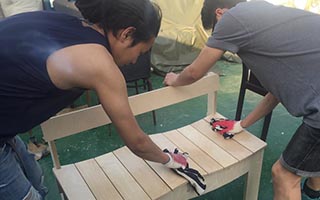
1. Sanding
Sandpaper (ISO/FEPA Grit designation : P220, P600). First time, I used P80 sandpaper, It was too rough for the birch plywood.
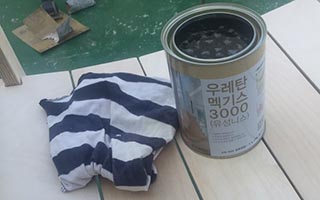
2. polyurethane
Polyurethan is a plastic in the form of a liquid until it dries, polyurethane is available in both water- and oil-based options, and comes in varieties from satin to glossy. I painted it with rags. It is good for waterproof.
|
 |
 |
 |
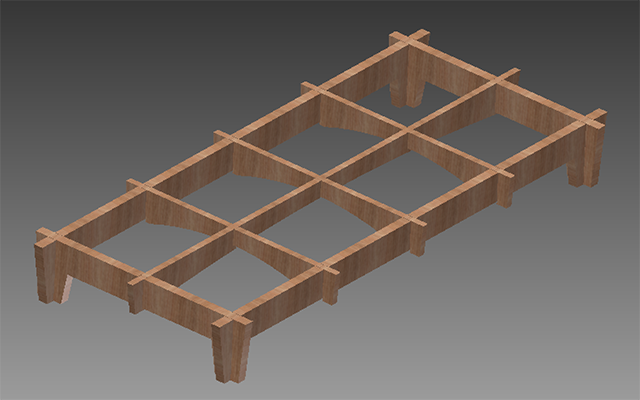
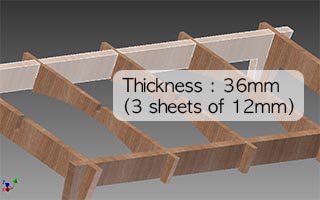
Add#1 Make a bed
In our lab, there are two 12mm plywoods that nobody using because of the bad qualities. I decided to make a bed with it. It was not easy to design it, because it has to be strong enough and use only 2 sheets (2440mmX1220mm) of plywood. I used 3 layers of the plywoods for the main legs. and 2 layers for the bridge.
Inventor Assembly file |
 Illustrator cutting file |
 |
 |
 |
 |
 |
 |